How To + Recommended + Software & Apps
How to Verify Your Mac’s Software Is Running Smoothly
Posted on
by
Jay Vrijenhoek
Software is everything from the operating system you run to the apps you use every day. Every so often, it’s important to check and verify that your hardware is working properly, and indeed it’s equally important to verify your Mac’s software is running smoothly. The goal is to not only have a smooth running system when it’s idle, but a smooth running system even when it is put through the wringer.
In this article, we’ll assume your Mac passed all the brutal hardware tests you threw at it, as outlined in part 1. Without hardware, you’d have no place to run your software, and since you’ve checked and verified that your hardware is in good shape, you are half way to a (self) certified solid workstation. Now is the time to make sure your Mac’s software is in good shape!
NOTE: Checking a system in most cases requires it to be put through the wringer. This can stress out and break components that may already be failing. Make sure you have one or more backups of all your data and proceed at your own risk!
There are quite a few things to cover here, so without further ado, following are some Mac maintenance tips you can use to help verify your software is in tip-top shape.
Fonts
Every application that displays text on your computer screen loads one or more fonts when it starts. Applications like Adobe InDesign and Microsoft Word load all the available fonts while other apps may load just a single system font. Either way, fonts are used in everything you do on your Mac. If your computer has damaged or corrupted fonts, it can make your Mac slow, and applications may behave weird or even crash your Mac, so we need to make sure everything is good in the font department. (RELATED: How to Fix Performance Issues for a Slow Running Mac.)
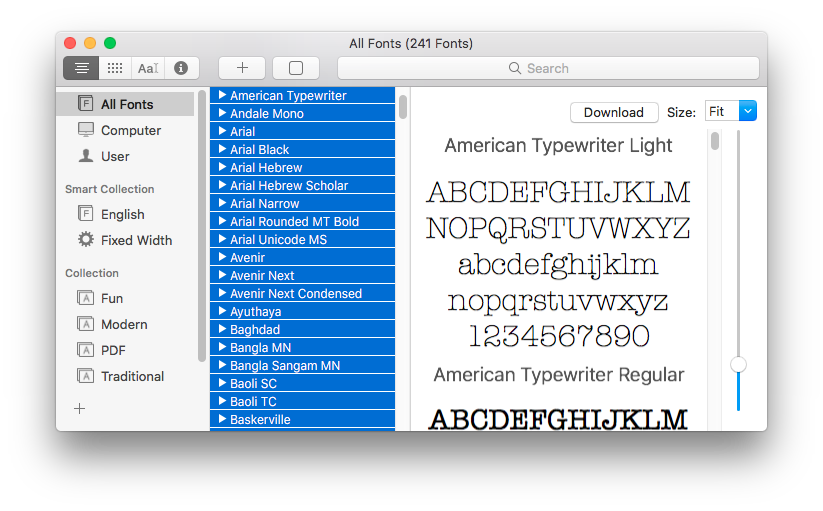
To verify your fonts are good to go, navigate to your Applications folder and open Font Book. You’ll see a window with three columns, and the center column will list all the fonts installed on your system.
Highlight one of the fonts in that column and from the Edit menu, choose “Select All.” You should be looking at something similar to this:
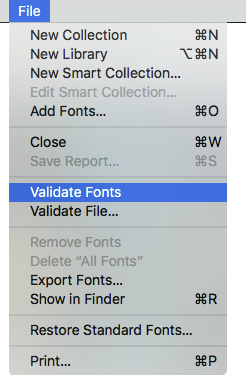
 Now from the File menu, select “Validate Fonts.”
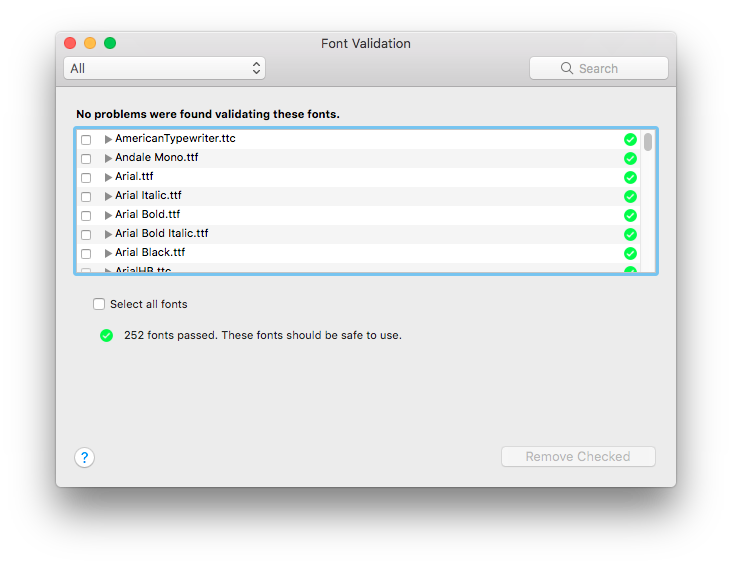
Allow Font Book a few minutes to check all the font for issues.
The results window will display three categories: No Warnings or Errors (green check mark), Warnings and Errors (yellow X), and Errors (red X).
Most of the time, warnings are simply duplicate fonts. While you can ignore duplicates, as applications know how to handle those, you can delete them to play it safe.
Errors are issues that need to be resolved right away. Make a note of the fonts that are listed as having errors (in case there are fonts you want or need to reinstall), select the offenders and remove them.
Note: An annoying bug since macOS 10.12 Sierra, which is still present in macOS 10.13 High Sierra, will cause Font Book to ask for an administrator password for each font that needs to be removed. In previous versions of OS X, the password was required only once. Therefore, if there are 100 fonts with errors, get ready to type your password a 100 times.
With the errors removed, run the font check again. The result should be nothing but green check marks.
You may also still see some yellow check marks, if you chose to ignore the duplicate fonts. Additionally, the removed fonts may still be loaded into the memory of the macOS and applications, so restart your Mac to make sure the removed fonts are not loaded. After the restart, empty your Mac’s trash to get rid of those damaged fonts.
Software Updates
Bugs and vulnerabilities are discovered all the time, and Apple releases software updates to fix them as well as introduce new features to its operating system. To ensure your Mac has the latest software updates, go to the App Store, click the Updates tab and install what’s available. This will bring your macOS and Apple applications up to the latest versions with the newest features and, more importantly, address all known software bugs. Your third-party applications require software updates as well, so make sure to check all software on your computer for available updates.
Related stories:
- How to Tell if Software and Updates Are the Real Deal
- How to Tell if Office for Mac Update is Valid
- How to Tell if Adobe Flash Player Update is Valid
Hard Drives
You’ve already checked your hard drives for S.M.A.R.T. related issues, and if no issues were found, chances are your drive is in good shape. What about the clutter stored on that drive though? I’m not talking about unused applications, old Mail attachments, duplicate files and things of that nature. Those can be easily taken care of by using Intego’s Mac Washing Machine. Instead, I’m talking about fragmentation.
I can hear what many of you may be thinking:
“Hold the phone, everyone knows that disk fragmentation does not affect Mac users. macOS defragments on the fly, so that’s never a problem.”
That is indeed the popular belief and it’s not far from the truth. It is, however, not the whole story. Apple’s macOS defragments small files under the hood; however, it does nothing for your photos, videos, mail attachments, or pretty much every other file in use today. macOS focuses on very small files that are part of the operating system and maybe some of your Word files that are small enough. Everything else fragments your hard drive.
Of course, fragmentation is not an issue for Solid State Drives (SSD), but with plenty of other hard drives still in use today, fragmentation is an ongoing and largely ignored issue. For example, here is a fragmentation snapshot of the hard drive that holds my photo libraries:

My music drive:

And my media drive:

As you’ve probably guessed, red marks indicate fragmented data. More red equals a bigger performance hit on the seek time and read/write speed of the drive, so you want as little of it as possible. The graphs above were generated by my go-to defragment applications: iDefrag. This app offers several algorithms from a quick optimization to a full defray—and the results are often amazing.
Note that while iDefrag runs on macOS 10.13 High Sierra, it is unable to handle APFS formatted drives.
UPDATE: Unfortunately, iDefrag was discontinued in 2019, but if you want to defrag an older Mac drive—a spinning hard drive formatted as Mac OS Extended (HFS+)—you can download iDefrag for free at coriolis-systems.com (be sure to download the version appropriate for your operating system; iDefrag 5.3.1 is the version for macOS 10.12 and later).
Disk fragmentation doesn’t just slow down your hard drive, it also puts more strain on the mechanical components that have to bounce all over the drive to retrieve your requested data. The data on your hard drive should ideally be in a single, continuous block, but can become scattered over hundreds of blocks. A hard drive that has to work harder will ultimately run hotter too, and a hard drive that runs hotter is more prone to failure in the long run.
Defragmenting the data on your hard drive will increase performance and might even get you some extra years of use. Clear empty blocks of data means that your hard disk is ready to take on more demand, at a moments notice, such as a mass photo import or during a large data dump of 4K video.
Disk Utility
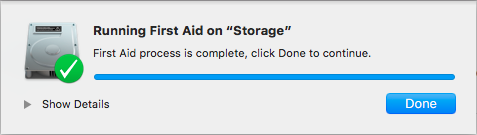
This one applies to both SSD’s and HDD’s. You can use Apple’s built-in Disk Utility to give all your drives and partitions a quick checkup with First Aid. It’s a quick way to see if the formatting, block accounting, volume bitmaps and more are in order. If an issue is found, Disk Utility will attempt to repair it automatically. The end result, if all went well, should be this:
Related stories:
- How to Manage Disks and Volumes with OS X’s Disk Utility
- How to Encrypt Disk Images with Disk Utility to Protect Sensitive Files
macOS Checkup
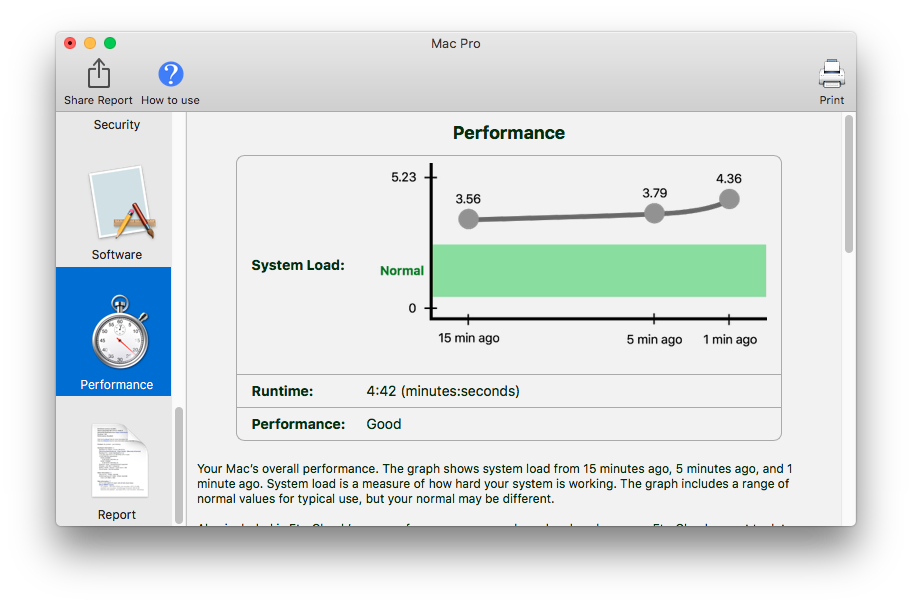
To get a broader overview of your Mac’s health, take a look at EtreCheck. This app was designed for use in the Apple Support Communities and started out as a simple script, but has since evolved into a sleek diagnostic application. It will run some diagnostics and report back with potential issues, and offer details on how these issues may affect your system performance. LaunchDeamons that no longer link to an application, applications or processes that take up an unusual amount of RAM or CPU power, a list of diagnostics results, and much more can all be found in EtreCheck.

If any issues are listed that you can’t resolve by yourself, you can do exactly what the app was designed for—share the report on Apple’s support forums and ask the community for help! 🙂
Battery
This software maintenance tip is for the laptop users among us. Your battery plays a very important role in the performance of your Mac. Laptop batteries today are no longer the ‘dumb’ collection of cells that provide power to your Mac and nothing else. They contain sensors that monitor current and temperature, and the failure of even one sensor can cause your Mac to run very slow (or power off unexpectedly). Your battery and its sensors may have already received a clean bill of health from Apple Diagnostics, Apple Hardware Test or the Apple Store Diagnostics, but with some software you can actually see the health of your battery.
One of my long time favorite utilities for checking battery health is coconutBattery. At a quick glance, you can see the original capacity of your battery and how much capacity your battery is still capable of storing. While similar information can be pulled up in About this Mac > System Report > Power, the coconutBattery app gives you a clean, visual representation and logs historical data as well. This allows you to see if your battery’s capacity is dropping too fast or if one or several calibrations had a positive impact.
How to calibrate your battery
If your battery’s capacity is not what it should be, calibrating your battery might make a big difference. Even if the capacity shows as being great, calibrating is still worth the effort. Apple has done away with the old tips on how to calibrate a battery, but I still reference them daily as they still apply and work today. The process is simple:
- Charge your battery to 100%.
- Leave the charger connected for an hour.
- Disconnect your charger and use the laptop as you normally would.
- Keep using it until you receive a warning that shutdown is imminent (or if your battery is not in great shape to begin with, your Mac might shut down without warning) and save your work. Keep using the Mac though.
- Once the battery no longer has enough juice to power your Mac, the Mac will go to sleep.
- Leave the Mac like this for at least 6 hours but more is better.
- Connect the charger and charge the battery back to 100% without interruptions, use the Mac as you normally would during this time.
- Once the battery is charged to 100%, leave the charger connected for an hour or so and then the calibration is done.
If you do this and then check back with coconutBattery, you might see that capacity took a hit—sometimes a significant hit. The calibration is not what ruined your battery, instead your battery had not been displaying the correct capacity all along. Now that the battery is calibrated, it knows its absolute 0% and absolute 100% values, something it probably lost track of prior to the calibration. This is why calibrating, even when it shows the capacity as being close to its original value, is a good idea.
Increasing capacity can be a matter of running the calibration once or twice. Even if the capacity does not increase, it should at least give you the warning that your Mac is about to shut down in a timely manner and give you a longer run time. I have gotten countless batteries back in good health and/or working more reliably by simply calibrating once in a while (from a PowerBook G4 to a 2016 MacBook Pro and everything with a battery in between).
This goes for your iOS devices as well, which, incidentally, coconutBattery can also monitor if the device is connected to your Mac.
Malware Protection
From time to time, it’s important to scan your Mac for the presence of malware. For the purpose of this article, let’s forget for a minute that malware can steal sensitive information, watch what you do through the camera and open backdoors to your system. Malware is software (malicious, of course) and software requires resources to run. Regardless of what the malware may be, it can nibble away RAM space and CPU power that you would otherwise want to use for other tasks. If the malware installed a bitcoin miner on your system, for example, it will do a lot more than nibble—it will take huge chunks of your RAM and CPU hostage.
Scanning your Mac for malware is easy. You can grab Intego’s free Mac anti-virus, VirusBarrier Scanner, from the App Store; or, you can get the paid VirusBarrier X9 from intego.com, which includes real-time malware scanning and negates the need to periodically run malware scans. If you choose to stick with the free VirusBarrier Scanner, run it every so often to keep resource leeching nasties off of your system.
And there you have it!
Your hardware is in good shape, your software is working as it should; you’re all set! You have a Mac you can count on for the simple things as well as the most demanding of tasks. Whatever you need, you can now rest assured your Mac has you covered.

