How to run Windows 11 on an Apple silicon Mac for free
Posted on
by
Kamso Oguejiofor-Abugu

If you’ve used a Mac for a while, you might remember Boot Camp — the tool Apple used to let you install Windows directly on your Mac.
While you can still use Boot Camp on a Mac with an Intel processor, it doesn’t work on Macs using Apple silicon chips like the M1, M2, M3, M4, or M5.
To run Windows 11 on these modern Macs, you’ll need virtualization software, which lets Windows run inside macOS like a regular app.
Since these Macs use a different internal architecture from Intel processors, you’ll need the version of Windows designed for Arm processors, known as Windows 11 Arm.
Parallels Desktop is usually the simplest virtualization app for running Windows on a Mac, but it requires a paid subscription. If you’d prefer not to pay, UTM is a practical alternative, though the setup takes a little more work.
This guide explains how to set up Windows 11 on an Apple silicon Mac using UTM and what to expect once it’s installed.
NOTE: UTM itself is free when downloaded from the developer’s website, and Microsoft provides the Windows 11 Arm file as a free download. However, you may still need a valid Windows license to activate every feature long term. It’s best to stick with official downloads from Microsoft; using modified versions or “cracked” installers often leads to security problems or a system that crashes regularly.
Can you run Windows 11 on an Apple silicon Mac?
Yes, you can run Windows 11 on an Apple silicon Mac using virtualization software, which lets Windows run inside your macOS desktop like a regular app. This means you can switch between Windows and macOS without needing to shut down or restart.
Because Apple silicon Macs use a different architecture from Intel PCs, you’ll need the Arm version of Windows 11 rather than the standard x64 version used on most Windows computers.
Boot Camp only works on Intel-based Macs, so it’s not available on Macs with M-series chips. On Apple silicon Macs, virtualization is now the standard way to run Windows.
There are two main ways to do this:
- UTM: A free app that works well if you only need Windows occasionally for basic tasks. You’ll have to handle more of the technical setup yourself, but it’s a practical option if you prefer not to pay for a subscription.
- Parallels Desktop: A paid app that handles most of the setup for you. It integrates more smoothly with macOS and is usually the better fit if you plan on using Windows every day.
Regardless of which app you pick, make sure you download the Arm version of Windows 11 to ensure everything works properly on your Mac.
Is it really free to run Windows 11 on a Mac?
You won’t have to pay for the tools used to run Windows on your Mac, but you may still need to pay for a Windows license.
UTM is free when downloaded directly from the developer’s website, and Microsoft provides the Windows 11 Arm64 ISO needed for installation. This means you can get Windows 11 running on your Mac to see how it works without having to pay for a subscription or a specific app first.
However, Windows 11 itself may still require activation with a valid product key. If you don’t activate Windows, you may notice small limitations, like restricted personalization settings or occasional activation reminders.
It’s also best to avoid cracked versions of Windows or unofficial installers found on the web. These can create security and stability problems for both Windows and your Mac.
To keep things simple and secure, download both UTM and the Windows 11 Arm64 ISO directly from their official sources.
What you need before you start
Before setting up Windows 11 on your Mac, it helps to have a few things ready:
- An Apple silicon Mac: Any Mac with an M1, M2, M3, M4, or M5 chip.
- Enough free storage: Try to have at least 100 GB of free space available. Beyond the installation itself, your Mac needs extra space to handle apps, virtual machine files, and system updates. If you’re low on space, you might want to clean up your Mac to free up some room.
- The UTM app: Download it directly from the developer’s site to get the free version safely.
- A Windows 11 Arm64 ISO: You’ll need this version from Microsoft’s website. The standard x64 version of Windows used on most PCs won’t work properly on Apple silicon Macs.
- A reliable internet connection: The Windows file is quite large (about 8 GB), so it’s best to use a connection that won’t drop out while it’s downloading or during setup.
- Time to complete installation: Depending on your internet speed and Mac hardware, the setup can take anywhere from 30 minutes to several hours.
- A Windows product key: You can finish the setup without one, but you’ll eventually need a license if you want to use every feature Windows offers.
What is UTM?
UTM is a free virtualization app that lets you use Windows on your Mac like a regular app. It’s one of the most popular free ways to run Windows 11 Arm on Apple silicon Macs.
You can download UTM for free on its website, or you can purchase it for $9.99 from the Mac App Store. The App Store version works the same way, but purchasing it helps support development and provides updates through the App Store.
Compared to Parallels Desktop, UTM is more hands-on and requires more manual setup. However, it’s free and works well if you only need to use Windows occasionally for simple tasks.
Step 1: Download UTM
Start by downloading UTM from the official UTM website. The initial download is about 238 MB. Once opened, drag the UTM icon into your Applications folder as you would with most other Mac software.
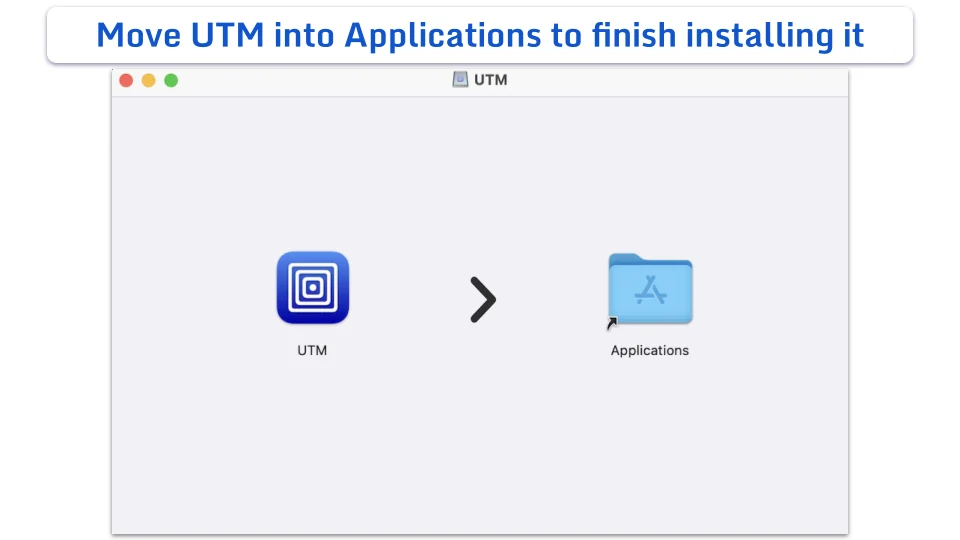
The file expands once it’s installed, so keep in mind that it will need about 1.22 GB of space on your drive.
Step 2: Download the Windows 11 Arm ISO
Next, get the Windows 11 Arm64 ISO installation file. The file is roughly 7.4 GB, so you might want to give it a few minutes to finish downloading.
It’s best to download the ISO directly from Microsoft. Unofficial versions can cause setup, security, or stability problems later on.
Step 3: Create a Windows 11 virtual machine in UTM
With UTM installed and your Windows 11 Arm64 ISO ready, you can now create your Windows virtual machine.
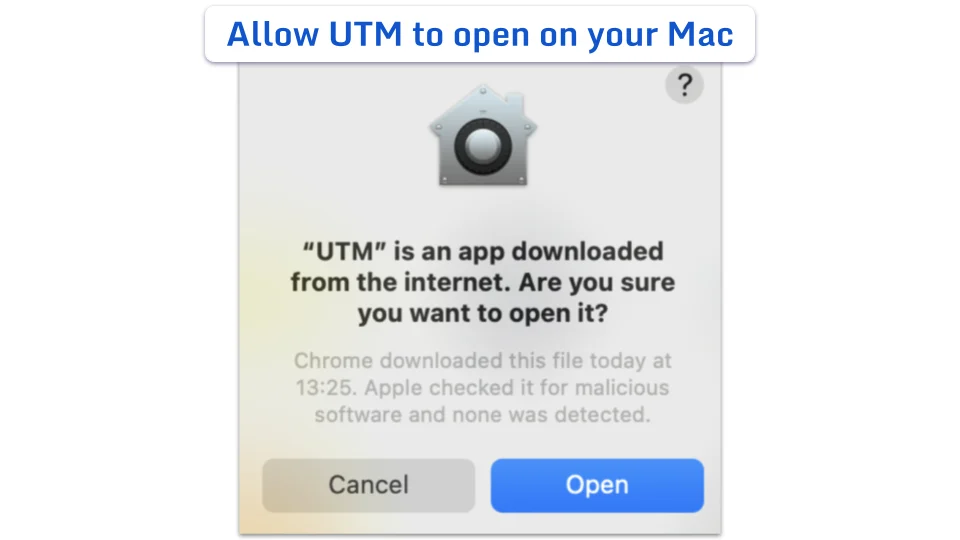
- Open UTM. If your Mac asks for permission to open the app, click “Open.”
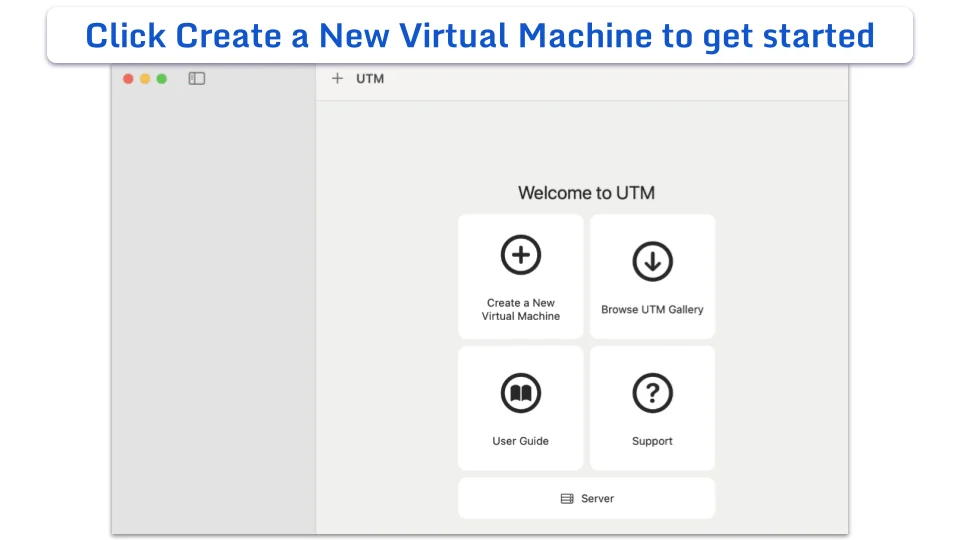
- Once the app is open, click Create a New Virtual Machine.
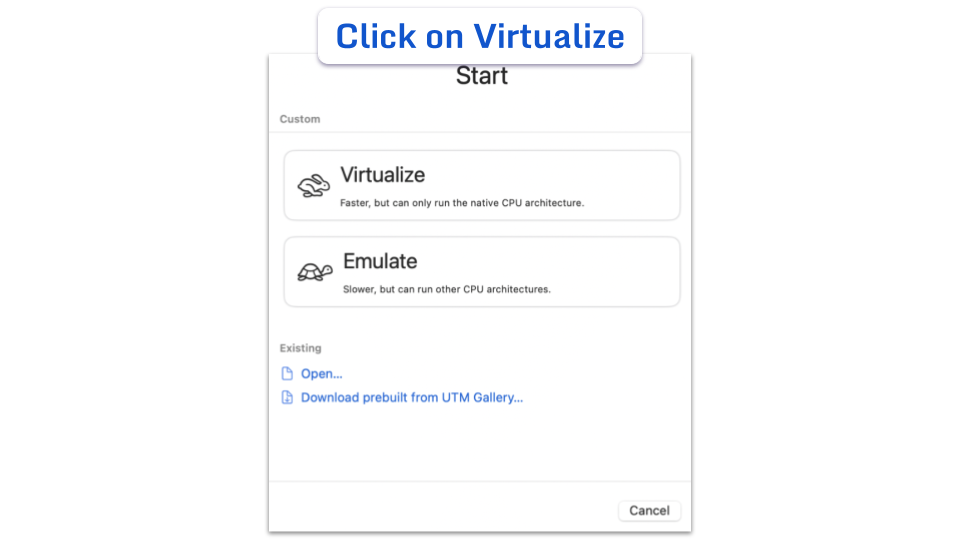
- Select Virtualize.
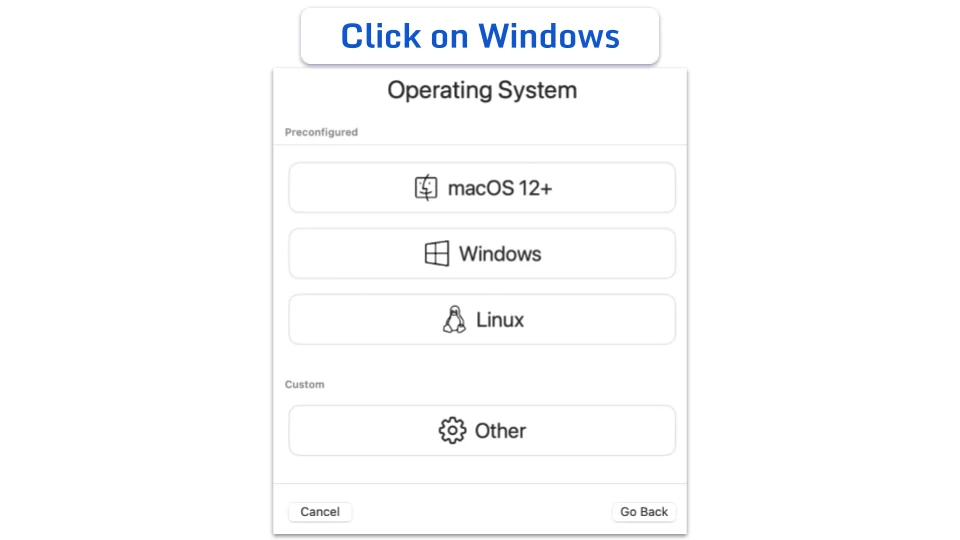
- Select Windows as the operating system you want to install.
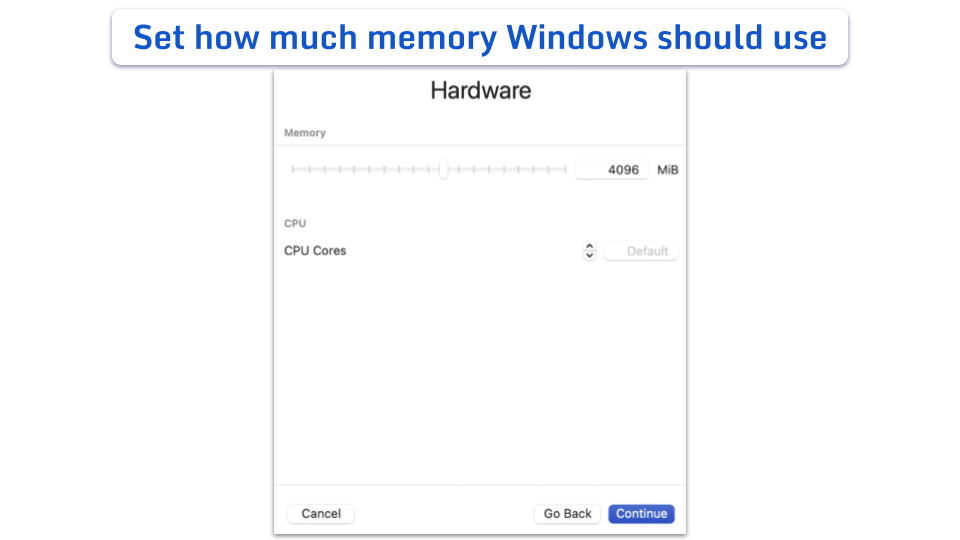
- Next, decide how much of your Mac’s power to use for Windows. The default settings are usually fine to start with, and you can adjust them later if needed. Click Continue.
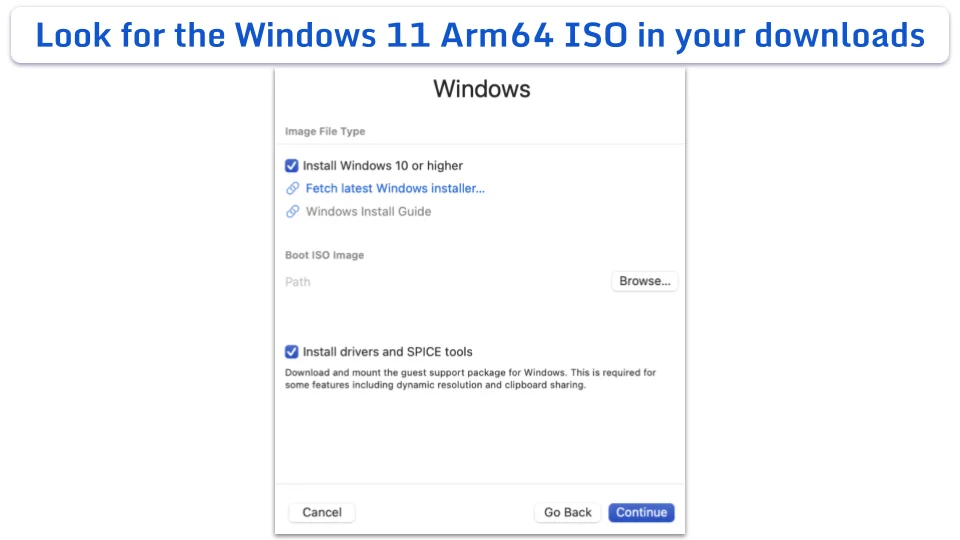
- Keep the default Windows and driver options enabled, then click Browse and select the Windows 11 Arm64 ISO you downloaded earlier.
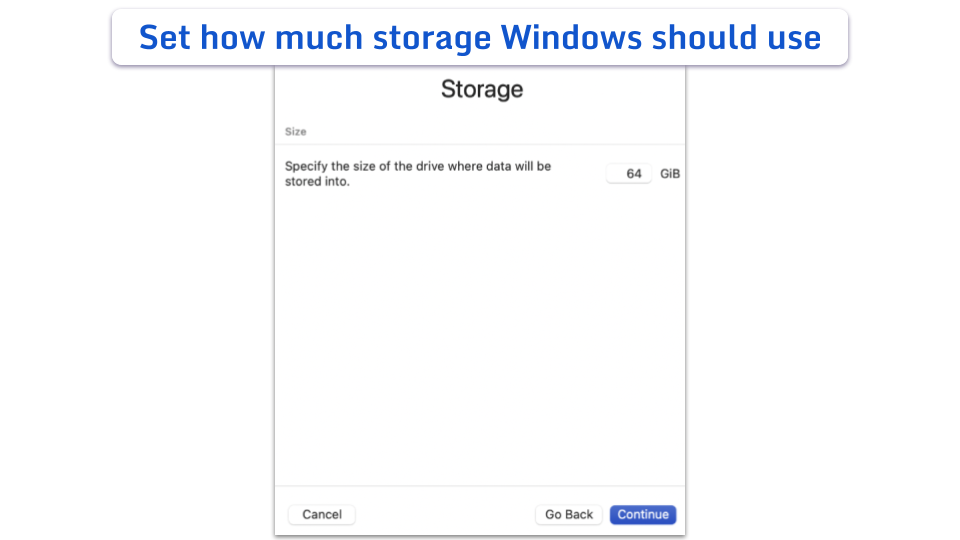
- The next screen asks how much room Windows should take up on your Mac. The suggested 64 GB works well for most people, but you can lower it if your Mac is low on storage. Just try to keep it above 20 GB so the system has enough room to operate. Click Continue.
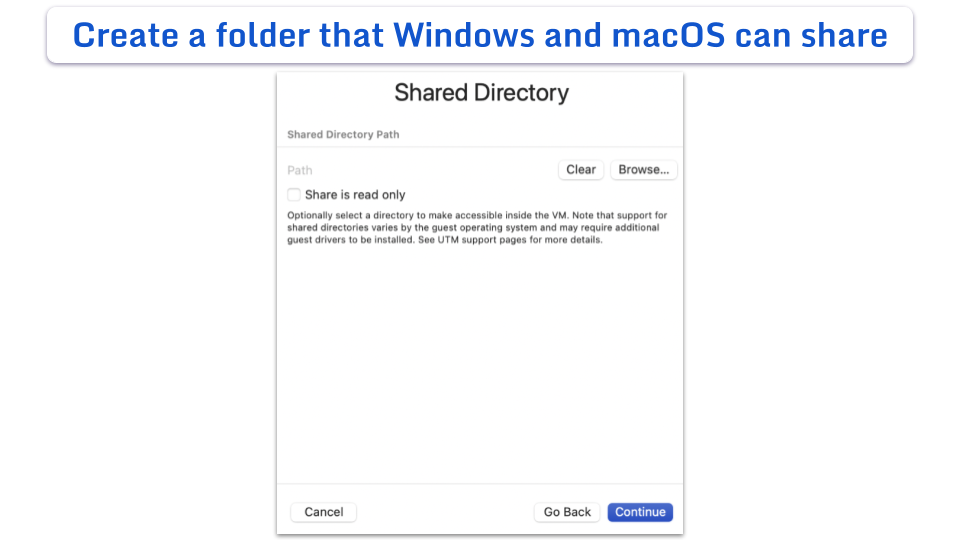
- Next, you can choose a shared directory. This lets you move files between macOS and Windows more easily. Click Browse to choose an existing folder or create a new one for this purpose. Then click Continue.
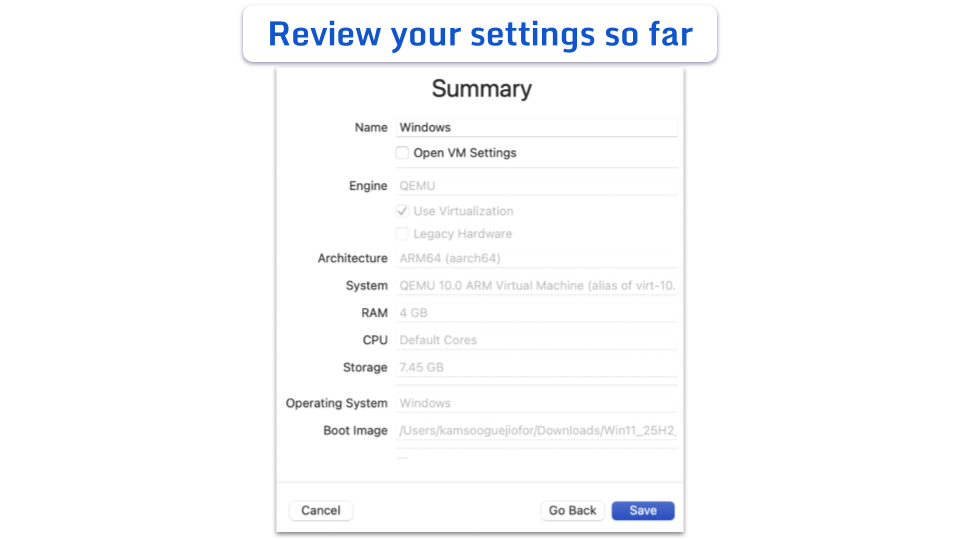
- The final screen shows a Summary of your choices and lets you give the virtual machine a name. Click Save, and UTM will prepare everything for you.
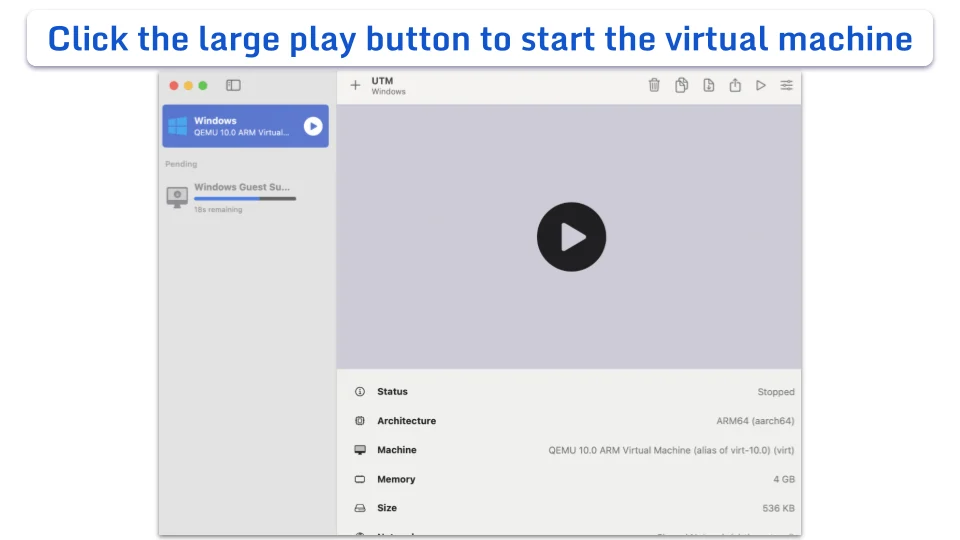
- You should now see a screen like the one below. Click the large play button to start the virtual machine.
- As the system starts up, look for a message asking you to “press any key to boot from CD or DVD.” When the virtual machine starts, press a key when prompted to boot from the ISO.

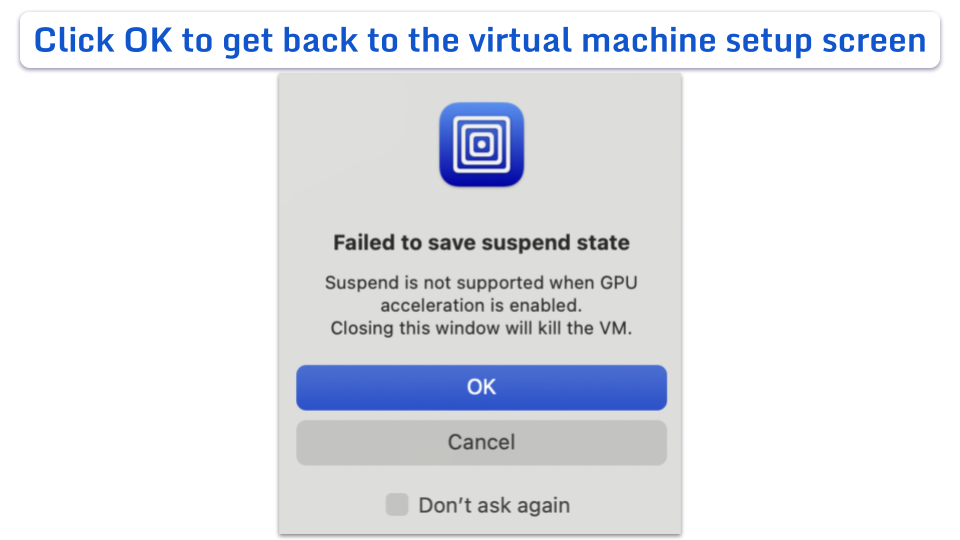
- If you don’t press a key in time, you’ll likely see a black command window like the one below.
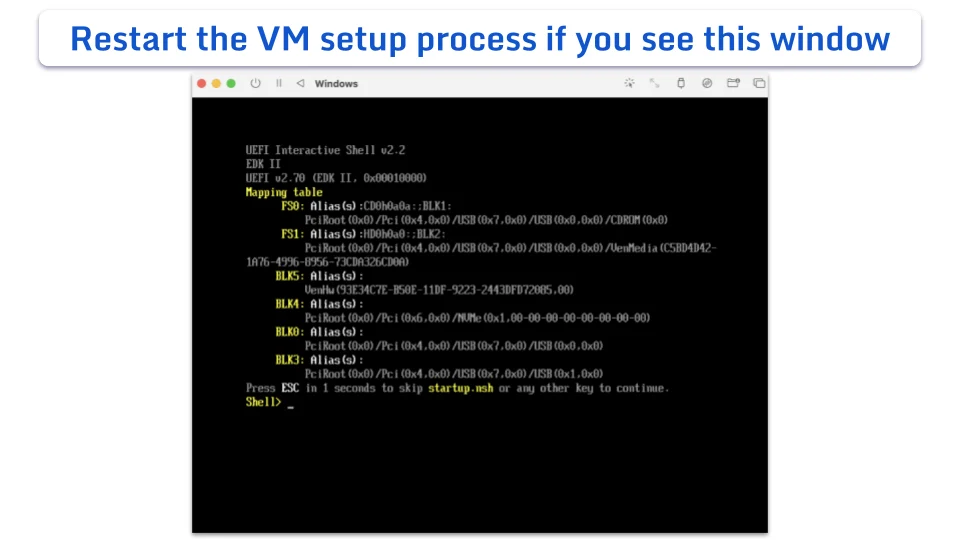
- If this happens, don’t worry — click the Close button at the top-left of the window, click OK to stop the VM, and click the Play button again.
Step 4: Install Windows 11
When the virtual machine opens, you’ll see the same Windows setup screens you’d find on any new PC, right inside the UTM window.
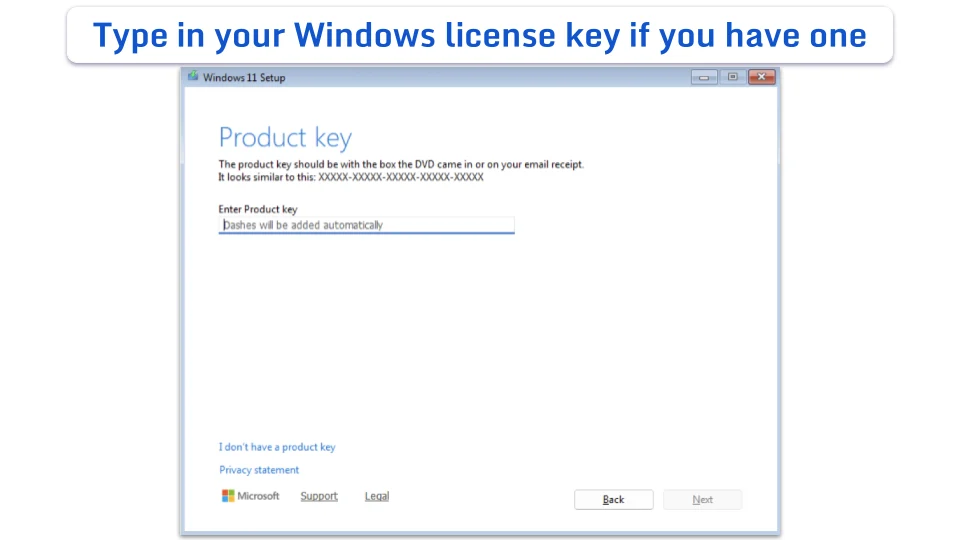
- After choosing your language and keyboard layout, Windows will ask for a license key. If you have one ready, you can type it in now; otherwise, select I don’t have a product key to skip.
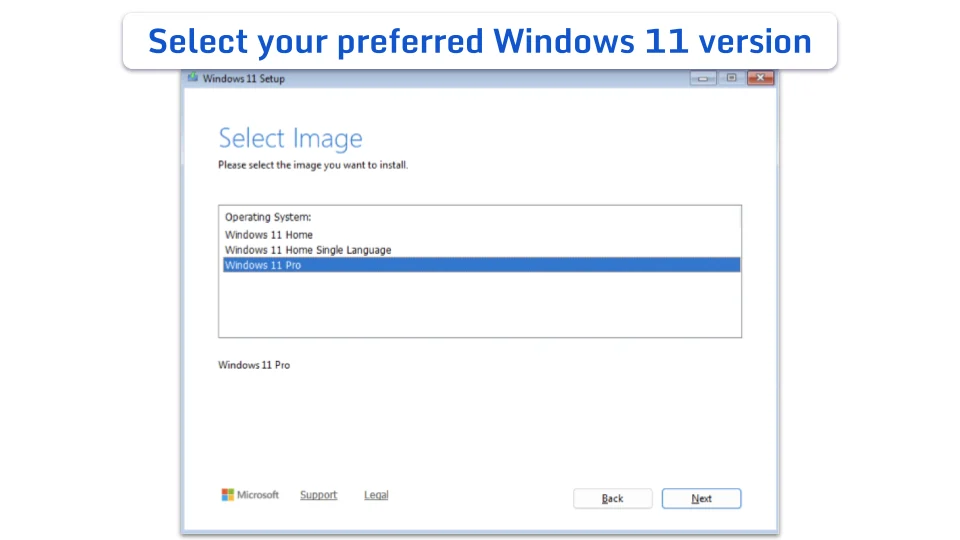
- Pick the version of Windows 11 that you plan to use. For this walkthrough, we’re choosing Windows 11 Pro, but you should select the edition that matches your license.
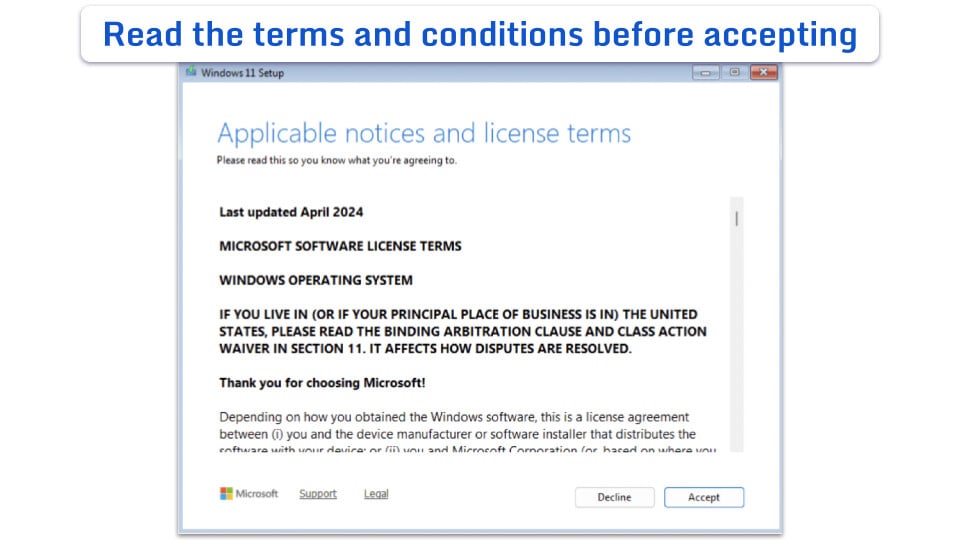
- Look through the terms of service, then click Accept if you’re comfortable with them.
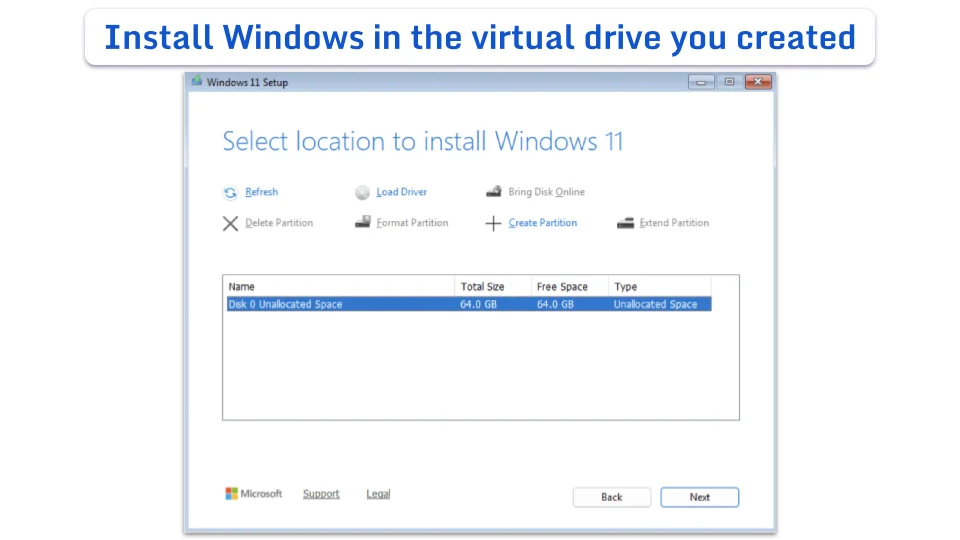
- Select the virtual drive you created earlier as the place to install Windows and click Next.
- Let the installer run. Don’t press any keys until Windows asks for your region. From there, you’ll be guided through a few setup steps, including choosing your keyboard layout, entering your name, and creating a password.
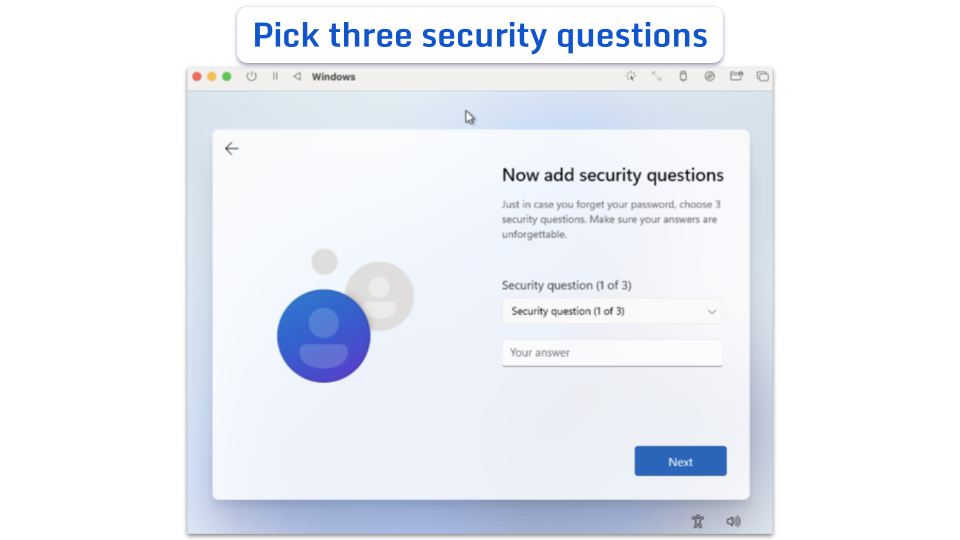
- You’ll need to pick three security questions. Since standard questions can be easy to guess, you might prefer to use made-up answers. Save them somewhere secure, like a password manager, so you can find them later if needed.
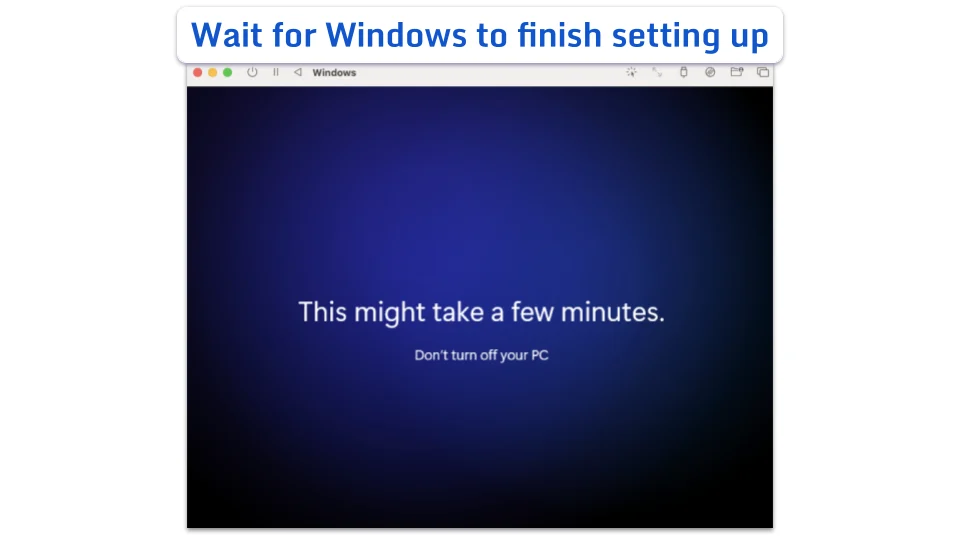
- After you finish the security setup, you should see a confirmation screen while the system finalizes your settings.
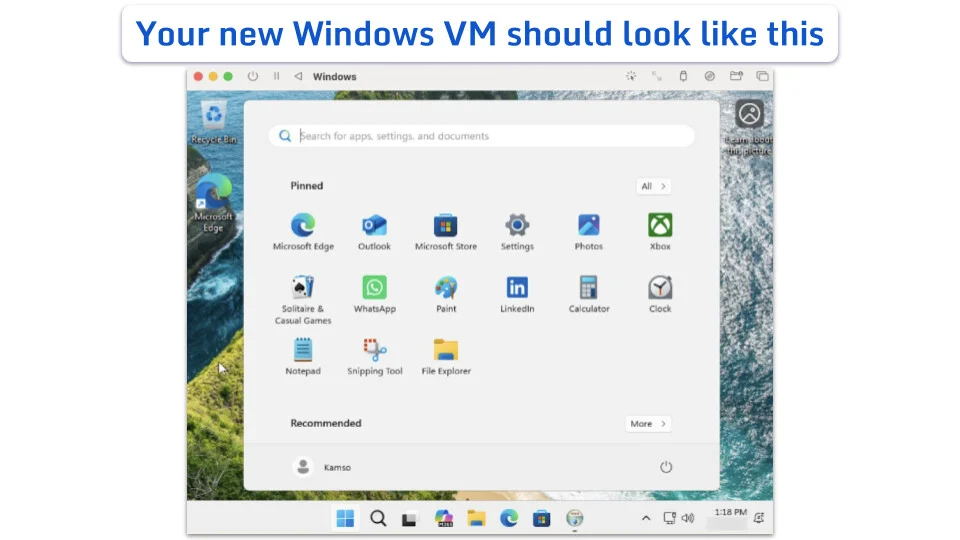
- When everything’s finalized, you should have a working version of Windows ready to use on your Mac.
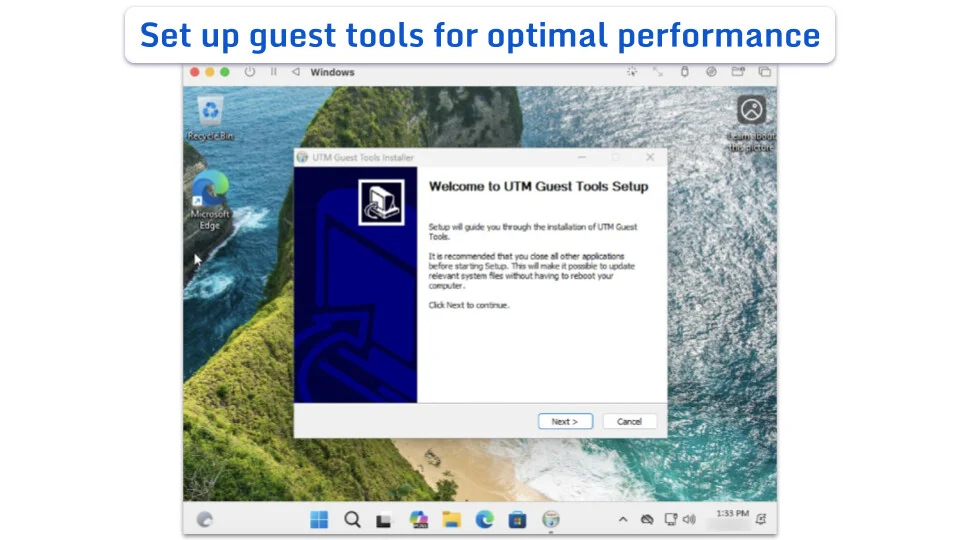
Step 5: Install guest tools and drivers
Before you start using Windows 11, you’ll want to set up the UTM guest tools and drivers. Without them, you may notice mouse lag, the window won’t resize properly, or slow file sharing between the two systems.
Guest tools can improve:
- Automatic resizing: The Windows window will expand or shrink to fit your screen as you move it.
- Mouse and keyboard support: The mouse and keyboard will feel responsive, without any lag or sticking.
- Copy and paste: You can copy text on your Mac and paste it directly into Windows.
- Shared files: You can share folders and files between the two systems more easily.
When the Windows screen opens, you’ll see a prompt to set up the tools. Follow the steps to finish the installation.
What works well in Windows 11 on UTM?
For most everyday tasks, Windows 11 on UTM performs reasonably well on an Apple silicon Mac. If you mainly need occasional access to Windows rather than a full gaming PC or workstation, the setup is usually practical for day-to-day use.
You can generally expect good results when:
- Using Windows-only apps for work or personal tasks
- Working in Microsoft Office or other lightweight programs
- Testing websites in Windows browsers
- Accessing internal company tools that require Windows
- Using basic accounting or administrative software
- Checking how apps or websites behave on Windows
What may not work well?
While Windows on Arm can run many traditional Windows apps, some apps and features may behave differently than they would on a standard Windows PC.
You may run into problems with:
- Graphics-heavy games or creative tools
- Software that depends on specific Windows drivers
- Some antivirus or low-level security tools
- Specialist hardware utilities
- Older apps designed only for Intel/x64 systems
- Nested virtualization features
- Certain engineering or enterprise tools
Performance can also vary depending on how much memory and storage your Mac has available. Running several macOS apps alongside Windows at the same time can slow performance, especially on Macs with limited memory.
Modern graphics-heavy games usually won’t run well in UTM, though some older or lighter games may still be playable.
Before relying on this setup for work or school, check whether your most important apps are compatible with Windows on Arm. Some apps may install successfully but still have limited features or stability issues.
UTM vs. Parallels: Which should you choose?
For most people, the choice is between the simplest setup and a free option.
UTM works well if you prefer not to pay for a subscription and only need Windows occasionally. It’s a practical choice for testing things out or running software that doesn’t require a lot of graphics or processing power.
Parallels Desktop offers a more polished setup experience and integrates better with Mac. It’s a better choice if you plan to use Windows regularly or need stronger overall performance. However, it requires a yearly subscription.
Before choosing, it’s worth checking if the specific apps you need are compatible with Windows on Arm. Some older apps or specialized tools may still not work properly.
Is it safe to run Windows 11 on a Mac?
Running Windows 11 inside a virtual machine on your Mac is generally safe, but it’s important to remember that the Windows environment still behaves like a real Windows PC.
That means malware, unsafe downloads, phishing emails, and malicious apps can still affect the virtual machine itself. If you share folders between macOS and Windows, infected files could potentially move between both systems.
To reduce risks:
- Download UTM only from the official UTM website
- Download the Windows 11 Arm64 ISO directly from Microsoft
- Avoid cracked software or unofficial versions of Windows
- Keep both macOS and Windows updated
- Be cautious with downloads, email attachments, and unfamiliar websites
- Scan unfamiliar files before opening them
Frequently asked questions
Can I run Windows 11 on an M1 Mac for free?
Yes. UTM is free to download from the developer’s website, and Microsoft provides the Windows 11 Arm64 installation files. However, you may still need a paid Windows license to use all of its features.
Does this work on M2, M3, M4, or M5 Macs?
Yes, the process is generally the same for all Apple silicon Macs with M-series chips.
Does Boot Camp work on Apple silicon Macs?
No, Boot Camp isn’t available on Apple silicon Macs. It only works on older Intel-based Mac models.
Is Windows 11 Arm required?
Yes. Apple silicon Macs require the Arm version of Windows 11 rather than the standard x64 version designed for most PCs.
UTM vs. Parallels: Which is better?
The choice between UTM and Parallels depends on how you plan to use it. UTM is a practical free option if you only need Windows occasionally. Parallels Desktop offers a more polished setup experience for regular Windows use.
Can I play Windows games using UTM?
You may be able to run older or lightweight Windows games, but UTM isn’t a good choice for demanding modern games or graphics-heavy titles.
Is running Windows 11 on UTM safe?
It can be, especially if you download UTM and the Windows 11 Arm64 ISO from official sources and keep both macOS and Windows updated.

