How to Use Two-Factor Authentication for Your Apple Account and iCloud Account
Posted on
by
Kirk McElhearn
Protecting the data in your online accounts is essential, and no account is more important to users of Apple devices than their Apple Account. This account covers many features, from email to calendars, from online storage to online purchases. We have long recommended the use of two-factor authentication whenever possible, and it is essential that you set this up for your Apple Account.
In this article, I’m going to explain how Apple’s two-factor authentication (2FA) works, how to set it up, and how to prepare for situations where you may not be able to get 2FA codes.
What is the Apple Account?
If you use any Apple devices, you have an Apple account, which you create when first setting up the device, and which you use to log into Apple services, such as iCloud, Apple Music, the online Apple Store, and others. Previously called the Apple ID, the company started changing the name to Apple Account in September 2024.
This is the most important account for any Apple device, because it not only gives access to data and services, but also protects your devices against theft, since your Apple devices are linked to this account, and you can disable them at any time, if they are lost or stolen, using the Find My app.
If you’re not using Apple’s latest operating systems after September 2024 – macOS Sequoia, iOS 8, iPadOS 18, and watchOS 11 – they you’ll still see the term Apple ID in the settings of your devices, but the process described below is the same.
What is two-factor authentication?
Two-factor authentication, or 2FA, is a way of protecting accounts that require both something you know – your user name and password – and something you have, which could be another device that can receive one-time password (OTP), or a dongle that generates these codes.
Apple’s implementation of 2FA leverages the Apple chain of trust, using one Apple device to authenticate a new device or new sign-in to an Apple service in a web browser. Once you are authenticated on a device, that device is trusted, and can receive OTP codes when you want to sign in on another device. Even if you only have one Apple device, you need to set up 2FA to ensure that you can get codes via email or SMS.
It’s worth noting that more and more Apple services require that you use 2FA. For many years, it was optional, and technically it still is, but you’ll be limited in your use of Apple products and services. For example, you cannot use AirTags without 2FA; you can’t sync an iCloud Keychain if 2FA isn’t set up; you can’t manage your home in the Home app on all your devices if you haven’t enabled 2FA; if you have an Apple developer account, you must use 2FA; and you can’t use ApplePay without 2FA.
How Apple’s 2FA works
Once 2FA is enabled and you attempt to sign into a new Apple device, or an Apple website, such as the Apple online store, or the site where you manage your Apple Account (appleid.apple.com – Apple has not updated the URL of this site yet, and may do so soon), you need to enter an OTP. When 2FA is enabled, your trusted devices will display a dialog informing you that someone is trying to sign into your account, and showing the location of that person. If you don’t recognize the sign-in attempt – if it’s not you – click or tap Don’t Allow; if you are trying to sign in, click Allow, and you’ll then see a six-digit code that you enter in the app you’re using.
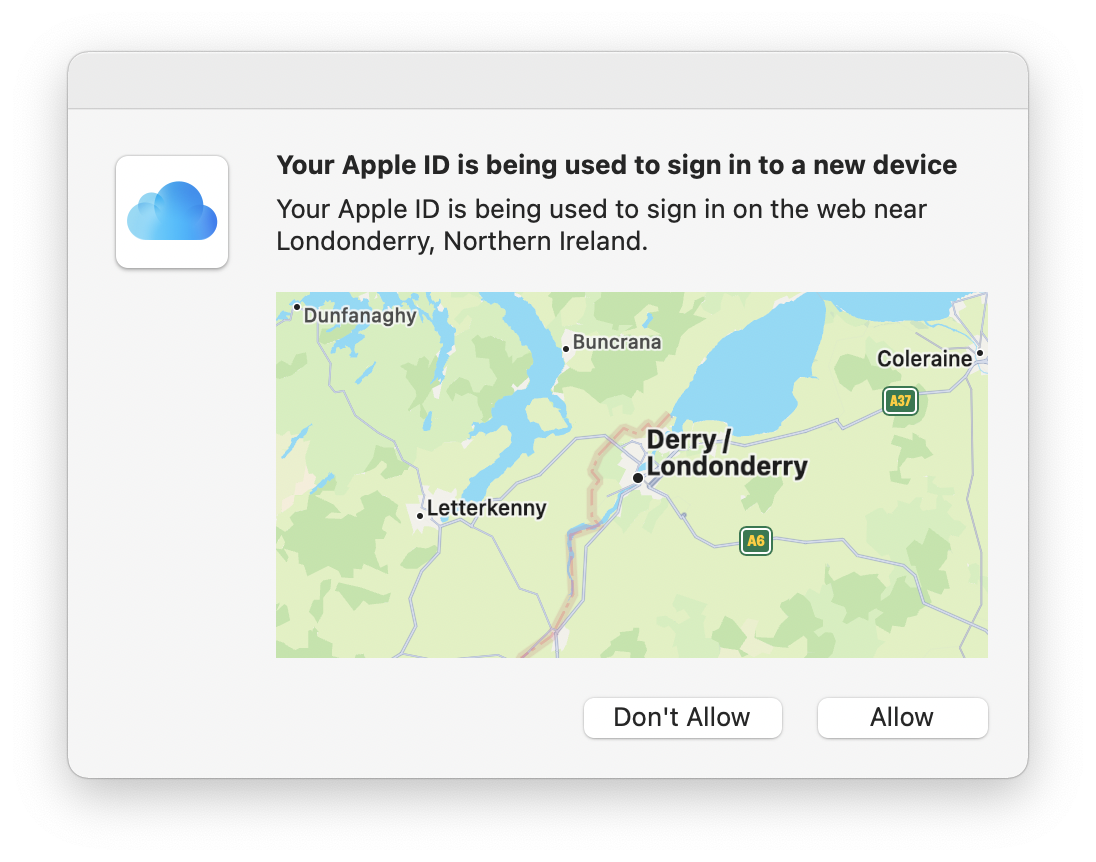
There’s a bit of a problem with the location in the screenshot above; I’m not in Northern Ireland, I’m in Warwickishire, England, and this might give you pause. Unfortunately, this sort of location divergence depends on your network operator. For some reason, my fiber broadband is showing as connected to another location in the UK. This might be even more problematic if you use Apple’s new iCloud Private Relay, which is designed to hide your precise location, or if you use a VPN, where you could appear to be in a different country. As long as you get a dialog right when you are signing into a device or service, you can trust it. If, however, you get this dialog out of the blue, when you have’t just tried to sign into any Apple services, click or tap Don’t Allow.
Here’s the dialog on my iPhone presenting the six-digit OTP that I enter in my browser:

Once you’ve signed into a device and provided a 2FA code, you won’t be asked again unless you sign out from the site, erase the device, or change your password. When you sign into a website, you can choose to trust the browser so you won’t need to enter a OTP again in the future with that browser, but don’t do this in a web browser on a public computer, or even a friend’s computer. Some Apple sites, such as the site you use to manage the Apple Account, will sign you out ofter a few minutes of inactivity, for security.
Apple’s chain of trust
Once you’ve authenticated on one Apple device, you can use this device to authenticate on others, as well as sign into Apple services on the web. This is Apple’s chain of trust. Your authentication has a snowball effect, and the more Apple devices you own, the more powerful this chain is. Each of your Apple devices can authenticate you for other Apple devices and services, but if you only have one Apple device, this can be more problematic.
Below, I’ll explain how to set up trusted phone numbers to got OTP codes if you just have one Apple device.
Turning on two-factor authentication
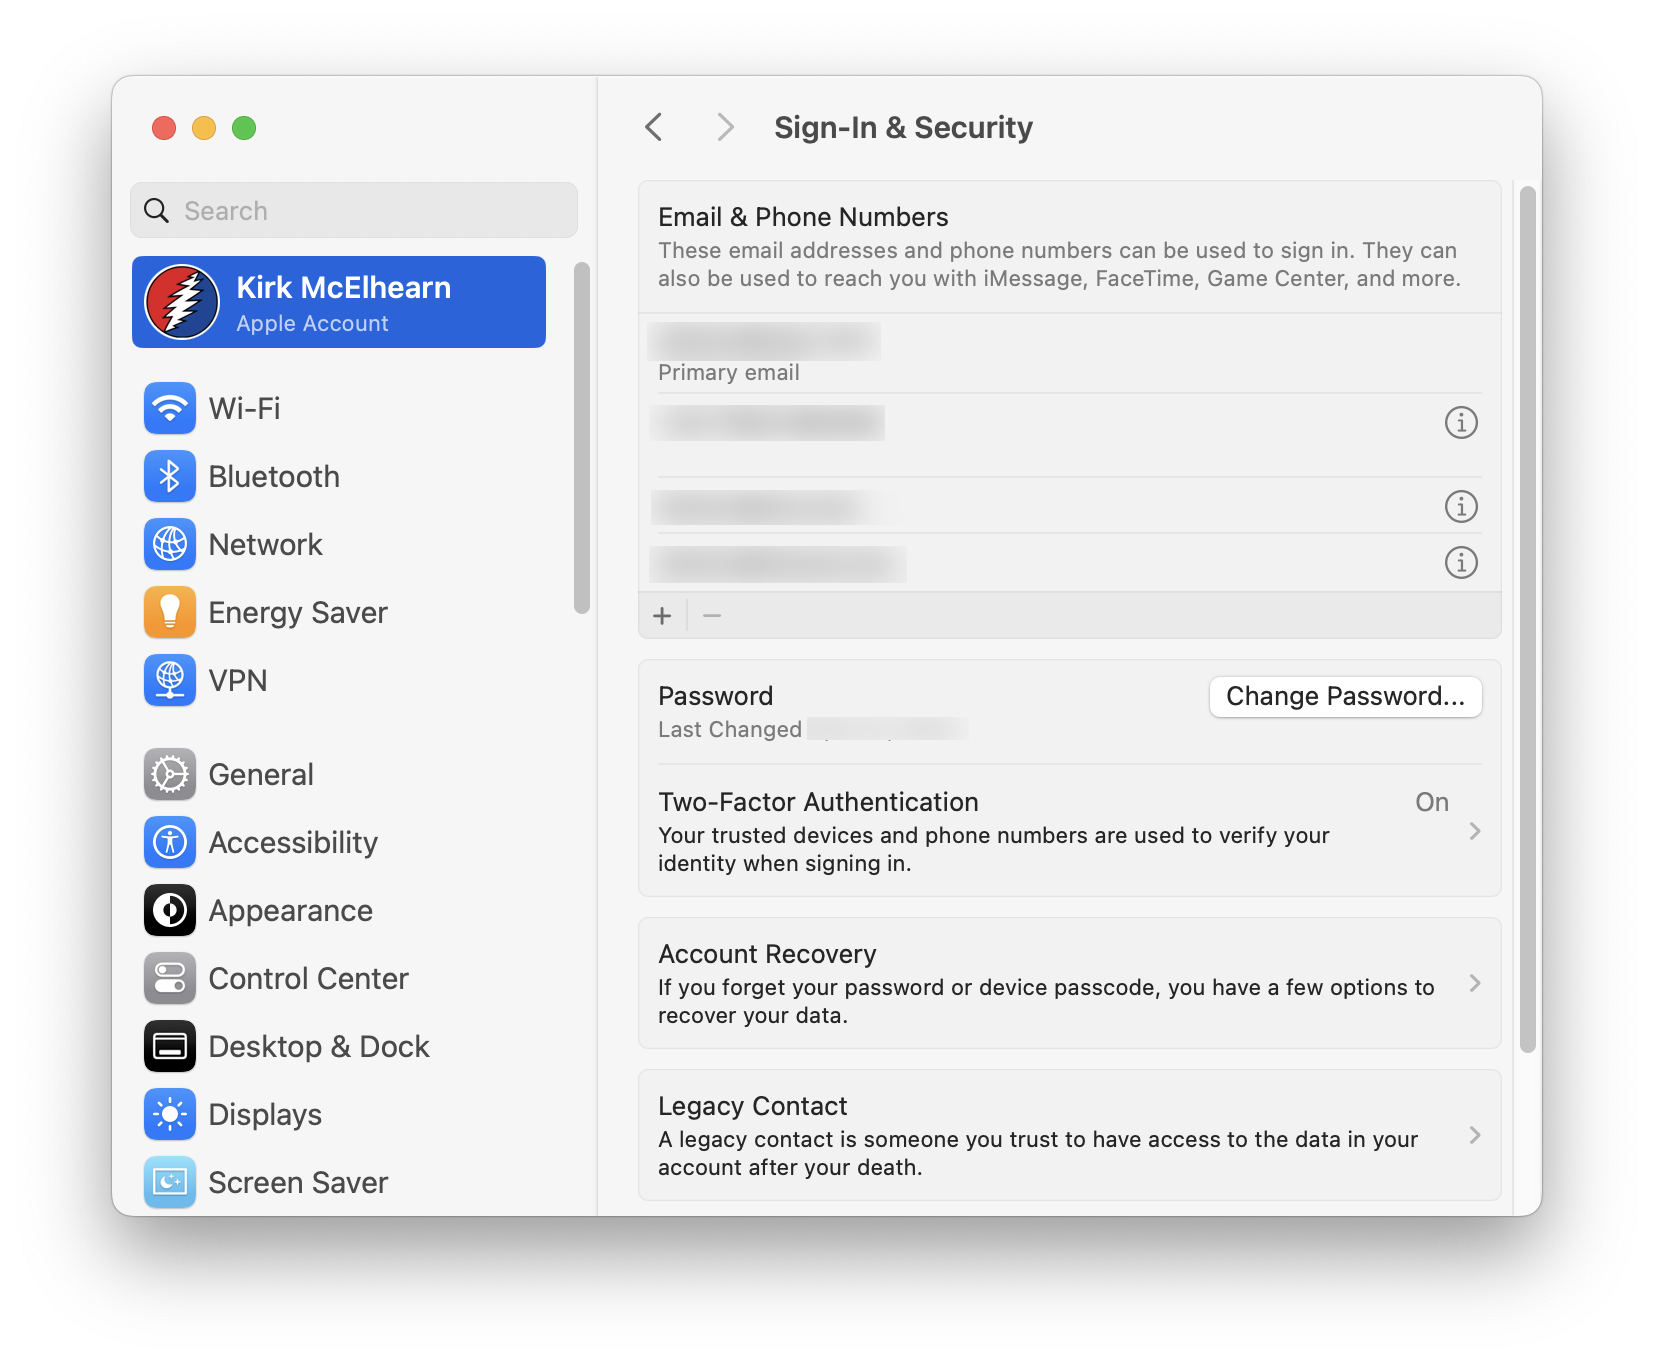
On an iPhone or iPad device, go to Settings, tap your name, then tap Sign In & Security. Tap Turn On Two-Factor Authentication and follow the instructions. On a Mac, go to Settings, click your name, click Sign In & Security, then Two-Factor Authentication, and following the instructions. You can also do this on Apple’s website at appleid.apple.com.
If you’ve been using Apple’s older two-step verification system, then you can upgrade to two-factor authentication. You’ll need to go to appleid.apple.com, sign in, answer your security questions, then follow the prompt to upgrade your account security. You’ll be asked to enter a phone number to receive an OTP to verify your identity, then you enter that code to complete the upgrade.
2FA doesn’t use security questions, like the older two-step verification or some websites. It only depends on your Apple devices and OTP codes they receive.
Getting verification codes
While you usually get verification codes automatically, as described above, you can also generate them from your Apple devices, if, for some reason, you’re not receiving them on a device. On an iPhone or iPad, go to Settings, tap your name, then tap Sign In & Security. Tap Two-Factor Authentication, then tap Get Verification code. On the Mac, you can do this in Settings > Apple Account > Two-Factor Authentication.
Setting up trusted phone numbers
If you only have one Apple device, how can you get OTP codes to authenticate on an Apple website? You’ll need to set up one or more trusted phone numbers: your own phone number, to start with, but it’s also a good idea to set up others, such as your home phone, if you have a landline, or numbers of family members or close friends. These phone numbers can help you get OTP codes if you have, for example, lost your iPhone when on a business trip or on vacation, and need to sign into the Apple website, or set up a new phone.
By default, the email address associated with your Apple Account is the main trusted email. You may also see other default email addresses, depending on how long you’ve had an Apple Account. (Older accounts can use the same email address with .mac, .me, and .icloud domains.) But you can add another email address if you have an additional account, and add other phone numbers to be sure you can access your account.
You can also set up a recovery contact for your Apple Account; this is a person who can help you get back into your account if you’ve forgotten your password. See How to Set iCloud Account Recovery Contacts, Legacy Contacts, and Trusted Phone Numbers to learn how to set up trusted phone numbers.
What if you forget your Apple Account password?
Your Apple Account password is important, and it shouldn’t be too simple, but it should be memorable. If you forget it, you can reset it on one of your Apple devices. On iPhone or iPad, go to Settings, tap your name, then tap Sign In & Security. Tap Change Password and enter a new password. On a Mac, go to Settings > Sign In & Security, then click Change Password.
If you don’t have access to an Apple device, you can change your Apple Account password at iforgot.apple.com.
Apple’s two-factor authentication may seem complex, but once you’ve set it up, you’ll realize how sophisticated it is, and how well it protects your vital personal data.
How can I learn more?
 Each week on the Intego Mac Podcast, Intego’s Mac security experts discuss the latest Apple news, including security and privacy stories, and offer practical advice on getting the most out of your Apple devices. Be sure to follow the podcast to make sure you don’t miss any episodes.
You can also subscribe to our e-mail newsletter and keep an eye here on The Mac Security Blog for the latest Apple security and privacy news. And don’t forget to follow Intego on your favorite social media channels: ![]()
![]()
![]()
![]()
![]()
![]()
![]()

