How to add iCloud Account Recovery Contacts, Legacy Contacts
Posted on
by
Kirk McElhearn

If you use Apple devices, your iCloud account is one of the most important repositories of your personal data. You don’t have to use iCloud, of course; you may use Google services for your calendar and photos, or Microsoft for email and online storage. But most Apple users store data in an iCloud account, and if you get locked out of that account, you may need a way to access your data.
Also, in the event of your death, you may want to ensure that your spouse, partner, or children can access your photos, emails, and other data.
In this article, I’ll explain how to nominate contacts to help you recover your iCloud account if you get locked out, and how to access your account in the event of your death.
In this article:
- Recovery Contacts
- How to set up a Recovery Contact for iCloud
- How to remove a Recovery Contact from your iCloud account
- How to help someone recover their iCloud account
- Trusted Phone Numbers
- How to set up trusted phone numbers
- Legacy Contacts
- Why you should set up a Legacy Contact for iCloud
- How to set up a Legacy Contact for iCloud
- How to remove a Legacy Contact from your iCloud account
- How can I learn more?
How to set up a Recovery Contact for iCloud
If you forget your Apple ID password, this Recovery Contact will be able to help you reset your password.
Note: I describe below how to set up account Recovery Contacts and Legacy Contacts on iPhones, iPads, and Macs, but you can also set these up on the Apple website by signing into appleid.apple.com.
In order to set up a Recovery Contact, you’ll need to first make sure that all your Apple devices are running at least iOS 15, iPadOS 15, or macOS Monterey; later versions are fine, and preferable. You also need to have two-factor authentication turned on for your iCloud account, and all your devices need to have passcodes. And your Recovery Contacts must also be using an Apple device. See this article for more on using two-factor authentication.
Go to Settings (iPhone or iPad) / System Settings (Mac), tap your name at the top, then tap Sign-In & Security.
Tap or click Account Recovery.

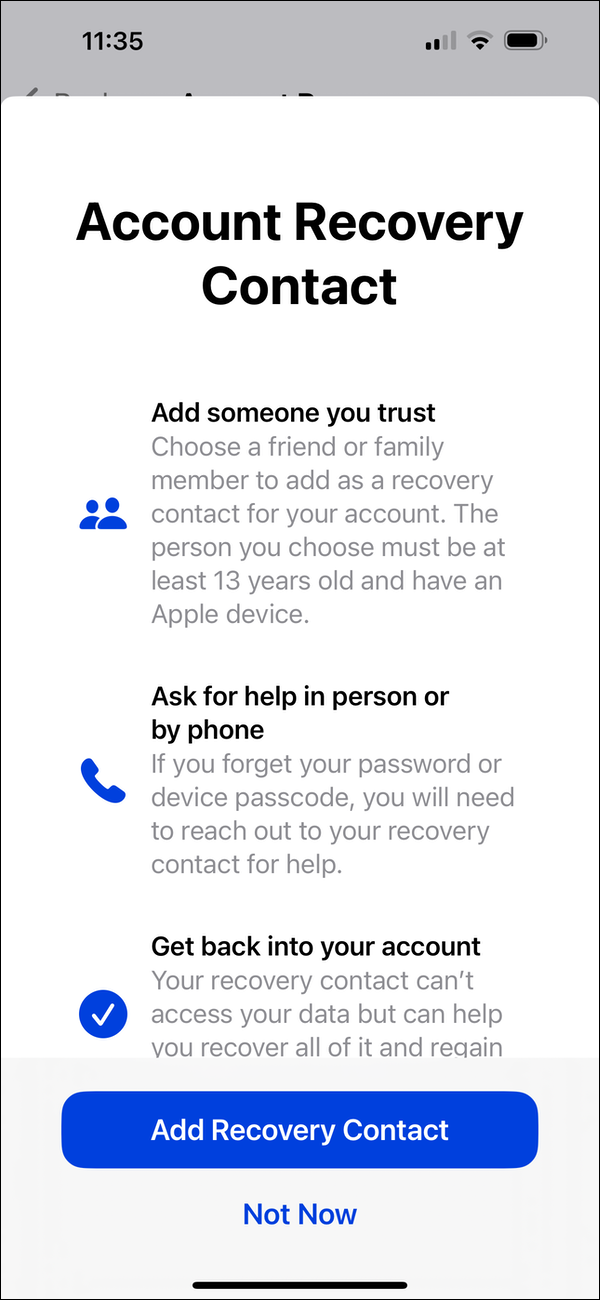
On the next screen, your device explains how account recovery works. To add a contact, tap Add Recovery Contact. Note that this Recovery Contact will not have access to your data, but will simply be able to generate a code to allow you to log into your account.
When you tap Add Recovery Contact, this screen explains the process.
Tap Add Recovery Contact at the bottom of the screen to continue, then type the name of your Recovery Contact; they must be in your contacts, and they must have an Apple device and use iMessage. Tap Add, and a message will be sent to your Recovery Contact saying that you have been invited for this purpose; if the contact is part of your family group, they will be added automatically. (If you use family sharing, it’s a good idea to set up one or both parents as Recovery Contacts for their children’s devices.)
When someone has been added as a Recovery Contact, this will be shown at the bottom of their Account Recovery screen.
How to remove a Recovery Contact from your iCloud account
You can remove a Recovery Contact by tapping their name on the Account Recovery screen, and then tapping Remove Contact.
You can remove yourself as someone else’s Recovery Contact by tapping their name in the Account Recovery For section of the Account Recovery Screen, then tapping Remove Contact.
How to help someone recover their iCloud account
As mentioned above, account Recovery Contacts see, at the bottom of the Account Recovery screen, who they are enabled to help. If you need to help someone recover their account, tap their name in the Account Recovery For section. You’ll see something like this:
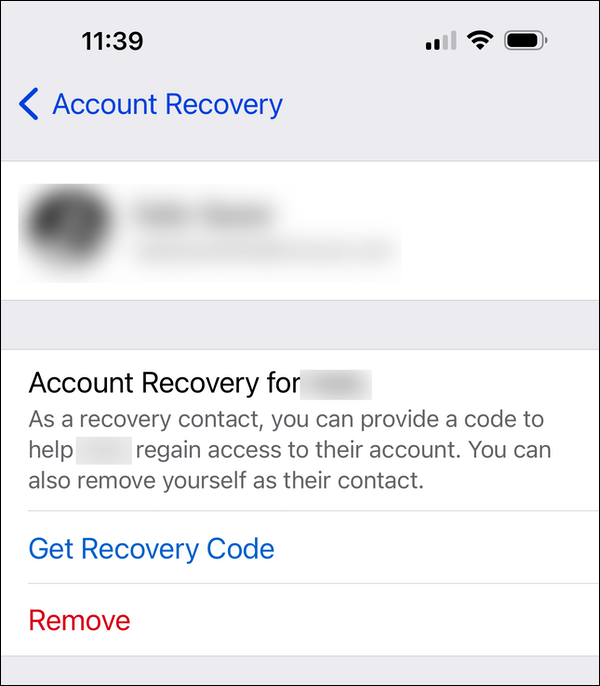
Tap Get Recovery Code to get a code. Again, you’ll need to give this code to the person, which could be face-to-face, over the phone, or via text message.
How to set up trusted phone numbers
It’s essential that your secure access to your iCloud account with two-factor authentication; this ensures that even if someone has your user name (Apple ID) and password, they can’t access your data. Apple’s two-factor authentication system uses other trusted Apple devices to deliver codes so you can log into your iCloud account on a new devices.
For example, when you get a new Mac, and sign into iCloud, your other trusted devices – your old Mac, your iPhone, iPad, or iPod touch – will present a code that you enter on the new device. Without that code, you cannot access your iCloud account.
But there may be times when you can’t get codes; the requirement of having another Apple device can be problematic. Say, for example, you’re on a business trip, or on vacation, and you’ve lost your iPhone, and need to log into your iCloud account on a computer, or you need to set up a new, replacement iPhone. If you have set up a trusted phone number, then you have that person receive the code you need to access your account. You’ll have to call them or text them to get this code, so make sure you know their phone number (unless you can meet them in person).
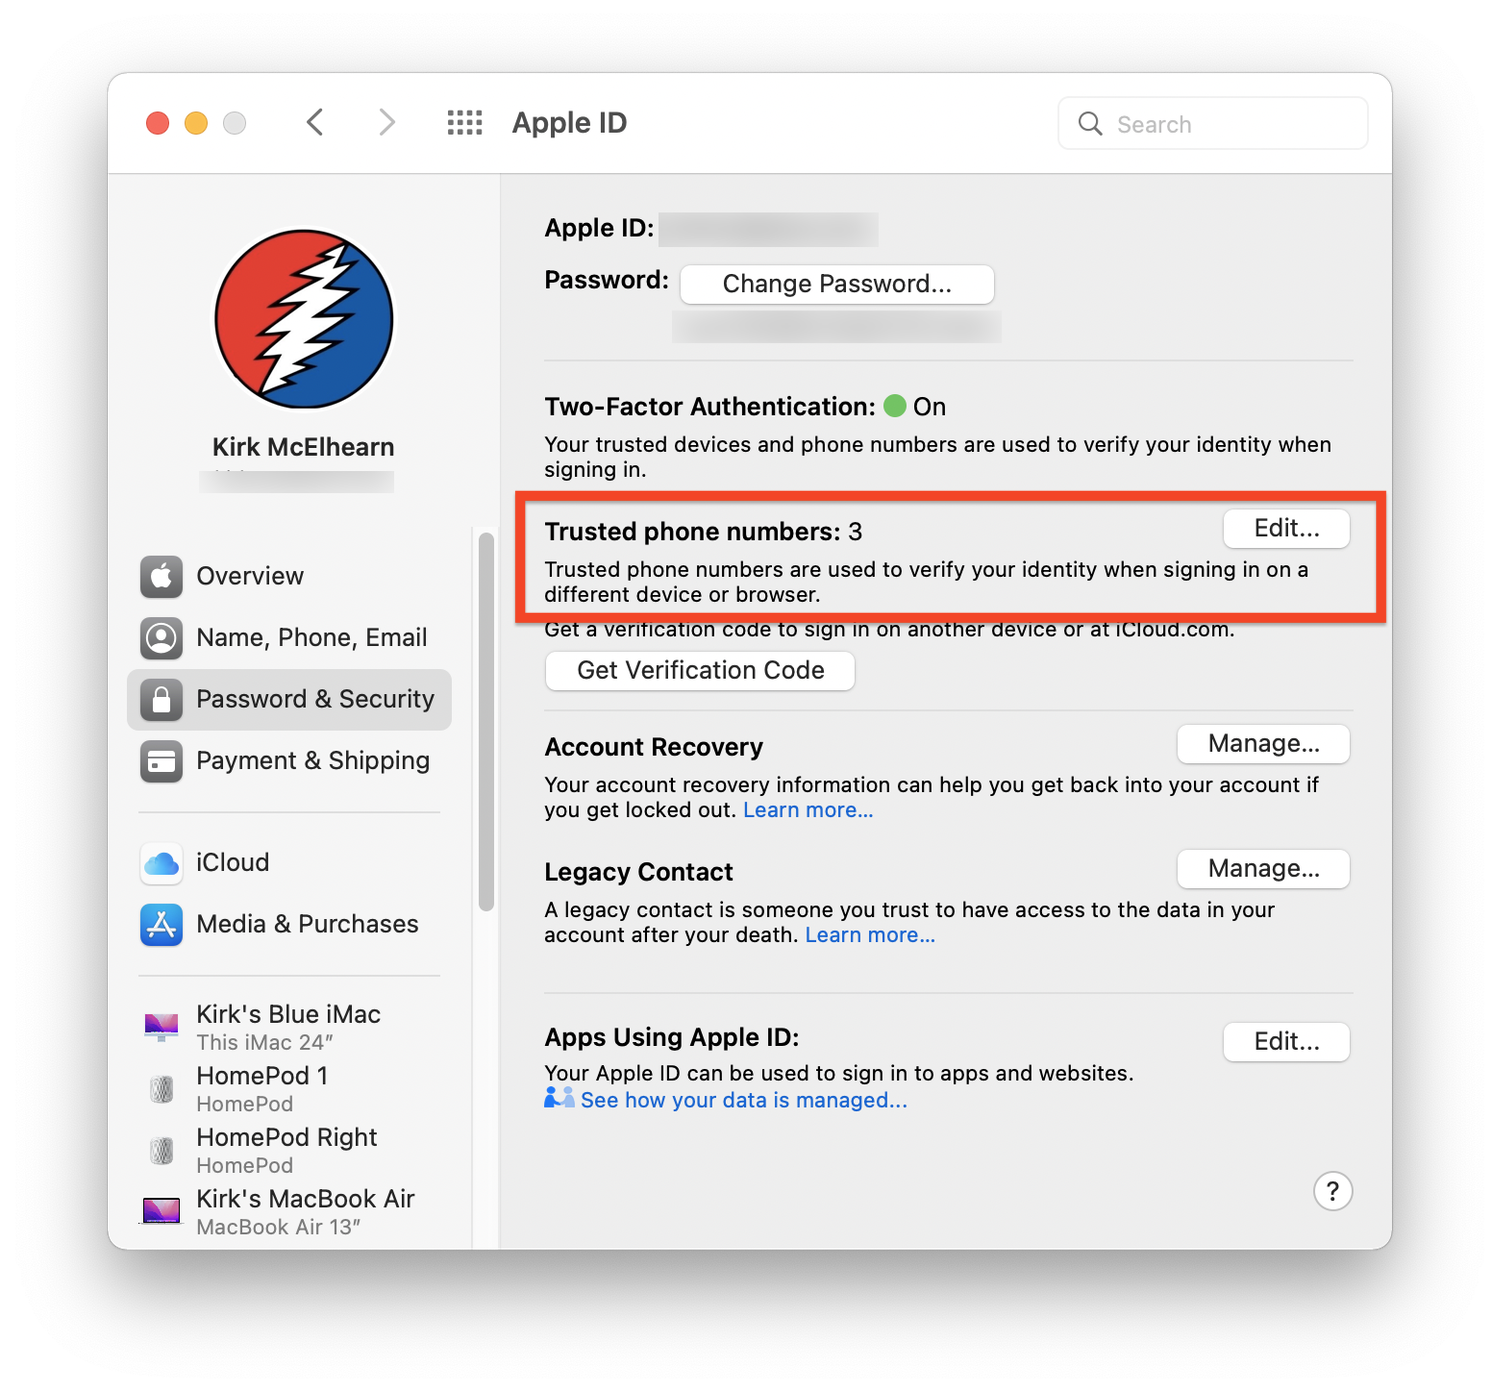
To set up trusted phone numbers, go to Settings > Password & Security (iOS or iPadOS), or System Preferences > Password & Security (macOS). In the Trusted Phone Numbers section, click or tap Edit.
Follow the instructions to enter the trusted phone number here; you’ll be able to choose initial verification by text message or phone call. This trusted phone number does not have to be linked to an Apple device; it could even be a landline. Make sure to add your own phone number as a trusted number, but it’s a good idea to add at least one other number in case you lose your phone and can no longer get calls to its number.
When signing into a new device, if you cannot access a code on an Apple device, you can choose to have a code sent to a trusted phone number. Learn more about two-factor authentication on Apple accounts.
How to Use Two-Factor Authentication for Your Apple Account and iCloud Account
Why you should set up a Legacy Contact for iCloud
For many years, Apple users had trouble accessing the personal data of spouses, partners, or family members who had passed away, and in some cases resorted to lawsuits.
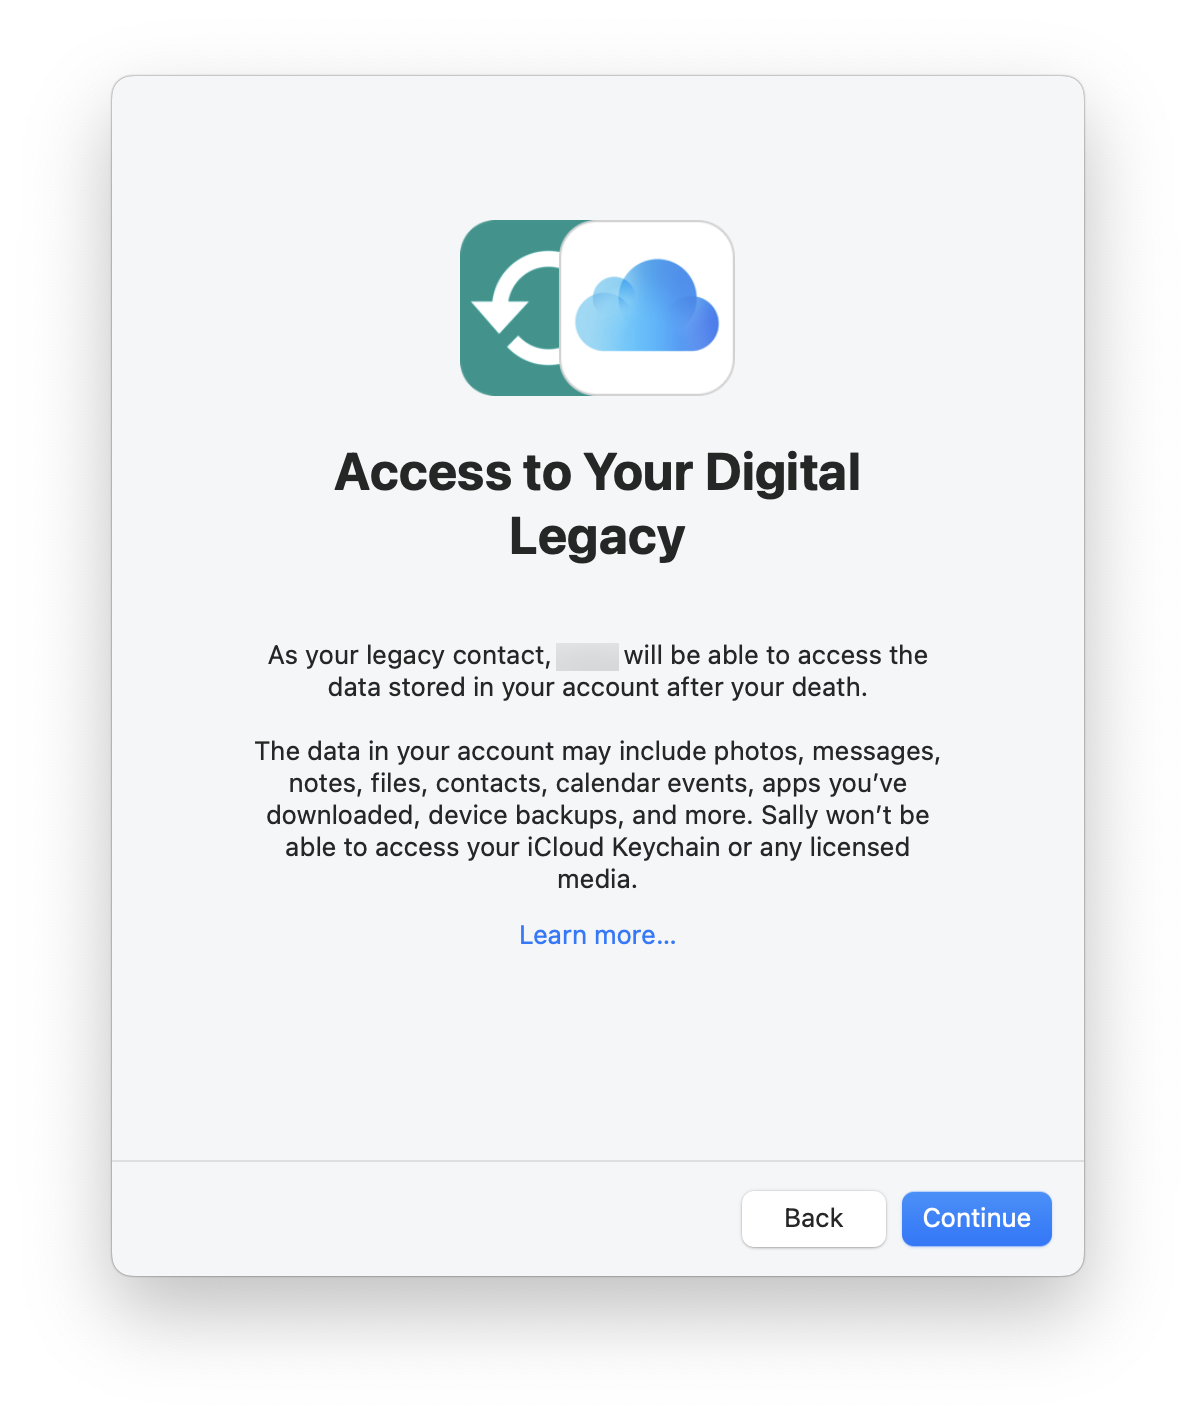
Since iOS 15.2, iPadOS 15.2, and macOS 12.1, you have been able to nominate a Legacy Contact who will be able to access your data after your death. As Apple says, “This data may include photos, messages, notes, files, apps they downloaded, device backups, and more,” but “Certain information, like movies, music, books, or subscriptions they purchased with their Apple ID, and data stored in their Keychain, like payment information and passwords, can’t be accessed by a Legacy Contact.”
In other words, while you can access your loved one’s photos and email, their purchases are lost. Also, you won’t have access to their passwords, hence preventing you from accessing any websites or services that may contain other personal data. For example, if someone stores photos on Google Photos or Flickr, you may not be able to access them. For this reason, it’s a good idea to store passwords and other data in a secure manner to be able to access non-Apple accounts. See How to Prepare Your Digital Legacy for more on this.
How to set up a Legacy Contact for iCloud
To set up a Legacy Contact, proceed as for an account Recovery Contact: go to the Sign-In & Security settings, then Legacy Contact, then tap or click Add Legacy Contact. The first screen explains what this means:
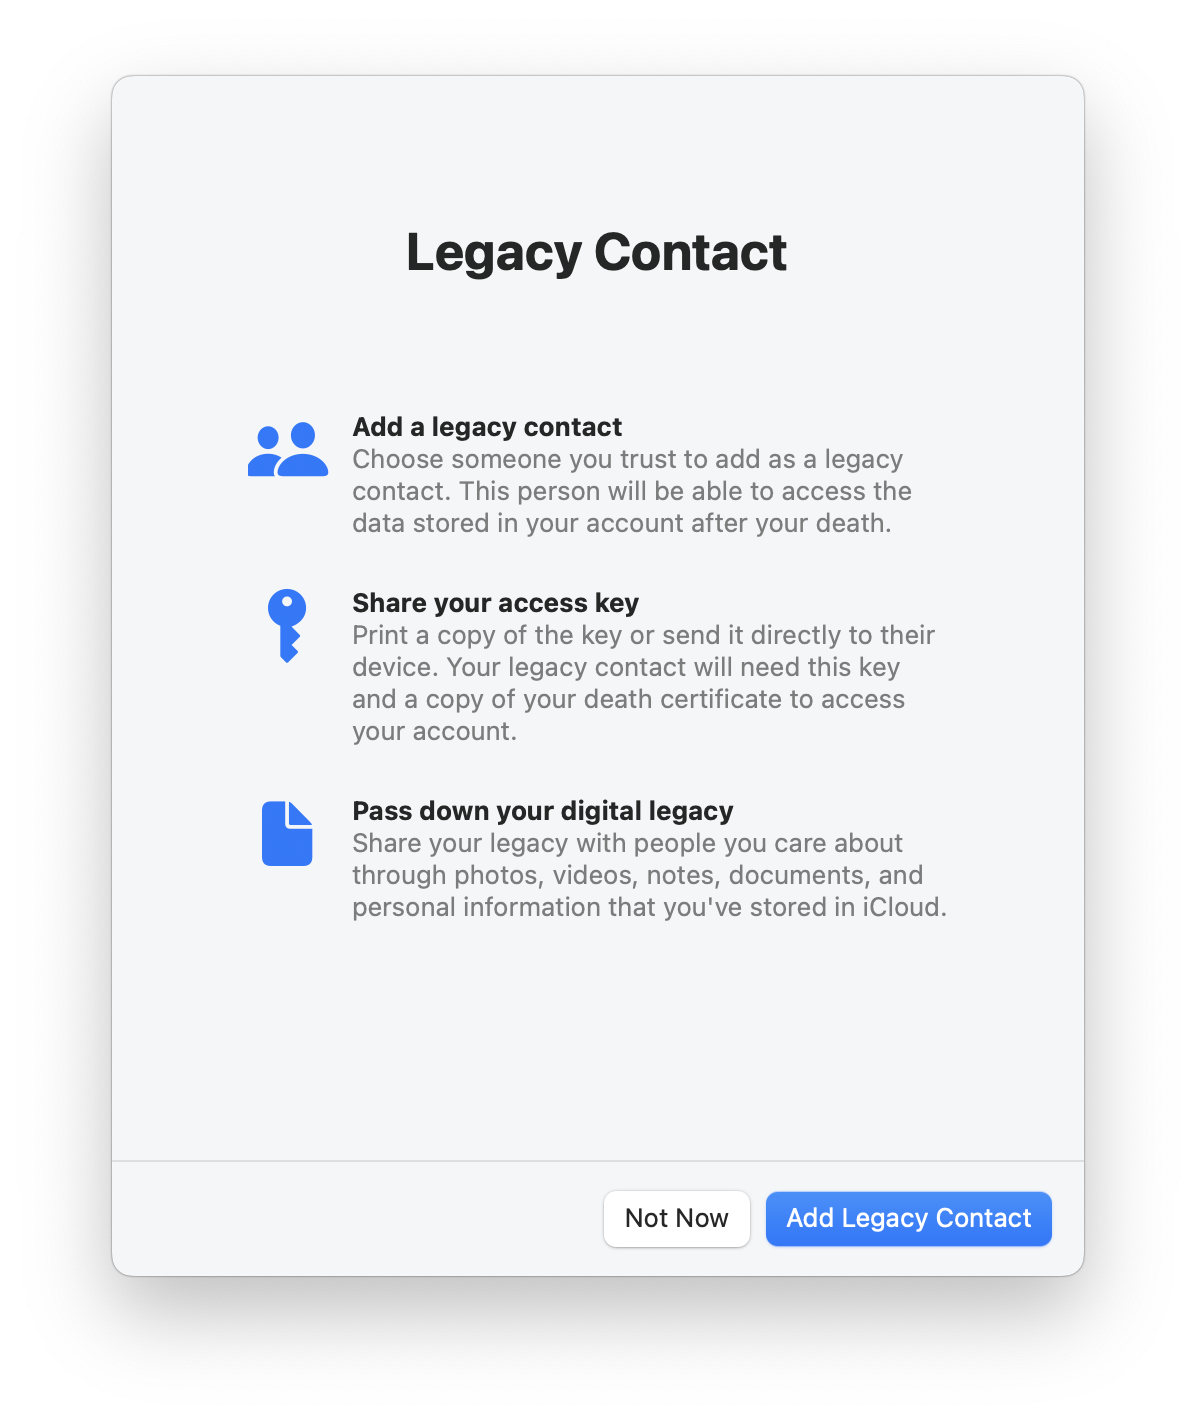
Add your Legacy Contact, and the next screen gives some more information:
Tap or click Continue, then choose how to share your access key.
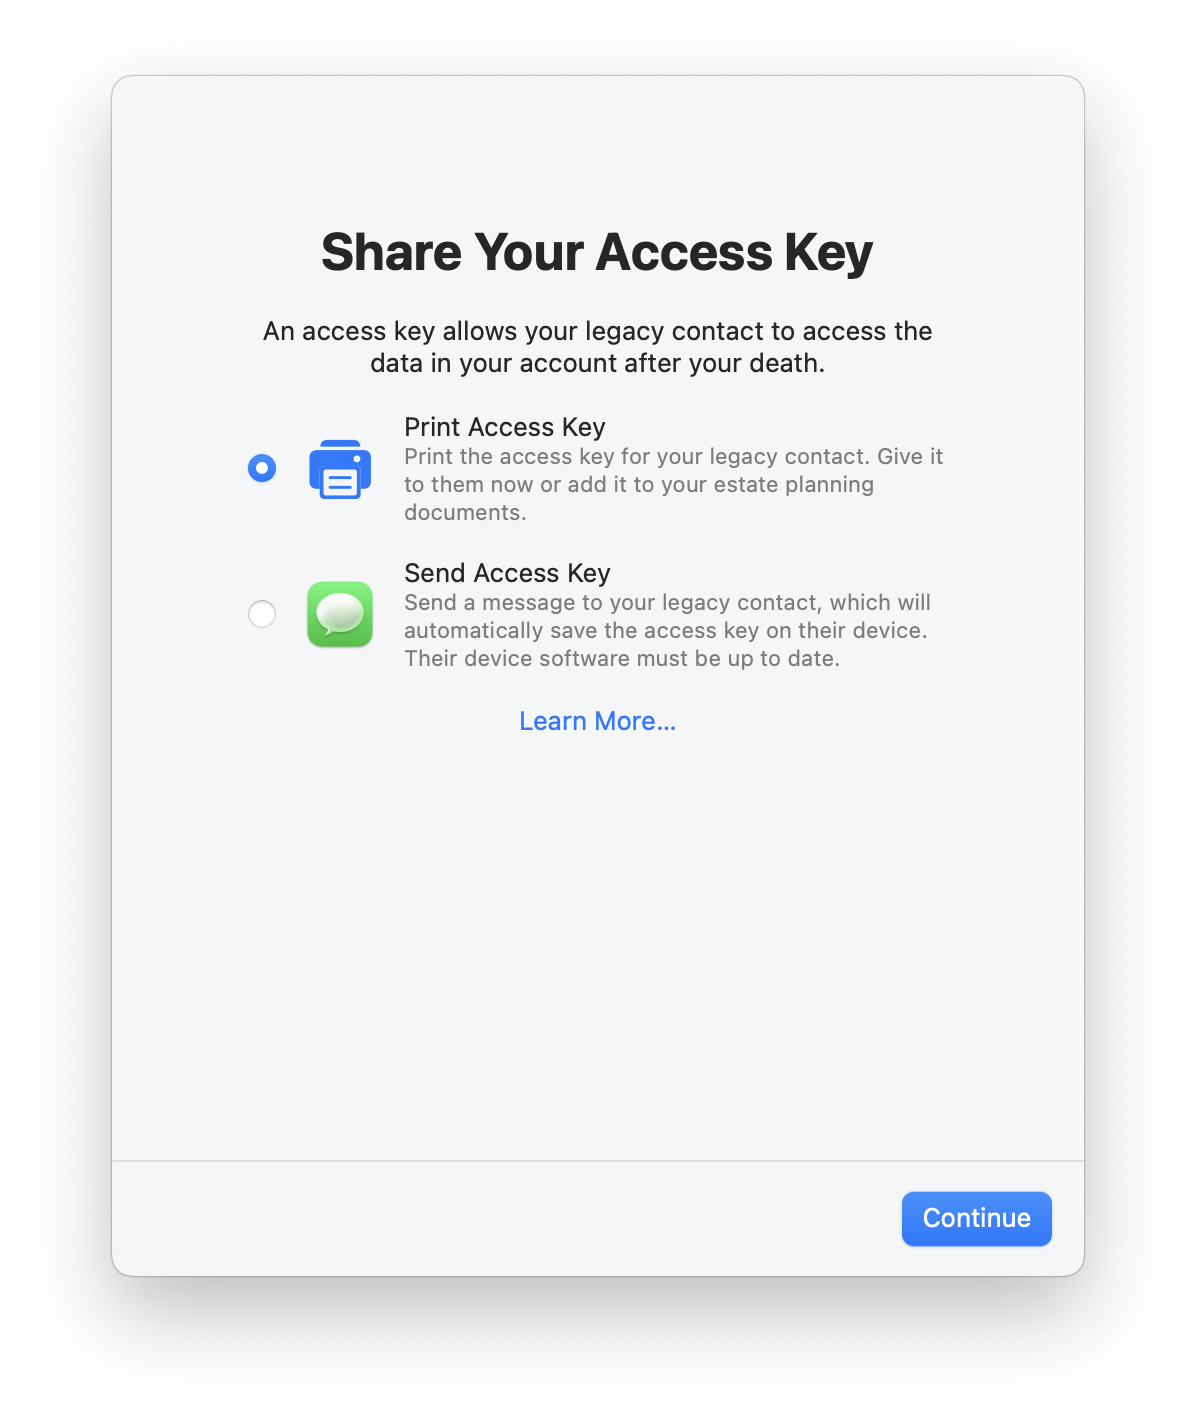
If your Legacy Contact uses an Apple device, you’ll see the option to send a message informing them that they have been added as a Legacy Contact. This message may seem a bit ominous; it’s a good idea to warn them in advance.
If they’re not using an Apple device, then the only option is to send a PDF or print a copy of the access key that they will need, together with your death certificate, to access your data. It’s a good idea to print this key anyway and save it with any will or estate planning documents.
How to remove a Legacy Contact from your iCloud account
You can remove a Legacy Contact by tapping their name in Your Legacy Contacts, then tapping Remove Contact. If you are a legacy contact for someone else, you’ll see this in the Legacy Contact section of Sign-In & Security under Legacy Contact For.
If you need to access an Apple account as a Legacy Contact, see this Apple support document. When Apple approves a Legacy Contact, that person gets a unique Apple ID allowing them to access the legacy account for up to three years, after which the account is deleted.
Setting up Recovery Contacts and Legacy Contacts is a good way to ensure that you don’t lose access to your Apple account, and that, in the event of your death, someone can inherit your data and photos.
How can I learn more?
 Each week on the Intego Mac Podcast, Intego’s Mac security experts discuss the latest Apple news, security and privacy stories, and offer practical advice on getting the most out of your Apple devices. Be sure to follow the podcast to make sure you don’t miss any episodes.
You can also subscribe to our e-mail newsletter and keep an eye here on The Mac Security Blog for the latest Apple security and privacy news. And don’t forget to follow Intego on your favorite social media channels: ![]()
![]()
![]()
![]()
![]()
![]()
![]()

