How to Protect your Apple Account with Security Keys on iPhone, iPad, or Mac
Posted on
by
Kirk McElhearn
 Apple has just released macOS 13.2, iOS 16.3, and iPadOS 16.3. One of the new security features is the ability to protect your Apple Account with a security key, a hardware device that acts as a second factor for two-factor authentication.
This robust addition to the security of your Apple account prevents hackers from getting into your account without the security key, but it’s not for everyone. In this article, I’ll explain why you might want to protect your Apple Account with a security key, and how to set this feature up.
Note that Apple changed the name of this account in late 2024 from Apple ID to Apple Account.
What is a security key?
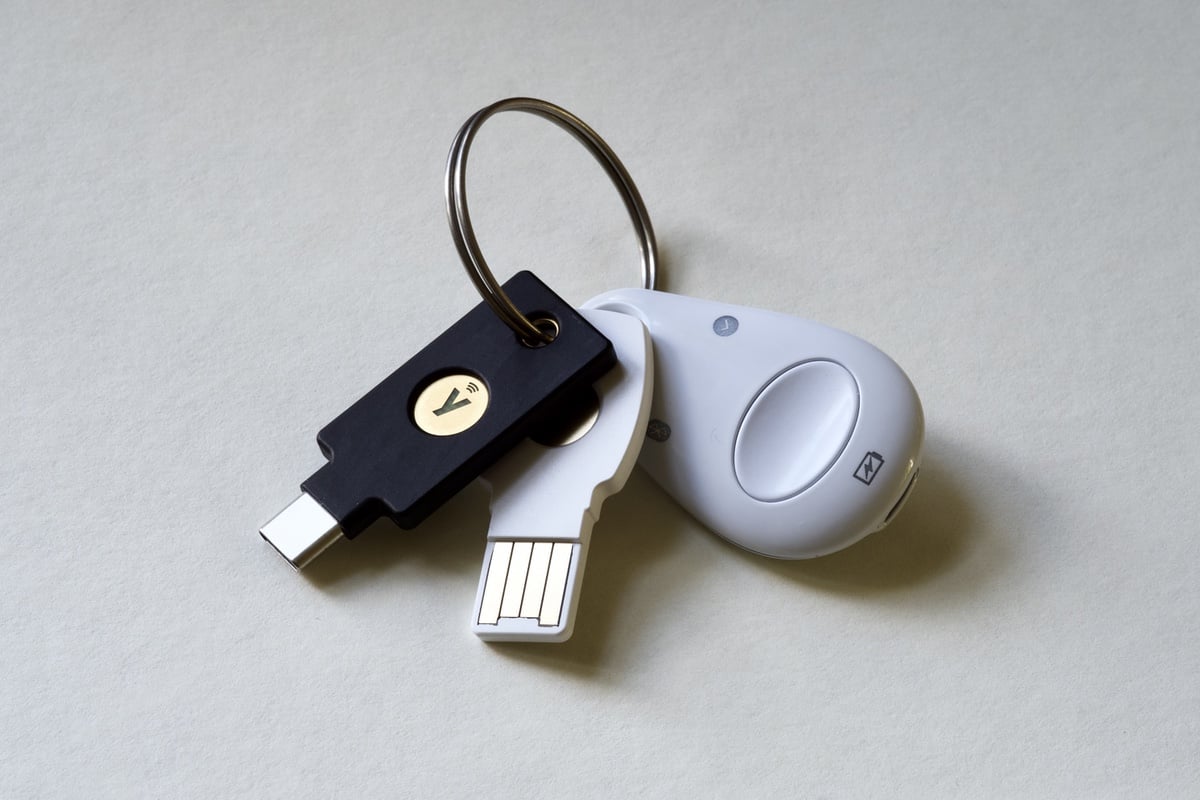
A security key is a small dongle-like device that has a unique identifier, and which contains a digital cryptographic key. When you pair a security key to an account, you need that device to access the account. Many companies make security keys, and some work via USB, while others use NFC (near-field communication), or Bluetooth.
The photo above shows three such keys: one with USB-C, another with USB-A, and the third works with NFC. To use a security key, you either insert it into a USB port on a device, or hold it near the device and press a button to activate it.
Some security keys come with two different USB plugs and/or NFC, and it’s important to use a key that not only works with your current devices, but with all devices you may wish to use to access your account. See this article for more on using security keys.
Why use a security key to protect your Apple Account?
As Apple says in a support document, “Security Keys for Apple Account is an optional advanced security feature designed for people who want extra protection from targeted attacks, such as phishing or social engineering scams.” This sounds great, right? This advanced protection means that you’re safe from hackers.
However, Apple also points out, in a press release, that, “This feature is designed for users who, often due to their public profile, face concerted threats to their online accounts, such as celebrities, journalists, and members of government.”
Because of some of the constraints of using a security key, this isn’t a feature that just anyone should use. If you are a celebrity, journalist, or member of government, you should certainly set up a security key for your Apple Account. If not, it might not be a good idea.
Apple’s two-factor authentication
Apple’s two-factor authentication uses a chain of trust across your Apple devices. Once you have authenticated on one device, you can use that device to authenticate another device, or to log into an Apple service on the web. For example, if you set up a Mac with your Apple ID, you’ve proven who you are. You can then set up a new iPhone using a code that Apple sends to that Mac, and which you enter on the iPhone. At that point, you have two devices that you can use to receive or generate codes to authenticate other Apple devices and services.
When you set up a security key on your Apple Account, you no longer get codes sent from Apple, nor will you be able to generate codes on your devices, but you will have to use the security key to authenticate your account. When you sign into an Apple website, service, or device, you enter your Apple Account email address, your password, then you use your security key to complete the process.
This hardens your security, because, if someone has managed to get access to one of your devices, they cannot use it to get access to other devices or to your account. And if you can’t get codes sent to your devices by Apple and request SMSes to authenticate, Apple won’t send those SMSes, which could be intercepted by a malicious third party.
Requirements for using a security key for your Apple Account
In order to set up a security key for your Apple Account, you need the following:
- At least two FIDO Certified security keys that work with the Apple devices that you use on a regular basis. You need at least two security keys in case you lose one, and having more as backups is safer. You can link up to six security keys to your account. Once you’ve set up a security key on your account, there’s no other way to access it.
- All of the devices where you’re signed in to your Apple Account must be running iOS 16.3, iPadOS 16.3, or macOS Ventura 13.2, or later on. This means that if you have any old devices not running these operating systems, you cannot protect your account. Remember, the security key protects the account, not individual devices. If you have older devices that you use regularly, you can set up a different Apple Account for them, but you won’t be able to share services and content with them.
- You must have two-factor authentication enabled for your Apple ID. This is already required for some Apple services, but if you haven’t activated it, you must do so. This article explains how to set it up.
- A modern web browser. You can use Safari on Apple devices, which will be up to date, but if you use an alternate web browser, you might not be able to sign into Apple services.
- To sign in to Apple Watch, Apple TV, or HomePod after you set up security keys, you need an iPhone or iPad that supports security keys. Even if you have a Mac, you cannot use these devices with your Apple Account and a security key without also having an iPhone or iPad.
-
To sign in to iCloud for Windows after you set up security keys, you need iCloud for Windows 15 or later. Make sure you keep iCloud for Windows up to date.
Limitations when using a security key with your Apple Account
There are some limitations to the use of security keys with your Apple Account:
- You can’t sign in to older devices that can’t be updated to a software version that supports security keys. As mentioned above, you can create a separate Apple Account for these older devices.
- Child accounts and Managed Apple IDs aren’t supported. Security keys are designed for individual accounts only.
- Apple Watches that are paired with a family member’s iPhone aren’t supported. You need to first set up the Apple Watch on your own phone.
Choosing the right security key
Apple’s support document gives information about the various types of security keys you can use. The best option is a security key with USB-C and NFC. You can connect to any Mac with USB-C, or with a USB-A to USB-C adapter; many security keys come with an adapter, or contain two USB plugs. NFC works with any iPhone that supports security keys.
How to set up a security key on the Mac
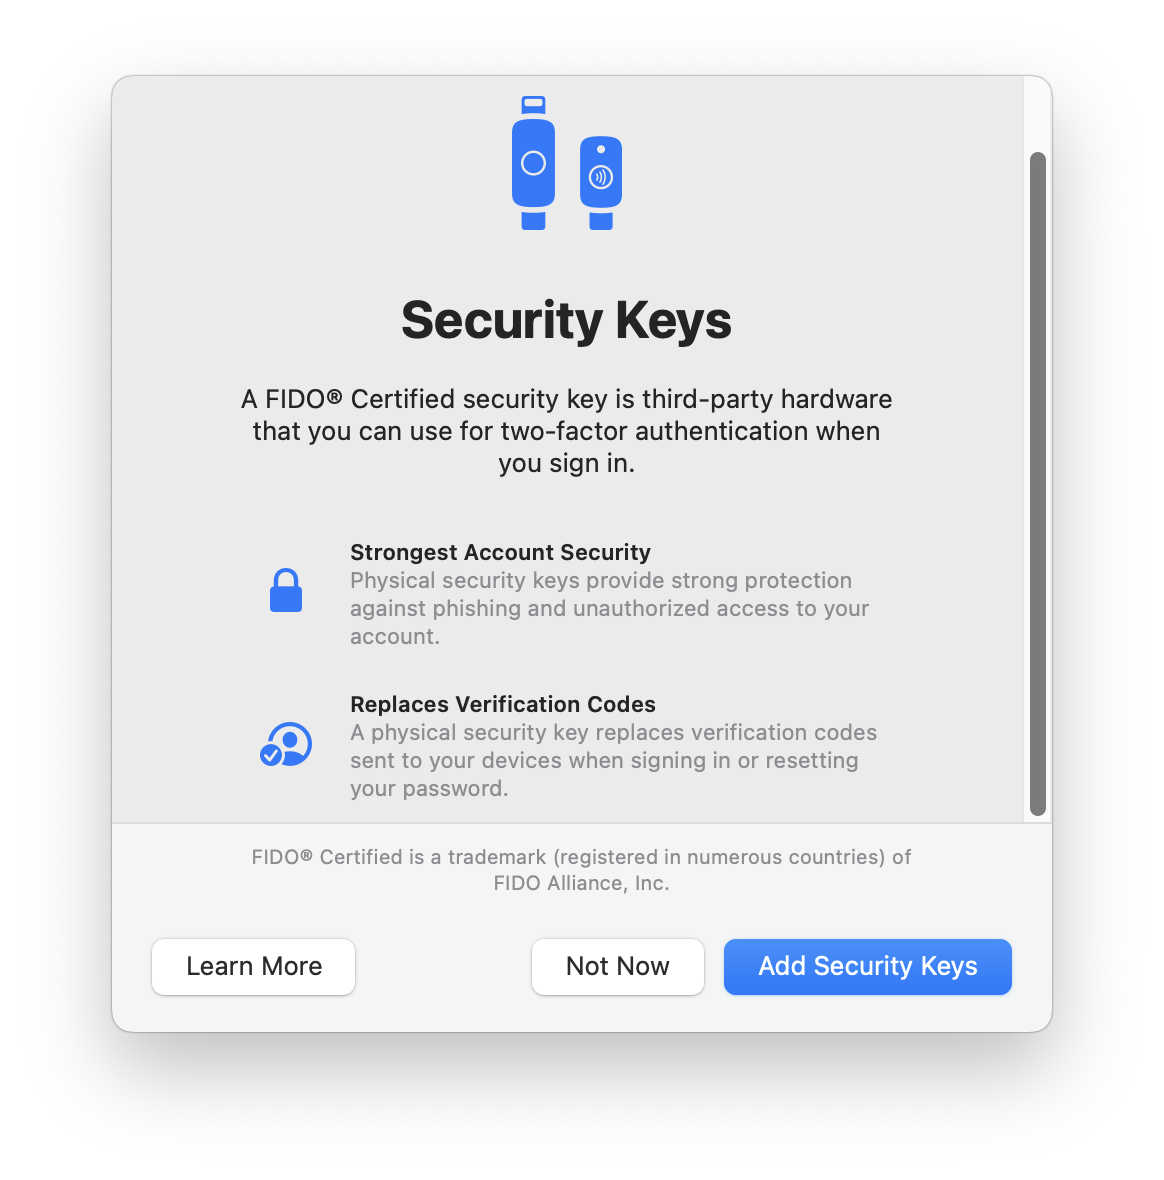
Open System Settings, click your name, then click Password & Security. Scroll down to the Security Keys section, then click Add. A dialog explains how security keys work.
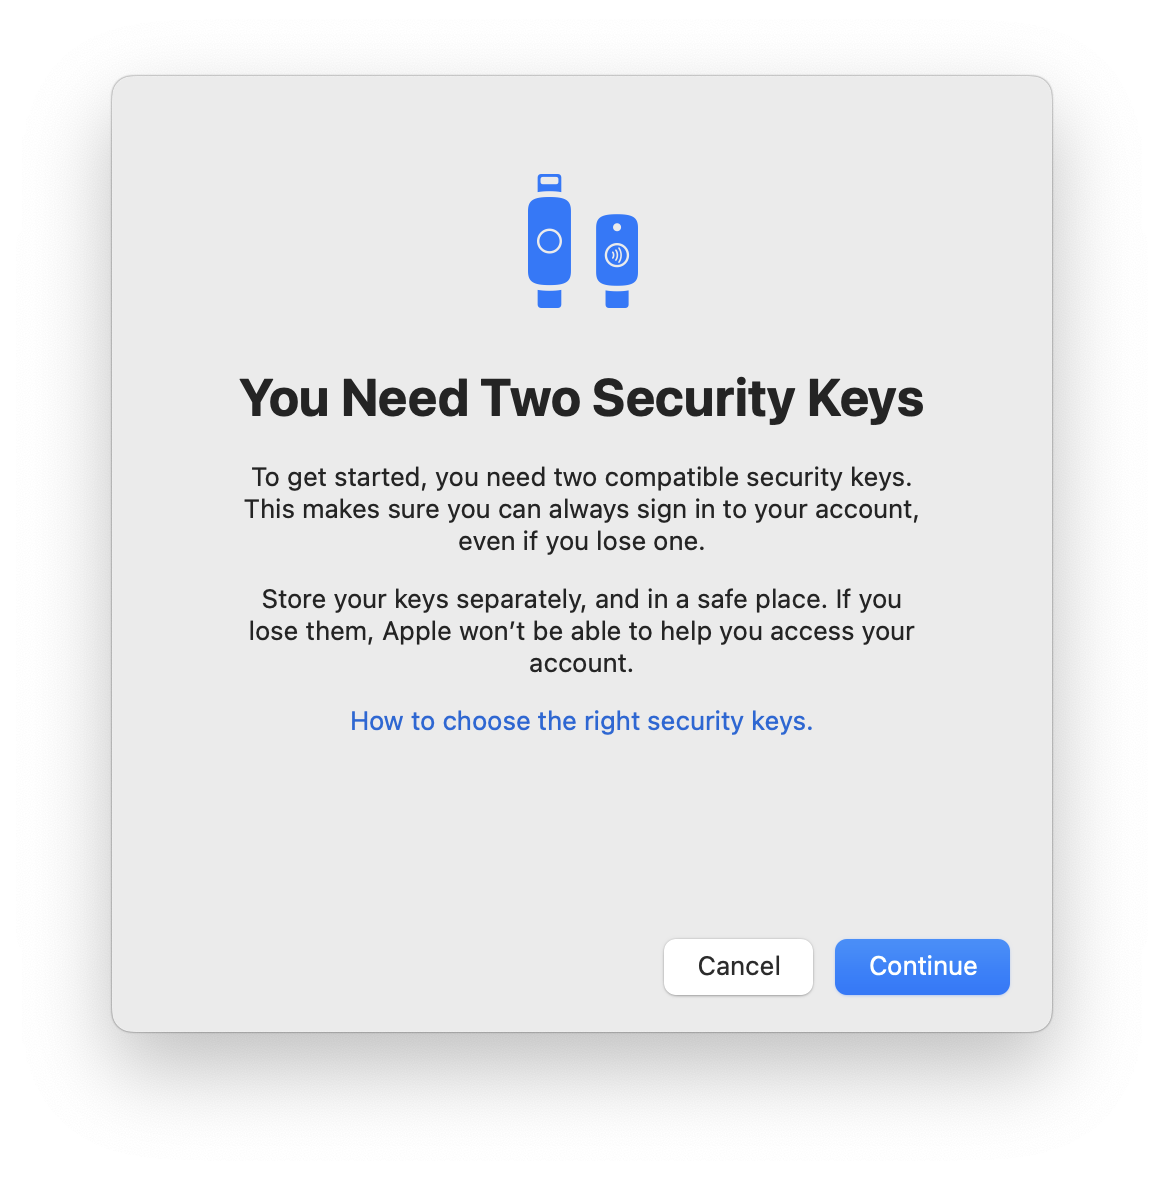
Click Add Security Keys. The next dialog explains that you need two security keys. Click Continue.
If you have any inactive in unsupported devices, that you have not used in the past 90 days, you’ll need to sign out of them. You can click Sign Out of Inactive Devices if you have any. Enter your password to continue.

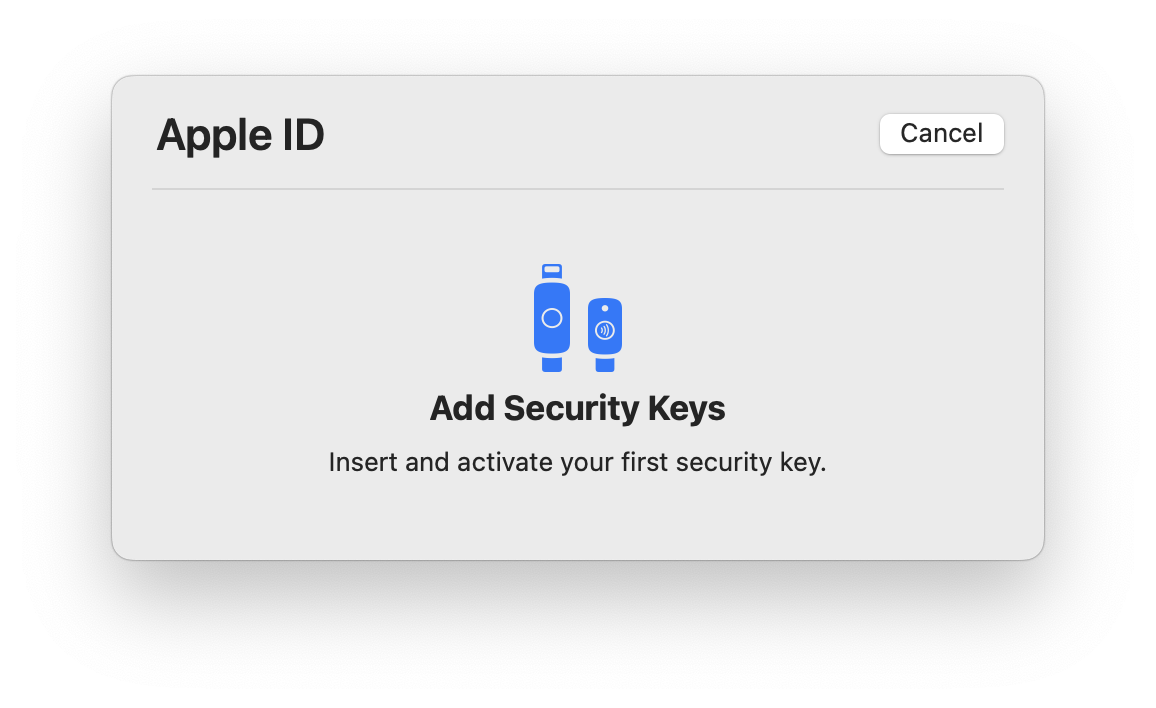
The next dialog tells you to add the first security key. Click Continue, then insert the security key. You may need to press a button on the security key to activate it.
Continue this process for as many security keys as you have, up to six, then follow the instructions to complete the process.
From this point on, you’ll need one of the security keys to sign into any Apple service, and to set up any new Apple device.
How to set up a security key on the iPhone or iPad
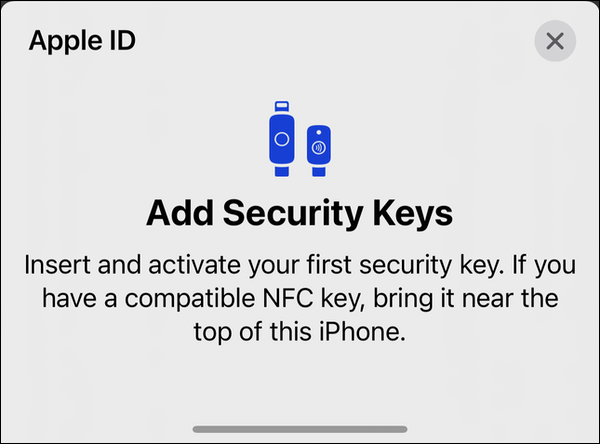
Go to Settings, tap your name, then tap Sign In & Security. Tap Add Security Keys. The process is exactly the same as above; you’ll see the same steps to add two or more security keys.
For the iPhone, you’ll need security keys that use NFC or that plug into the device. If you’re using an iPad, you’ll need a security key that connects to the device’s port. All currently sold iPhones and iPads use USB-C, and some older iPads – and iPhones prior to the iPhone 15 – use a lightning connector.
How to sign into accounts or devices using a security key
Once you’ve set up security keys for your Apple Account, you will need to use them when signing into Apple websites or services, or when setting up new devices. When prompted, either hold an NFC security key near the top of your iPhone – your security key may have a button you press – or insert a security key in a USB port on the device you’re using.
How to remove security keys from your Apple Account
You can link up to six security keys to your Apple Account. If you want to remove any keys, in order to pair new keys, go to System Settings (Mac) or Settings (iPhone or iPad), tap or click your name, then choose Sign In & Security, then Two-Factor Authentication, then Security Keys. If you want to remove individual keys, tap the ones you want to remove, then tap Remove Key.
To remove all the keys associated with the account, tap or click Remove All Keys, then click Remove. If you do this, the account will revert to using six-digit codes sent via your other devices.
How to turn off security keys for your Apple Account
As explained above, if you remove all security keys associated with your account, this turns off security keys entirely.
As you’ve seen above, it’s pretty straightforward to set up security keys for your Apple Account, but there are limitations. The main one is that if you don’t have access to a security key, you can’t get into your account. Also, if someone gets access to one of your devices and a security key, then they may be able to compromise it. To ensure that you don’t lose your security keys, you should keep one on your keyring, perhaps with an AirTag to track it if it’s lost or stolen. Keep another at home, and one at work. It’s better to have more security keys just in case. Because if you lose all of your security keys, you will be locked out of your Apple Account, and Apple cannot help you get access.
How can I learn more?
 Each week on the Intego Mac Podcast, Intego’s Mac security experts discuss the latest Apple news, including security and privacy stories, and offer practical advice on getting the most out of your Apple devices. Be sure to follow the podcast to make sure you don’t miss any episodes.
You can also subscribe to our e-mail newsletter and keep an eye here on The Mac Security Blog for the latest Apple security and privacy news. And don’t forget to follow Intego on your favorite social media channels: ![]()
![]()
![]()
![]()
![]()
![]()
![]()

