Apple + Recommended + Security & Privacy
iOS 11: A Complete Guide to iOS Security and Privacy
Posted on
by
Jay Vrijenhoek

You’re likely aware that Apple released iOS 11 this week — and you know what that means: Time to go over all of the security and privacy features built-in to the new operating system. iOS 11 brings numerous new security features to your iPhone and iPad, and is compatible with devices as old as the iPhone 5s to the brand new iPhone 8 and iPhone X, as well as most iPads as old as the iPad mini 2.
If you’ve upgraded your iPhone or iPad to iOS 11, or you’re new to iOS, it’s a good idea to review the many security & privacy features this new version of Apple mobile operation system offers. Some of these features have been around awhile, and some are brand new. Following is a comprehensive look at iOS 11’s new security features and how to configure them.
Locking Access to Your Device
Locking and unlocking your phone can be done in more ways than one, and there are several types of keys available. Following are all the ways you can lock down access to your device.
Passcode
We all know the 4-digit passcode that has been around since the very first iPhone. Apple offered a 6-digit passcode option when users updated to iOS 9, and that has been the standard since. Of course, you’ve been able to set an alphanumeric password as well. In iOS 11, you can set a 4-digit passcode, custom-digit passcode or an alphanumeric password.
To set up or change the passcode on your device, go to Settings > Touch ID & Passcode > Change Passcode, and then enter your current password — but don’t enter a new one; instead, tap the “Passcode Options” link above the keypad.
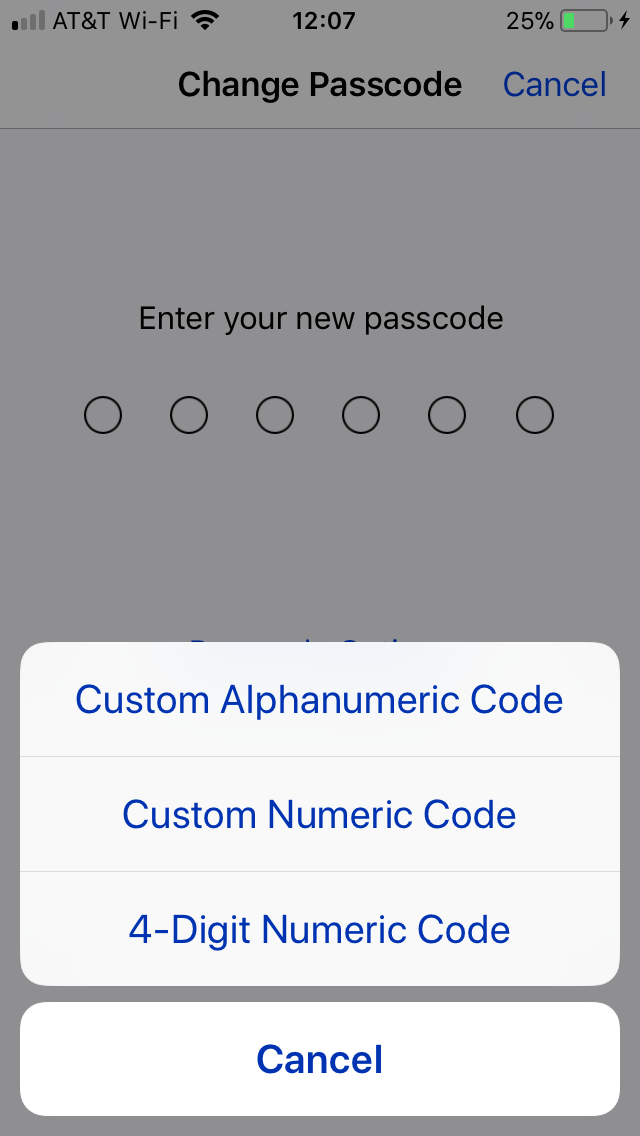
If you feel like setting a 7-digit or even 15-digit numeric passcode, now you can! I do not recommend using the 4-digit passcode ever again, more characters is typically better. If you’re happy with your current passcode, simply cancel out of the Change Passcode window.
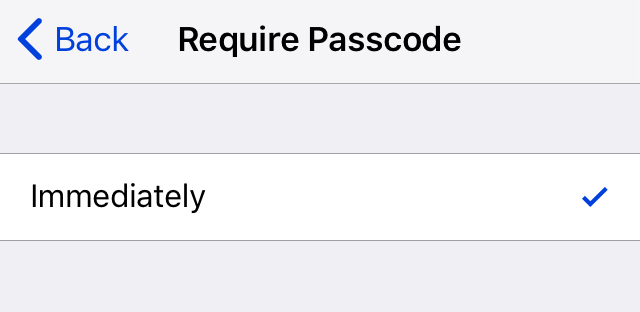
While still in the Touch ID & passcode settings, have a look at the “Require Passcode” option. You’ll notice that the previously available “After 1 minute,”and “After 5 minutes” options are gone. Now, “Immediately” is the only option available in iOS 11, which begs the question, if there are no other options, why even put the option in the settings?
At the bottom of the Touch ID & Passcode settings window, you can enable “Erase Data” if it’s not already enabled. Having this feature enabled will ensure your iOS device gets wiped completely if the wrong passcode is entered 10 times, a great defense against repeated unauthorized attempts to get to your data.
Having said that, if you have young kids and the device you’re using is often accessed by them, you may want to reconsider enabling the Erase Data feature. The last thing you want is to retrieve your iPhone only to find it’s been wiped by your youngster who doesn’t know any better. Trust me, it has happened! But I digress…
Touch ID
If you have an iPhone 5S or newer iOS device, you’ll likely be familiar with Touch ID already. Using your fingerprint to unlock your device, pay with Apple Pay and to authorize iTunes and App Store purchases is very convenient and also very secure.
To set it up, go to Settings > Touch ID & Passcode and add your fingerprint to get started. Your passcode will still exist on the phone and you’ll be required to enter it after your device restarts.
Face-ID (New!)
If you’re the proud owner of an iPhone X soon, you will be able to use Face ID, a new biometric way of unlocking your iOS device that replaces Touch ID as the home button is no longer present on that iPhone model. While an iOS 11 feature, it will only work on the iPhone X (for now) due to the hardware required to make it work. Apple stated that the chances of a stranger unlocking your device with Face ID is 1 in 1,000,000 compared to the Touch ID’s 1 in 50,000 chance. Of course, identical twins will likely be able to unlock each others phones.
Auto-lock
For enhanced privacy, you want your device to lock when you put it down or when you walk away from it. This will not only save battery power but also keeps unwanted snoopers out. In Settings > Display & Brightness you’ll find “Auto Lock”; set the time for this feature as low as possible, if you can. The lower the time, the smaller the window for an unauthorized person to get a hold of your device and get to your data. Unlocking your device is a breeze, especially with Touch ID and now Face ID, so setting the Auto Lock to 30 Seconds should not be a problem.
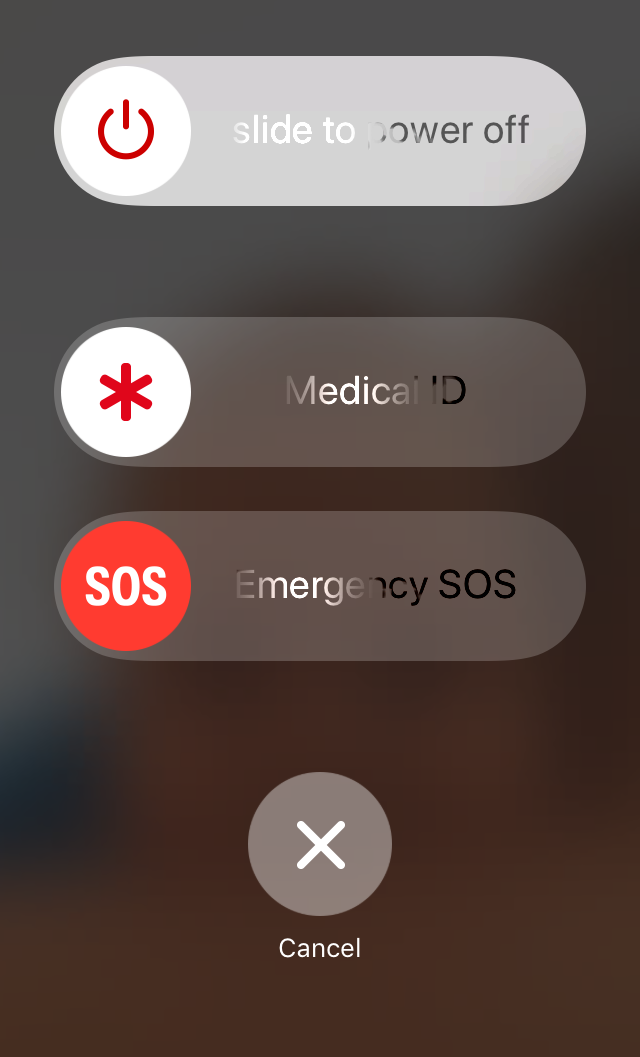
Emergency SOS (New!)
Emergency SOS is a new feature that will give you quick access to your Medical ID information and emergency services contact info. Just press the on/off button on your device 5 times fast and the screen will pop up. A very nice added bonus is that after using this shortcut, Touch ID and Face ID will be disabled.
You’ll need your passcode or password to regain access to your device. This can come in handy at TSA checkpoints, rallys, if you feel you’re about to get mugged or arrested, etc. (Any situation where you feel your biometric information could be used without your consent.) To configure this feature, go to Settings > Emergency SOS. It is built-in to iOS 11, so the feature itself is enabled by default and cannot be disabled.
This covers the ways your device can be locked and unlocked. There is a lot more to be done, though, to make your device as private and secure as you want it.
iOS 11 Security & Privacy
There are quite a few new and returning security and privacy features in iOS 11. Below is a list of salient features you’ll want to enable for even greater protection of your device and the data on it.
Notifications (hide preview on lock screen)
While notifications are very convenient, they can pose a privacy risk and possibly a security risk. Imagine the two-step verification codes that are texted to your iPhone visible on your lock screen. This may be convenient for you as you don’t have to unlock your phone to read the message, but it’s also convenient for the person who may have just stolen your bag with laptop and phone in it.
Fortunately, there is a balance you can strike between convenience and better security & privacy. To do this, go to Settings > Notifications. Here you’ll have a list of all the apps that can send you notifications and the style and format they use. Tap on apps that can display potentially sensitive information, scroll down and tap on “Show Previews.” Now you can tell that app to not display a preview of the content you’re being notified about at all or only when the device is unlocked. You will still get the notification on your lock screen, it just won’t tell you what it’s about.
Since you’re there, scroll all the way down in the Notifications settings window and select the government alerts that you’d like to receive. Receiving AMBER alerts may help you save someone else’s life, and the Emergency alerts may save yours. Personally, I appreciated the emergency alerts of tornadoes that touched down just up the road during hurricane Irma.
AirDrop
A very nice feature on both iOS and macOS, which a lot of people are still not aware of, is AirDrop.
AirDrop is on by default and is set to receive from anyone. If you plan on using AirDrop, set it to receive from “Contacts Only.” This can be done in Settings > General > AirDrop, or by pressing and holding the connectivity bubble in Control Center. Keeping AirDrop on and set to “Everyone” is not a good idea and I can’t think of a scenario where it would be. You really don’t want to be in a position where anyone can send you undesirable content.
Intelligent tracking prevention (New!)
During Apple’s keynote in June, a new Safari feature was announced called “Intelligent tracking prevention.” This is a new feature in Safari’s underlying WebKit that uses several ways to limit the way you are tracked through ads online, a move that has major advertising groups on Apple’s case, stating that it’ll hurt user experience and campaign targeting. If the advertising industry is this upset about the new feature, you know it probably works as advertised, which is good news for the privacy minded among us!
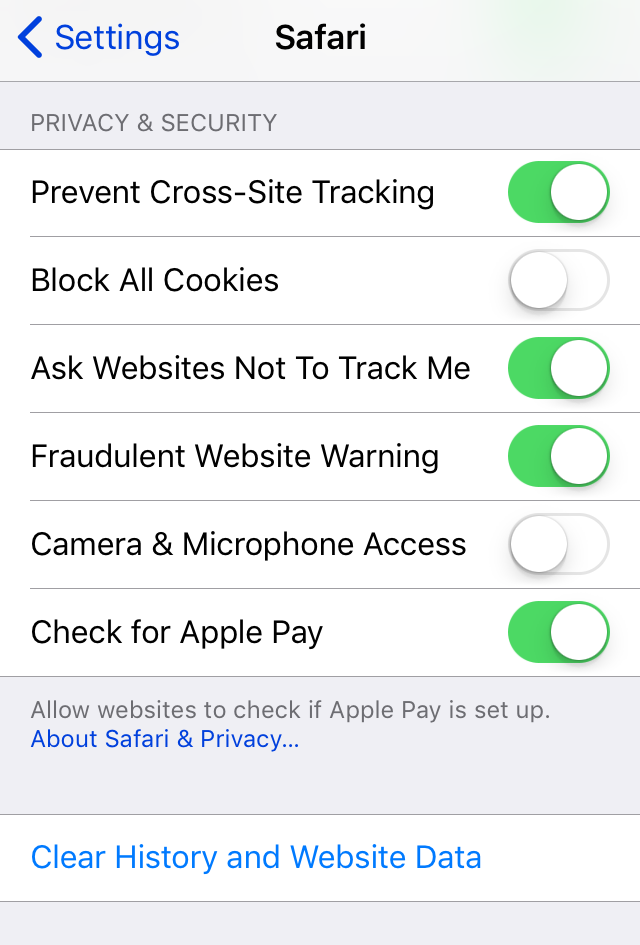
It does not appear that you have to do anything to enable this feature; it’s built-in to Safari and works as soon as you update to iOS 11. If you wish to disable the new privacy enhancement, you can do this in Settings > Safari. Here you’ll find a group of settings under “Privacy & Security” that you can enable/disable. “Prevent Cross-Site Tracking” is the new intelligent tracking prevention feature, which is on by default. Also new in this section of the settings is the “Camera & Microphone Access” toggle, something you may want to disable if there is no reason for Safari to access those capture devices.
Wi-Fi and Bluetooth buttons in Control Center (New!)
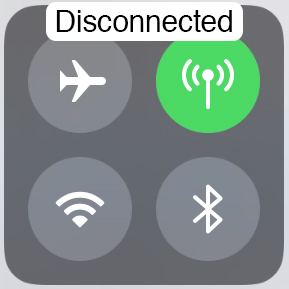
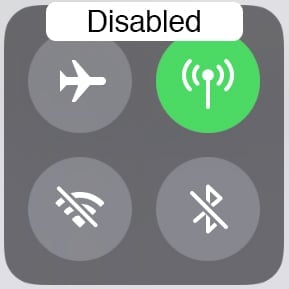
Apple has changed the behavior of the Wi-Fi and Bluetooth buttons in control center. Before iOS 11, tapping these buttons turned off their respective radios, but now it merely disconnects you from the network or device you are connected to — something that has caused quite a stir for those privacy and security minded. Sadly, this is not a bug, instead it works as intended. Now, to turn off Wi-Fi and Bluetooth, you have to go to Settings > Wi-Fi or Settings > Bluetooth and disable the radios. A faster way to do this is to simply tell Siri to disable them.
The Control Center buttons have three states:

More control over location data (New!)
In iOS 10, you could select if an app would have access to your location data “never” or “always,” if a developer chose to hide the “While Using the App” option. In iOS 11, developers can no longer hide that option, giving you more control over when an app can use your location data. These settings can be found in Settings > Privacy > Location Services and controlled on a per-app basis.
Also related to location data is the bright blue bar that will be shown at the top of your screen if an app is using your location data in the background.
More control over your photo library (New!)
You can now select which specific album an app has access to, and that access can be made write-only. Not comfortable sharing your entire photo library with an app? This feature should take care of that. Found in Settings > Privacy > Photos, it appears the “read only” option is only available if the developer chooses to at this time.
All Privacy controls
A good look at all of the settings in Settings > Privacy is recommended to make sure your location, contacts, calendars, photos and other potentially sensitive data is not accessed by any app that has no need for that data.

Do Not Disturb while driving (New!)
The new Do Not Disturb while driving feature is something I hope many people will use for the security of themselves and those around them. As the name implies, this will ensure you are not distracted by calls and texts while you should be focusing on the road. (A brief writeup of this feature can be found here.) iOS 11 will prompt you if you wish to enable this feature shortly after upgrading, but if you’d like to enable it right now, go to Settings > Do Not Disturb > Activate. The options are to activate this mode manually, when connected to your car’s Bluetooth, or automatically.
Enhanced security when connecting to a computer (New!)
With iOS 11, you are required to enter your device passcode before a connection with a computer is made, even when the phone is unlocked. This is a very nice improvement over the previous “Trust” pop-up. If someone were to get their hand on your device and compel you to unlock it (remember, biometric locks are fair game for law enforcement), all they would then have to do is tap the “yes” button on that pop-up and it would connect to any computer.
Now, even if the phone is unlocked with Touch-ID or the new Face-ID, connecting to an unknown computer will still require your 4 or 6 digit pin code, or the alphanumeric password if you have one set up. And because passcodes and passwords are still safe — as in law enforcement cannot compel you to surrender it, assuming Fifth Amendment rights have not been further eroded — this is a very nice enhancement.
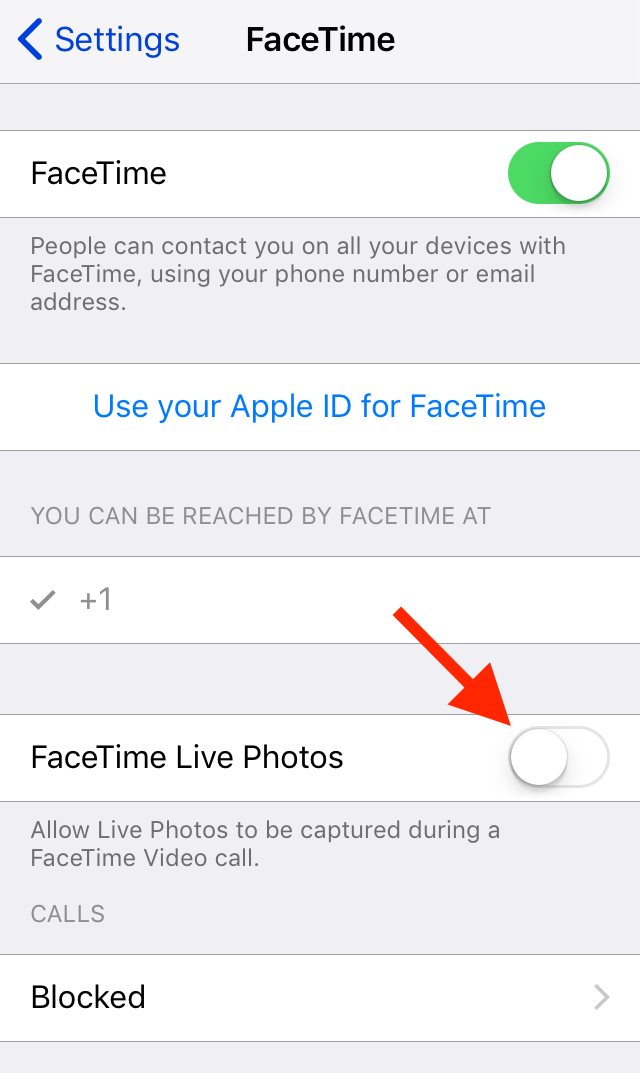
FaceTime Live Photos (New!)
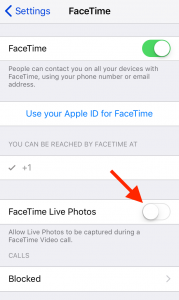
FaceTime Live Photos offers the ability to take a live photo of the connected party during a FaceTime call. A small capture button will be visible during the call, much like the photo button you see while recording a video, and it’ll record a small clip of video only, but no audio. The person you just took a live photo of will be notified that you did so and the photo will be stored in your camera roll. Apart from being a Live photo, this is also different from taking a screenshot in that the FaceTime controls are not visible in the photo.
While you can’t stop anyone from taking a screenshot during a FaceTime call, you can disable the FaceTime Live Photos feature. To do this, go to Settings > FaceTime > FaceTime Live Photos and toggle it off. This will disable the button for the other party during a call.
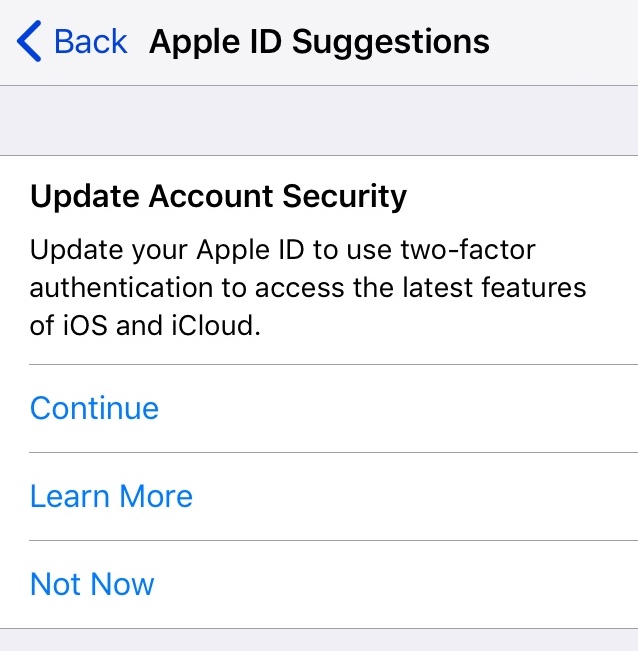
 Two-factor authentication (New!)
iOS 11 forces the upgrade of existing iCloud accounts with two-step authentication to now use two-factor authentication. Two-step authentication simply sent a 4-digit code via SMS to a trusted device, but two-factor authentication will send a 6-digit code to any trusted device using push services. Not only does this not require the insecure SMS protocol, it also allows Apple to show you the location where the new login is occurring. Your device will prompt you to upgrade if you currently use two-step authentication, so there is no need to search for this feature.
Best practices for iOS 11 security and privacy
• Disable Wi-Fi and Bluetooth when leaving the house/car
There are a myriad of ways you can be tracked and profiled, even when simply walking around in a mall, for example. Stores use beacons and analyze the signals from your Wi-Fi and Bluetooth radios to see where you go, what areas you spend time and more. Of course, having these radios constantly broadcasting, looking for something to connect to, will impact your battery life as well. Turning these radios off when you don’t need them is therefore a good idea.
• Back up your data regularly
Whether you prefer iCloud or iTunes, just make sure all your data is safe. Accidents and theft happen, but while a device can be replaced, the thousands of photos from your vacation or of your toddler are much more difficult to replace. For more on iOS backups, check out at our ultimate guide to backups and storage for iPhone and iPad.
Have something to say about this story? Share your comments below!

