How to Activate Apple’s Two-Step Verification for iCloud
Posted on
by
Kirk McElhearn

See the newer version of this article: How to Use Two-Factor Authentication for Your Apple Account and iCloud Account.
You’ve heard the stories about iCloud accounts getting hacked; the ones that make the news are celebrities’ accounts, but there may be people wanting to get into yours too. In addition to your Apple ID—the email address you use to identify your account—your password is the key that lets you into that account.
But anyone can pretend to be you, and attempt to get into your account, saying they’ve forgotten the password, and then attempting to answer the security questions that you chose when setting up the Apple ID. If they get through them, because they know the name of your first pet, your favorite sports team, and whatever else, they can access your account. Unless you add an additional layer of security.
Many services use two-factor authentication (Apple calls this “two-step verification”) to protect accounts. This means that your password alone is not enough; you need to have information that is sent to you or generated on a trusted device. My bank uses a device that gives me one-time codes when I log into my account; my username and password aren’t enough. In Apple’s implementation, any time you log into your account from a new device, they require an additional code, which is sent to one of your trusted devices: your iPhone, iPad or iPod touch. (You can’t use computers as trusted devices.)
You may need this code in normal usage. If you get a new iPhone, for example, and have set up two-step verification, you’ll need to get a code on the old iPhone to be able to do this. (If you no longer have the old iPhone, this is still possible; see below.)
Apple’s two-step verification uses three elements:
- The password used with your Apple ID
- A trusted device
- A Recovery Key
As Apple shows, you enter your Apple ID, then you get a verification code, and then enter that code to complete your login.

Here’s how to set up and use Apple’s two-step verification.
1. Go to Apple’s My Apple ID page and click Manage My Apple ID. You’ll be asked to enter your Apple ID and password.
2. After you sign in, click on Password and Security; you’ll have to answer a couple of security questions to go further.
3. At the top of the Manage your security settings section, you’ll see some information about Two-Step Verification. Click Get Started. To be able to set up two-step verification, you may need to wait; if you’ve made any changes to your Apple ID account information, Apple considers that this could be malicious, so you’ll have to wait three days. This is just a good safety precaution, though it can be annoying. Apple will send you an email to remind you when the waiting period is over.
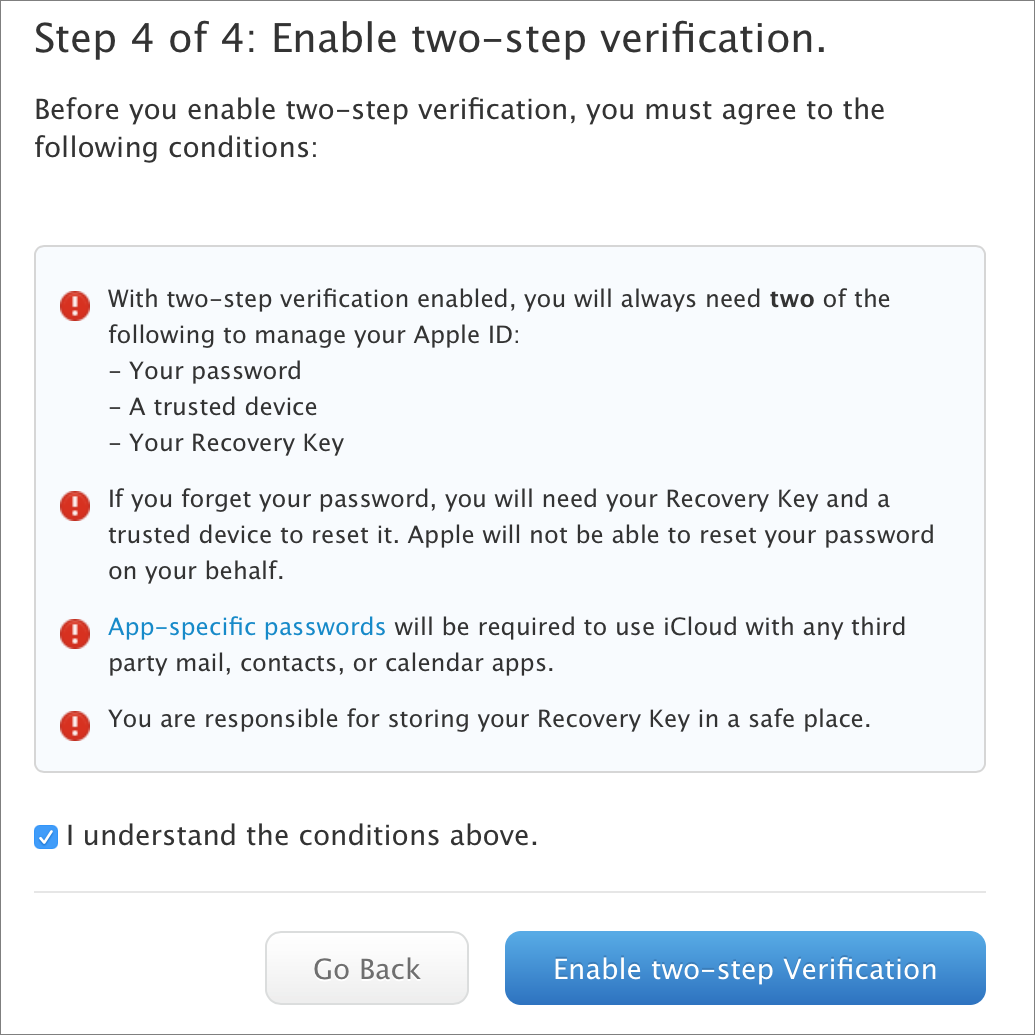
4. Apple gives you some information explaining how the process works:
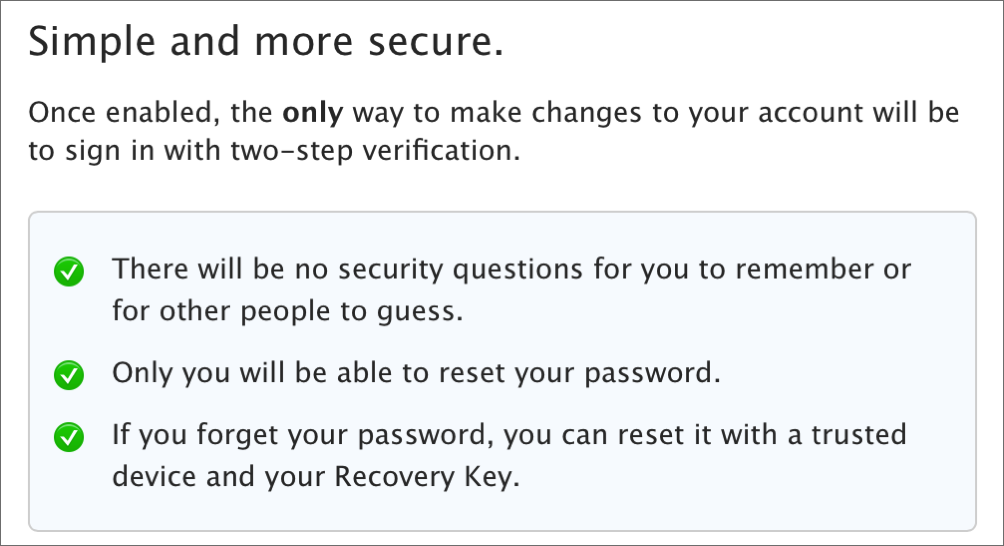
Read this and click Continue.
5. Apple reminds you, just in case you’re not sure, that you need to have two elements to manage your Apple ID, and that you absolutely must not lose your Recovery Key.
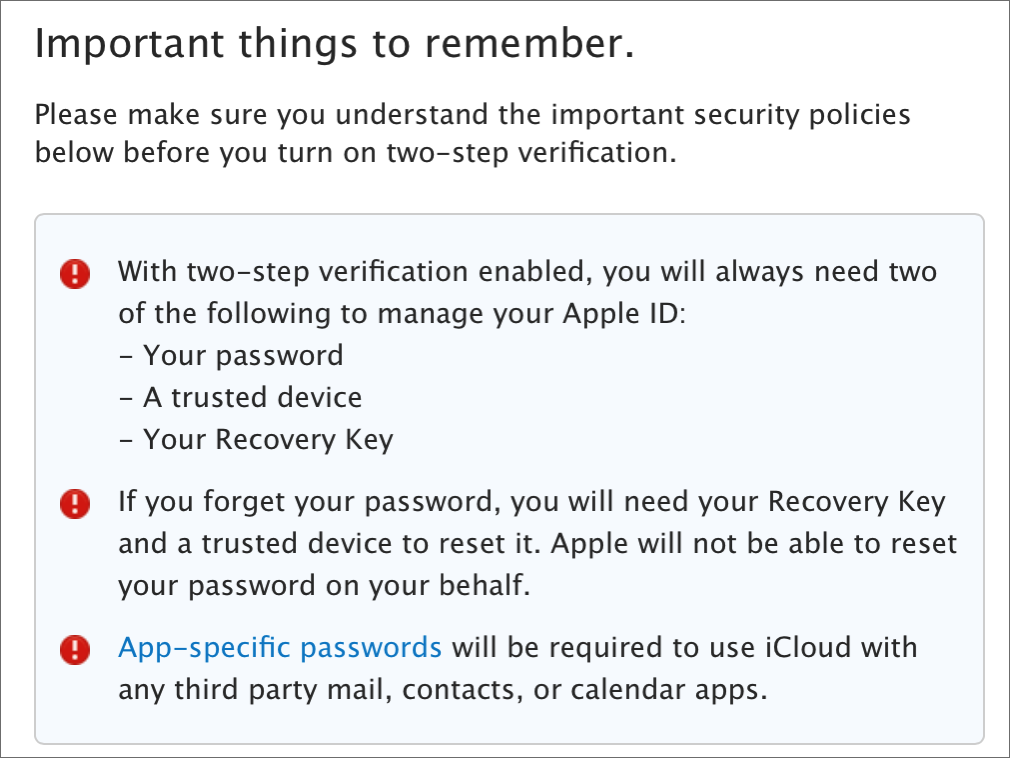
I can’t stress enough how important this Recovery Key is. Not only will you need it if you lose your trusted device, but if Apple detects attempts to get into your account and locks it, there is no other way for you to access your Apple account. (A journalist from The Next Web learned this the hard way.)
Click Get Started to move to the next step.
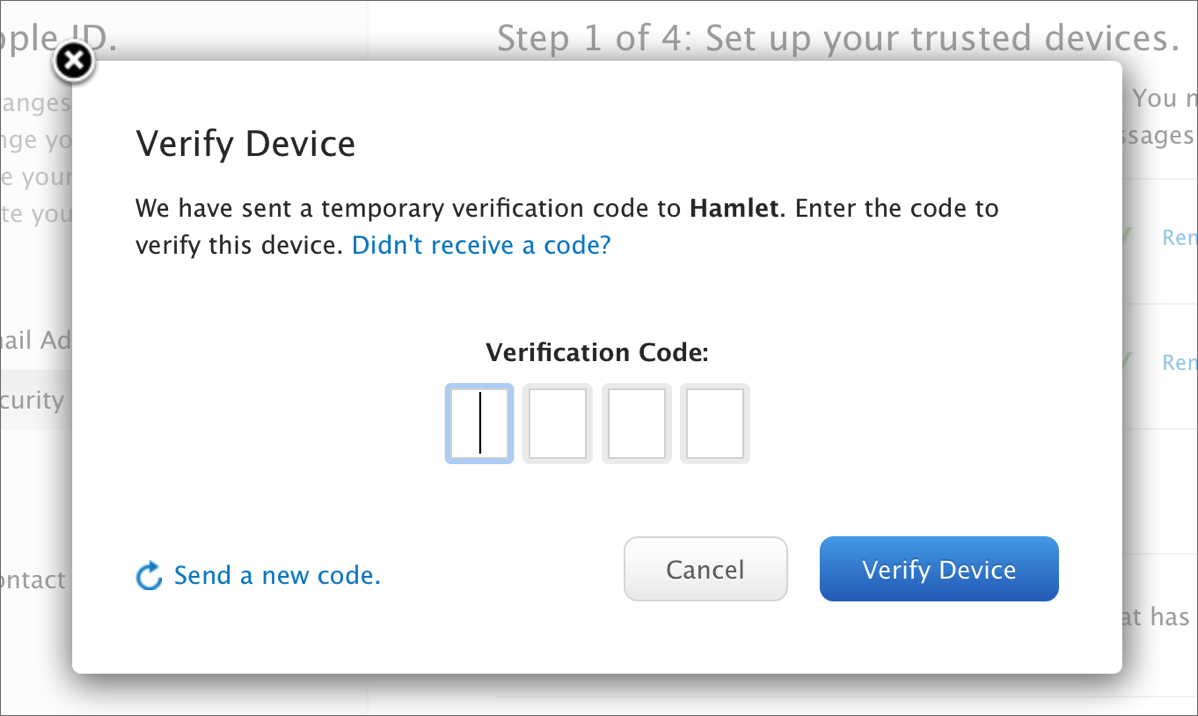
6. You’ll be asked to set up at least one SMS-capable phone. It’s a good idea to set up a second one too, just in case; this could be your spouse’s or partner’s phone, or a phone belonging to one of your children or close friends. It doesn’t have to be an iPhone—one of them can even be a landline, if yours can accept SMSs.
You’ll also be asked to set up trusted devices. To do this, Apple sends codes to your devices, and you enter them on the Apple ID website.
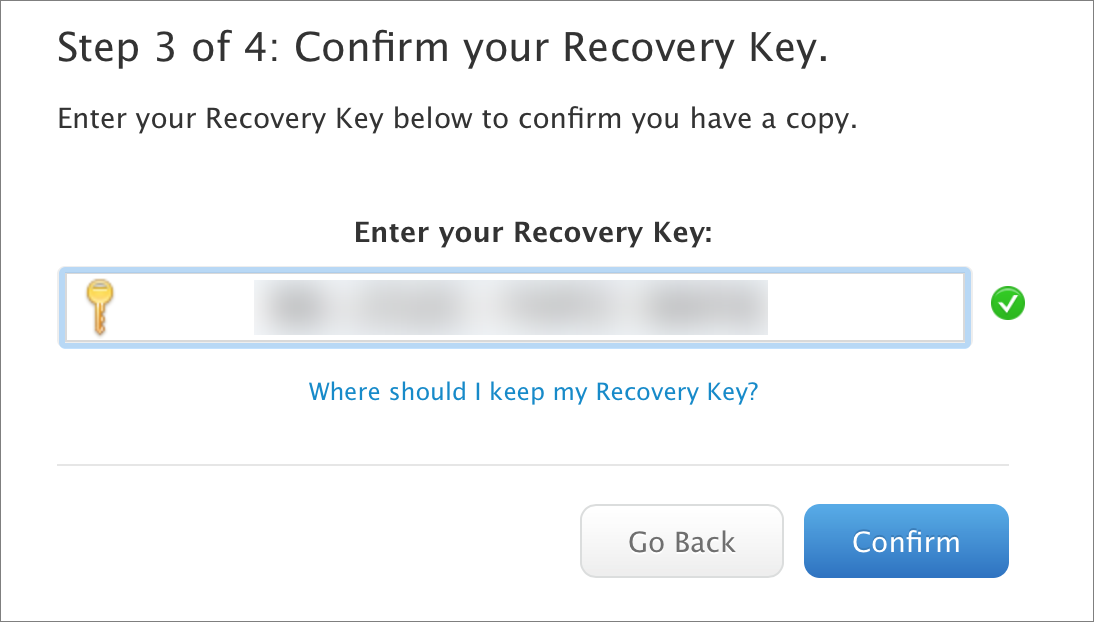
7. Apple then sends you your Recovery Key. This 14-character key is essential, as I explained above; it may be the only way you can get access to your account. Apple suggests that you print it out, that you not store it on your computer. If you use a password manager, you can add it to that app’s database, but if you print it out, don’t leave it in your desk or near your computer. The best thing would be to put it in a safe or safe deposit box, but you can also give a copy to a friend or family member you trust to store it in a different location. No matter what, don’t lose it.
You may need this Recovery Key if you’re logging into your account from a new device, and no longer have a trusted device. This may be the case if you lose your iPhone, or if it’s exchanged, for example. So make sure you can easily access the Recovery Key.
Apple then asks you to type the Recovery Key, to prove that you have indeed read it correctly.
8. After you’ve completed the above, you finally get to the point where you can enable two-step verification.
Once you’re sure you understand everything, and have a copy of your Recovery Key, click that button to enable two-step verification.
If you ever want to turn off two-step verification, see this Apple support document. And for more about two-step verification, see this detailed support document.
Further Reading:
- What is Multi-Factor Authentication, and How Will It Change in the Future?
- Did Jennifer Lawrence’s Naked Photos Leak Out Because She Told the Truth?
- 4 Security Lessons Learned from Mat Honan’s iCloud Account Hack

