How to clean out disk space on your Mac in macOS Sequoia
Posted on
by
Kirk McElhearn
Today’s Macs are powerful computers, capable of running apps for productivity and entertainment. But file and app sizes are increasing, and with SSDs in current Macs, you may end up running out of disk space if you have lots of videos and other large files. macOS lets you view the storage on your Mac’s drives, and it can help you weed out the files that take up the most space. Using the built-in Storage Settings tool, you can see which types of files take up the most space, and macOS can help you eliminate files you no longer need.
How to check storage on your Mac
The first thing to do is to check your Mac’s drive to see how much space is used. To view your Mac’s storage, go to Settings > General, then click Storage.
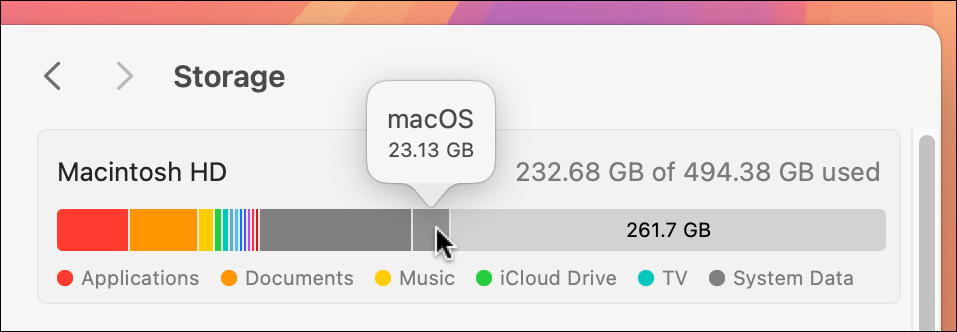
Above is a screenshot from my MacBook Air; it has a 500 GB SSD, and I keep it fairly empty. (It’s not my main Mac, so I don’t store lots of files on it.) The Storage bar shows the amount of space different types of files take up. I’ve hovered my cursor over the macOS section of the storage bar; it shows that the operating system takes up about 23 GB.
If you hover your cursor over the different sections in the storage bar, you’ll see popovers showing the type of files each color represents and how much space they take up. For some people, the System and macOS sections – the dark and light gray in the bar – will be the largest. For others, as above, it can be applications (red), Documents (orange), or music (yellow).
In my case, the largest category is Applications, which take up almost 50 GB out of 264 GB used on my drive.
How to save space in macOS
While the storage numbers can help you get an idea what’s using up your disk space, you can use a number of features to help you cull files you don’t need. Below the Storage bar, you see a number of recommendations.
- Store in iCloud lets you save space by offloading some of your files to iCloud. This is useful if you have a lot of files you need to access regularly and have sufficient iCloud storage. However, this means that you need to download large files when you need them, and you may not always have the bandwidth to do so, if you take a laptop on the road. So you need to plan ahead. To learn how to use this feature, see this article.
- Optimize Storage lets you choose to have your Mac automatically delete movies and TV shows when you’ve watched them. This saves a lot of space if you buy or rent videos in the Apple TV app, as these are generally several gigabytes each. Note that you can revert this setting by going to TV > Settings > Files, and unchecking Automatically delete watched movies and TV shows.
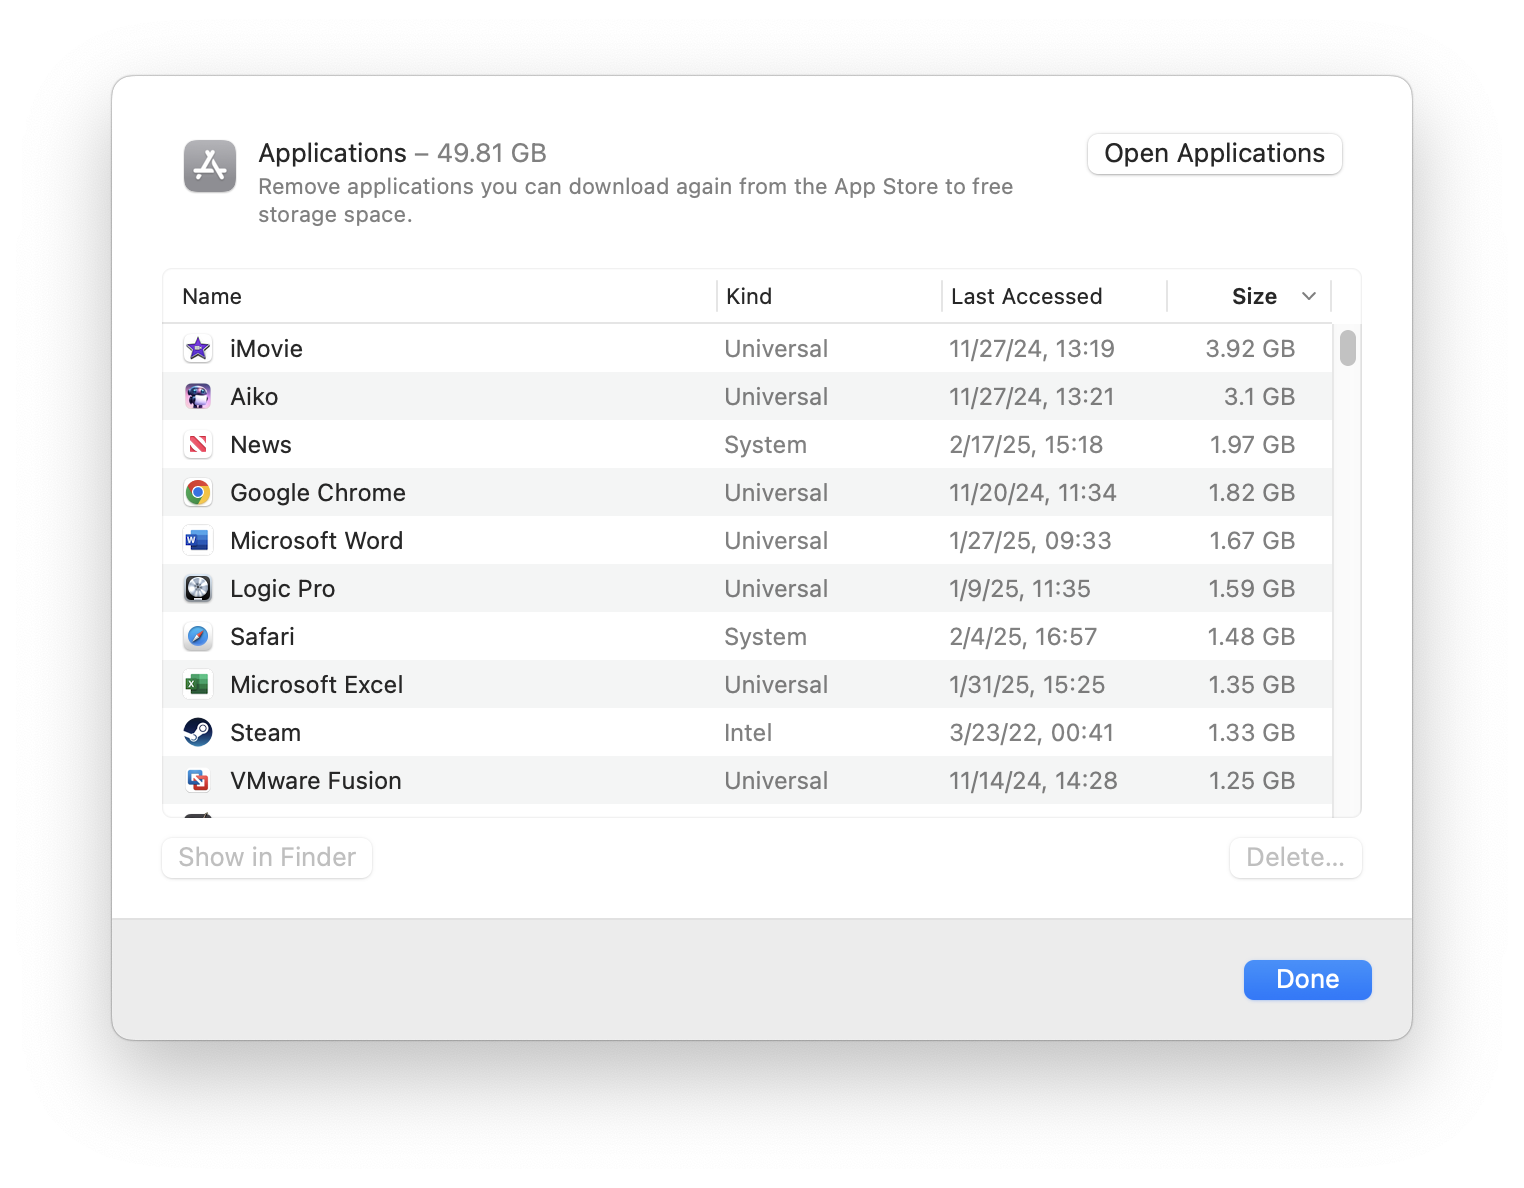
Below these two sections, you see a list of file types and the amount of space they take up. If you click the i icon to the right of any of these categories, you’ll see a list of files. You can click any of the headers – Name, Kind, Last Accessed, or Size – to sort by that criterion. You can select any of the files and delete them if you want to save space.
Most of these categories are self-explanatory, but it’s worth looking closely at a couple of them. Messages shows you attachments you’ve sent or received via the Messages app. For some people, this can represent several gigabytes of disk space. You might want to cull the largest videos and photos that your Mac is storing.
The Documents category has four tabs: Large Files, Downloads, Unsupported Apps, and File Browser. In the Documents section, you may find some large files that aren’t easily visible on your Mac. These files may be stored in a folder such as Application Support, and you may not even know why they are there. Select any file, then click Show in Finder to see the file. Don’t delete files unless you’re sure they’re not needed by an app you use. But some of these files may be large logs or cache files that you can safely delete. In my example below, I have some large files because I have two virtual machines on my Mac.
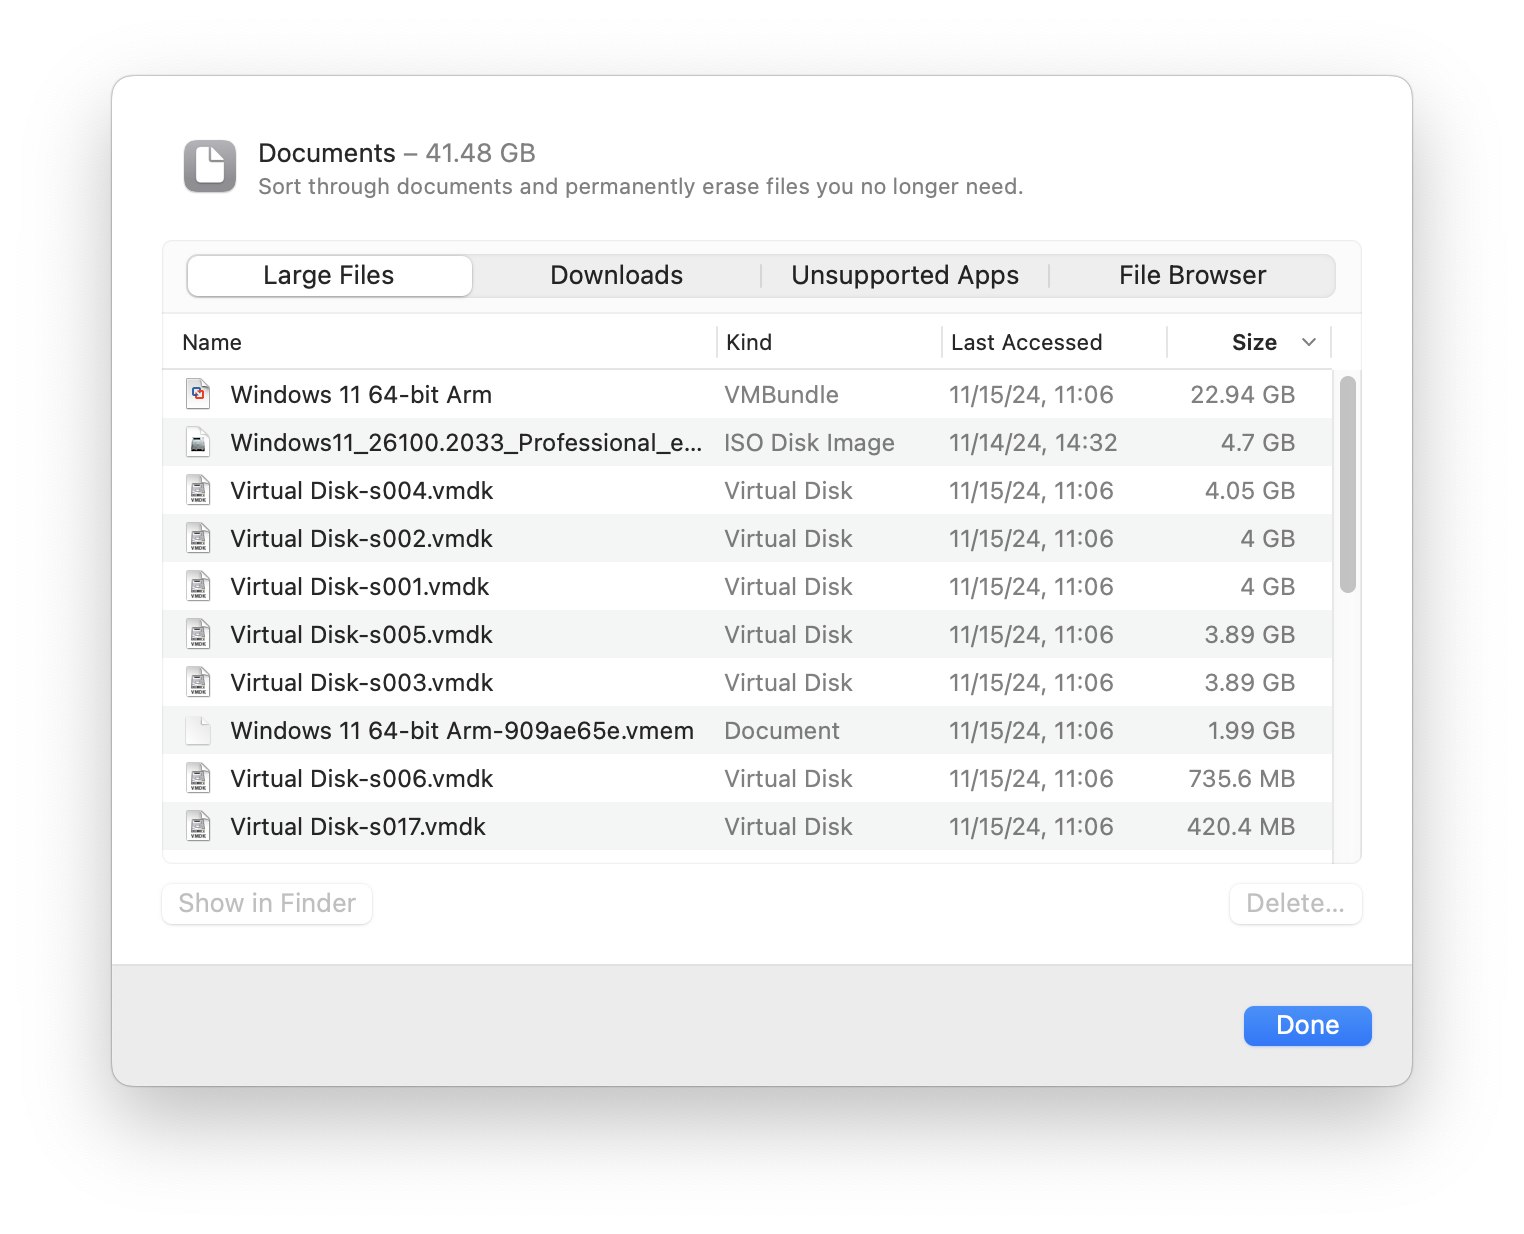
You can check if there are any downloads you don’t need to keep; that is often one place where you can save space. Unsupported Apps are files belonging to apps that no longer run on your Mac. And File Browser lets you browse all the files on your Mac in column view. This is a good way to see what’s taking up space.

As you click the different entries in the column browser, you see the largest files and folders first; you may find some very large items you didn’t know about, and that you don’t need. To delete an item in the column browser, select a file then click Move to Trash. But don’t just randomly delete files unless you’re sure you don’t need them or have other copies of them. You’ll see that some folders are dimmed, and you cannot delete them, and you cannot choose to delete entire folders.
For some categories, you can only delete files within apps. For example, if you click the i icon next to Photos or Podcasts, you see a button to open those apps. You can only manage those files in those apps.
How to remove caches, logs, language files, duplicates, and more…
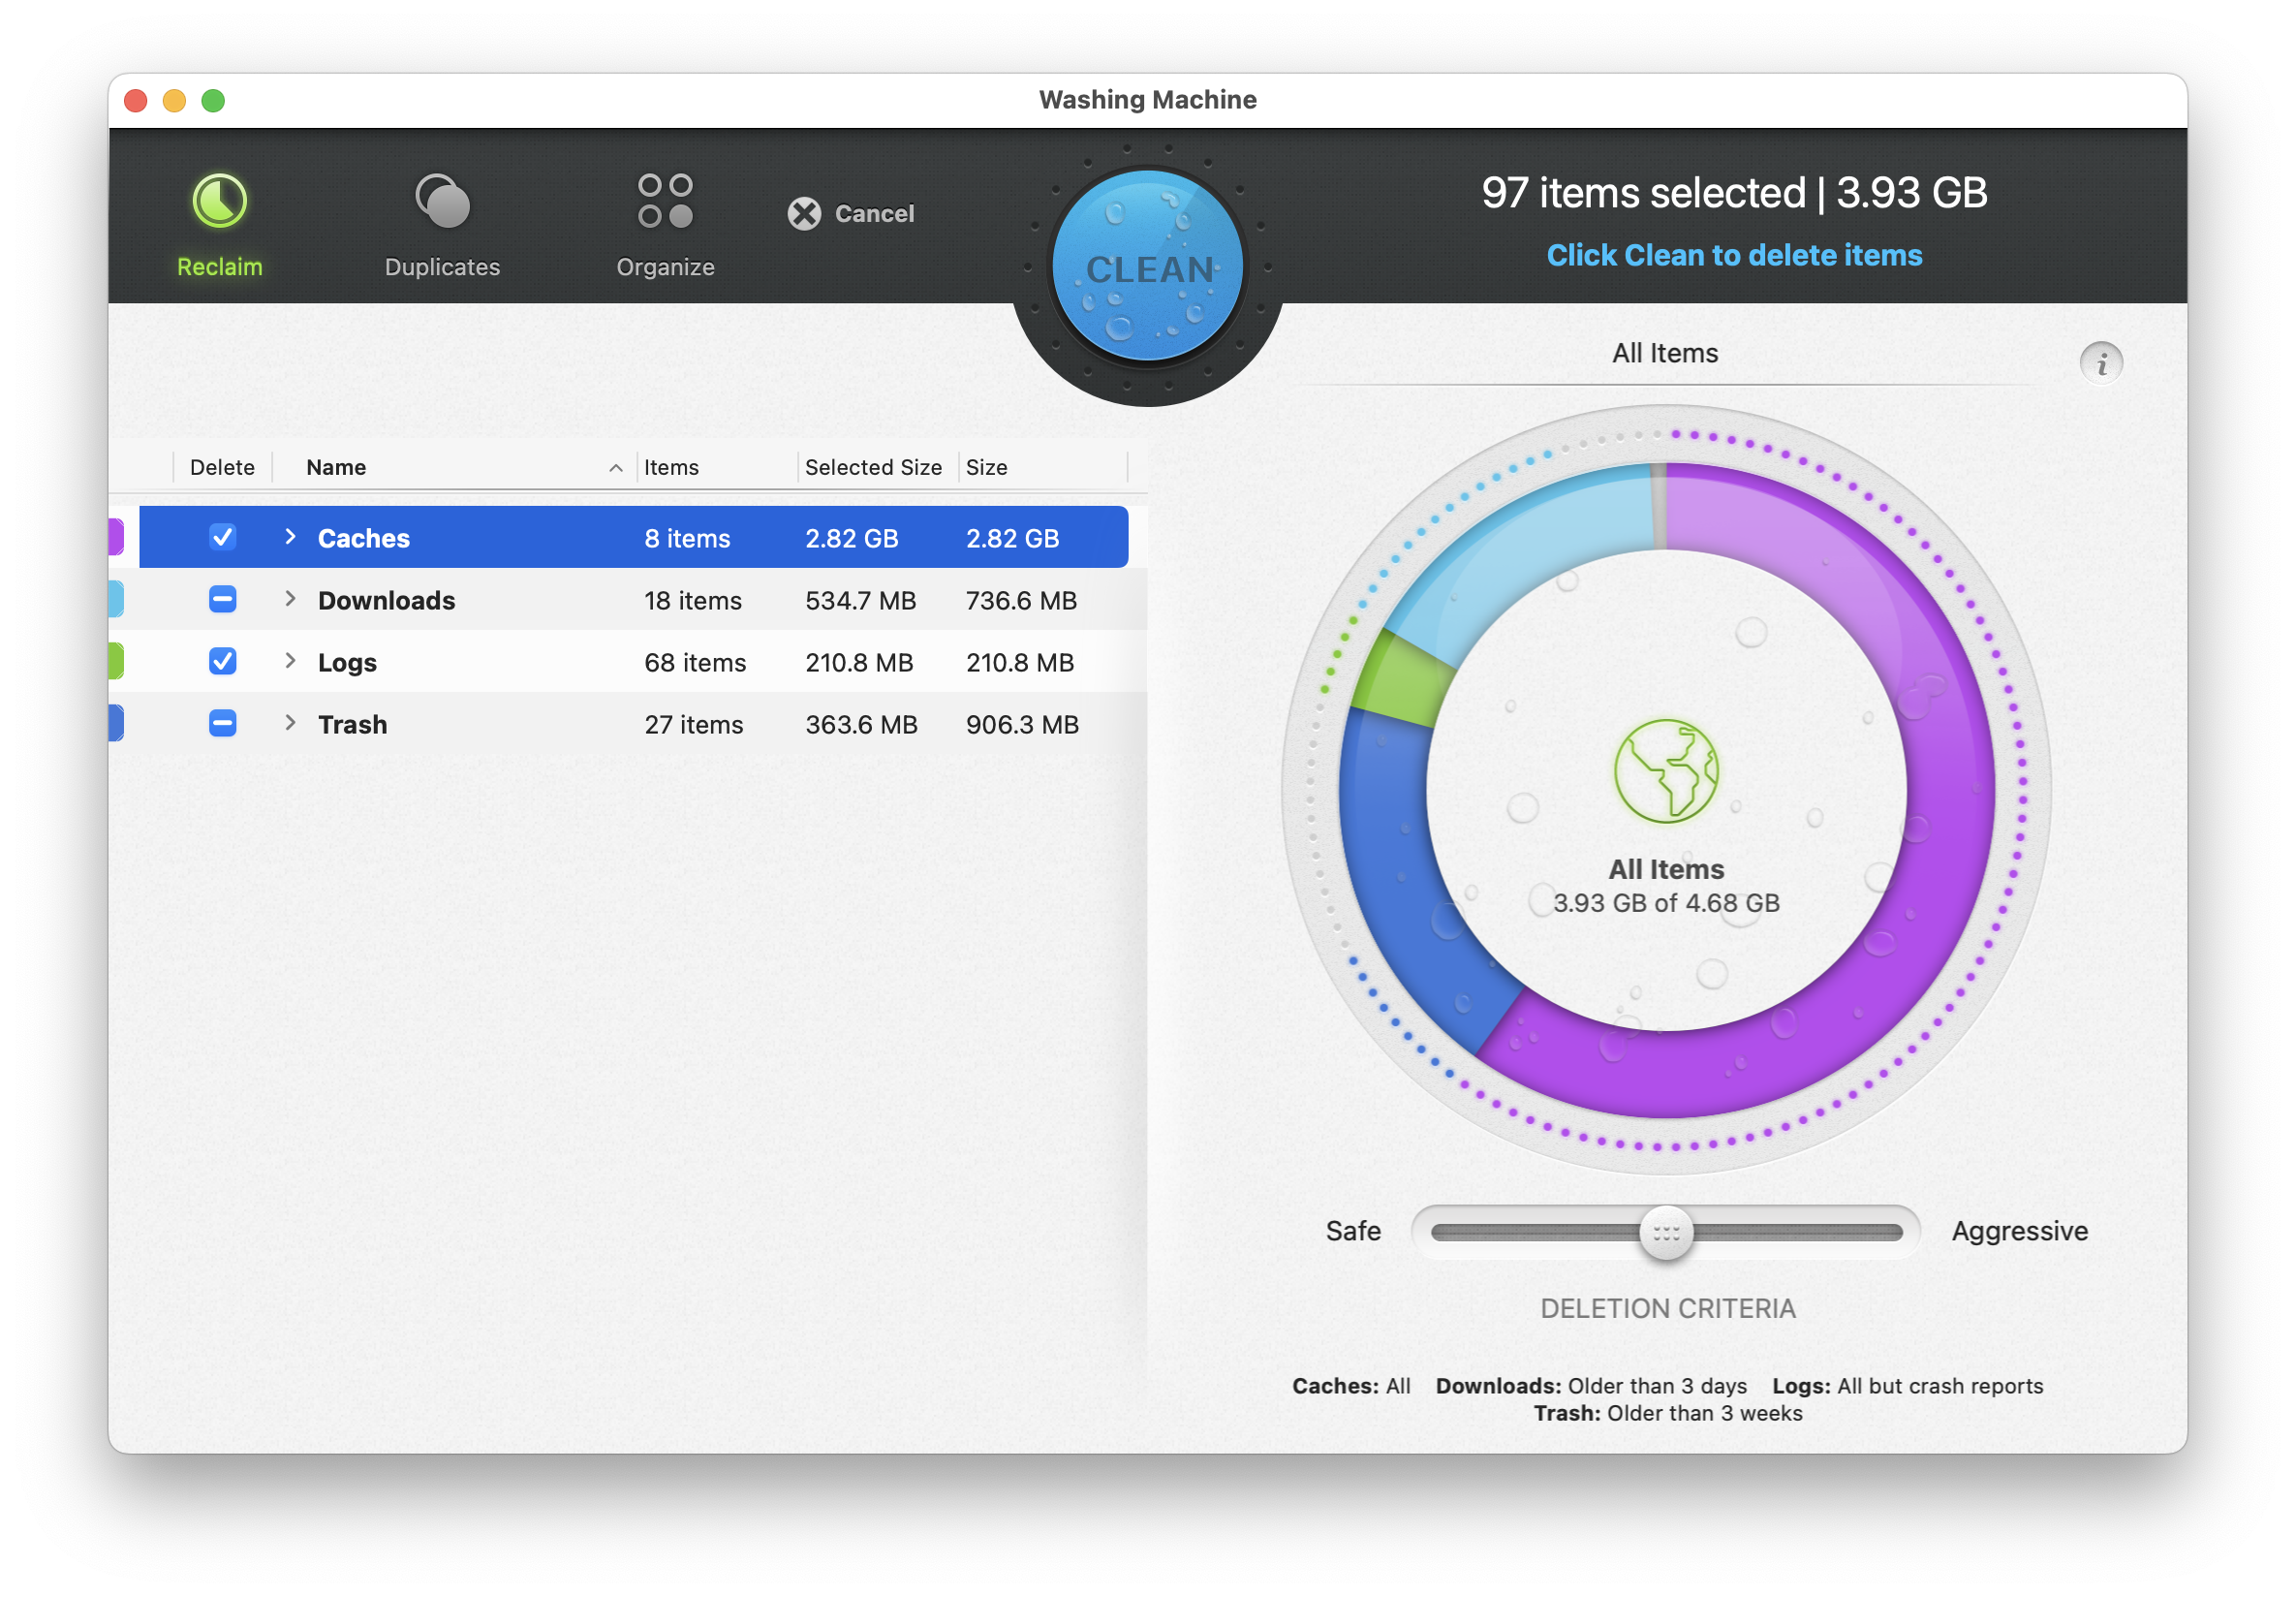 While macOS shows you some of the files you can delete to save space, you can go even further with Intego’s Mac Washing Machine. It is designed to save more disk space, and to do so with just a few clicks. When you run Washing Machine, it scans caches, downloads, logs, and your Trash, to find files to delete. By default, it deletes downloads older than three days, and files that have been in your Trash for more than three weeks. It also deletes all caches, and most logs.
Washing Machine also searches for duplicates, and helps you organize files on your Desktop, in the Dock, and in smart folders. Take it for a spin and see how much extra space you can reclaim on your Mac!
With these built-in macOS features and Intego Washing Machine, you can easily ensure that you always have free space on your Mac’s drive.
How can I learn more?
 Each week on the Intego Mac Podcast, Intego’s Mac security experts discuss the latest Apple news, including security and privacy stories, and offer practical advice on getting the most out of your Apple devices. Be sure to follow the podcast to make sure you don’t miss any episodes.
You can also subscribe to our e-mail newsletter and keep an eye here on The Mac Security Blog for the latest Apple security and privacy news. And don’t forget to follow Intego on your favorite social media channels: ![]()
![]()
![]()
![]()
![]()
![]()
![]()

