Apple + How To + Recommended
How to Use macOS Sierra’s New iCloud Drive Features
Posted on
by
Kirk McElhearn
iCloud Drive has evolved a great deal since it was first introduced as part of OS X Yosemite and iOS 8. You may recall a story last year in which I discussed getting started with iCloud Drive and how to sync data between a Mac and an iOS device. Those basic features have not changed, but macOS Sierra and iOS 10 have introduced a new iCloud feature.
You can now have your Mac automatically store the contents of your Desktop and Documents folders in the cloud. This means that you can access these files on any other Mac, or on any iOS device, if you are signed in to the same iCloud account.
In this article, you will learn how to work with macOS Sierra’s new iCloud Drive feature and keep your files in sync on multiple devices. So let’s get started!
Getting Started with macOS Sierra’s iCloud Drive
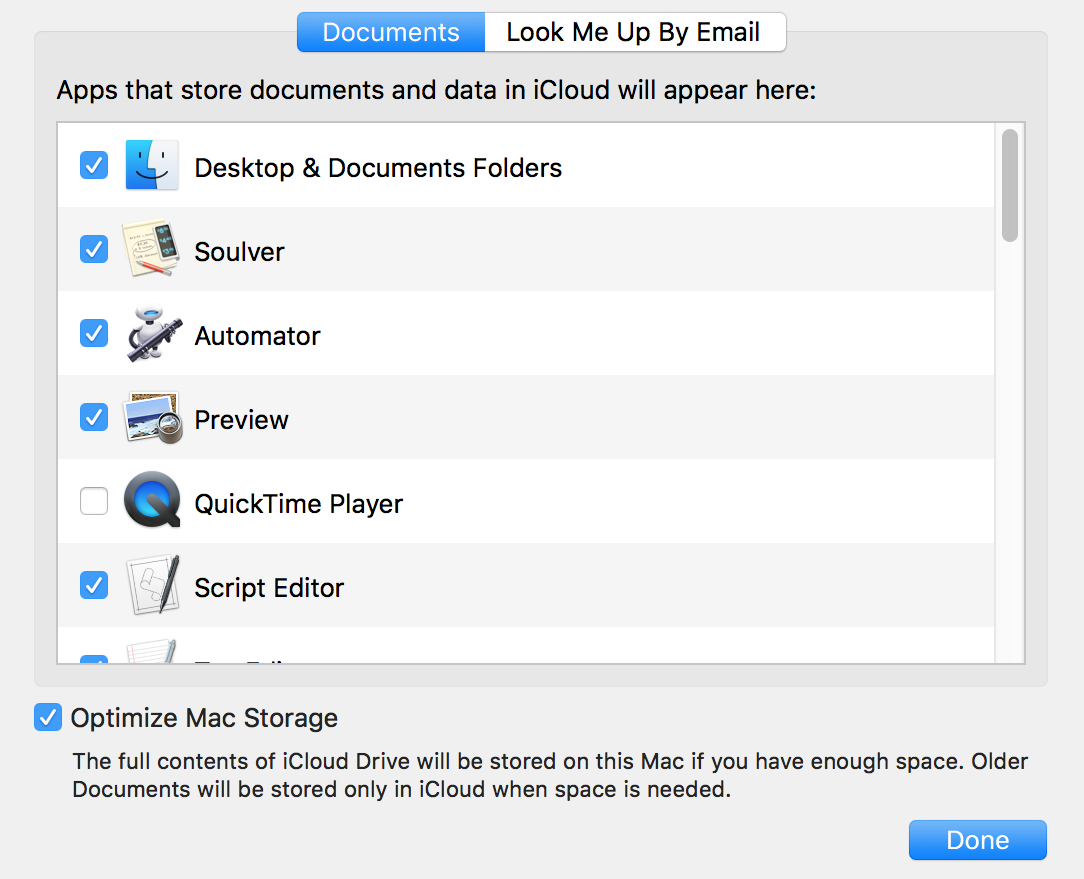
To start with, you need to tell your Mac to save your files on iCloud Drive. To do this, open System Preferences, then click iCloud. Click the “Options” button next to iCloud Drive. In the Documents tab, you will see a number of apps on your Mac that can store files on iCloud Drive. By default, the Desktop & Documents Folders item is unchecked; check this to tell your Mac to copy the contents of these two folders to iCloud Drive.
When using iCloud Drive, it’s important to ensure you have enough space in your iCloud account. The 5 GB that Apple gives you for free is likely not enough, so you will need to increase the amount of storage you pay for. There are three options: 50 GB for $0.99 a month, 200 GB for $2.99 a month, and 2 TB for $9.99 a month.
When you are sure you have enough space in the cloud, you can check the Desktop & Documents Folders option and your Mac will read all of your files, then start uploading them. If you have a lot of files in these two folders, and limited bandwidth, it may take a while, even several days, for all these files to be uploaded. In addition, if your upstream bandwidth is low, it may take a long time to sync any large files. In this case, you may find this process to be unwieldy.
The contents of these two folders now display in an iCloud section of the Finder sidebar. As you can see in the screenshot below, my Desktop and Documents folders show little cloud icons to the right of their names.
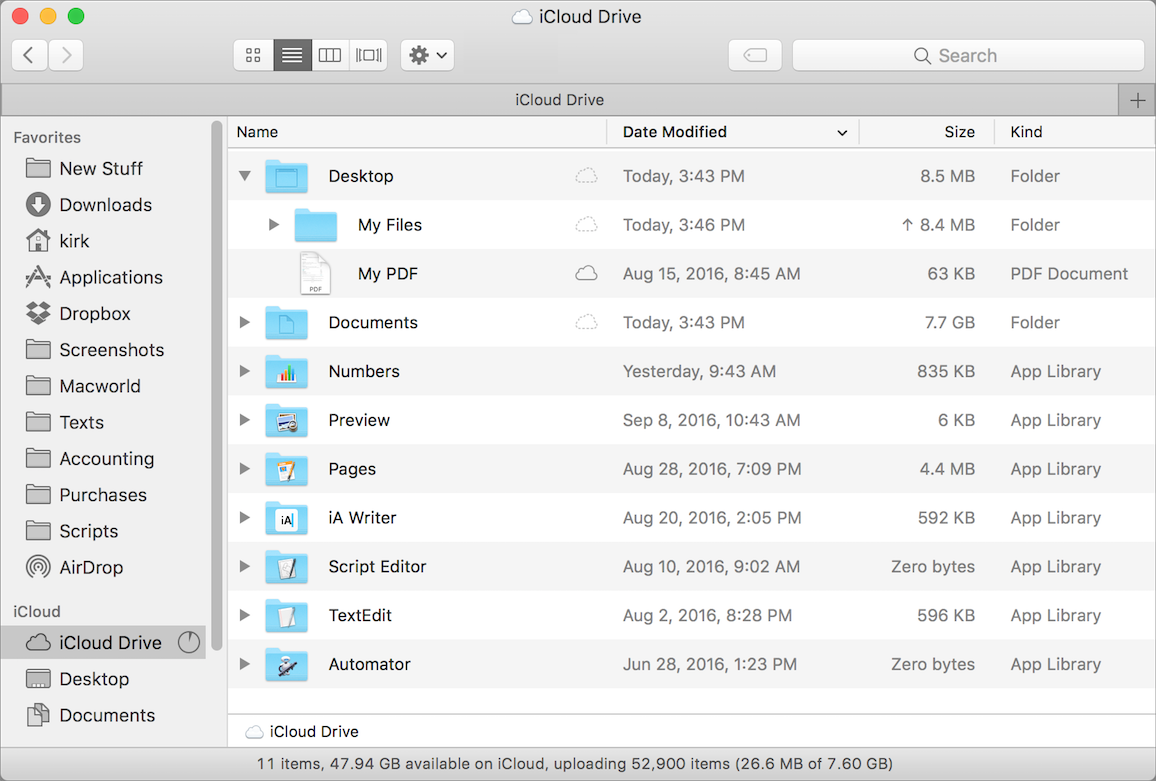
The gray, dotted-line icons show items that have not yet been uploaded; the dark icon next to My PDF, shows that it has been uploaded. In addition, if you look to the right of the My Files folder, next to its size, you see an arrow pointing upwards. This indicates that the contents of that folder are currently being synced.
One useful option is the Optimize Mac Storage setting, which you see at the bottom of the window of the first screenshot above. This tells your Mac to only save the contents of your iCloud Drive if your Mac has enough free space. If not, the files stay in the cloud until you need them. This is a great way to expand the storage of your Mac, especially if it has an SSD, with limited space. Of course, you can then only use these files when you have internet access.
Accessing Your Files on Other Devices
To access these files on another Mac, activate the setting you enabled on the first Mac. The second Mac will check with iCloud and display these two folders and their contents. As you create or modify files that are in one of these folders, they will be synced to the cloud.
Even if the other Mac is not running Sierra, you can still access these files. Just click on iCloud Drive in the Finder sidebar; if you don’t see it there, choose Finder > Preferences, click Sidebar, and check “iCloud Drive.” Files in these two folders won’t be synced automatically, so you will need to drag them to those folders in the iCloud Drive for them to be accessible on your first Mac. Though to make this easy to deal with, and prevent errors, it’s best to update both of your Macs to Sierra.
You can also access these files on your iPhone or iPad. To do this, go to Settings > iCloud Drive and toggle this feature on, if this is not already the case. Next, locate the iCloud Drive app, tap it, you’ll see your Desktop and Documents folders, along with any other folders stored on your iCloud drive.
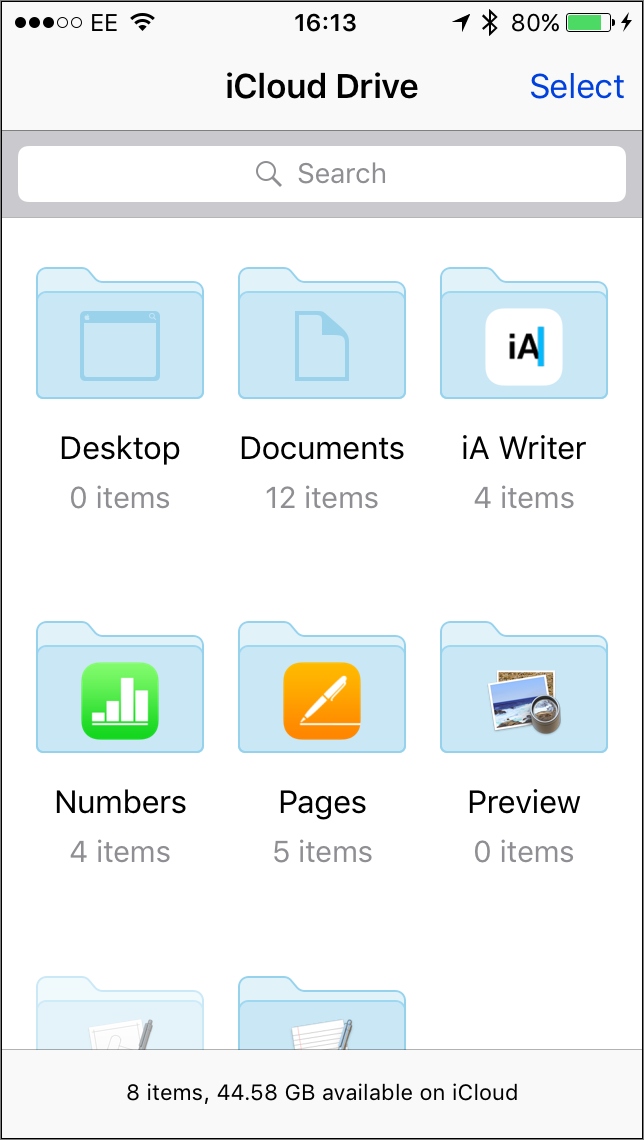
Many of the files in your Documents folder aren’t very useful to you on an iOS device. You won’t be able to open them all on iOS; this depends on which app created them. But these files don’t take up any space on your device, unless you open them from iCloud Drive.
However, if your iCloud account doesn’t have a lot of free space, you may find it useful to move some of the files from the Documents folder to another location on your Mac. You can only really do this if you have an external hard drive, but if you do keep a lot of files in your Documents folder, you may need to do this to be able to store that folder in the cloud. Unfortunately, there is no way to tell your Mac to not upload certain folders within your Documents folder.
Turning Off Documents & Desktop Sync
If you ever decide that you no longer want to store these files in your iCloud Drive, just go back to the iCloud preferences and uncheck Desktop & Documents Folders. The dialogue will ask you to confirm that you no longer want to sync these files, and will inform you that they will remain in your iCloud Drive. Click Turn Off, and your Mac will stop syncing. Don’t delete them from iCloud Drive; if you do this, they’ll go into your Mac’s trash. You need to copy them back to your home folder, the one with your user name and the house icon.
So check out the new feature in iCloud Drive. If you have more than one Mac, or want to access your Mac’s files on an iOS device, you may find this to be very practical.
Have something to say about this story? Share your comments below!
Editor’s note: Originally published September 22, 2016, this post was updated January 3, 2018 for accuracy and comprehensiveness.New to Mac? We’re here to help!
Want to get the most out of your new MacBook, iMac or other Apple computer? Whether this is your first laptop or you’ve just switched from Windows, there are a few things you should know about your new Mac, like basic keyboard shortcuts or how to use the various features macOS has to offer. Learn more about what your Mac computer can do for you at the Intego New Mac User Center: Get started now!

