How to Use Apple’s Built-in Features to Encrypt Files and Folders
Posted on
by
Kirk McElhearn
The best way to protect your data is to encrypt your files, ensuring that, even if they get into the hands of hackers or cybercriminals, your personal data is safe. macOS provides a suite of tools to protect you, and, in this article, I’ll discuss the many ways you can use built-in macOS features to provide unbreakable encryption. (Unbreakable with current computing power; it’s possible that future quantum computers will be able to break the robust encryption algorithms that macOS uses.)
In this article, I’ll explain how to encrypt your startup disk with FileVault; how to encrypt other disks; and how to create encrypted disk images to store files securely in the cloud or send by email; and how to encrypt PDF files.
Encrypt Your Startup Disk with FileVault
When Apple first added FileVault to Mac OS X in 2003, the feature was clunky; it slowed down Macs, and I didn’t recommend using it at the time. But over the years, Apple has improved FileVault, and processors have gotten much faster. Now in its second iteration – FileVault 2 was released in 2011 – FileVault is secure and doesn’t noticeably affect the performance of your Mac. While there were good reasons to avoid the first implementation of FileVault, there are no reasons to not use it any more.
FileVault provides full-disk encryption: when it is active, every file on your drive is encrypted, and as you write new files, they are encrypted too. No one can access that drive, or even start up your Mac, without the FileVault password. And if someone removes the drive and attempts to access the files it contains, they won’t be able to. FileVault uses uses XTS-AES-128 encryption with a 256-bit key; that’s a simple way of saying that it is extremely robust.
In addition, FileVault 2 allows you to use Find My Mac to remotely erase your drive if your Mac is lost or stolen. And if you decide to sell, give away, or destroy your Mac, you don’t need to worry about securely erasing the disk. Since it is password protected, anyone who recovers the disk will not be able to access your files. It’s a good idea to erase it anyway, but there is no longer a "secure erase" feature for SSDs on macOS, so it’s really important to use FileVault on an SSD.
Activating FileVault
To turn on FileVault, go to System Preferences > Security & Privacy, unlock the preference pane by clicking the padlock and entering your administrator’s user name and password, then click FileVault.

Click Turn On FileVault. By default, your login password unlocks the disk, but if you forget that, you need another way to access your data. You are asked whether you want to be able to use your iCloud account the unlock your disk if you forget your password, or if you want to save a recovery key.
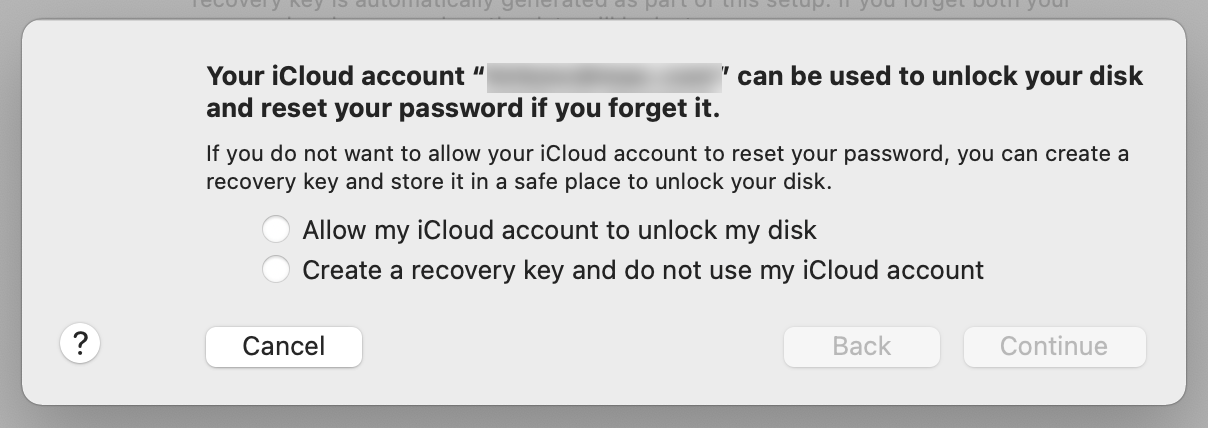
If you store your recovery key on your iCloud account, you’ll need access to that account to unlock your disk. So if you don’t have internet access, you won’t be able to unlock the disk. And if, perchance, you get locked out of your iCloud account, then you could be in trouble.
The recovery key is a string of 20 characters, such as TH3E-T829-ELOW-34BD-LMJ9. If you do opt for saving the recovery key, you will need to save it securely. You could store it in a password manager, or print it and save it in a secure location, such as a safe deposit box. If you do choose the recovery key, you can double-click it in the dialog, copy it, and paste it into a document. Or, you can take a screenshot and save that. (To take a screenshot of your Mac’s screen, press Command-Shift-3. The screenshot is saved to the Desktop.)
Click Continue, and FileVault begins encrypting your disk. Note that your computer must be connected to power for this to work; if you disconnect a laptop from its power source, FileVault will pause until it is reconnected.
The initial encryption takes from a couple of hours to a couple of days, depending on the size of your disk, and SSDs encrypt more quickly. However, any new files you create or download are automatically encrypted during this period. It can seem like a long time, but you can continue working with your Mac, and you won’t notice much of a performance hit as FileVault does its initial encryption.
You can turn off FileVault at any time in this preference pane, and if you wish to change your recovery key, you’ll need to turn off FileVault and turn it on again.
Encrypting Other Disks
macOS offers a similar feature to encrypt any drive that you connect to your Mac. For example, if you use a thumb drive to shuttle files between home and work, it’s a good idea to encrypt it in case you lose it.
Encrypting Empty Disks
To do this, mount the drive, then open Disk Utility (it’s in the Utilities folder in your Applications folder). Select the drive, then click Erase in the toolbar. In the Format menu, select APFS (Encrypted).
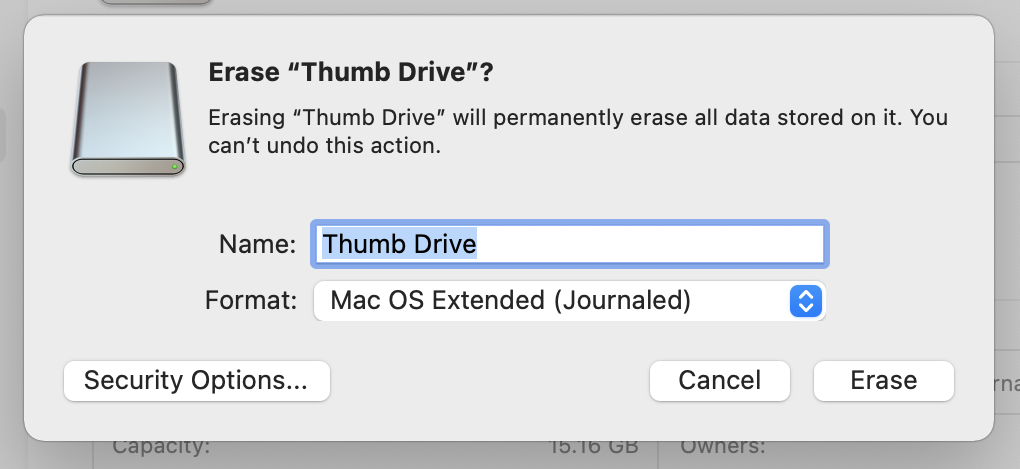
Enter a password, then enter it again. It’s a good idea to enter a password hint. Click Choose, then click Erase. Disk Utility erases the drive and creates a new encrypted volume; any files you write to that drive are encrypted, and when you mount it on a Mac, you need to enter its password. You can, however, choose to store the password in your Mac’s keychain, but you probably don’t want to do this on any Mac that doesn’t belong to you, such as one in your office.
Encrypting Disks Containing Data
If you have a drive that already contains data, and you don’t want to erase it, you can still encrypt it, but not in Disk Utility. Mount the drive, then right-click it in the Finder, and you’ll see an Encrypt option.
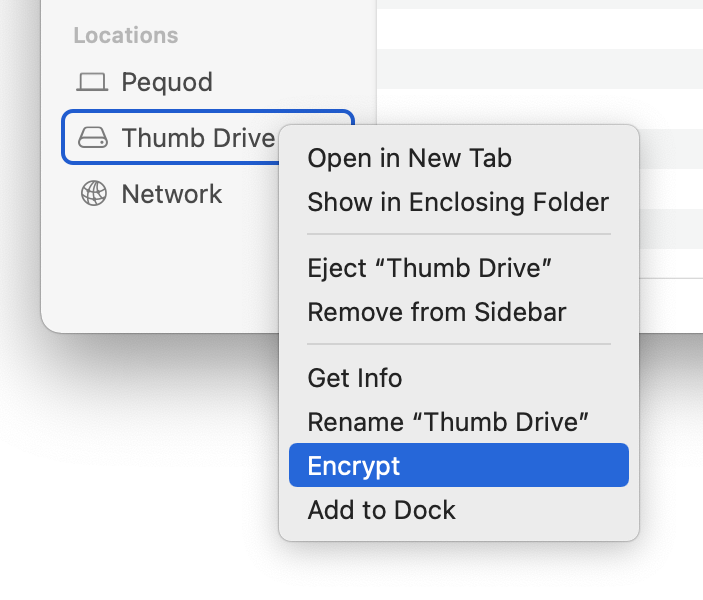
Choose that option, then enter and verify a password, and enter a password hint (it’s required here). If you click the key icon, you can have macOS suggest a password.
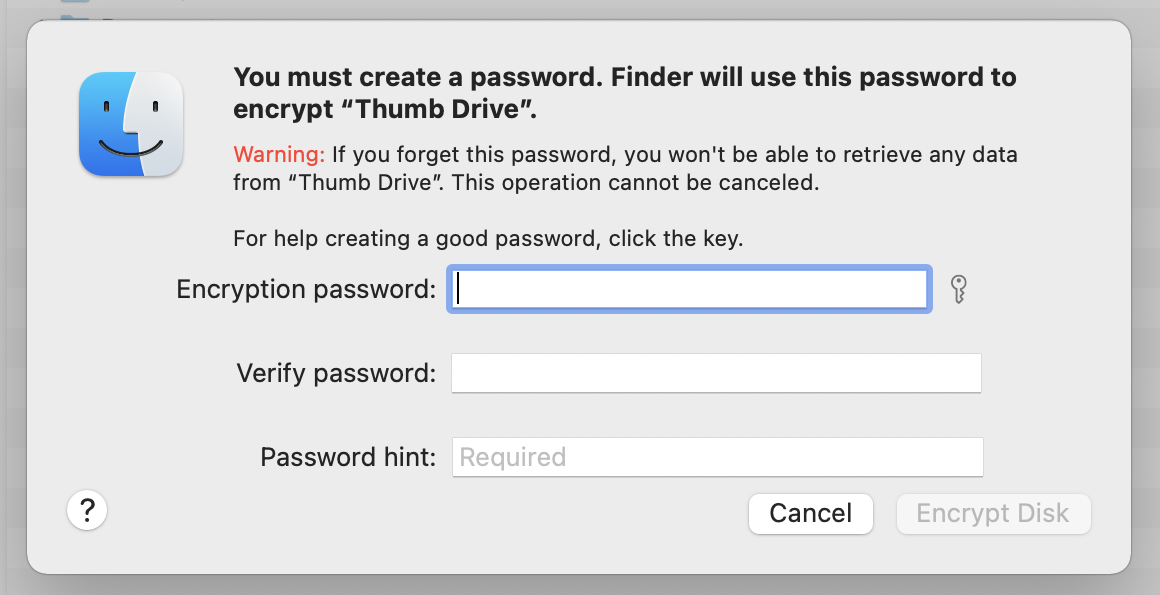
The Finder unmounts your drive, and it may take a few minutes for it to be remounted, and then the encryption process may take some time, as with FileVault.
Encrypt Time Machine Backups
If you use Time Machine to back up your Mac, you have the option to encrypt the drive you use for backups, and you should definitely to this. To enable encryption, you need to choose the option when you set up your disk for Time Machine. If you are already using a disk with Time Machine, you can stop using it, turn on encryption, then add it again.
Open the Time Machine preference pane (in System Preferences). Click Add or Remove Backup Disk. Choose a disk, and check Encrypt Backups at the bottom of the dialog.
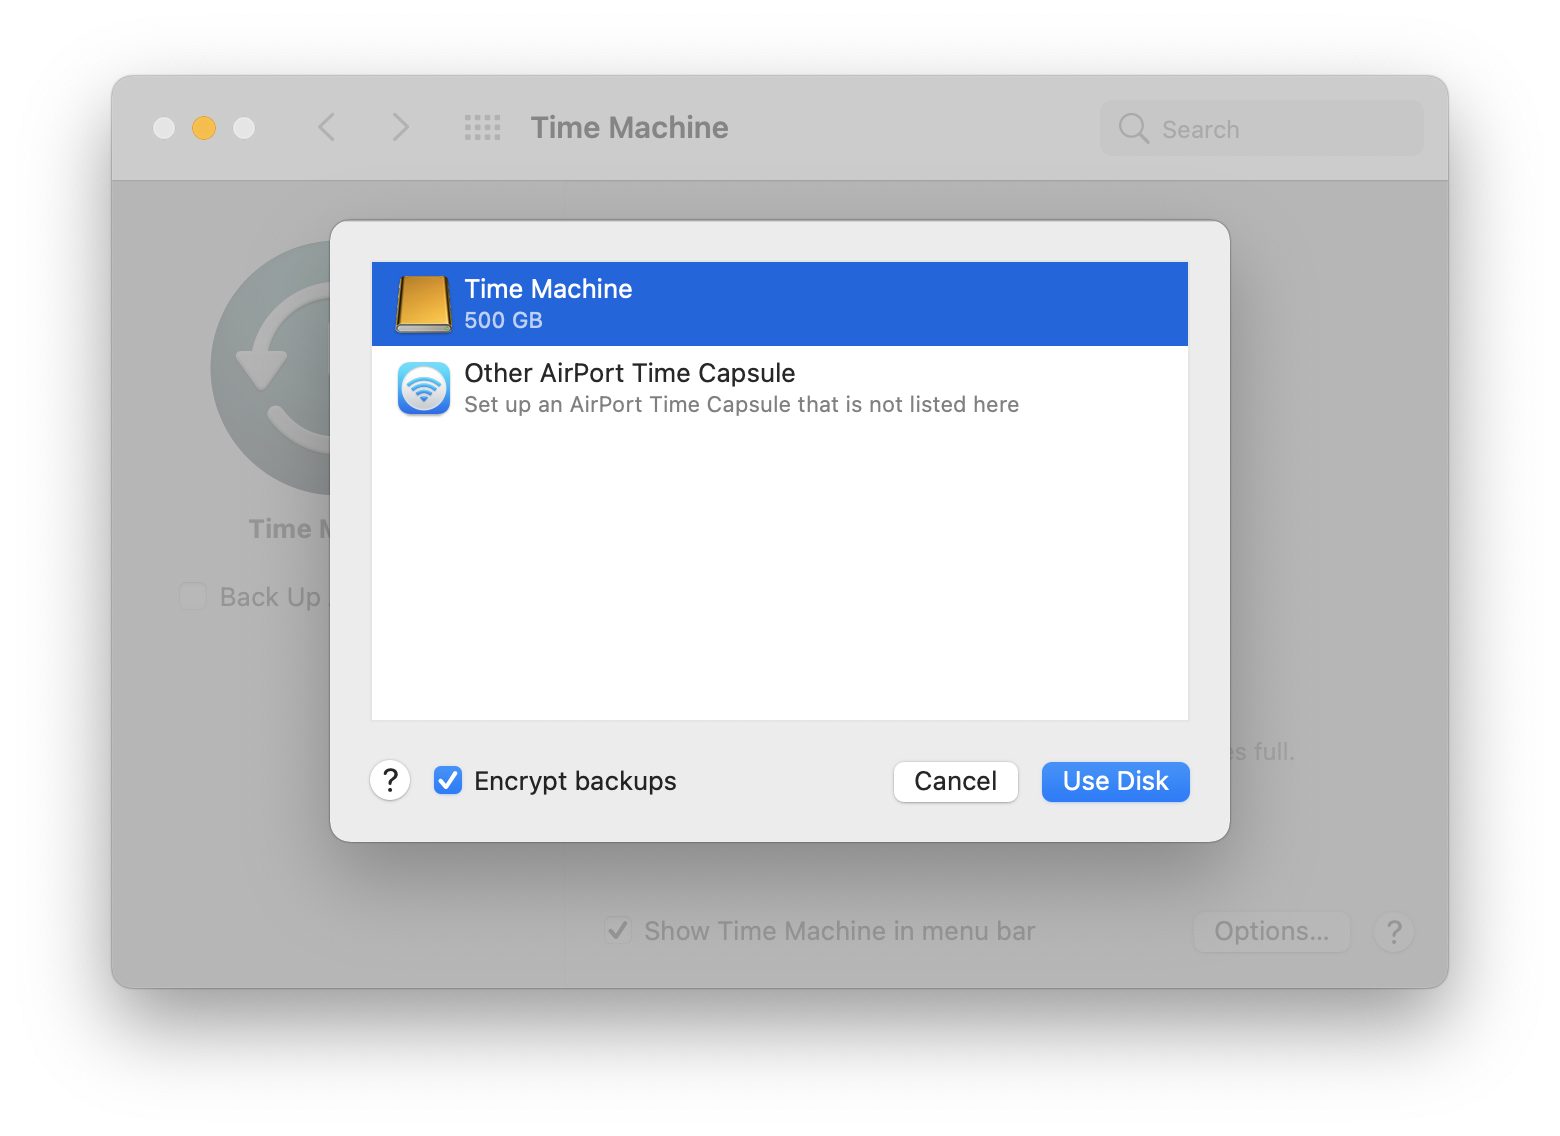
If you want to turn on encryption for a disk you’re already using, select that disk, then click Remove Disk. Click Select Disk in the Time Machine preference pane, select that disk, then click Use Disk; make sure to check Encrypt Disk.
No data is lost when you do this with a local disk, but if you’re backing up to a network drive, then your backups will be erased, so it’s best to ensure that you have a full backup of your Mac before making this change.
Store Files on an Encrypted Disk Image
Another way to encrypt files is to store them on an encrypted disk image. A disk image is a special file that acts as a container for other files; you can create one that is encrypted, so the container and all its contents are protected. Encrypted disk images let you store files securely on cloud servers, and you can even use them to send sensitive files via email. Just give the receiver the password – by telephone or secure messaging – and they’ll be able to open the disk image and access the files, or add their own files to it.
To do this, open Disk Utility, and choose File > New Image > Blank Image. (If you want to take a folder and create an encrypted disk image with its contents, choose File > New Image > Image from Folder, and select the folder you want to use.)
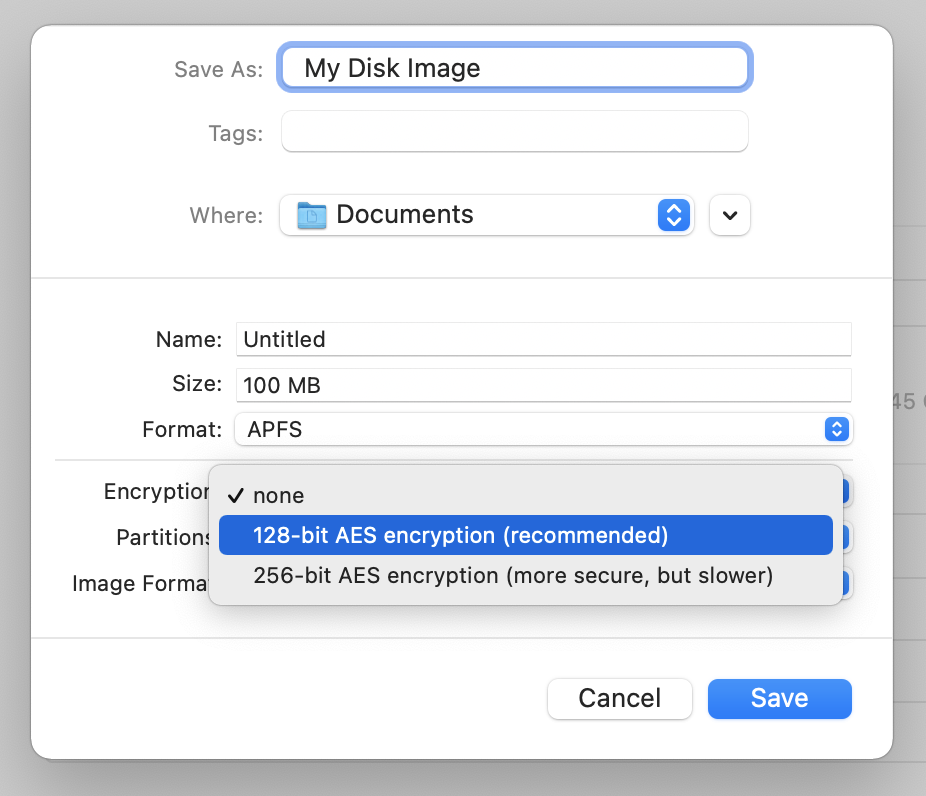
Enter a name for the disk image file in the Save As field, then you have a number of options at the bottom of the dialog.
- Name: This is the name of the disk image that mounts in the Finder, rather than the name of the actual file. Enter anything you want here; you’ll only see this name when the disk image is mounted in the Finder.
- Size: Enter an appropriate size. You may only want this disk image to store a handful of documents, so perhaps 10 MB might be enough. But if you want to put a lot of files on it, maybe you want it to be 1 GB. If you’re not sure, see below in Image Format for other options.
- Format: Choose Mac OS Extended (Journaled), or, if it’s only going to be used with Macs running macOS 10.13 or later, choose APFS.
- Encryption: Choose 256-bit encryption. It’s more secure, and, while Disk Utility tells you that it’s slower, you generally don’t need to worry about speed unless your disk image is huge. You’ll be asked to set a password at this point.
- Partitions: Choose Single partition – GUID Partition Map.
- Image Format: If you’re not sure of the size you need, choose sparse disk image. Disk Utility will set its size to 100 MB, which is the maximum size for the disk image, but you can go back to the Size field and enter another size, such as 1 GB, or even 1 TB. A sparse image is a special format that will grow as needed until it reaches that maximum. The initial disk image file will be very small – about 7.5 MB – but will grow as you add files to it.
Sparse images are the best option when you don’t know what you want to store on the disk image. When you add files to a sparse image, the size of the disk image file increases. When you delete files, however, the disk image file doesn’t get any smaller. There is a way to compact sparse images. If you are familiar with Terminal, you can run this command:
hdiutil compact <disk path>
Type the first two words in Terminal, then drag the disk image file to the Terminal window and press Return. You’ll see something like this:
$ hdiutil compact /Users/kirk/Documents/My\ Disk\ Image.sparsebundle
Starting to compact…
Reclaiming free space…
...............................................
Finishing compaction…
Reclaimed 772.8 MB out of 948.2 MB possible.
Encrypt PDF files
You can also use macOS’s built-in Preview app to encrypt PDF files. Open a PDF in Preview, then choose File > Export as PDF. Click Show Details, check Encrypt, and enter a password.
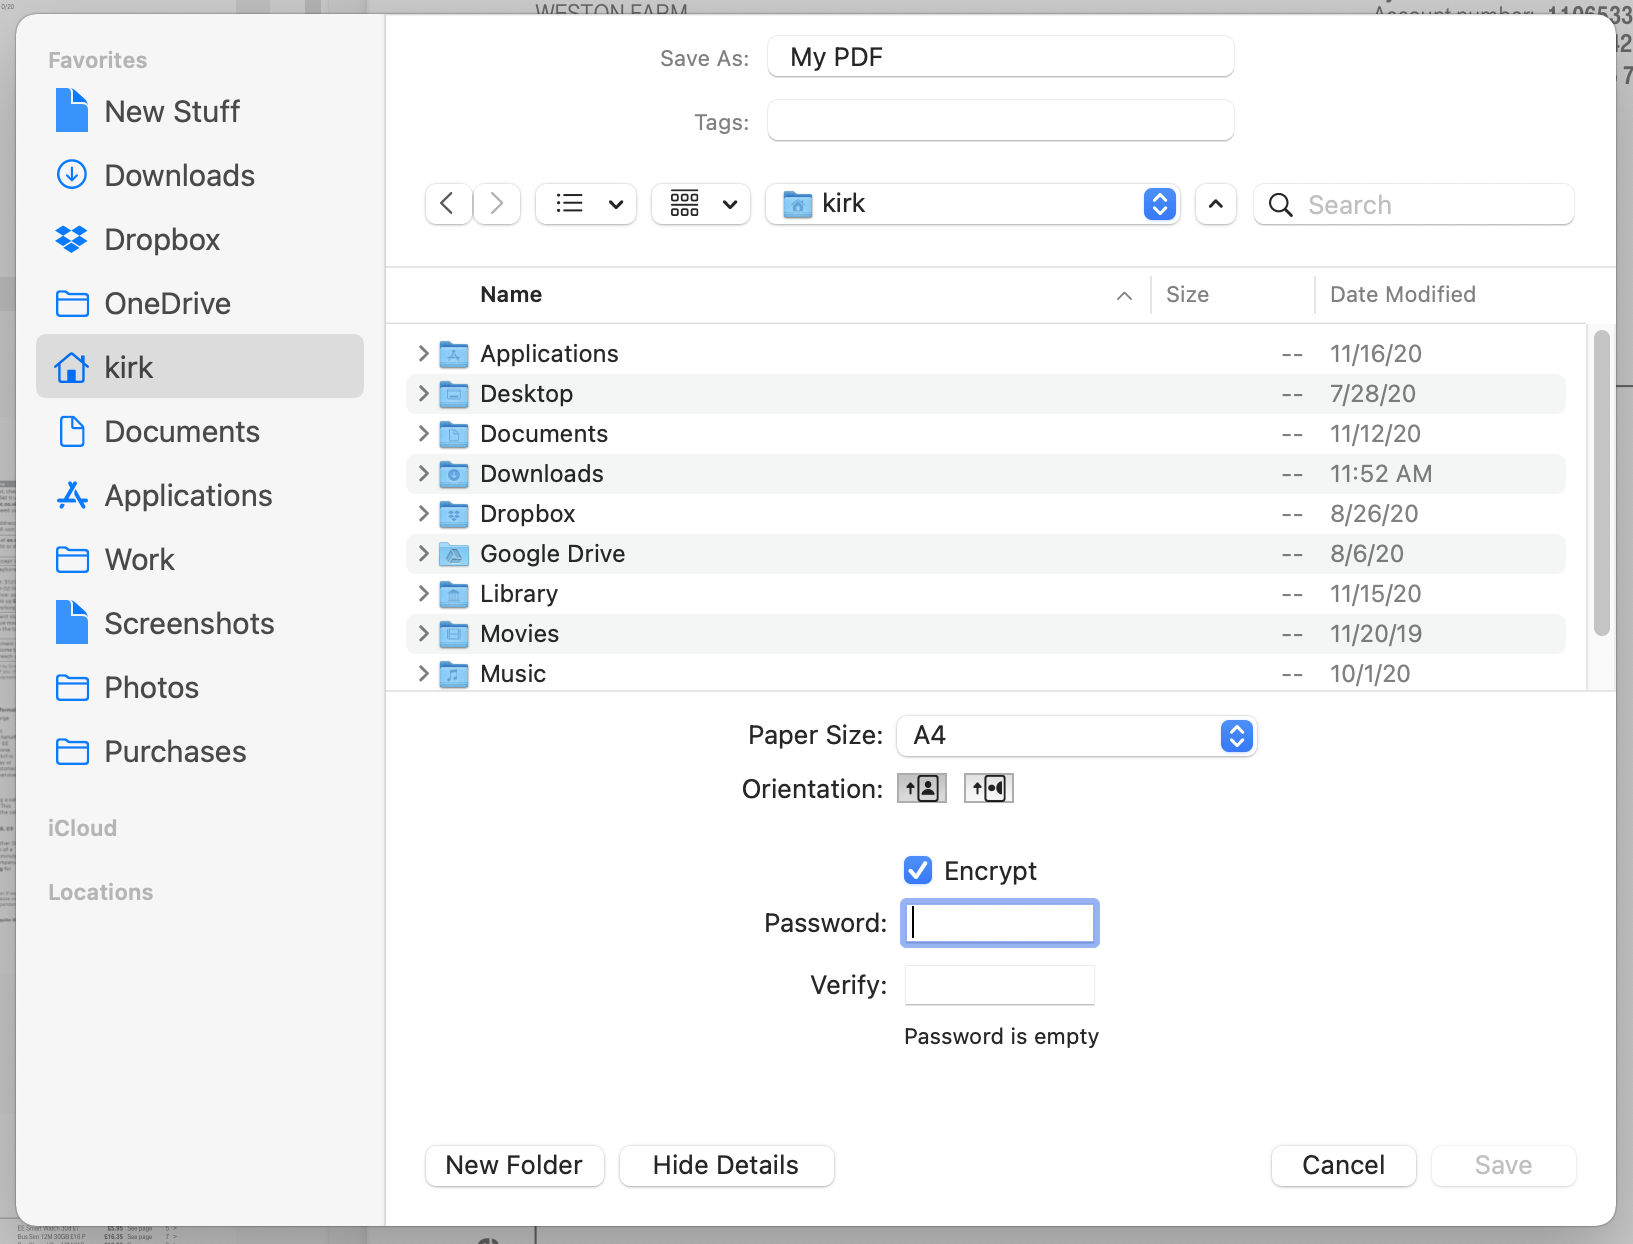
Click Save, and Preview will export the encrypted PDF. When you open the PDF, you’ll see a dialog asking for the password.

Make sure to note this password in a secure location, so you can read these files later. Most of the time, you’ll encrypt a PDF file to send it to someone over the internet. So you’ll need to give them the password in a secure way, such as using secure messaging, like with Apple’s Messages app, or over the phone.
Remember, that only this exported copy is protected by a password. If this is the only copy you want to keep, you can delete the original.
Summing Up
With all these options, you can safely encrypt your disks and even create encrypted disk images that you can send via email, store in the cloud, or save on network servers. Your data is protected by encryption algorithms that are robust and secure. Also, using the built-in macOS encryption features means that you don’t depend on third-party software, and these disks and files will be compatible on any Mac. Just don’t forget (or lose) your passwords.
How can I learn more?
 Each week on the Intego Mac Podcast, Intego’s Mac security experts discuss the latest Apple news, security and privacy stories, and offer practical advice on getting the most out of your Apple devices. Be sure to follow the podcast to make sure you don’t miss any episodes.
You can also subscribe to our e-mail newsletter and keep an eye here on Mac Security Blog for the latest Apple security and privacy news. And don’t forget to follow Intego on your favorite social media channels: Facebook, Instagram, Twitter, and YouTube.

