How to Send Files Securely
Posted on
by
Kirk McElhearn
There are many occasions when you need to send files securely to a friend, colleague, or client. If you can’t meet in person to exchange files, there are a number of online and cloud services that can handle file transfers for you. It’s easier than ever to use these services, many of them free, to securely send files to others. Here are a few options.
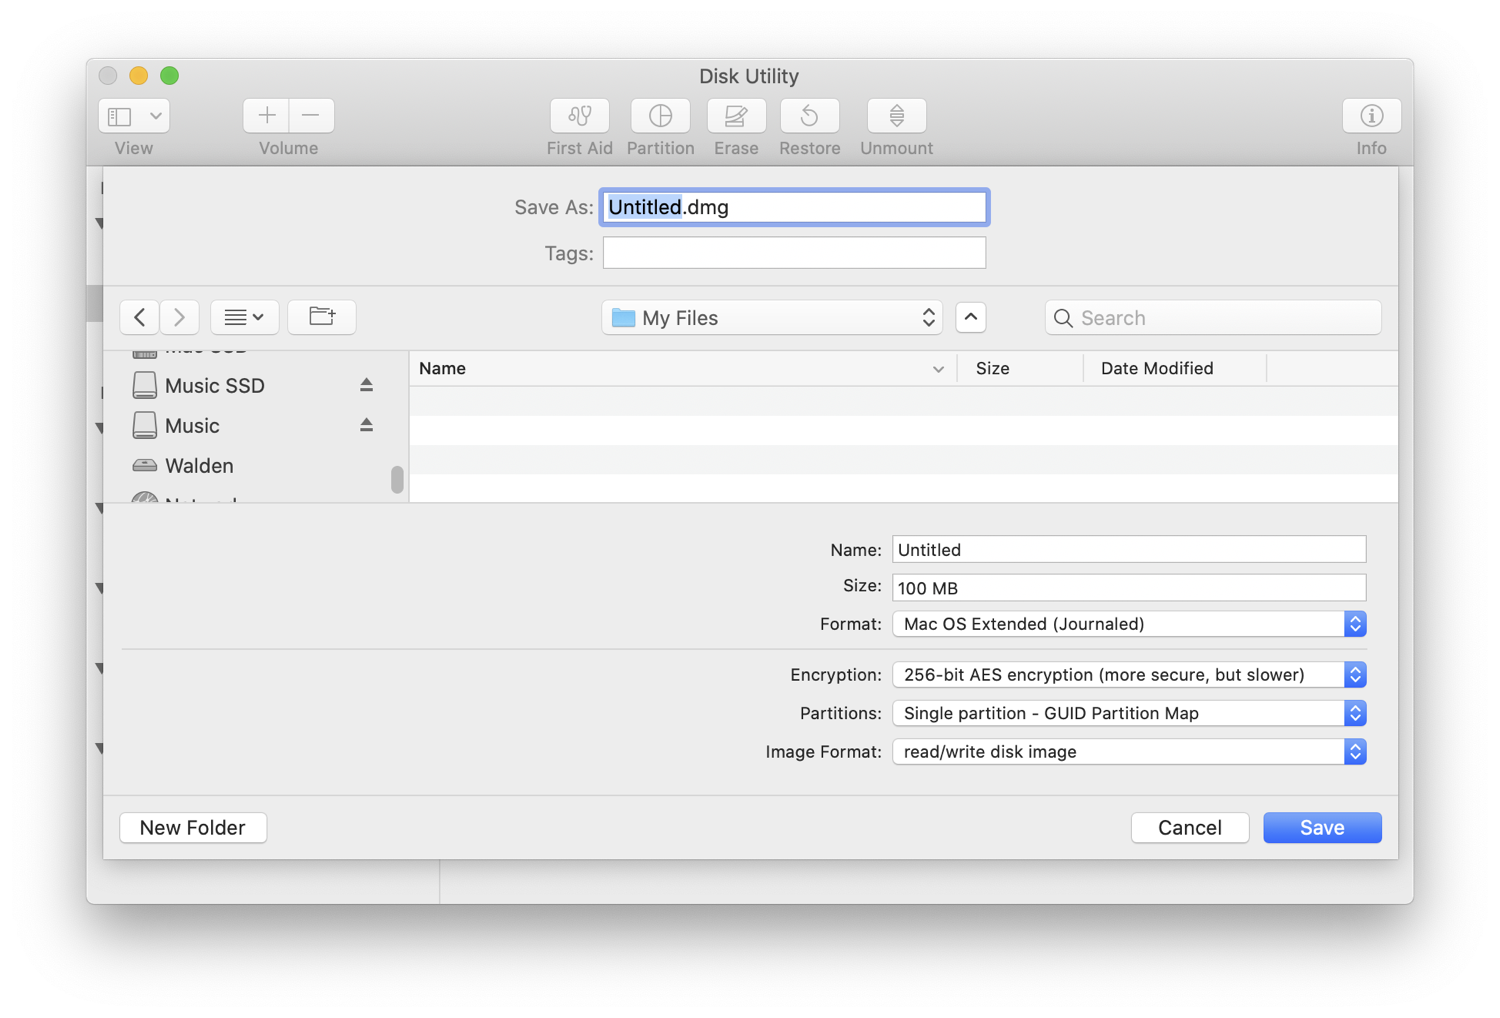
Most people would say that you should never send sensitive files by email, but you can do this safely if you package the files in a secure, encrypted wrapper. The easiest way to do this on the Mac is with a disk image; we explain how to do this in this article.
Encrypted disk images are highly secure, and you can use them to send files to anyone who uses a Mac, as long as you can give them the password they need to access the files. Naturally, you don’t want to send this password via email, but you could send it by a messaging app that supports encryption, such as Messages, Signal, Slack, or others. (See this article for more on encrypted messaging apps.) Or you could call them and spell out the password.
If the disk image is very large, you may run into attachment size limits with your ISP or email host, but Apple’s Mail Drop lets you send attachments up to 5 GB. When you send files with Mail Drop, the recipient gets a link in their email message that allows them to download the file from Apple’s servers. See this Apple support document for information on Mail Drop limits.
Of course, there is a risk with sending a link to a file by email: anyone who intercepts the email could download the file, so using an encrypted disk image is always a good idea, if the files are really sensitive.
Secure messaging
For individual files, or a compressed archive of files, you can use Messages or other secure messaging apps, such as those mentioned above. These apps all have file size limits. Apple limits these transfers to 100 MB; for most cases, this is more than enough. And if you have a small enough encrypted disk image, as explained above, you can send the disk image and the password needed to decrypt it by the same service.
You can even use a videoconferencing app like Skype to send files. This way, you can see your recipient, to make sure they’re the right person. Just drag files into a Skype chat window, and they’re encrypted during the transfer.
One advantage of sending files this way is that it is synchronous; you know that your recipient has the file, and when they receive it. With email, or some of the other methods mentioned below, you won’t know exactly when they download the file.
Other secure sending services
There are many online services that allow you to send files securely. WeTransfer lets you send files up to 2 GB at a time, as often as you want, for free. If you subscribe to WeTransfer Pro, you can send up to 20 GB per transfer, with a total of 1 TB of storage. SendSafely lets you transfer up to 50 GB per month for free, and offers a number of paid tiers. Some of these services, such as WeTransfer Pro, allow you to password protect files, and SendSafely lets you set an expiration date for downloads.
Cloud storage services
There are a number of easy-to-use cloud services, such as Apple’s iCloud, which you automatically have when you create an Apple ID, or cloud services like Dropbox, OneDrive, or Google Drive that have free and paid tiers. All of these services encrypt files in transit, and you can share files either directly from the Finder, or from the services’ websites. For extra security, you can wrap files in an encrypted disk image, as explained above, and share that disk image.
These services are probably the easiest way to send secure files, but you may run into limitations in your storage space. For example, iCloud’s free tier gives you 5 GB, which you share with all your other data, such as photos and backups, so if you have large files to send, you may not be able to without paying for more storage. (Which is why Apple created Mail Drop; see above.) Services like OneDrive and Dropbox offer 1 TB and 2 TB respectively for paid accounts, so, unless you have lots of files in the cloud, it should be easy to share large files.
With some cloud storage services, you have additional options to secure your transfers. If you have a paid OneDrive account, you can set a password and an expiration date for the transfer, so only your intended recipient can access your files. With Google, you can limit access to specific people, as long as they have Google accounts (free or paid). There are no such limits with Dropbox.
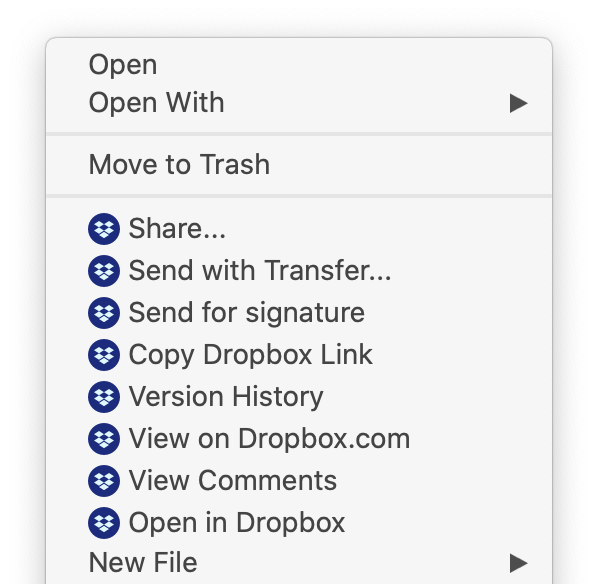
Dropbox and Google Drive (via the Google Backup and Sync app) have Finder integration, so you can right-click a file and immediately get a sharing link. While this doesn’t let you add additional security options in Google, it’s quick and easy. Just share a link, and have your recipient let you know when they’ve gotten the file so you can delete it immediately. With OneDrive, you have to go to the OneDrive website in a browser to share, so it’s a bit more work, but you do have the extra security options I mentioned above. Dropbox also gives more sharing options if you have a paid account; choose Send with Transfer from the contextual menu to add an expiration date and password.
iCloud Drive
iCloud Drive is a bit different from other cloud storage services. It was originally designed to integrate with apps, storing documents that you use specifically with one app or another. But you can also create folders on iCloud Drive, and even sync your Desktop and Documents folder to iCloud Drive. If you do the latter (go to System Preferences > Apple ID > iCloud for this setting), you can use iCloud Drive to share any files in these folders.
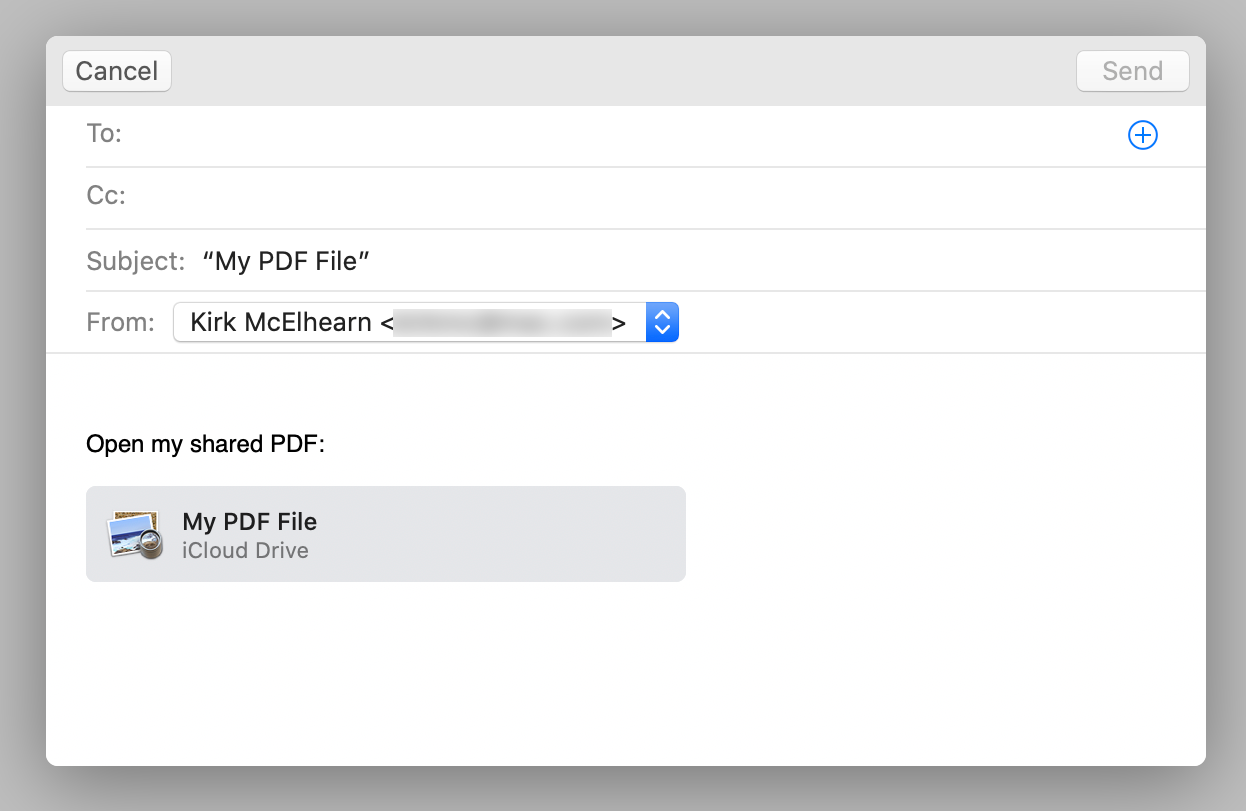
Choose Go > iCloud Drive; you’ll see a number of folders with app names, as well as any folders you may have added. Find a file you want to share, then click the Share button in the Finder toolbar, and choose Add People. Click Email, then add the email address of the person you want to share a file with. Send the email, and the recipient will have a link to access the file.
If you often share files with someone via iCloud, you might want to create a shared folder. Apple explains how to do that in this support document. You can do the same with other cloud services as well, and this allows you to have a receptacle where you can securely share files just by dragging them into a folder in the Finder. Just make sure you have enough storage available on your account for the files that you and others will share; they all add up against your quota.
With all these options, you’ll easily find a way to share files securely with anyone. Choose the methods that work best for you, and for people you work with.

