Use Apple HomeKit to automate and secure your home
Posted on
by
Kirk McElhearn
![]()
Smart home devices are becoming increasingly common, and Apple’s efforts in creating a platform to manage all these devices has finally reached maturity. Apple is pushing the smart home features of its operating systems, and one of the categories on the Apple website, TV & Home, says:
The future hits home.
Simply connect your favorite devices and transform your house into a remarkably smart, convenient, and entertaining home.
Here’s why HomeKit is important, and how you can get the most out of its features.
- What is HomeKit?
- How HomeKit works
- Using HomeKit Remotely
- The new HomeKit architecture
- HomeKit And Security
- The Future of HomeKit
- How can I learn more?
What is HomeKit?
HomeKit is a framework that runs under the hood on macOS and iOS, and most people ignore it, unless they’ve explored smart home devices. HomeKit is quite easy to set up and use, and it gives you a powerful and secure way of controlling smart home devices like cameras, lights, doorbells, heating, and more. You can control these devices from the Home app on any Apple device, or using Siri commands. You can also create automations, which trigger actions when certain conditions are met: motion detected, temperature reached, etc.
Apple introduced HomeKit in 2014, with the release of iOS 8. It took a while for devices to be HomeKit compatible, in part because Apple initially required devices to have a special encryption chip. They since changed the requirements to allow software authentication, and you can find devices that support HomeKit in many categories: lights, sensors, security devices, speakers, thermostats, and much more; you can find a comprehensive list on Apple’s site.
Apple doubled down on HomeKit with the release of the HomePod mini, which can serve as a HomeKit hub; see below for more on this. In addition, the HomePod mini is a Thread border router, which means that it can connect with devices using the Thread protocol. Thread is a technology for the smart home that uses low-power mesh networking and IPv6 addressing to connect smart home devices. The goal of this is to do away with product-specific hubs, and allow smart devices to interact directly over a Wi-Fi network. In addition, some Thread capable devices can extend the network outside the home, to provide remote control of your devices. Thread is being superseded by Matter, which uses the technology that Thread is built on to go further, and Matter compatible devices are starting to roll out in early 2023.
How HomeKit works
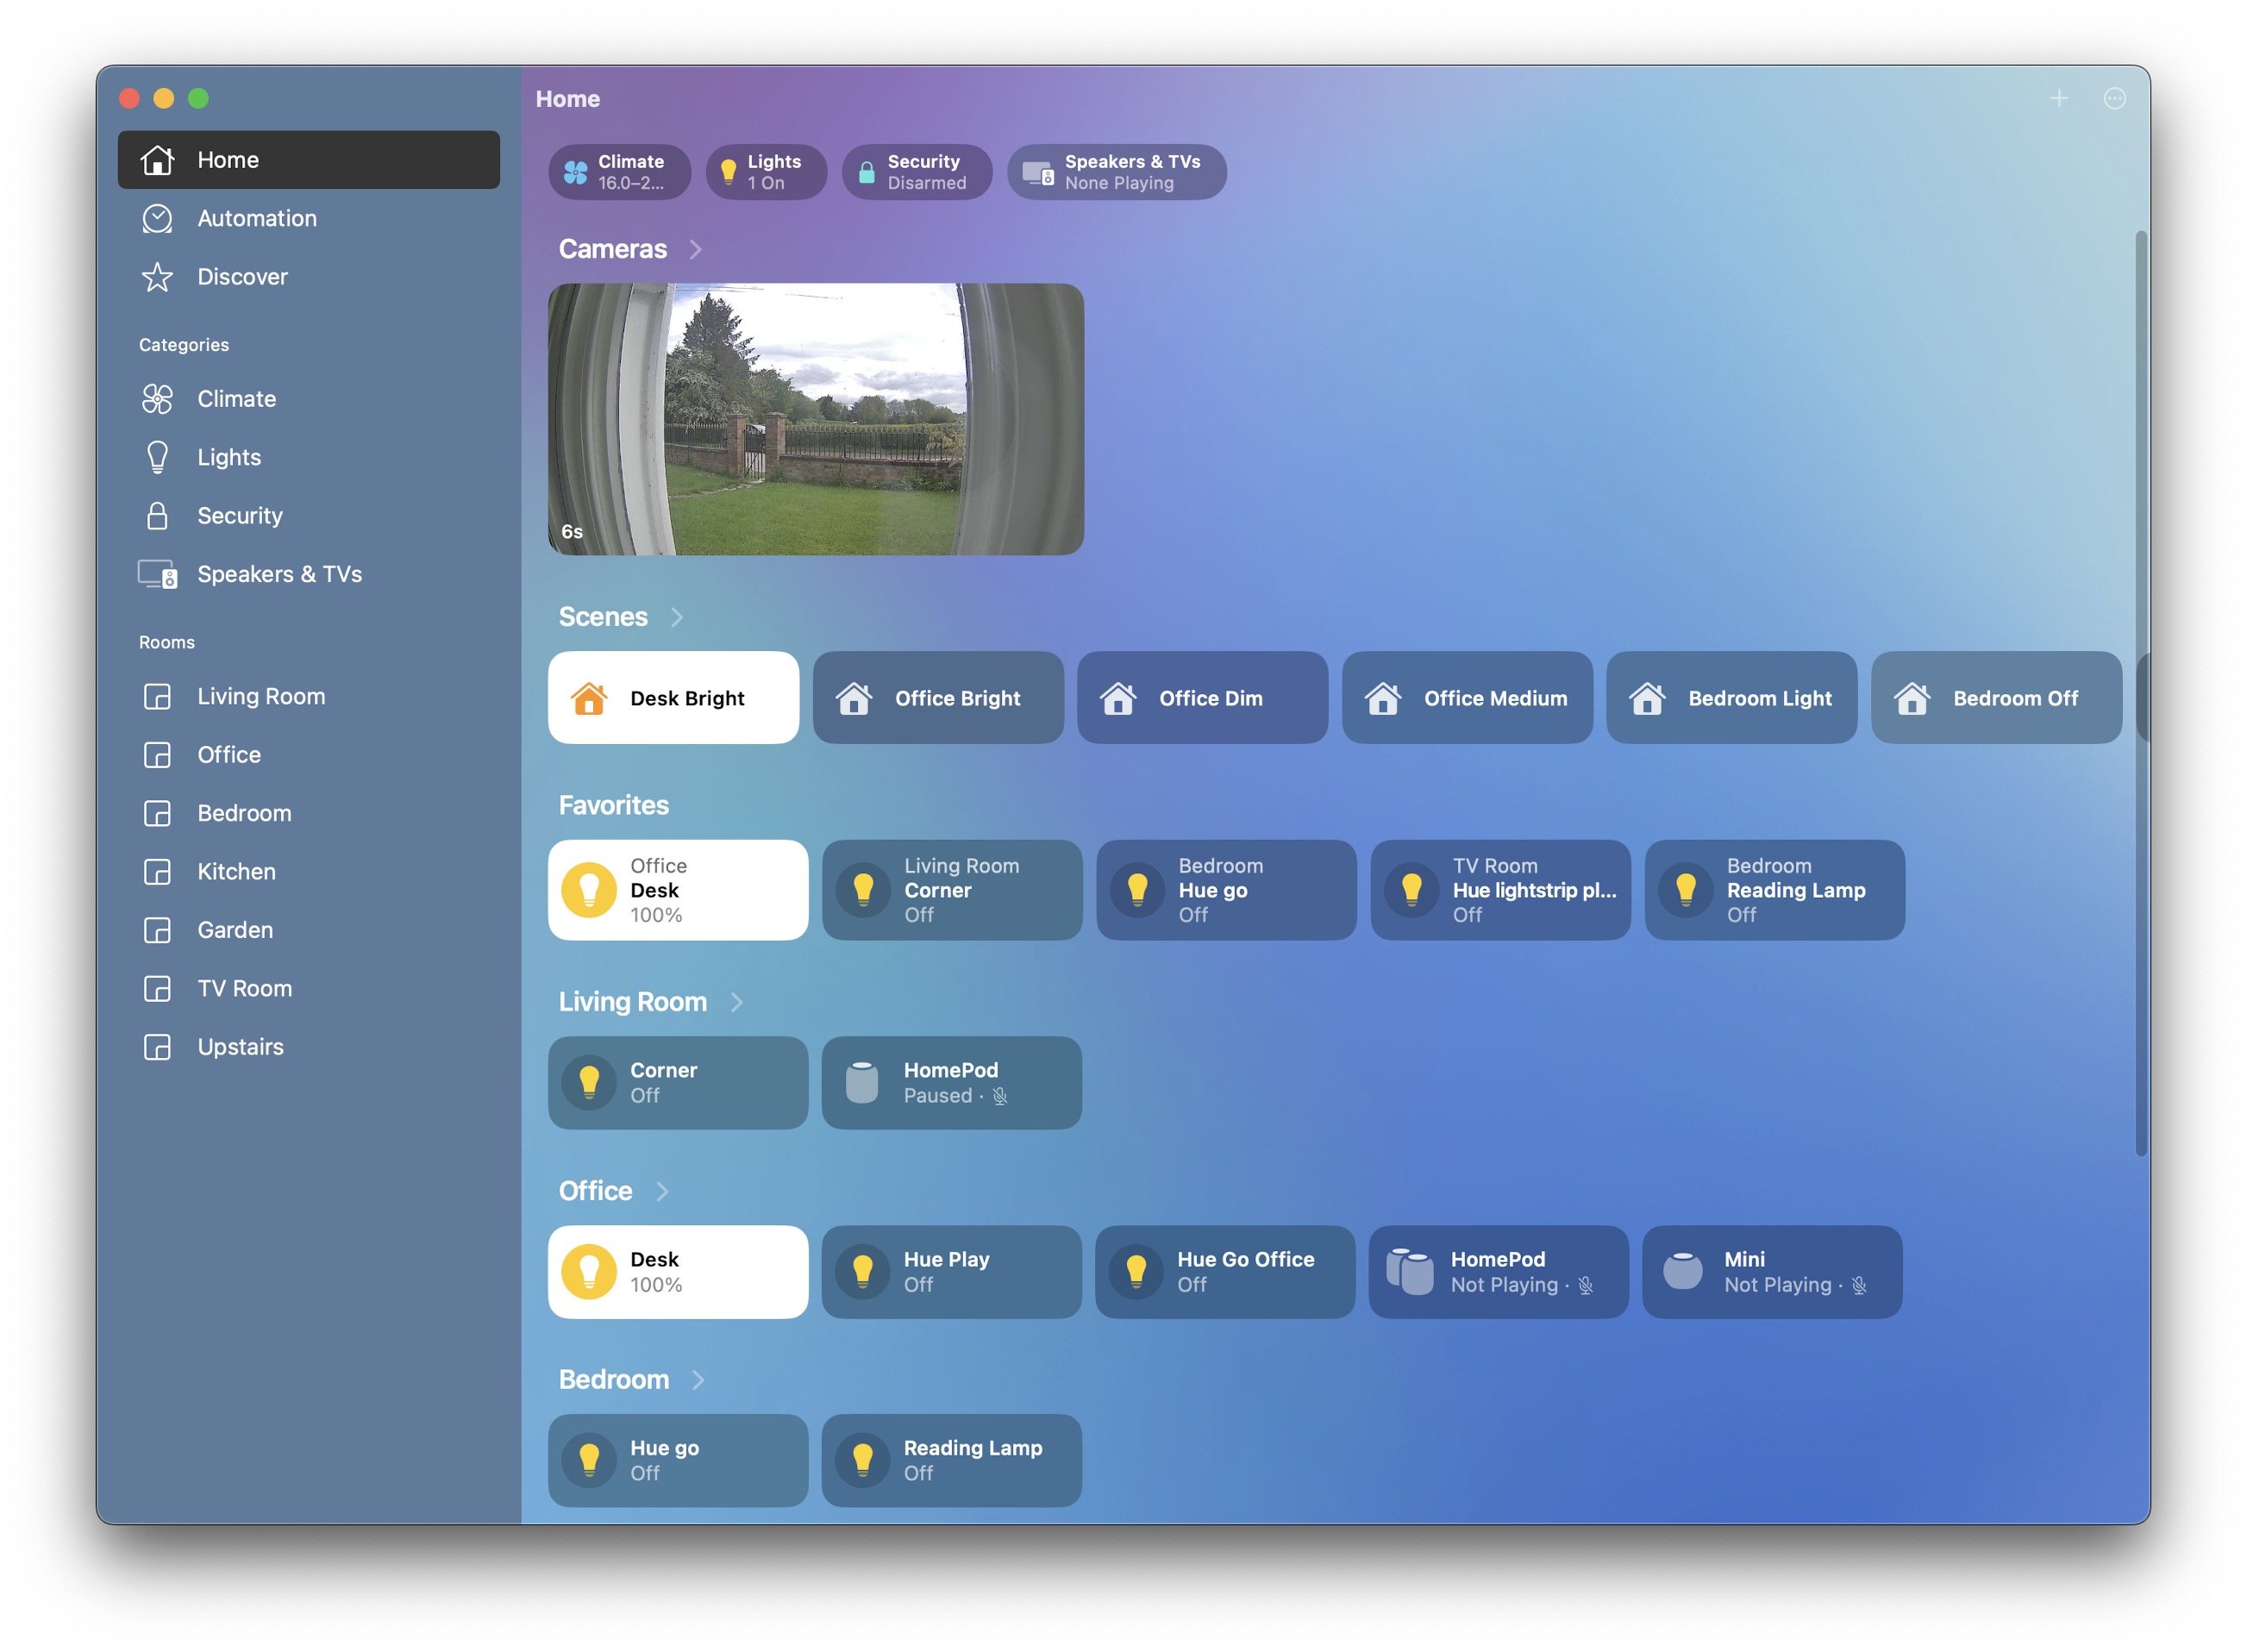
HomeKit functions in the background on your network. All the configuration information for your smart home devices is shared through your iCloud account, and you can control them with the Home app on your iPhone, iPad, Mac, and Apple Watch, and with Siri. You need to be signed into your iCloud account to use HomeKit, and use two-factor authentication to control devices remotely. This is mainly because many smart home devices affect the security of your home: devices like cameras, smart locks, alarms, and more.
When you add HomeKit devices, you add “accessories,” and you assign them to specific “rooms.” You can also create “scenes,” which are groups of devices and settings that you can activate with a tap in the Home app, or using Siri.
HomeKit also enables automation: for example, you can create a routine where, when the temperature goes below a certain level, your heat goes on. Or when you open your garage door in the morning, your lights go off, your heat goes down, and your door locks.
The Advantages of HomeKit
With HomeKit, you don’t need to use the apps made by the manufacturers of the hardware. You may need to use those apps to set up the devices—you often need to create accounts with the manufacturers to do this—and you may not have access to all the settings and features of devices from the Home app. But for most uses, it means you have a central app to control all your smart home devices.
The ability to group devices in “scenes” makes HomeKit especially powerful, as does the ability to use “geofencing.” A scene is a combination of actions the different devices carry out. For example, lights go on and music starts playing in your living room. Or lights go off, the heat goes down, and your alarm is armed.
Geofencing activates scenes when you arrive at or leave locations. You can have routines that activate automatically when you leave home or get back home. You can even have a scene that activates when you leave the office, adjusting the thermostat and turning on lights at home, for example.
HomeKit also allows you to invite others to access your devices. You can invite your spouse, partner, and children, or even friends, to be able to control your HomeKit devices.
Using HomeKit Remotely
HomeKit works with any iPhone, iPad, Mac, or Apple Watch running iOS 10 or macOS Mojave or later, though you won’t have access to the new HomeKit architecture with devices running operating systems older than iOS/iPadOS 16.4 or macOS Ventura. You can also control HomeKit devices from an Apple Watch, if it is running watchOS 9. Each of these platforms has a Home app that shows you all your devices, rooms, and scenes, and provides settings and controls, though the Apple Watch only provides controls. You can, however, view security cameras on an Apple Watch.

To control HomeKit remotely, you need a “HomeKit hub,” which is a device that remains in your home to receive remote commands. Any HomePod or Apple TV can serve as a HomeKit hub. This can seem a bit confusing, because you don’t actually have to do anything to set up the HomeKit hub. As Apple says, "When you set up HomePod mini and HomePod, they automatically become home hubs." HomePods and Apple TVs automatically register themselves as HomeKit hubs, if they are signed into the same iCloud account where you’ve set up your HomeKit compatible devices.
You can also use an iPad as a HomeKit hub, but only if you are using the original HomeKit architecture. (See below.) For an iPad, you need to go to Settings > Home and toggle on Use this iPad as a Home hub for this to be enabled. The assumption is that an iPad may not always be at home, which is why it is treated differently.
Related: Everything you can do with an Apple HomePod
Once your HomeKit hub is established, you can check in the Home app on any device to see which hubs are active. In iOS, iPadOS, or macOS, tap the more button (…) at the top right of the window, then tap Home Settings, then Home Hubs & Bridges. You’ll see that in my home, there are six hubs: one is active and five are on standby.
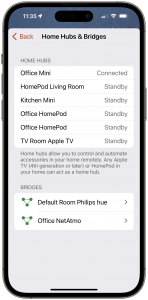
In the screenshot above, you can also see two “bridges”: one for my Philips Hue lights, and another for my NetAtmo weather station. Bridges are hardware devices from manufacturers that register with HomeKit, and control their devices indirectly. Going forward, with Matter, bridges will no longer be needed, but they will continue to work with older accessories. In practice, you can ignore the HomeKit hubs, unless you’re having issues controlling your devices.
It’s worth noting that, until Matter updates are made available for devices – and many existing devices will not be able to use the features of Matter – you will have to use multiple apps to control many smart home accessories. For now, the number of smart home accessories that are HomeKit compatible is limited. Apple’s list of compatible accessories shows that, as of May 2023, there are lots of cameras, but only four doorbells, and what is probably the most popular doorbell, Amazon’s Ring doorbell, is not HomeKit compatible.
The new HomeKit architecture
When Apple released iOS 16.2, they introduced what they vaguely call "the new HomeKit architecture." At that time, there were lots of bugs, so Apple pulled the feature, and reintroduced it with iOS 16.4, in March 2023. Apple says that this is "the new, more reliable, and more efficient Home architecture."
To upgrade your home to use this new architecture, you can go to the Home Settings in the Home app on any device, then go to Software Update. If this new architecture is available, you’ll see a notification Home Upgrade Available.

To update your home, all your devices must be running the latest versions of their operating systems; if not, the Home app will tell you which devices aren’t compatible, and inform you that, until they are updated, they will lose access to your home. Follow the instructions to upgrade your home, if your devices are updated and you are ready to make the change.
The update is supposed to make HomeKit more resilient, and some users have found that commands execute more quickly. You may or may not notice improvements, but it is important to make this update so your home can work with new HomeKit features, such as Matter.
HomeKit And Security
Many people use HomeKit to manage devices they use to protect their homes: cameras, doorbells, sensors, etc. As such, this framework has a high level of security, notably through the use of two-factor authentication, and through secure data storage on iCloud. All your settings are part of your iCloud data, and you can use HomeKit Secure Video to store video from security cameras in iCloud. This is useful since many camera manufacturers make you pay a subscription to store videos in the cloud; others let you connect a USB storage device to their base station so you can store videos locally. But storing videos in the cloud means you can access them from anywhere.
As you can imagine, this data needs to be extremely secure; you wouldn’t want anyone to get access to your cameras or to be able to control the temperature or lights in your house, or unlock doors if you have smart locks. Apple tests and approves each device before allowing it to be compatible with HomeKit, and requires that you use two-factor authentication for remote access, both of which help ensure this security. Since your HomeKit devices are associated with your Apple ID, this means you should be especially careful with your Apple ID password. If someone compromises it, and can get access to a device you use for two-factor authentication, they could also gain access to your security cameras, smart locks, and more in your home.
The Future of HomeKit
It’s taken several years for HomeKit to gain critical mass, and the smart home is still in its early years; it will take a while for people to become comfortable with these devices, and to integrate them into their homes. Apple’s HomeKit makes this easy, and can help people appreciate the possibilities of smart home devices and of automation.
As Matter compatible devices roll out, HomeKit will be able to control a much wider array of accessories, from many more vendors. But to benefit from Matter, you may need to upgrade some of your accessories; existing models may not be capable of handling these new features. So you may be using other manufacturer’s apps for years to come, unless you want to buy new devices when they are available.
Many people have found that, starting with a few lights, smart plugs, or other simple devices, they can make their homes easier to manage with smart home accessories. Maybe it’s time to try some out.
How can I learn more?
To learn more about HomeKit and the smart home, I recommend the book Take Control of Home Automation, by Josh Centers.
Subscribe to our e-mail newsletter and keep an eye here on The Mac Security Blog for updates.
And make sure you’re following Intego on your favorite social and media channels: Facebook, Instagram, Twitter, and YouTube (click the 🔔 to get notified about new videos).

