Understanding Compressed Files and Apple’s Archive Utility
Posted on
by
Kirk McElhearn
Compressed files and archives are very common. You certainly see these files often—they bear the .zip extension, and contain one or more files that have been shrunk to save space. Archives also allow you to store a number of files in a single file, making them easier to move around or send to others. (For instance, if you sent a hundred text files to someone by email without compressing them, it would be very annoying to receive that many attachments.)
Apple’s macOS uses Archive Utility, a small app hidden away in an obscure folder and used to create and decompress .zip files. The Archive Utility app has some options that may make working with archives easier. In this article, you’ll learn about compressed files and Archive Utility, and we’ll show you some options you can adjust that will make working with compressed files easier.
Where is the Archive Utility?
Archive Utility is a small app hidden in a system folder. To access Archive Utility on your Mac, go to /System/Library/CoreServices/Applications. Here you’ll find Archive Utility along with some other apps that you may occasionally use, such as About this Mac, Network Utility and Screen Sharing. All of these apps are generally launched in other ways, not by double-clicking. About this Mac launches when you click the Apple menu and choose About this Mac. You can launch Screen Sharing by choosing Go > Connect to Server in the Finder.
How to use Archive Utility
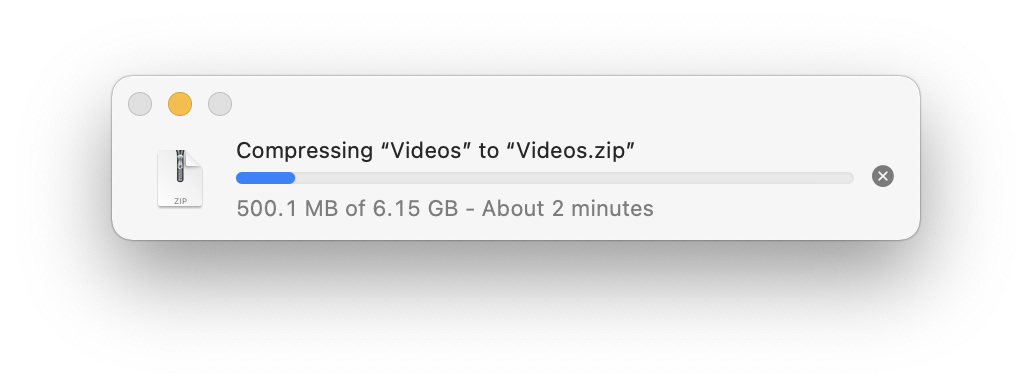
In most cases, you’ll use Archive Utility without launching it directly. If you want to compress a file, a folder, or a group of items, select it/them, then right click and choose Compress [item name]. Archive Utility launches, compresses the item(s), and then it quits.
The same is the case if you receive a .zip archive and want to expand it; just double-click the archive. Archive Utility opens, decompresses the archive, and then it quits.
However, if you need to create a lot of archives, you might want to launch the app, so you can drag files and folders onto its Dock icon and not have to bother with the contextual menu.
Archive Utility Preferences
If you launch Archive Utility, then choose Archive Utility > Preferences, you see a small window with a number of options.
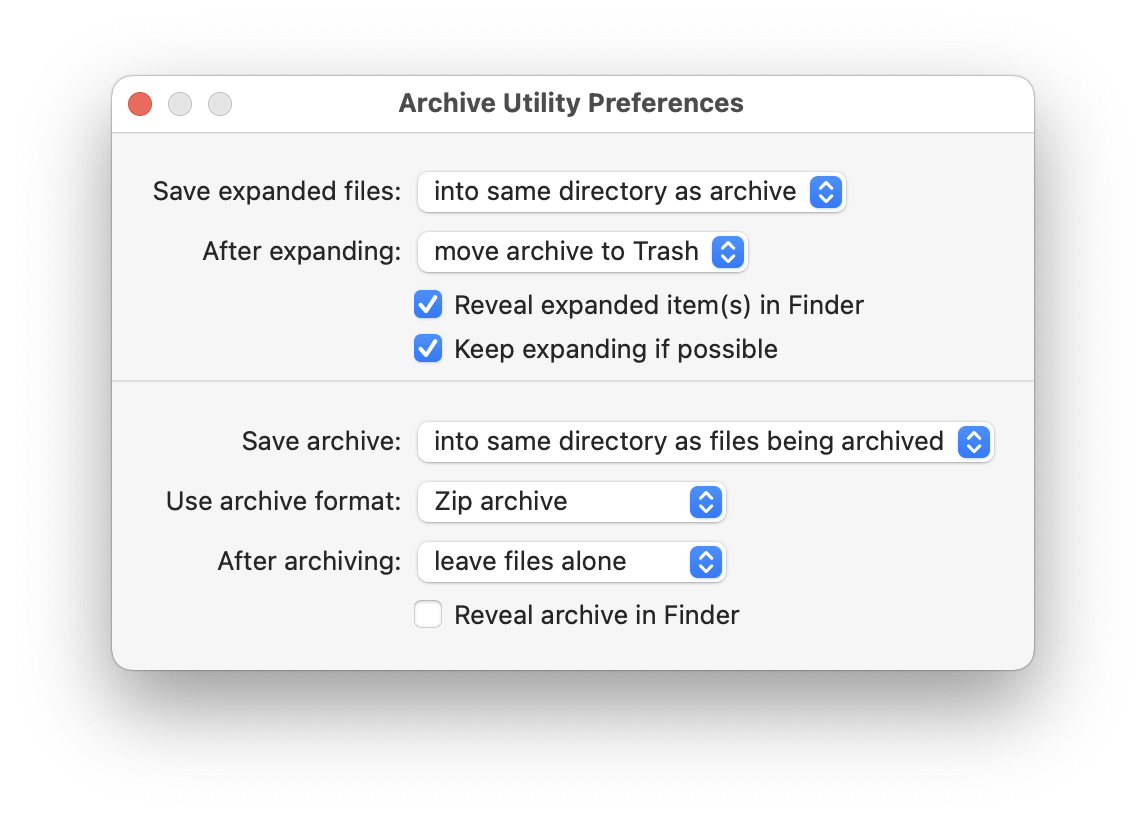
Archive Utility preferences can be very useful if you work with compressed files often. There are two sections to the window, with a horizontal rule dividing them. The top section controls what happens when you decompress archives. These settings are as follows:
Save expanded files lets you choose to save decompressed archives in the same folder as the original, or in a specific folder. If you want to use a different location, click the popup menu and choose Into, then select a folder. This can be useful if you get lots of .zip archives—such as daily backups, or database dumps—and want to automatically store them in a specific location after expanding them.
After expanding lets you leave the archive where it is, move it to the Trash, or delete it (without putting it in the Trash). You can choose one of these options from the popup menu. You can also choose Move archive to, and select a folder, if you want to save your archives.
Reveal expanded item(s) in Finder tells Archive Utility to select the decompressed file or folder and bring its window to the front. If you don’t move the expanded files to a different folder, you probably don’t need to change this.
Keep expanding if possible tells Archive Utility to decompress any archives it finds within an archive. This isn’t common, but there are some types of archives that may present like this, such as Unix archives that first use a .tar compressed, then a .gz compression.
The bottom section, below the horizontal line, tells Archive Utility how to create compressed archives.
If you want to tell Archive Utility where to save the archives you create, from the Save archive popup menu, choose Into, then select a location. Otherwise, they are created in the same folder as the original items.
When you compress items in the Finder, Archive Utility always creates a Zip archive. However, you can use Archive Utility to create compressed archives in other formats; you might want to do this to such archives to people for use on other operating systems. To do this, open Archive Utility, then choose File > Create Archive, and select the item(s) you want to compress.
You can use one of three archive formats in this manner: Compressed archive, regular archive, and Zip archive.
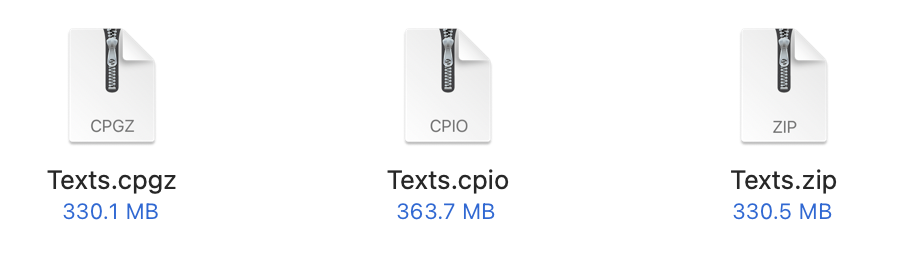
- A Compressed archive is a .cpgz archive. This is used on Unix and Linux, and you won’t want to use this format unless you’re sending archives to a computer running one of these operating system.
- A Regular archive is a .cpio archive, which combines multiple files in a single file without compressing them. As above, you won’t need to use this unless you’re working with other operating systems.
- A Zip archive is what we’re all familiar with; it combines and compresses files, in some cases reducing the overall size by half or more. It both saves space, and makes it easy to manage large numbers of files. It’s also the most compatible, being readable on both macOS and Windows.
After archiving, Archive Utility can leave files alone (do nothing to them), move them to the Trash, or delete them (without moving them to the Trash). You can also check Reveal archive in Finder to have Archive Utility show you archives when it’s finished. This can be useful if you create large archives that can take several minutes to create, and want a sort of notification when they’re finished.
I prefer to leave all the settings at their defaults, with the exception of the After expanding option; I’ve set that to move archives to the Trash. It’s rare that you’ll need to keep an expanded archive, and this saves time, because you won’t have to manually trash them. (You can always recover them from the Trash if you need to keep them.) You may want to change other settings, especially if you need to keep your .zip archives, or want to expand them in a different location from where you access them (often the Downloads folder).
Archive Utility is an essential tool. With the awareness that you can change some of its settings, you’ll find it easier to work with archives.
How can I learn more?
 Each week on the Intego Mac Podcast, Intego’s Mac security experts discuss the latest Apple news, security and privacy stories, and offer practical advice on getting the most out of your Apple devices. Be sure to follow the podcast to make sure you don’t miss any episodes.
You can also subscribe to our e-mail newsletter and keep an eye here on Mac Security Blog for the latest Apple security and privacy news. And don’t forget to follow Intego on your favorite social media channels: Facebook, Instagram, Twitter, and YouTube.

