Master the Touch Bar – and Get One on Any Mac (or iPad)
Posted on
by
Craig Grannell
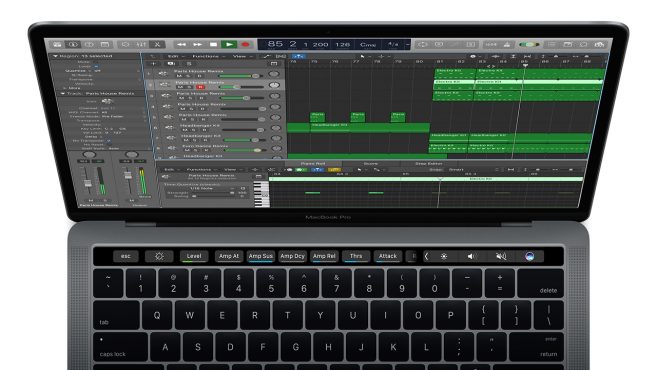
With its fourth-generation MacBook Pro, released in late 2016, Apple replaced the row of function keys at the top of the keyboard. In its place: a touch-sensitive strip called the Touch Bar.
This decision was about versatility. Function keys are archaic, and although they’ve been co-opted for various uses (such as triggering shortcuts in pro apps), Apple figured there was a better way to use the space.
Rather than a rigid set of keys, the Touch Bar gives you a blank canvas. As with an iOS display, it can become anything in the hands of a skilled developer. It also integrates Touch ID, adding another layer of security to a Mac.
Use and configure the Touch bar
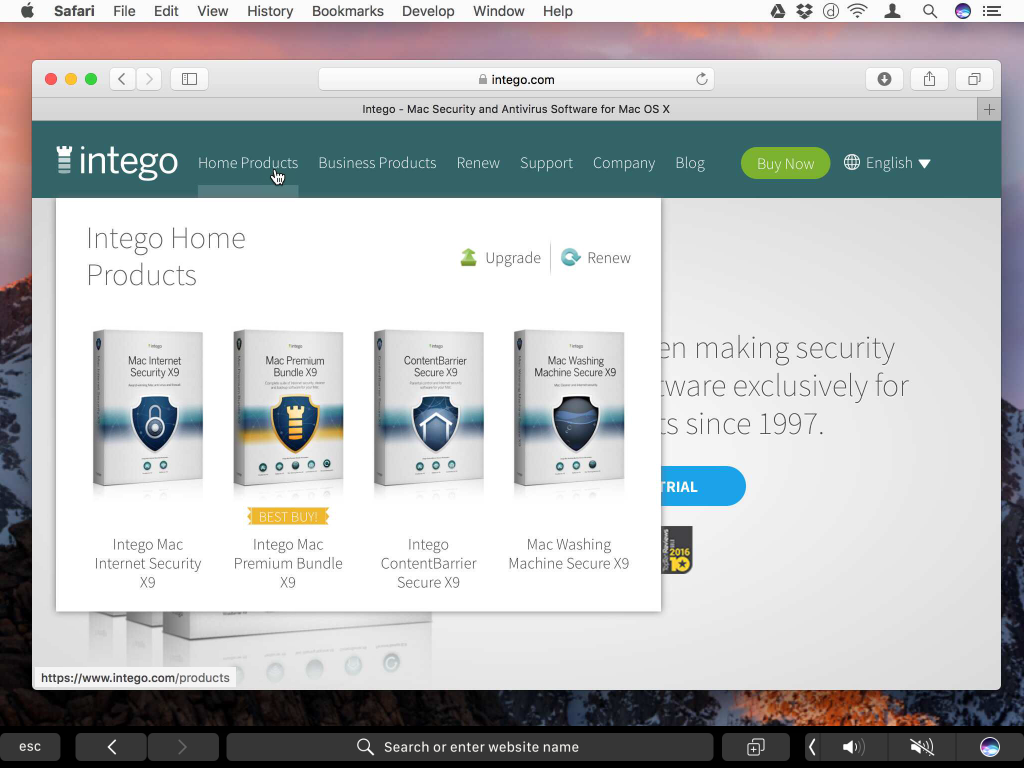
Interact with a MacBook Pro and the Touch Bar immediately activates. What it displays depends on the app you’re using – and what part of it. For example, when using Safari, the Touch Bar may display a large button to begin a search, icons of stored web page favorites, or thumbnails of open web pages.
![]()
That said, some keys are always displayed. To the far left is the Escape key. To the right is the Control Strip, housing a Siri button, and controls for brightness and volume.
![]()
To expand the Control Strip, tap the ‘<’ button. It will then mirror the special feature keys found on standard Mac notebook keyboards.
![]()
Customize the MacBook Pro Touch Bar
What’s displayed in the Touch Bar can be customized. For system-wide settings, open System Preferences and click Keyboard. In the Keyboard tab within that pane, the ’Touch bar shows’ and ‘Press Fn key’ menus dictate the behavior of the Touch Bar.
By default, it shows app controls and the Control Strip, and function keys when you press Fn. However, you can opt to have the Touch Bar initially show app controls only, or the fully expanded Control Strip; if you select the latter option, Fn will instead show app controls when pressed.
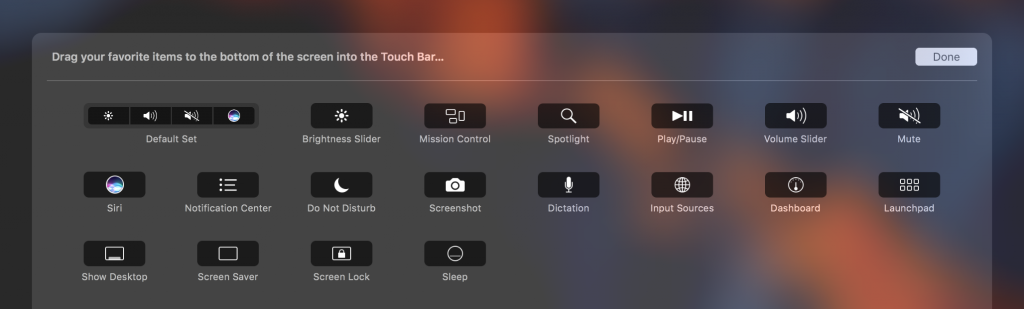
Click Customize Control Strip and you can adjust the items within the collapsed and expanded Control Strip. Simply drag your favorites from your Mac’s display to where you want them on the Touch Bar. Revert to factory settings at any point by dragging the Default Set to the Touch Bar. Click Done to close.
Many apps enable you to customize their specific Touch Bar items. The option for doing so usually found in View > Customize Touch Bar, and the process for defining favorites uses the same drag-and-drop method mentioned earlier. There are occasionally exceptions, however: for example, Logic Pro X houses Touch Bar customization within Logic Pro X > Key Commands > Edit.
Also, should you use an app that utilizes function keys a lot, you can have the Touch Bar show them while you’re in that app, but revert to its usual behavior elsewhere. In the Keyboard pane of System Preferences, select Shortcuts and choose Function Keys from the sidebar. Click ‘+’, select an app, and click Add. When in the chosen app (or apps, if you add several), the function keys will be displayed, and pressing Fn will show the expanded Control Strip.
Manage Touch ID on your MacBook Pro
At the right-hand side of the Touch Bar is the Touch ID button. This enables you to use a finger or thumb to unlock your Mac, use Apple Pay, and confirm payments in iTunes and on the App Store.
When you first set up your Mac, you go through the process of setting up Touch ID, but you can make adjustments in the Touch ID pane within System Preferences. The checkboxes toggle what Touch ID can be used for, and you can add up to three fingerprints.
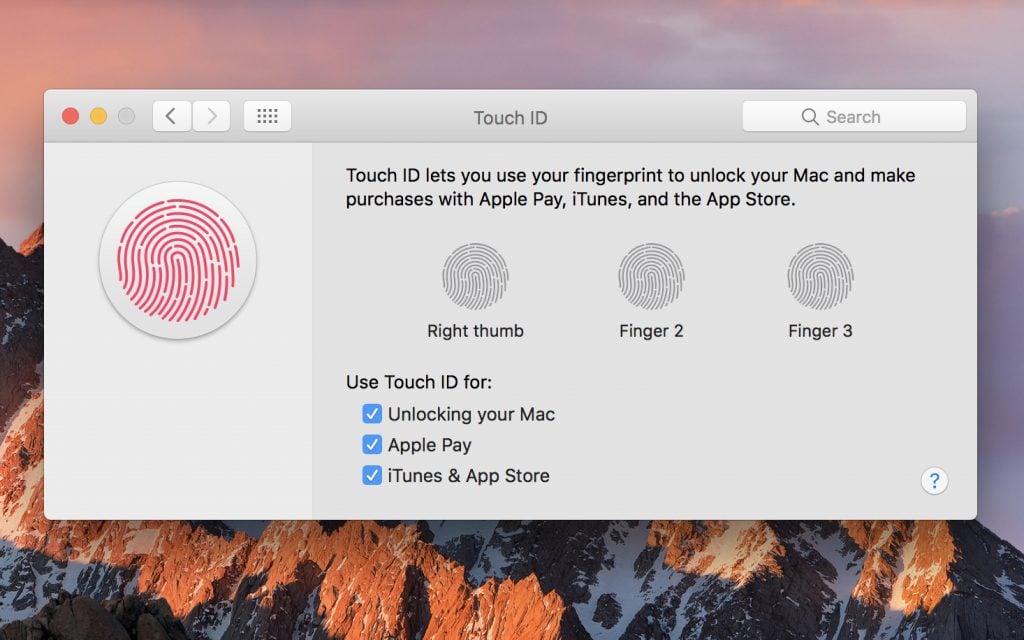
Typically, most people will use a thumb, as on an iOS device, but you might also try adding the index or middle finger of your right hand, which more naturally stretches to a MacBook Pro’s Touch ID sensor when you’re typing.
Get a Touch Bar without buying a new MacBook Pro
If you fancy trying the Touch Bar, but don’t want a new MacBook Pro, you have two options. The first is Touché. This free download adds a virtual Touch Bar that sits at the bottom of your display.

It’s an interesting app for learning about how the Touch Bar works, but it has drawbacks. First, Touché sits above other content – although using its settings you can at least create a system-wide shortcut to toggle the app. Secondly, it’s not so much Touch Bar as Click With A Mouse Bar.
Duet Display ($19.99) gets around both issues, for any iOS device connected to your Mac using a Lightning cable. Install and launch Duet Display on an iPad or iPhone, and the Duet client on your Mac. Your iOS device will become a second display. Select your device from Duet Display’s menu bar icon on the Mac, choose ‘Touchbar [sic] enabled’, and the Touch Bar will appear on your iOS device, working in the same way as it would on a MacBook Pro – and you get extra screen space to use as well.
Are you new to Mac?
Want to get the most out of your new MacBook, iMac or other Apple computer? Whether this is your first laptop or you’ve just switched from Windows, there are a few things you should know about your new Mac, like basic keyboard shortcuts or how to use the various features macOS has to offer. Learn more about what your Mac computer can do for you at the Intego New Mac User Center: Get started now!
