Apple + How To + Recommended
Interface Tweaks for El Capitan
Posted on
by
Kirk McElhearn
When you use a Mac, you probably want to adjust things so it’s exactly right for the way you work. There are lots of ways you can tweak El Capitan to customize the way it displays. You can tweak the menu bar, alter the Dock, change Desktop wallpaper, zoom the cursor to make it bigger, and more.
In this article, I’ll tell you how to customize the way El Capitan looks and make it easier to work with your Mac.
Tweak the Menu Bar
In El Capitan, you can change the menu bar in several ways. You can eliminate its translucency, make it black, or set it to hide automatically.
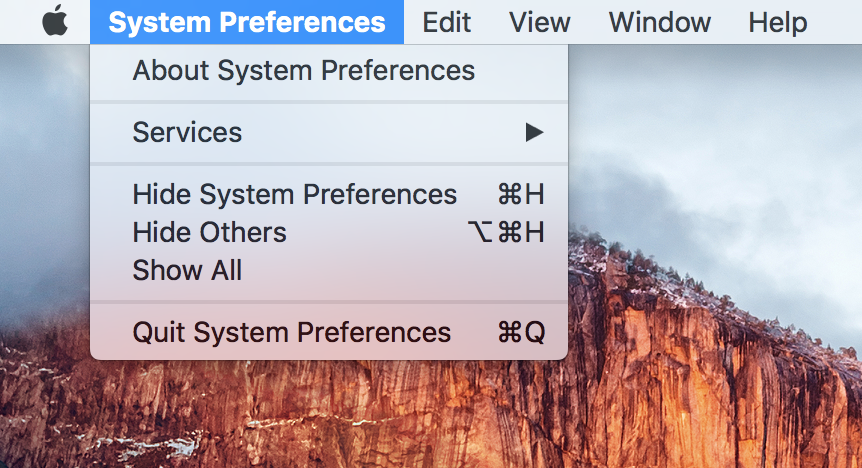
The translucency setting affects the menu bar, but also other interface elements, such as menus and some floating windows. You may find that translucent menus and menu bar are pleasing, but you may also find that they make text blurry and hard to read. Translucency is turned on by default, and the menu bar and menus look like this:
To change this, open System Preferences, click Accessibility, and then Display. Click “Reduce transparency” to make the menu bar and menus opaque again.
You can also make the menu bar and menus black; this, too, looks cool, and you may find it less intrusive in that color. To change this, go to the General pane of System Preferences, and check “Use dark menu bar and Dock.”
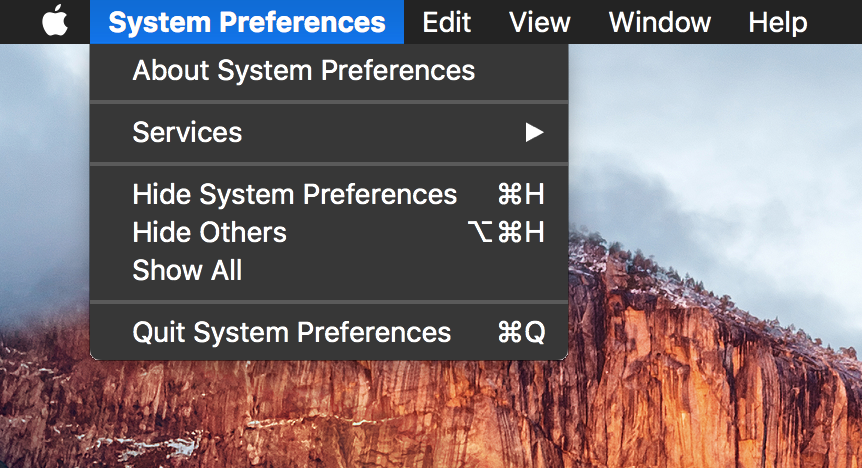
If you use the dark menu bar, you should still decide whether you want it, and its menus, to be translucent; the same setting applies to the dark theme.
The General preference pane also has a setting to “Automatically hide and show the menu bar.” If you check this, the menu bar disappears. It’s not gone for good; just swipe your cursor up to the top of your display and it slides into view. When you’re finished and move your cursor back down, the menu bar hides again. This is a good way to remove some distraction, but if you depend on any menu extras — icons that display in the menu bar — for information, you probably won’t want to hide it.
Alter the Dock
There are a number of changes you can make to the way the Dock displays. You saw just above that the setting that darkens the menu bar also affects the Dock. You can also change the Dock’s position on your screen or set it to hide.
The Dock has its own pane in System Preferences. Click it to see the many ways you can adjust its display.
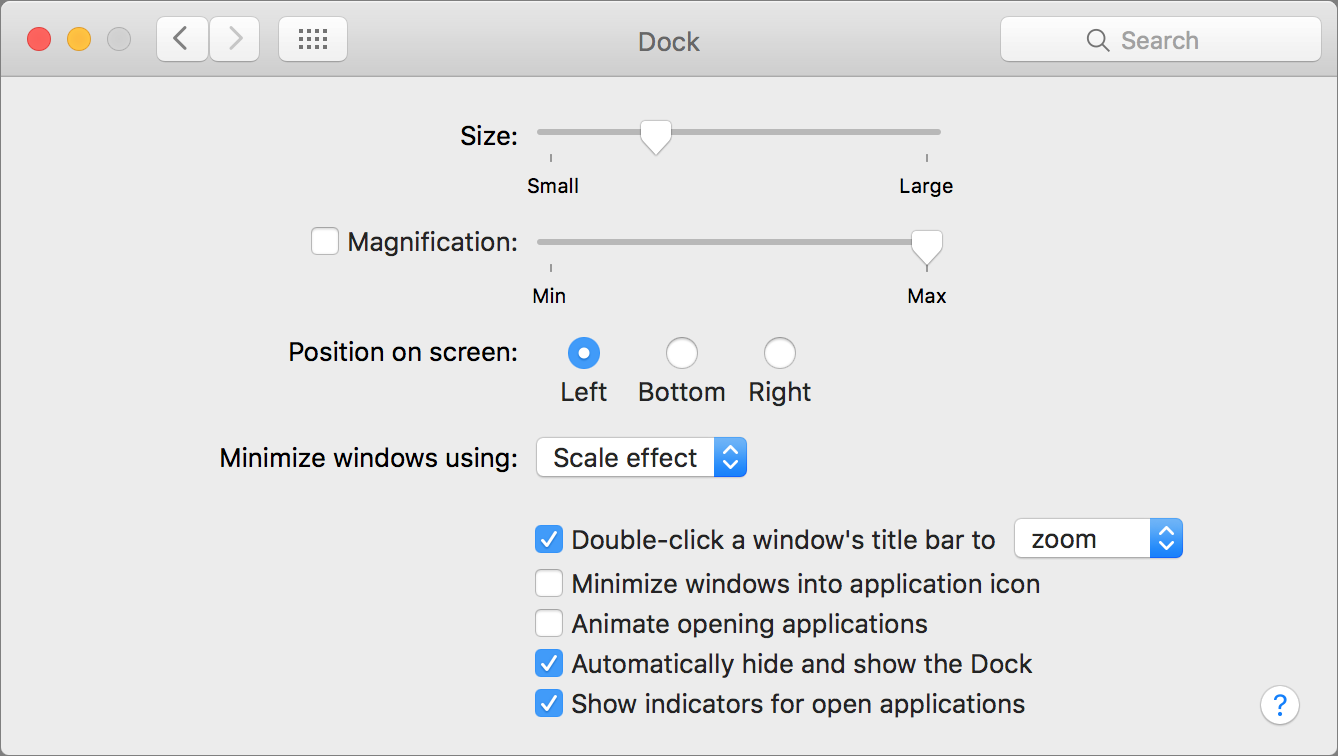
You can change the Dock’s position on the screen by choosing Left, Bottom, or Right. By default, the Dock is at the bottom of the display, but this takes up a lot of vertical space; I find it more practical to have it on the left, but you should try the three options to see which is best for you.
You can also check “Automatically hide and show the Dock” to keep it invisible, except when you want to use it. As with the menu bar, just glide your cursor to the side of your display where the Dock is hiding to bring it into view. You can drag files to the edge of the screen, and the Dock will display, so you can drop them on icons or folders in the Dock.
You can also change the Dock’s size, by moving the slider at the top of the preference pane, turn on magnification (which makes the icons you hover over grow), and choose from some other settings here that affect how windows react or go into the Dock.
Zoom the Cursor
If you have a large display, such as Apple’s 27″ iMac, you’ll have noticed that with all that real estate it can sometimes be hard to see where the cursor is. El Capitan has a neat feature that helps you find your cursor. Just shake your mouse a few times, or drag your fingers sideways on a trackpad, back and forth, and the cursor gets really big so you can find it easily.
But you can also make the cursor bigger all the time. Go to the Accessibility pane of System Preferences, and click Display. There’s a Cursor size slider; drag this to the right a bit. As you do so, you’ll see the cursor get larger.
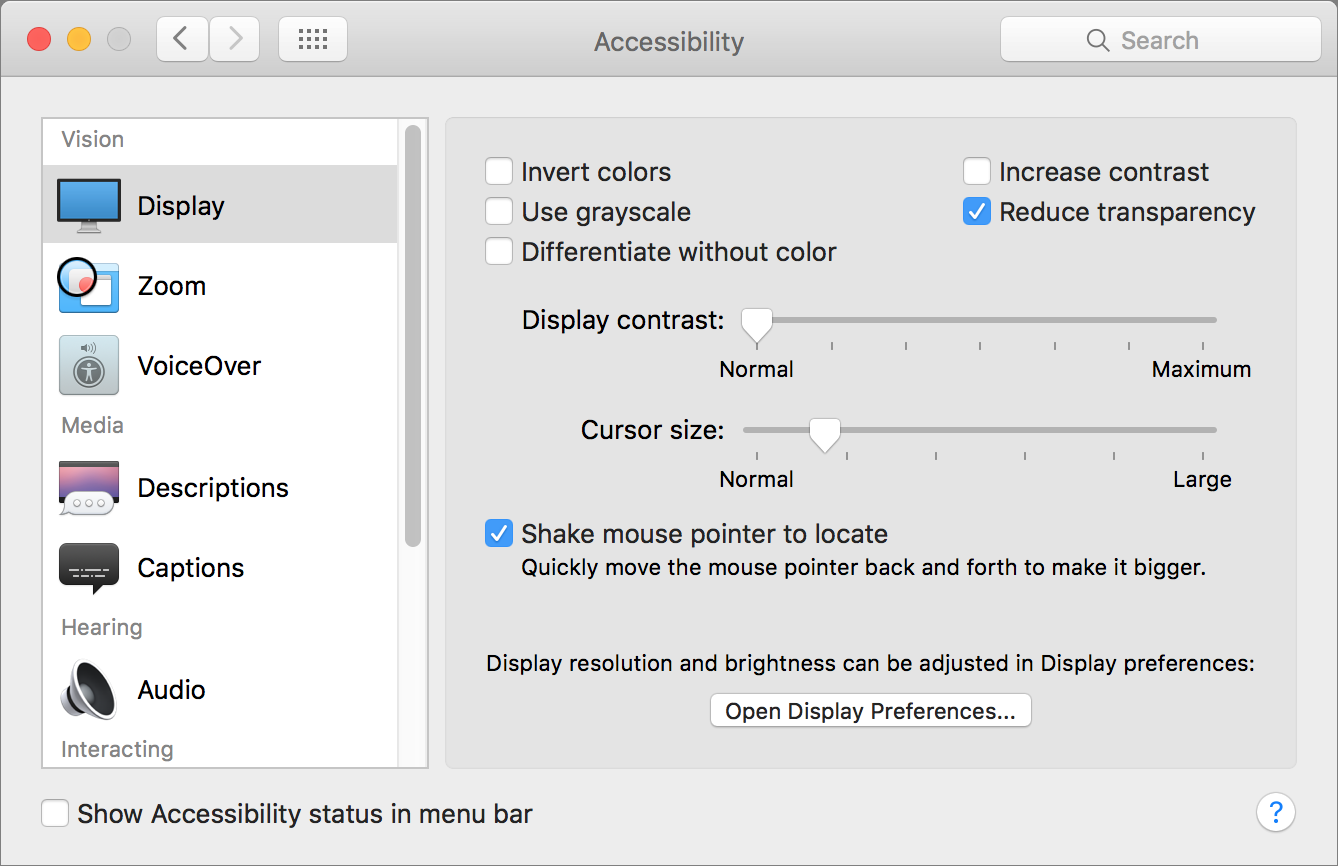
You can make the cursor just a bit larger than the default, or you can make it REALLY BIG, whichever is best for you. And you can also uncheck Shake mouse pointer to locate, if you don’t want to use that feature.
Change Wallpaper
Nothing is more personal than your Mac’s wallpaper. You may be a traditionalist, and use one of Apple’s stock photos, such as the spectacular shots of Yosemite National Park. Or you may want a solid color. Or you may want to use a photo of your own: of your family, your pet, or your last vacation.
You can easily change the Desktop background to use anything you want. To do this, right-click on the Desktop and choose “Change Desktop Background,” or click the Desktop & Screen Saver pane of System Preferences.
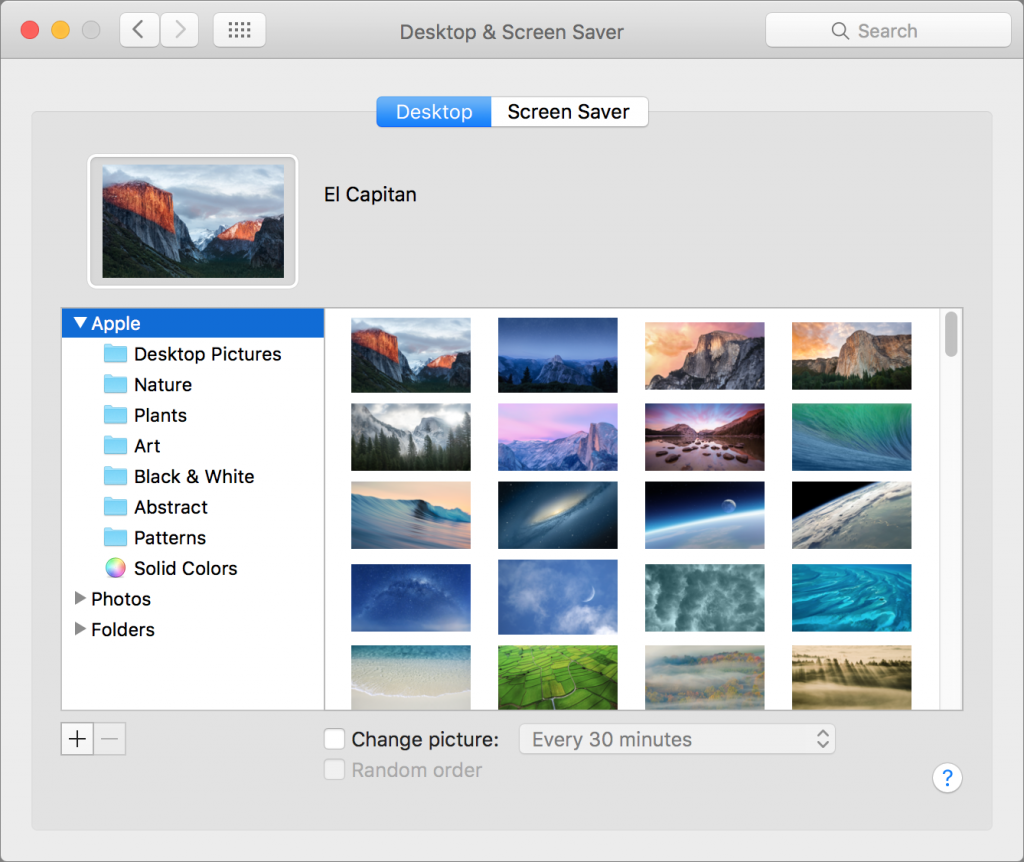
In the sidebar, you see three top-level options: Apple (the stock wallpaper that Apple provides, including solid colors), Photos (your Photos or iPhotos library), and Folders (the Pictures folder in your home folder). Click one of these and browse its contents. To set a Desktop picture, just click it. If you’ve selected a folder, you can choose to change the picture every 30 minutes, or at another frequency, and you can check Random order to have them change out of sequence.
You can also drag a photo to the artwork well to add it to your Desktop; that’s the space near the top of the preference pane where you see the example of the photo you’ve selected. And if you want to add a folder of photos to the sidebar, just drag it there, or click the + button below the sidebar and navigate to the folder.
With all these options, you can customize El Capitan to best suit the way you work. Take a few minutes to try them out.
Further Reading
- OS X El Capitan: Security and Privacy Features Overview
- Intego Software Updated for OS X El Capitan Compatibility
- OS X 10.11 El Capitan: What Mac Users Need to Know

