How to Use Cloudflare’s 1.1.1.1 Public DNS (And Why You Should)
Posted on
by
Kirk McElhearn
Cloudflare, a company that provides content delivery networks, DNS services, and more, has recently announced a new public DNS service, called 1.1.1.1. This service is designed to be both faster than traditional DNS services and more private. Cloudflare claims that they will not store your data, and that their DNS service allows people to avoid censorship that some ISPs may use.
There are a number of things to explain here. First, DNS, or domain name system, is the system that acts like a sort of phone book on the Internet. Instead of having to remember a numerical IP address, such as 96.126.119.191, you can type intego.com to go to the Intego website. There is a huge directory that records the correspondence between these numerical addresses and domain names to facilitate Internet usage, and to make it easy to move a domain from one server to another.
Most people rely on the DNS server provided by their ISP or phone company. By default, your Macs and iOS devices look for this DNS server, which is either specified in your router, or in the server your iPhone connects to, in order to perform this address translation. But you don’t need to use this DNS server; you can use any one you want. In many cases, ISP’s DNS servers may not be the fastest ones, and this can have a big effect on your Internet usage. For example, if a web page is made up of multiple elements, that are not all hosted on the same server, your browser has to request these elements at a number of servers, and each different domain name requires a new request.
In addition, some ISPs may record the metadata of your Internet activity, or the requests you make: the websites you visit, the servers you connect to, and more.
Some big businesses may use dedicated DNS services to ensure the fastest possible access for their clients, but, in general, individuals are stuck with the few public services that are available. One of the best known is, of course, Google (8.8.8.8), which has, well, all the disadvantages of using a Google service.
How to set up 1.1.1.1
It’s easy to set up the 1.1.1.1 DNS server. On a Mac, go to System Preferences, then Network. Click the padlock and enter an administrator’s user name and password. You’ll see a number of network interfaces in the left-hand column. One has a green dot next to it; this is the one your Mac is using. Click it to select it, then click Advanced. Click the DNS tab.
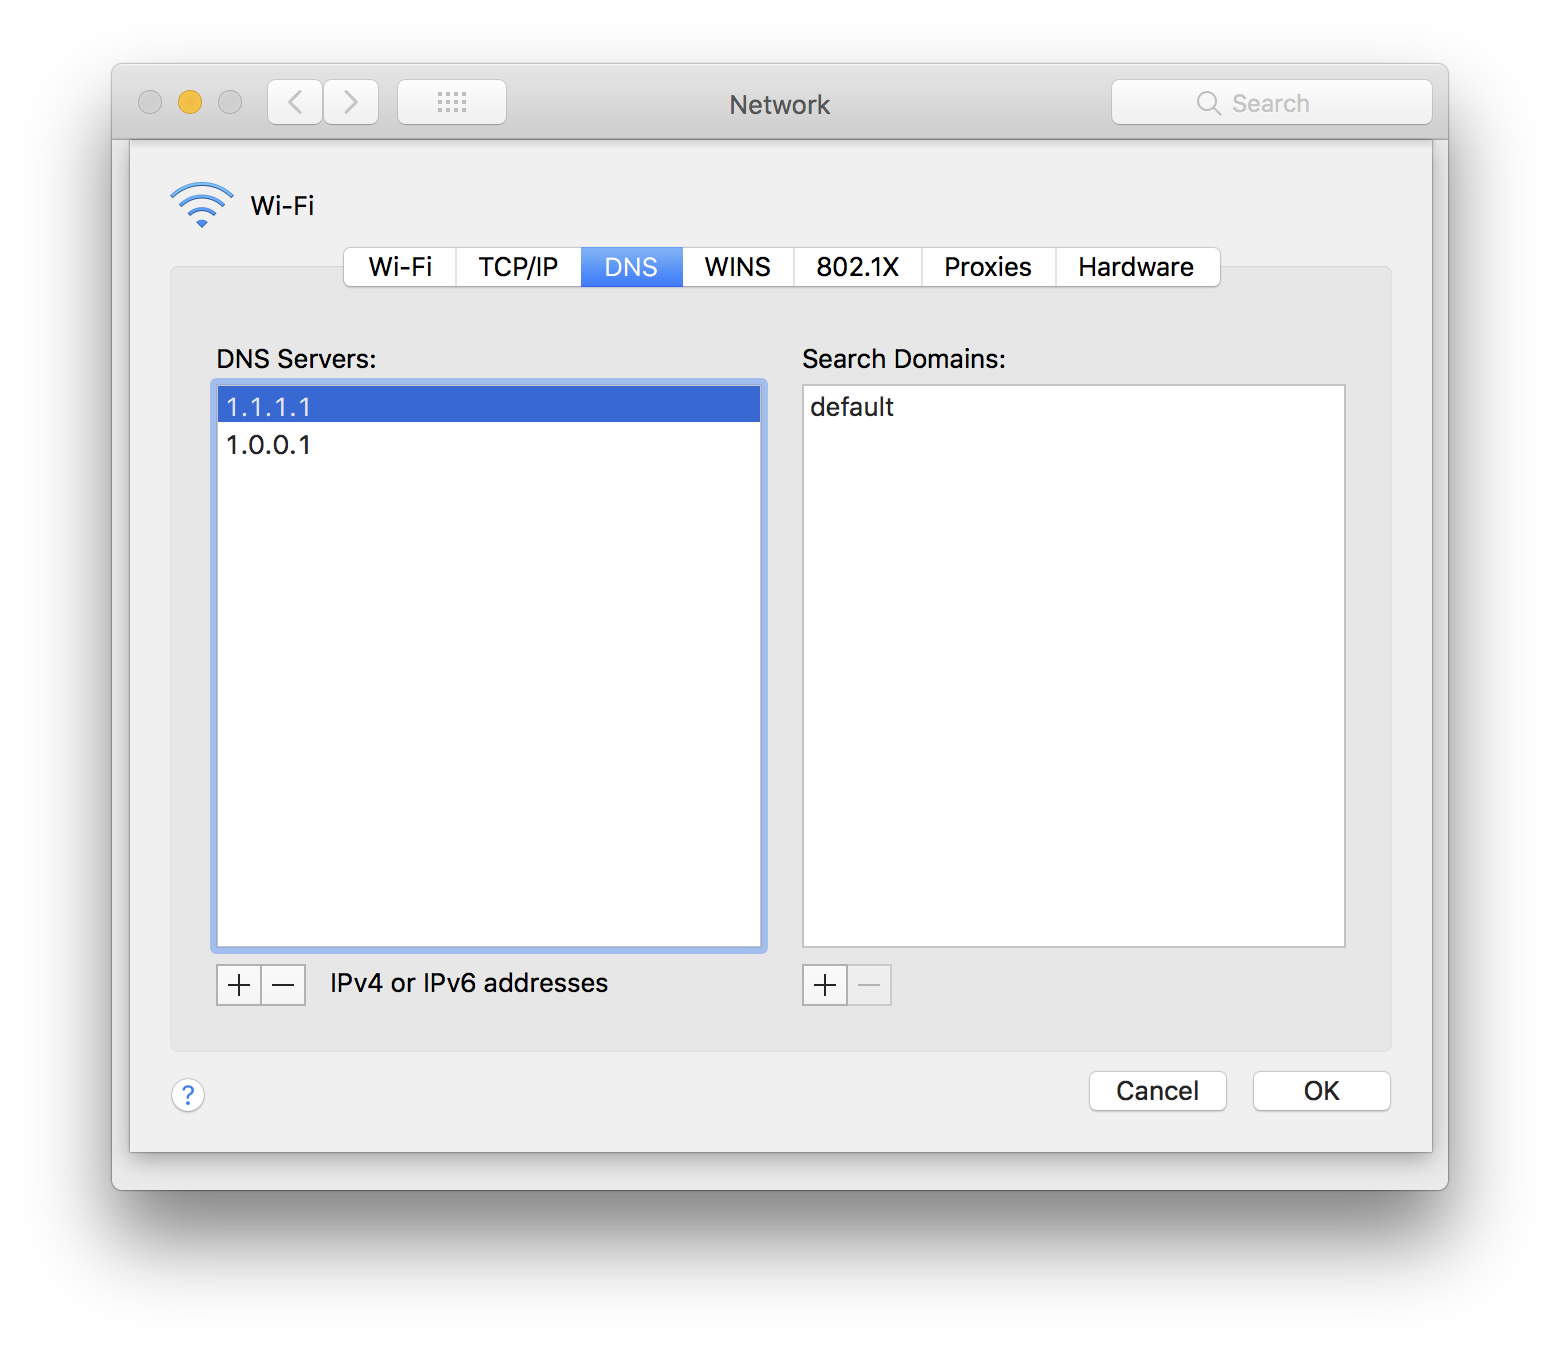
Click +, then type 1.1.1.1. Press return. Click + again, then type 1.0.0.1, which is the backup server, useful in case the main 1.1.1.1 server ever goes down. Click OK to save your changes, then click Apply.
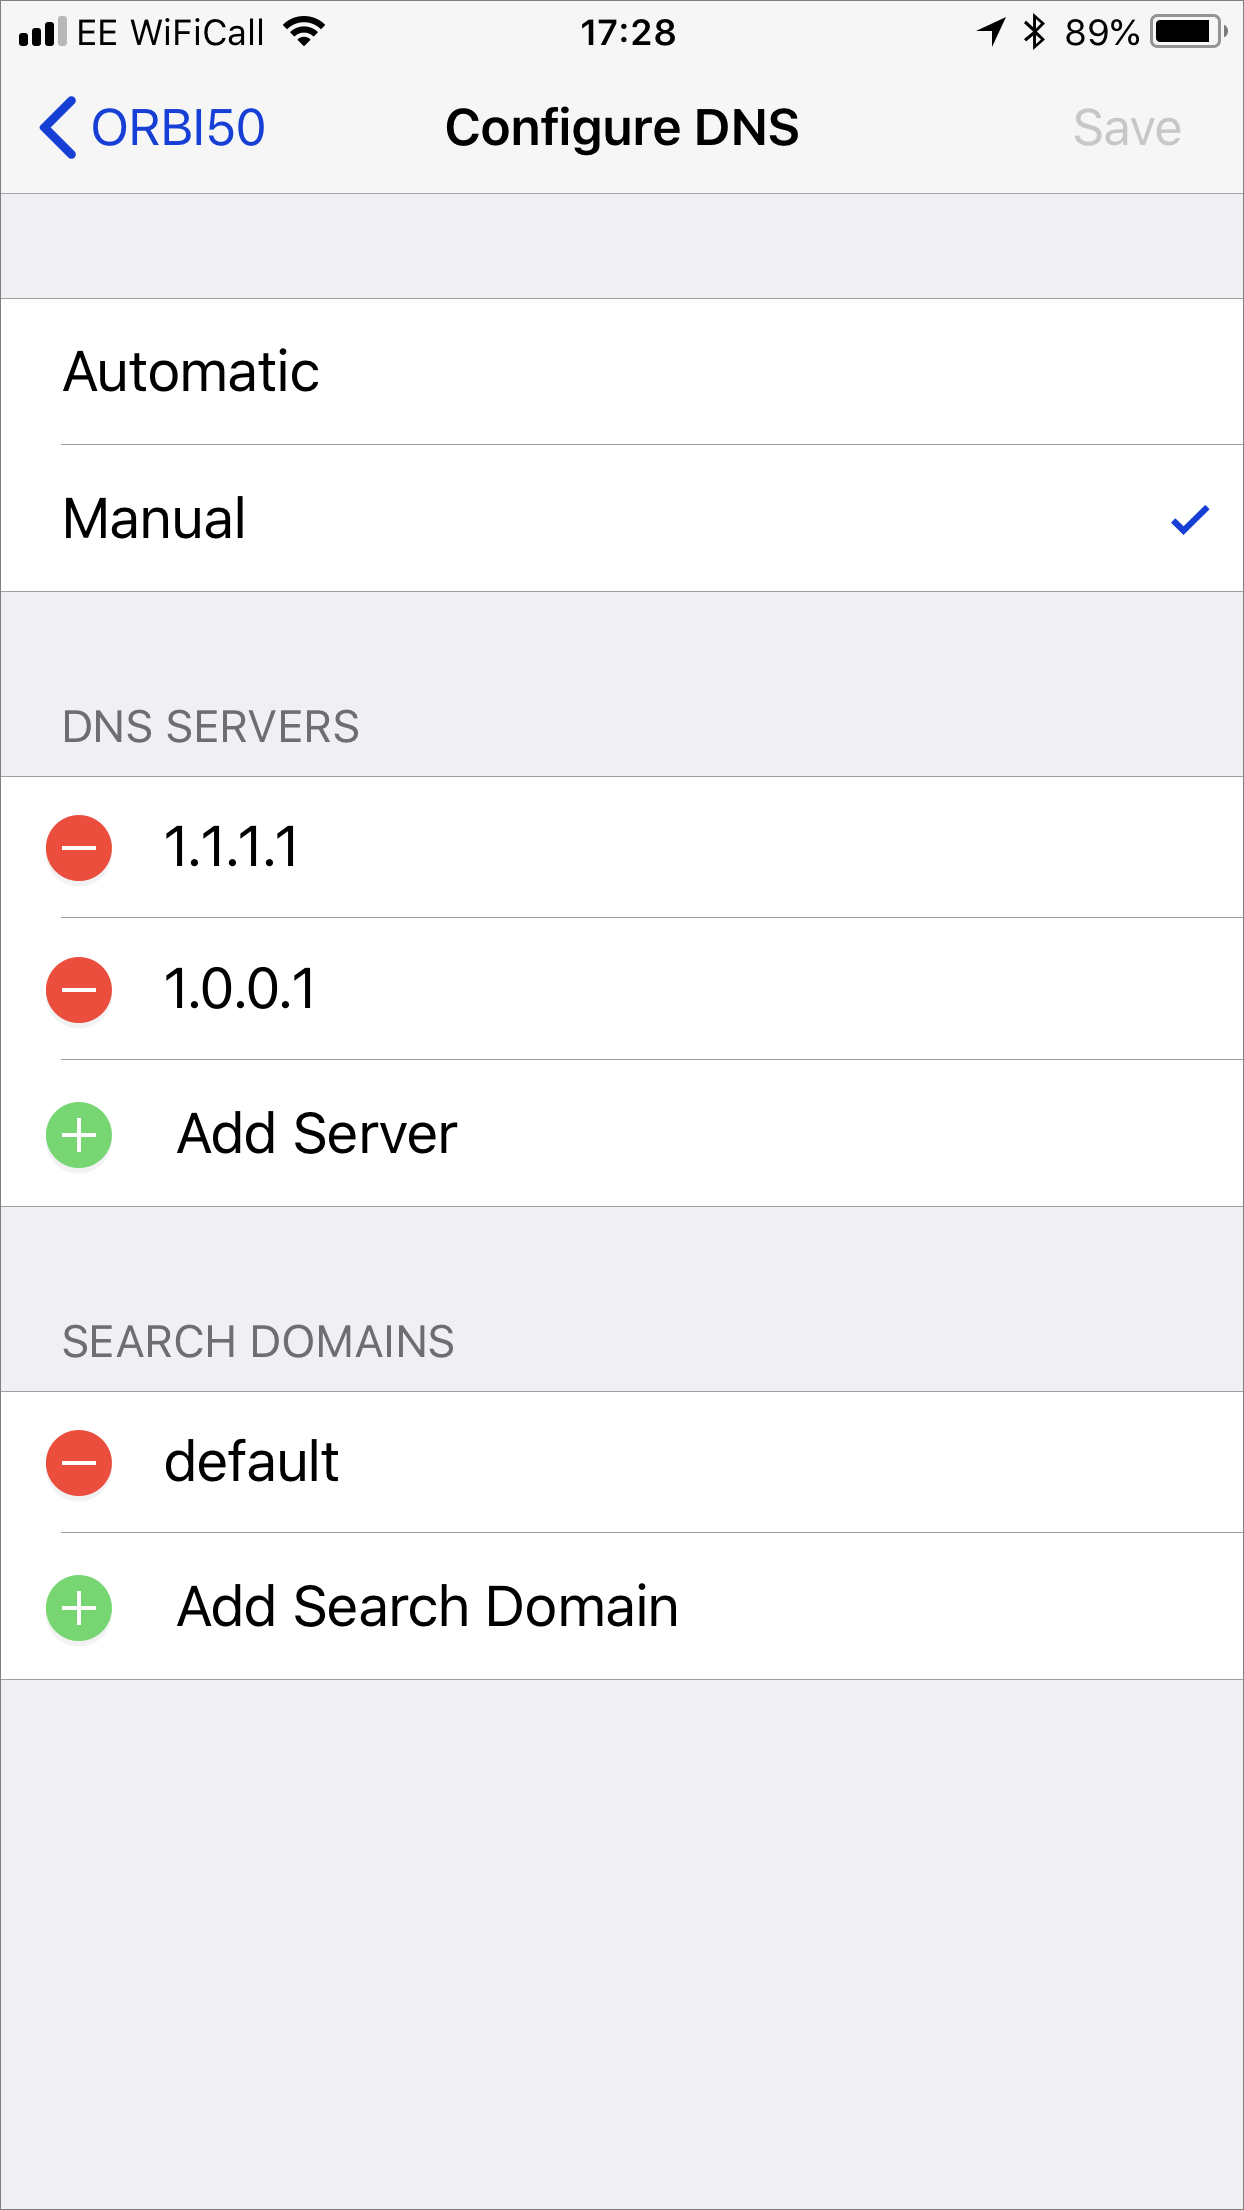
On iOS, go to the Settings app, then tap Wi-Fi. (On iOS, you won’t be able to change the DNS server you use when you have cellular access, only wi-fi.) Tap the i button at the right of the name of the hotspot you’re connected to.
In the DNS section, tap Configure DNS, then tap Manual. Tap + Add Server, then enter 1.1.1.1. Repeat this for 1.0.0.1.
Both your Mac and your iOS device will now be using the 1.1.1.1 DNS server. If you ever have problems, you can go back and remove this. On the Mac, just delete the two entries you added, and the Mac will search for the default DNS server that your router is set up with. If you switch DNS configuration on your iOS device back to Automatic, it will do the same thing.
Note that if you use multiple hotspots, you’ll need to enter this information for each one.

