How to Rip DVDs or Blu-rays and Add Them to Your Apple TV Library
Posted on
by
Kirk McElhearn
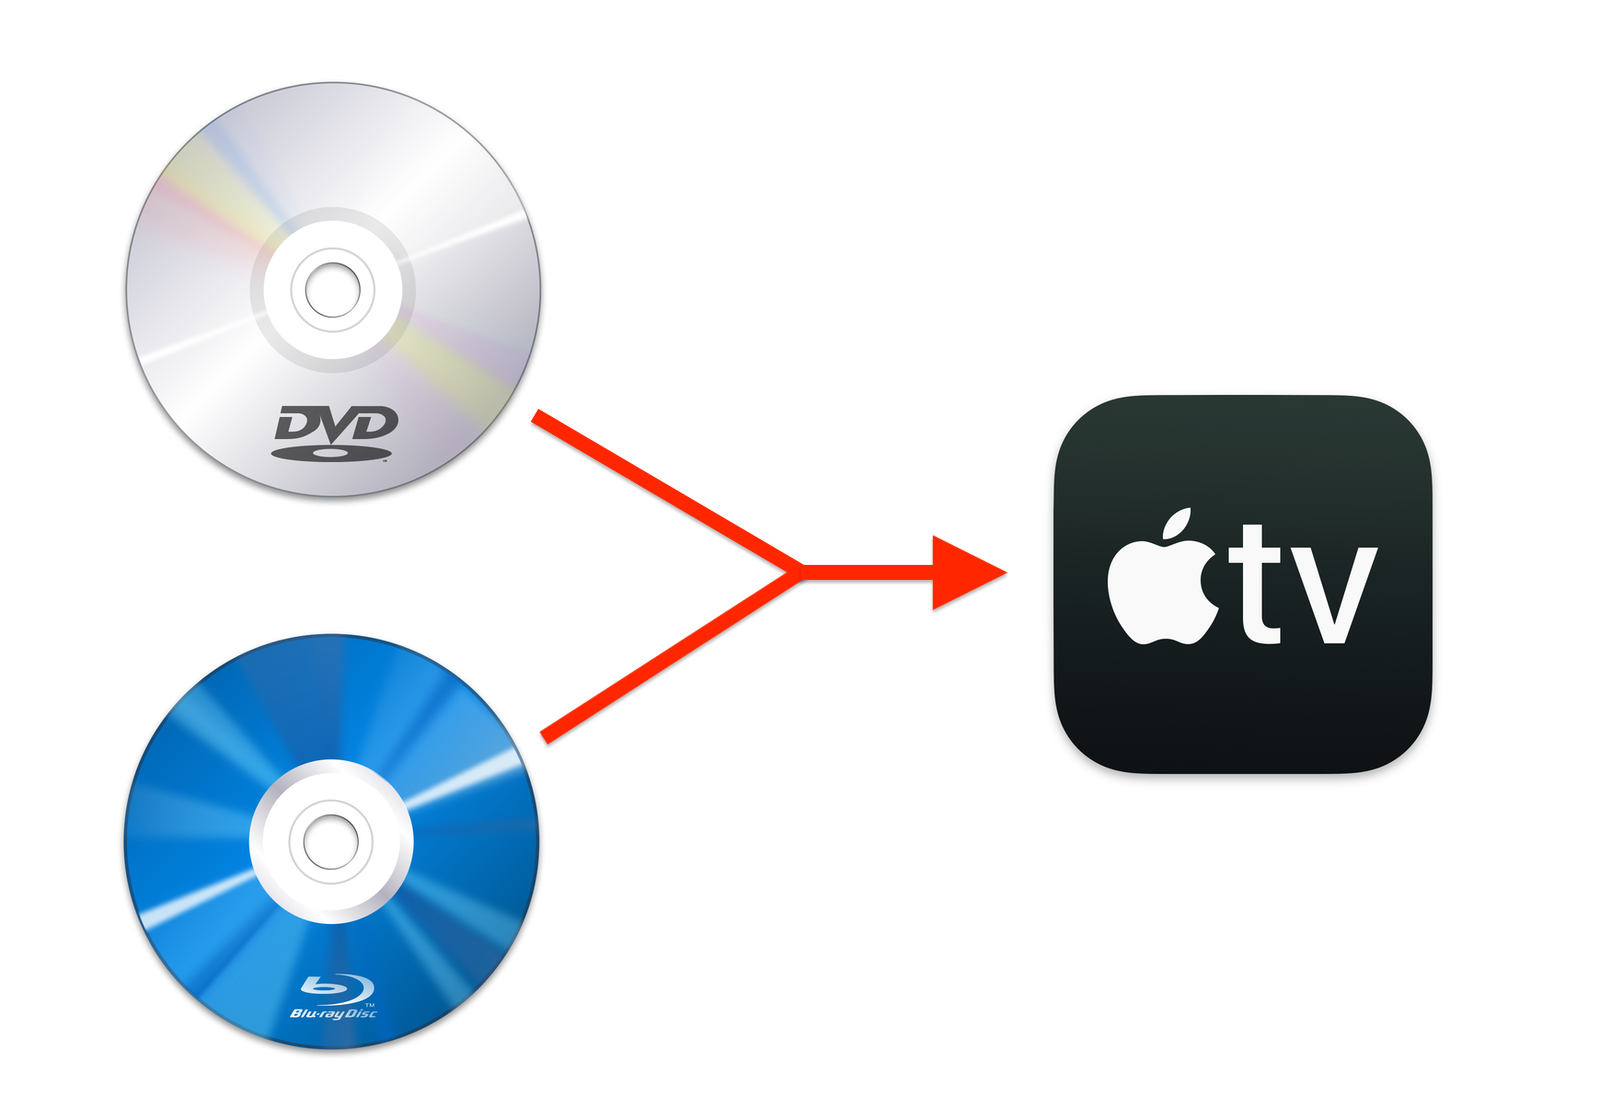
While you probably get a lot of your movies and TV shows digitally, you may still have a collection of DVDs and Blu-ray discs. Many films are not available digitally, and DVDs and Blu-rays often come with special features that you may want to see.
You can certainly watch these discs the usual way, with a DVD player, but wouldn’t it be great to add them to your personal video library, so you can sync them to your iPad or iPhone and watch them anywhere? Ripping DVDs and Blu-rays on a Mac is simple; it takes a bit more time than ripping CDs, but it’s not much more difficult.
You can’t do this with Apple software, of course, since ripping DVDs involve a gray area of copyright law. Fair use suggests that you should be able to rip them for personal use, but in some countries this is patently illegal. I won’t deal with those issues here. If you know it’s legal where you live, or if you believe that you have a right to rip DVDs or Blu-rays that you own for personal use or backup purposes, then read on to find out how.
Getting the software
In the rest of this article, when I discuss ripping DVDs, I mean either DVDs or Blu-ray discs.
When you rip DVDs, you rip the raw video from the disc, then you convert it to the size and format you want to use. A DVD holds about 4 GB or 8 GB (Depending on whether it’s a single-layer disc or a dual-layer disc), and a Blu-ray anywhere from about 25 GB to over 100 GB. While you could use the raw video, ripped from disc, to watch your film, it makes no sense to waste that much space. Also, if you stream the video over your home network, you may not have enough bandwidth.
The apps I use are the following:
- MakeMKV: Available for Mac and Windows, MakeMKV can convert DVD or Blu-ray discs into large MKV video files. MakeMKV can also defeat copy protection, allowing you to rip commercial discs. Supposedly, MakeMKV will eventually cost something once it’s out of beta. However, it has been in a seemingly perpetual beta state for many years, during which you can get a new free license key every month.
- HandBrake: This free app lets you convert a DVD, or MKV file into a much smaller, compressed digital video file, which you can then add to your home video library. It’s immensely powerful, offering all sorts of options for ripping, managing audio tracks, displaying subtitles, and more. You can also use it to convert videos from most formats to Apple-compatible files. Handbrake cannot defeat copy protection, but if you install certain additional software it can. Google is your friend.
- iFlicks: This $35 app takes your ripped videos and finds metadata for them — artwork, the names of actors, descriptions, release dates, and more — adds them to the videos, and then adds them to your TV app library. It can also convert videos from different formats to Apple-compatible formats.
- Plex is a home media server that you can run on any Mac, PC, or NAS. You can add your ripped videos to its library, then stream them to your Apple TV, iPad, iPhone, smart TV, or other device. There is a Plex app available for pretty much every device out there. One advantage of Plex is that it lets you organize your library in a more granular way than the TV app. If you use Plex, you won’t need iFlicks, since Plex can find metadata for your videos.
Getting the hardware
Macs don’t come with optical drives any more, so you’ll need to buy one, if you don’t already own one (unless your Mac is old enough to still have a drive). Just about any USB DVD or Blu-ray drive will work; you don’t need anything special. I use Pioneer’s BDR-XD05 6x Slim Portable USB 3.0 BD/DVD/CD Burner. I’ve had this since 2015, and it’s always worked fine. It’s self-powered, and compact, so it doesn’t get in the way.
My DVD ripping workflow
Step 1: First, I rip my DVDs with MakeMKV. The first time you launch MakeMKV, you’ll have to jump through some hoops, since it’s not code-signed. If you’re running a recent version of macOS, your Mac will tell you that it can’t open the app because the developer cannot be verified. Click Cancel, then go to your Applications folder, find MakeMKV, and right click on the app. Choose Open and it will launch. See this Apple support document for more.
At some point, MakeMVK will ask if you want to purchase the app, start a trial, or register. Click Register and enter the license code that you’ll find on this page of the MakeMKV website. The page says that “all features of MakeMKV are free while program is in beta,” and the post is dated 2010, so it’s likely that the app will never be out of beta.
MakeMKV reads your disc and displays something like this:
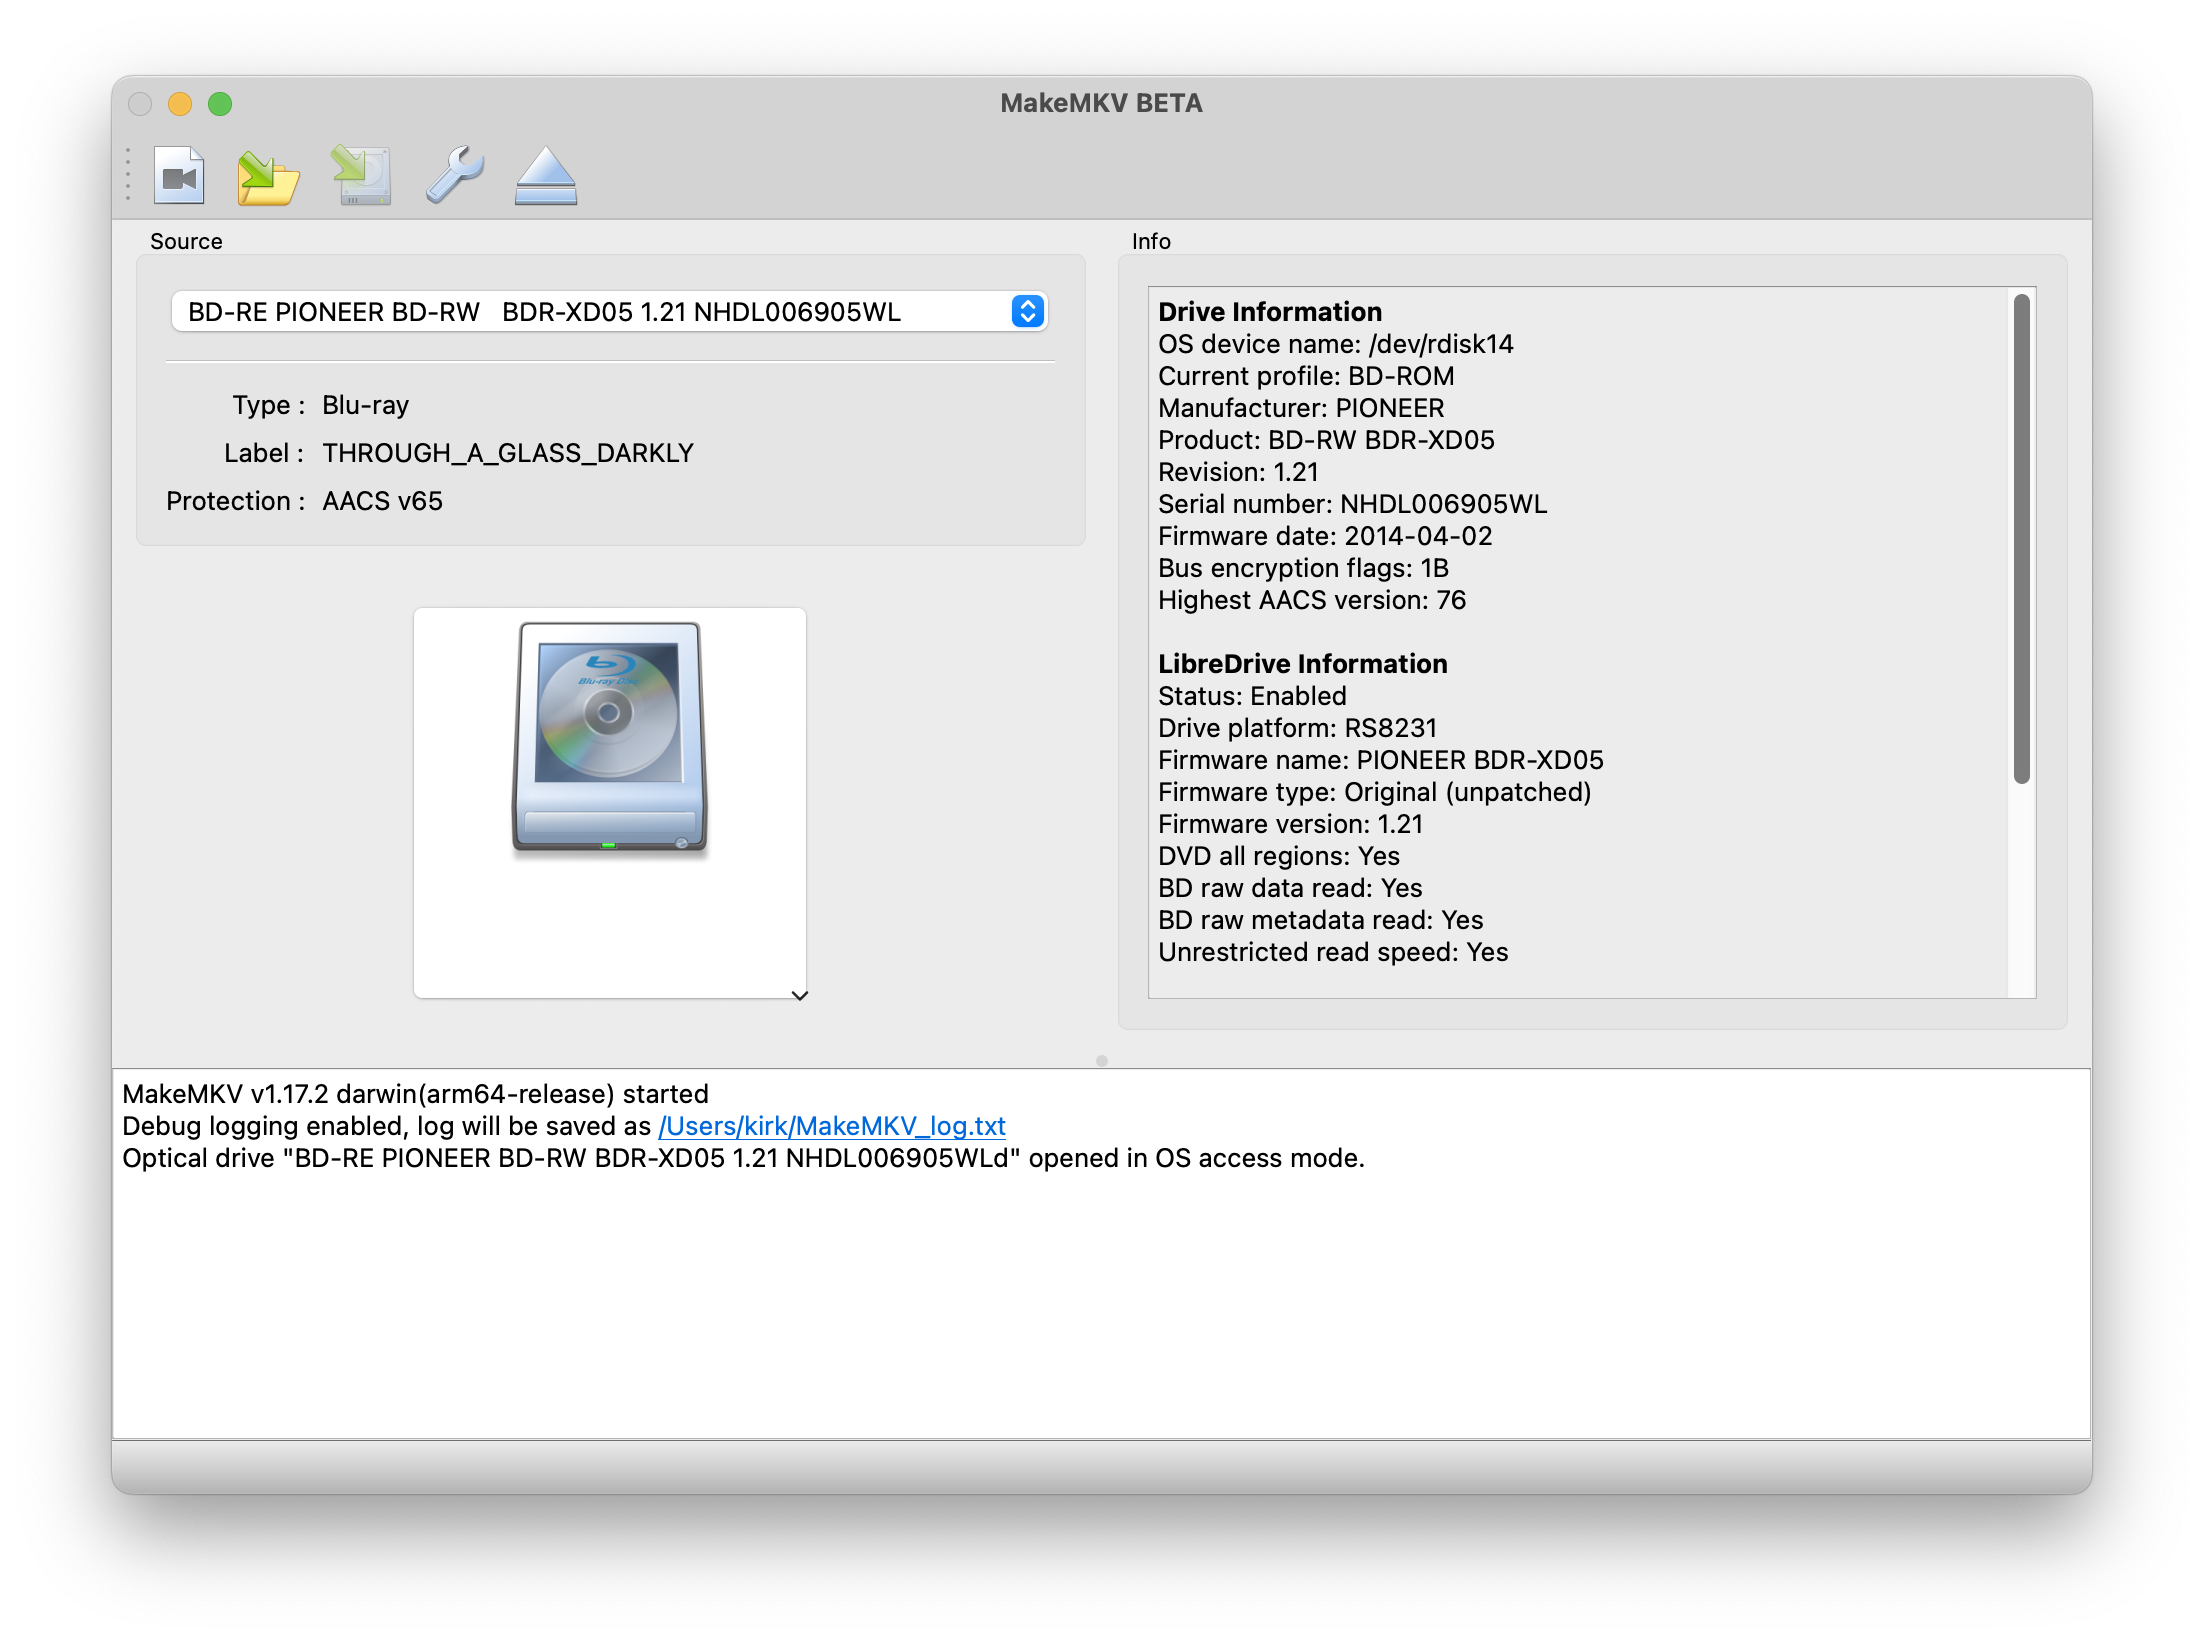
Click the Blu-ray (or DVD) disc graphic in the left-center of the window, and MakeMKV reads the disc, then shows its contents:
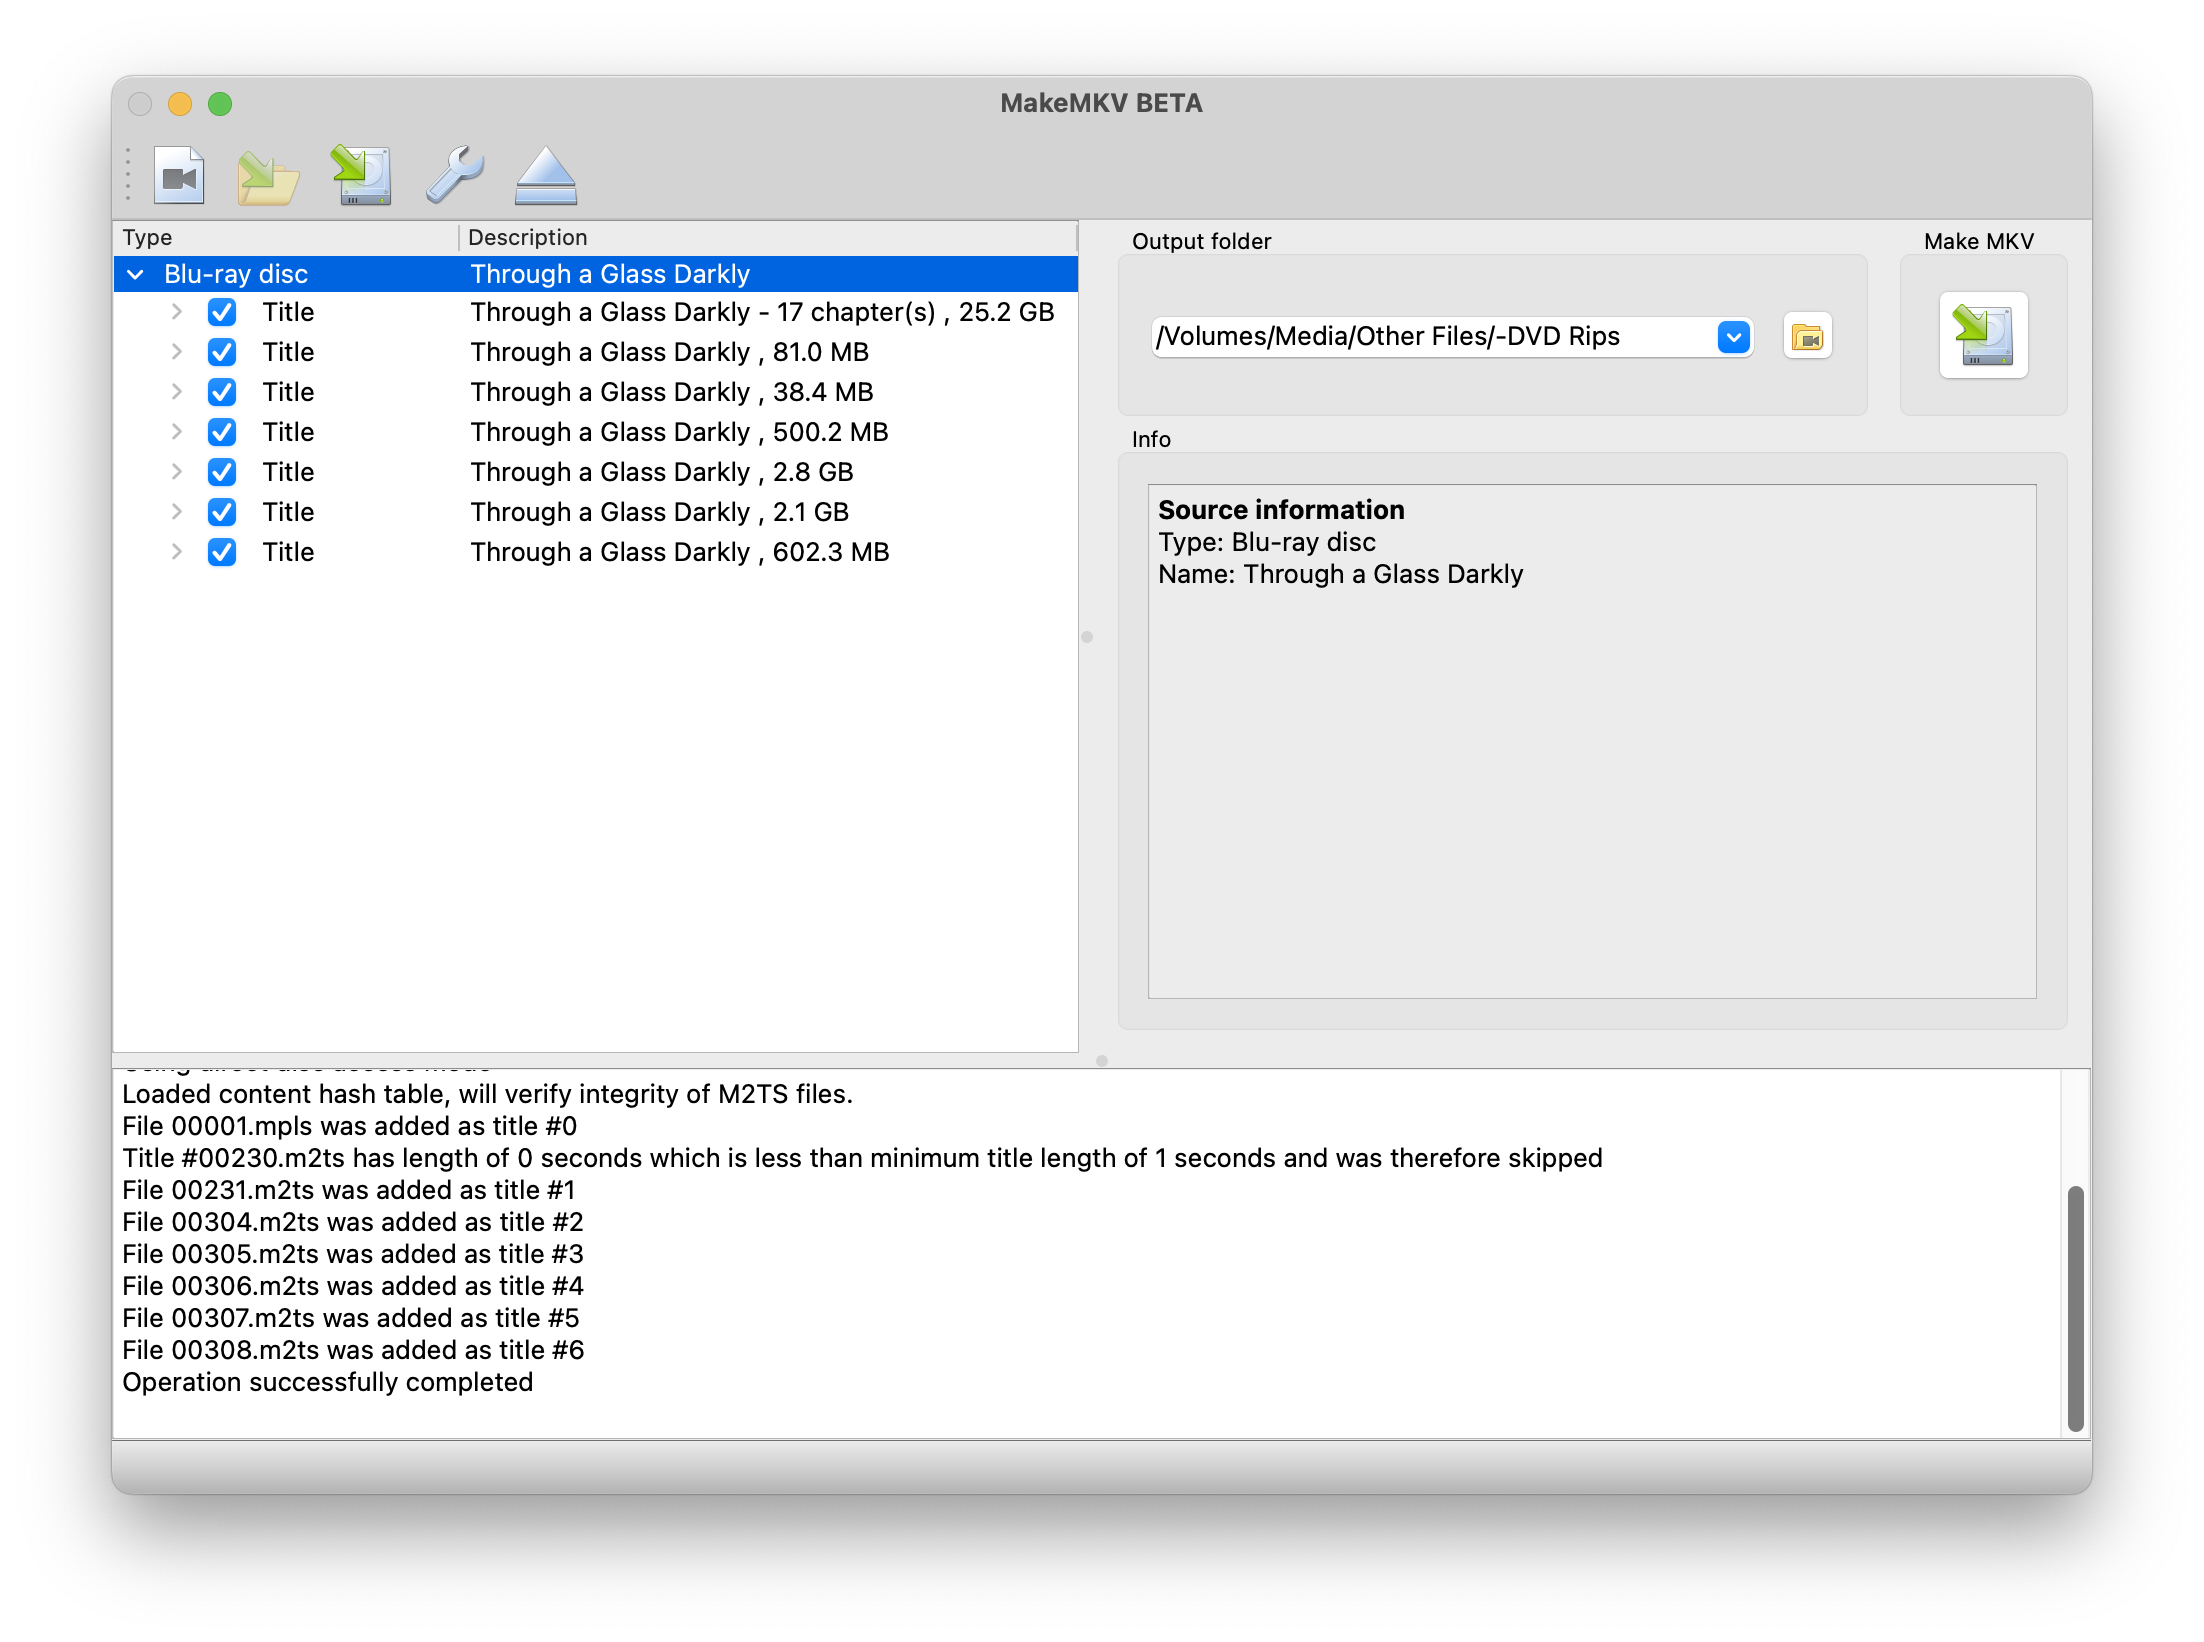
As you can see above, the raw data for this film — Ingmar Bergman’s Through a Glass Darkly — is about 25 GB. The other elements listed are things like title sequences and special features. It’s easiest to just rip everything, but if you want to exclude some items, uncheck them. If you click the disclosure triangle next to any of the titles, you’ll be able to choose to exclude any audio tracks or subtitles you don’t want, but this isn’t essential; when you convert the MKV files in Handbrake, you can pick what you want to retain.
Choose an output folder, then click the small hard drive icon at the top left of the window (or the same button under the “Make MKV” label near the top-right corner of the window). MakeMKV starts ripping your disc.
The speed of the rip depends on your drive, the length of the video, and a number of other factors. In this case, the speed of the rip in the screenshot below shows 2.9x, but it got faster as it progressed. This is always the case when ripping discs: since their RPM (rotations per minute) is fixed, and they start at the inside of the disc, they rip faster as they get toward the outside, because there’s more data in each rotation of the disc. By the end of the rip, the drive was at its maximum of 6x. This 90-minute movie took just over 20 minutes to rip. Go make a cup of tea while you wait.
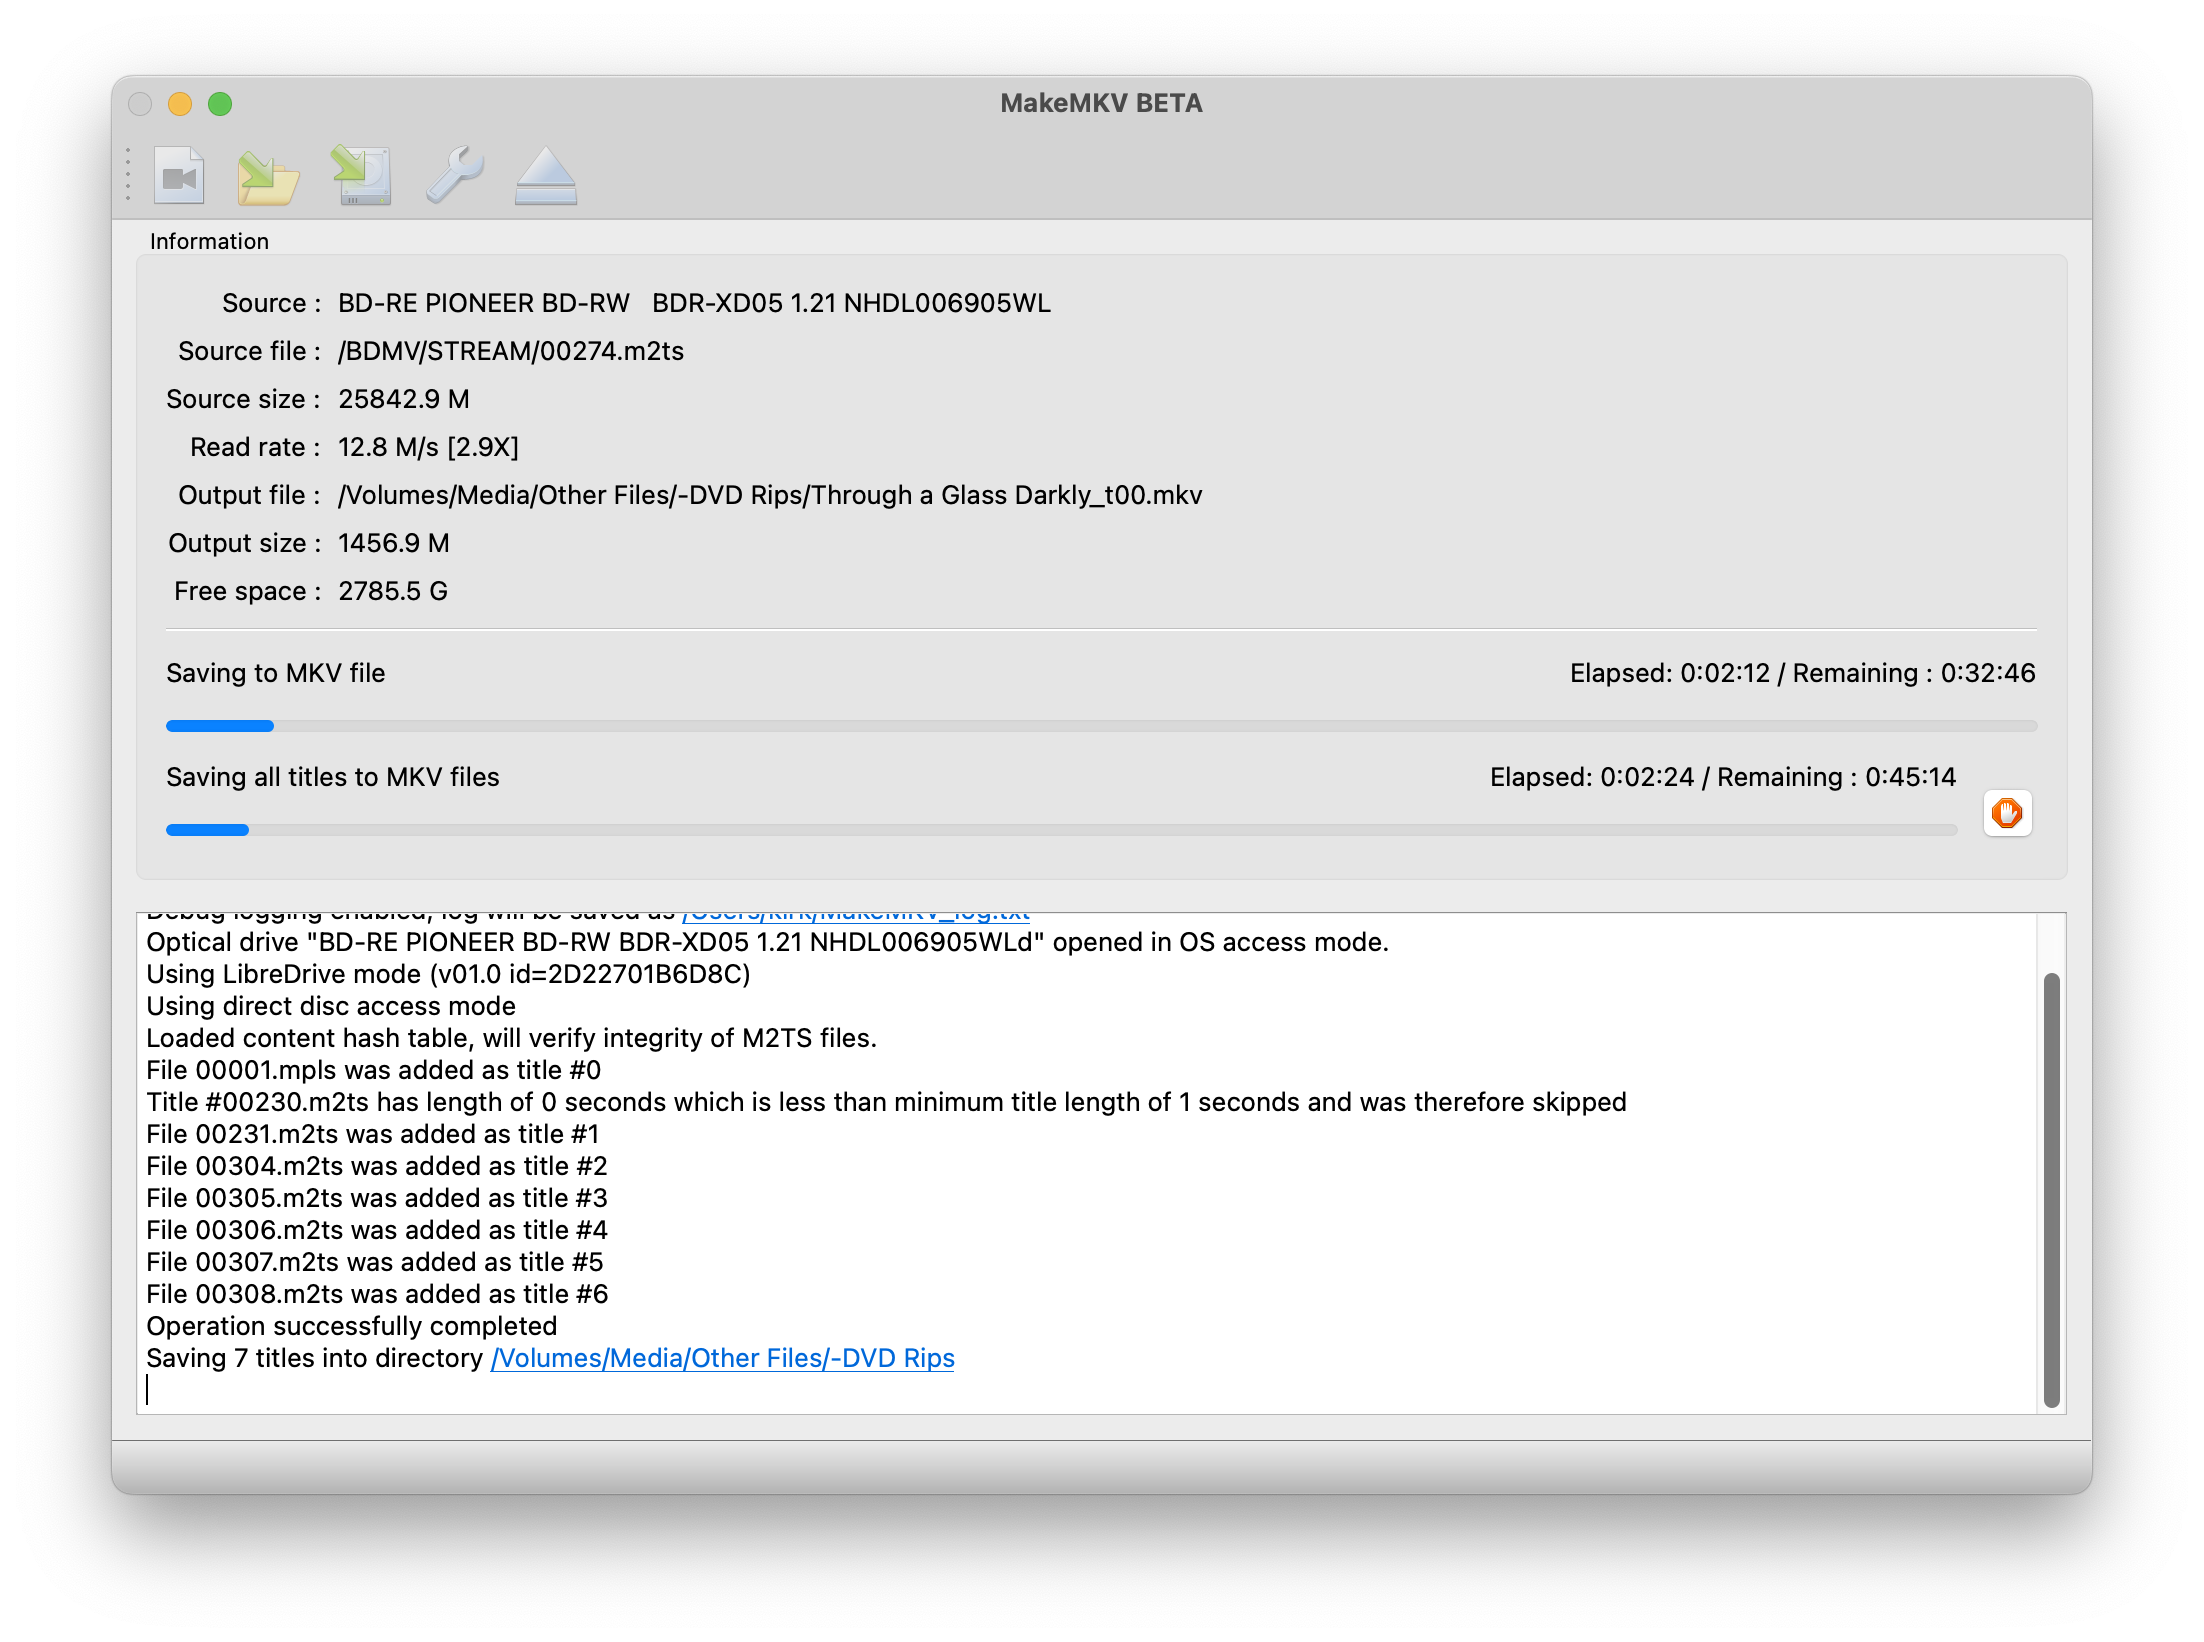
When MakeMKV has finished, go to the location where the file was saved.
Note: MKV is “a container format that can hold an unlimited number of video, audio, picture, or subtitle tracks in one file” (Wikipedia). It’s an open standard that is very useful, since it holds these various elements individually, allowing you to choose what to display or hear, and this also makes it easy to choose what to include when you convert the files in Handbrake.
Step 2: Launch Handbrake. Select your MKV file and choose your options. There are lots of these, and you don’t need to know them all, but if you’re curious, check out Handbrake’s extensive help file.
If you click Presets, you’ll see a number of preset options. Choose according to the resolution of your disc: there’s no point choosing 1080p if your disc is a DVD. The profiles in the General section all make MP4 files, which are compatible with Apple software and hardware. So if you want to add these videos to your TV app library, choose one of these. Otherwise, you may want to choose an MKV format, if you’re using something like Plex.
Unless you’re in a hurry, don’t choose the fastest rips; the HQ presets are best. I sometimes tweak the audio and the subtitles when ripping a movie in a language I don’t understand. When you’ve adjusted everything, click Start, or if you want to rip multiple files at the same time – such as if you want to run Handbrake overnight – click Add to Queue.

Step 3: If you want to rip multiple episodes of a TV show, or a movie and bonus features, click the Title menu and select other titles. Each time you’ve selected one, click Add to Queue. Each title is ripped as a separate file.
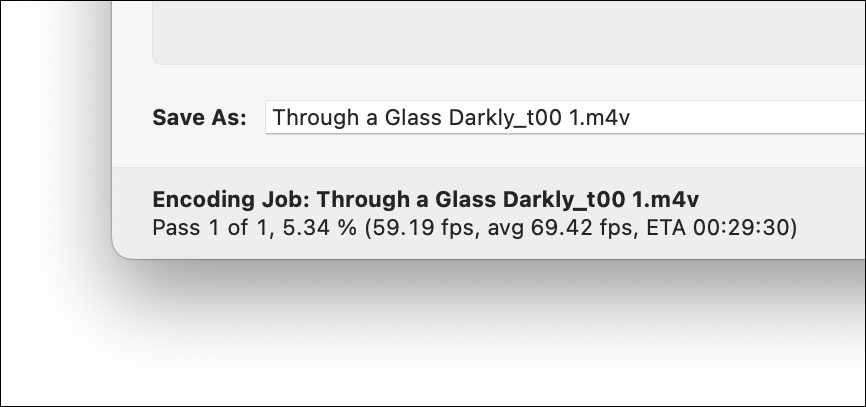
Step 4: Click Start.. You should notice that your Mac starts working very hard; the fan may quickly go to its maximum speed, as Handbrake uses all your CPU cores. Depending on your Mac’s processor, it may take quite a while to convert a DVD.
For this article, I’ve ripped a Blu-ray disc of Ingmar Bergman’s Through a Glass Darkly, which is 90 minutes long. It took about 35 minutes to convert the film on a M1 iMac, but with a slower Mac, it could take a lot longer. The time also depends on whether you rip a DVD or a Blu-ray; the latter contains much more data. Handbrake shows its progress at the bottom of its window
Step 5: When Handbrake finishes ripping, you’ll have an .m4v or an .mp4 file. You can either add this directly to your TV app library (see step 6) or use iFlicks to search for metadata, and then add it to your library.
If you have iFlicks, drag the file to iFlicks’s window. iFlicks starts searching for metadata and artwork for your movies. When iFlicks has found metadata, the window will look like this:
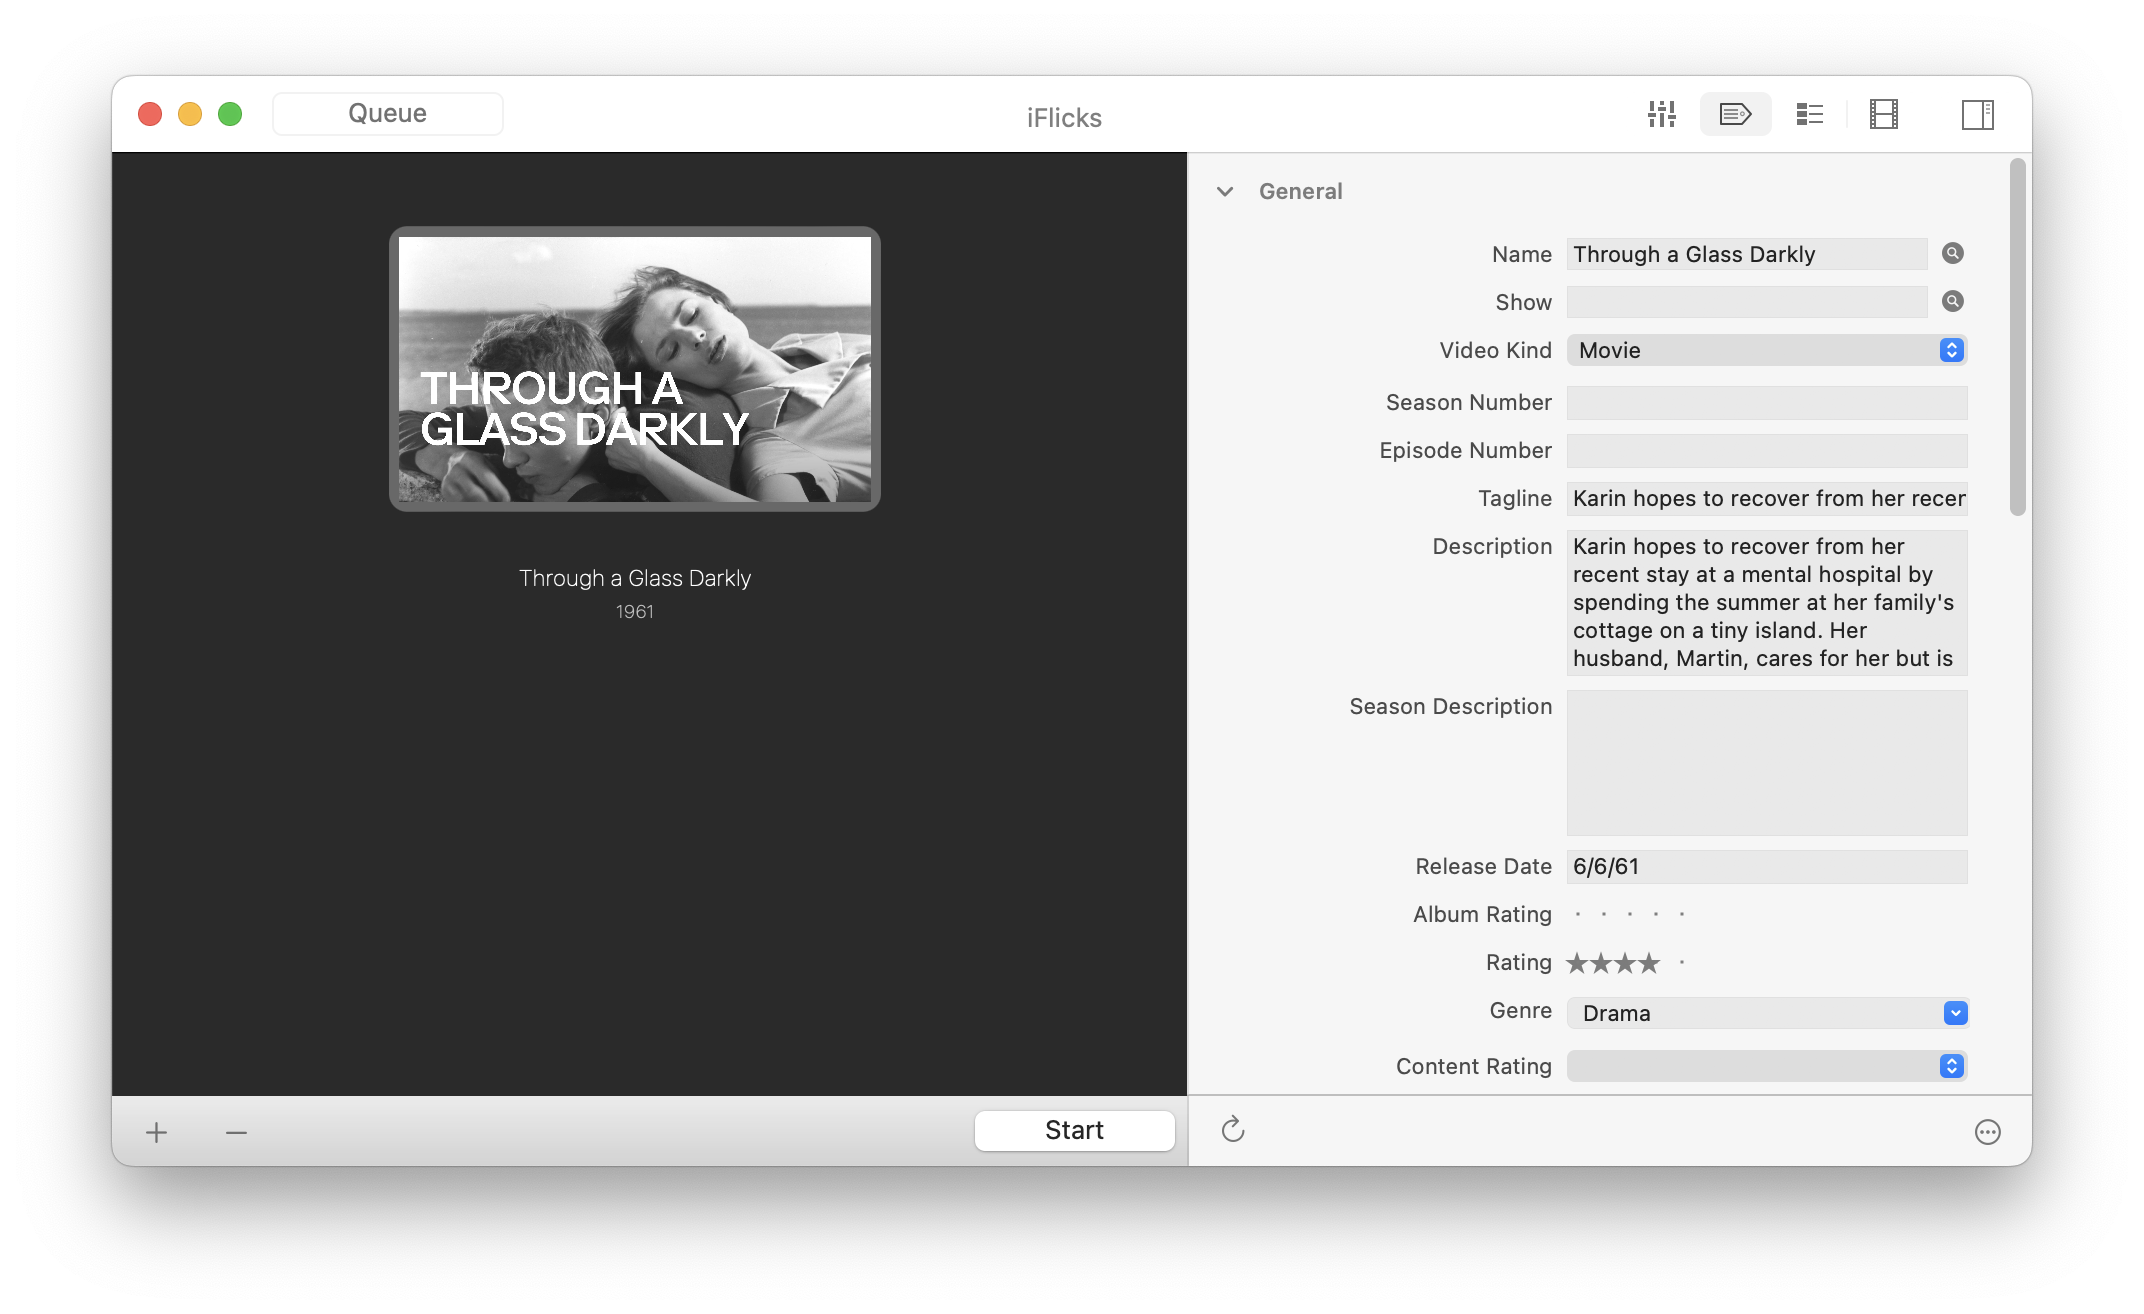
Step 6: Click Start to have iFlicks process the file. It adds the metadata, and then, if you choose, it adds the file to the TV app’s library; this takes a couple of minutes. If you have added files in other formats to iFlicks, the app converts them to .m4v files, adds metadata, and then adds them to the TV app, if you choose.

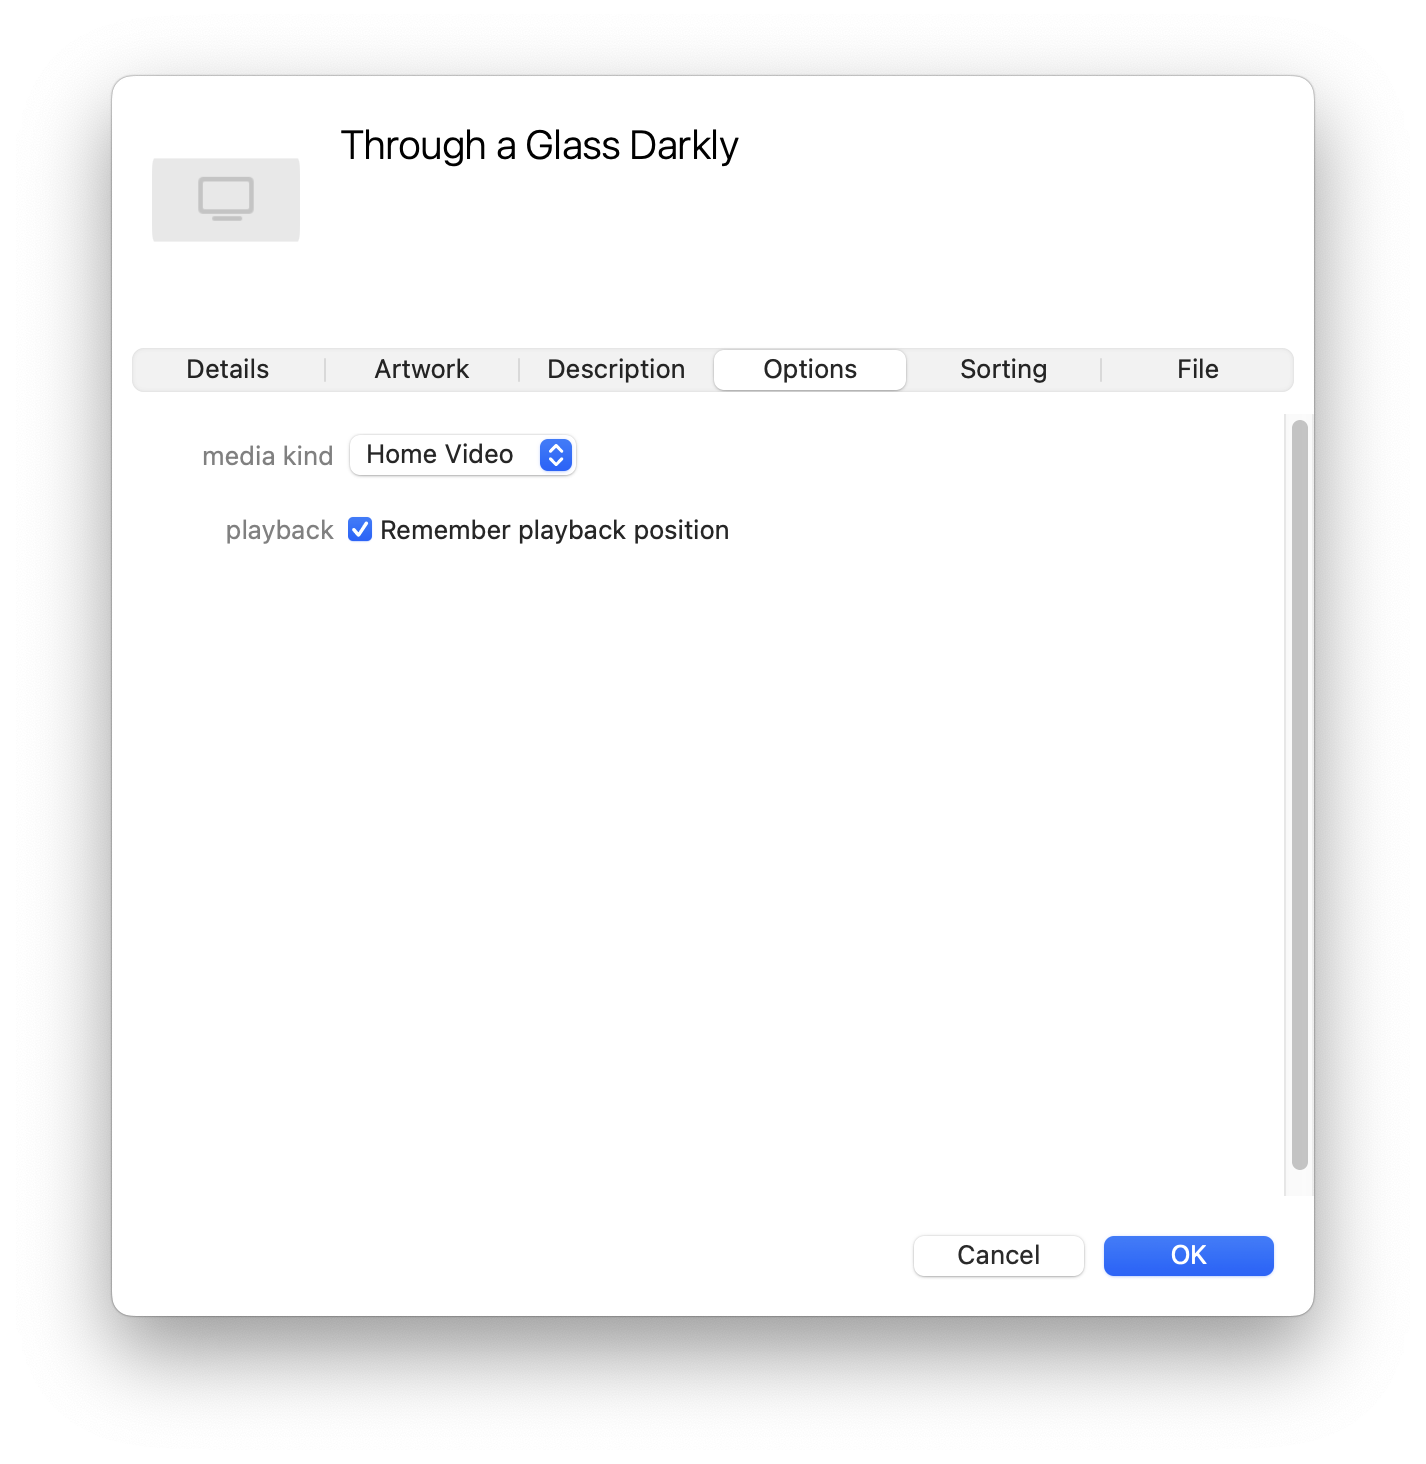
Step 7: If you don’t use iFlicks, add the file to your TV app library manually. To do this, launch the TV app, click the Library tab, then drag the file. Select the file in the TV app, press Command-I, and click the Options tab. By default, the TV app adds all videos as Home Videos. Change it here to either Movies, Music Videos, or TV Shows, according to the type of video it is. Your choice determines whether the file is stored in your Movies, Music, or TV Shows library.
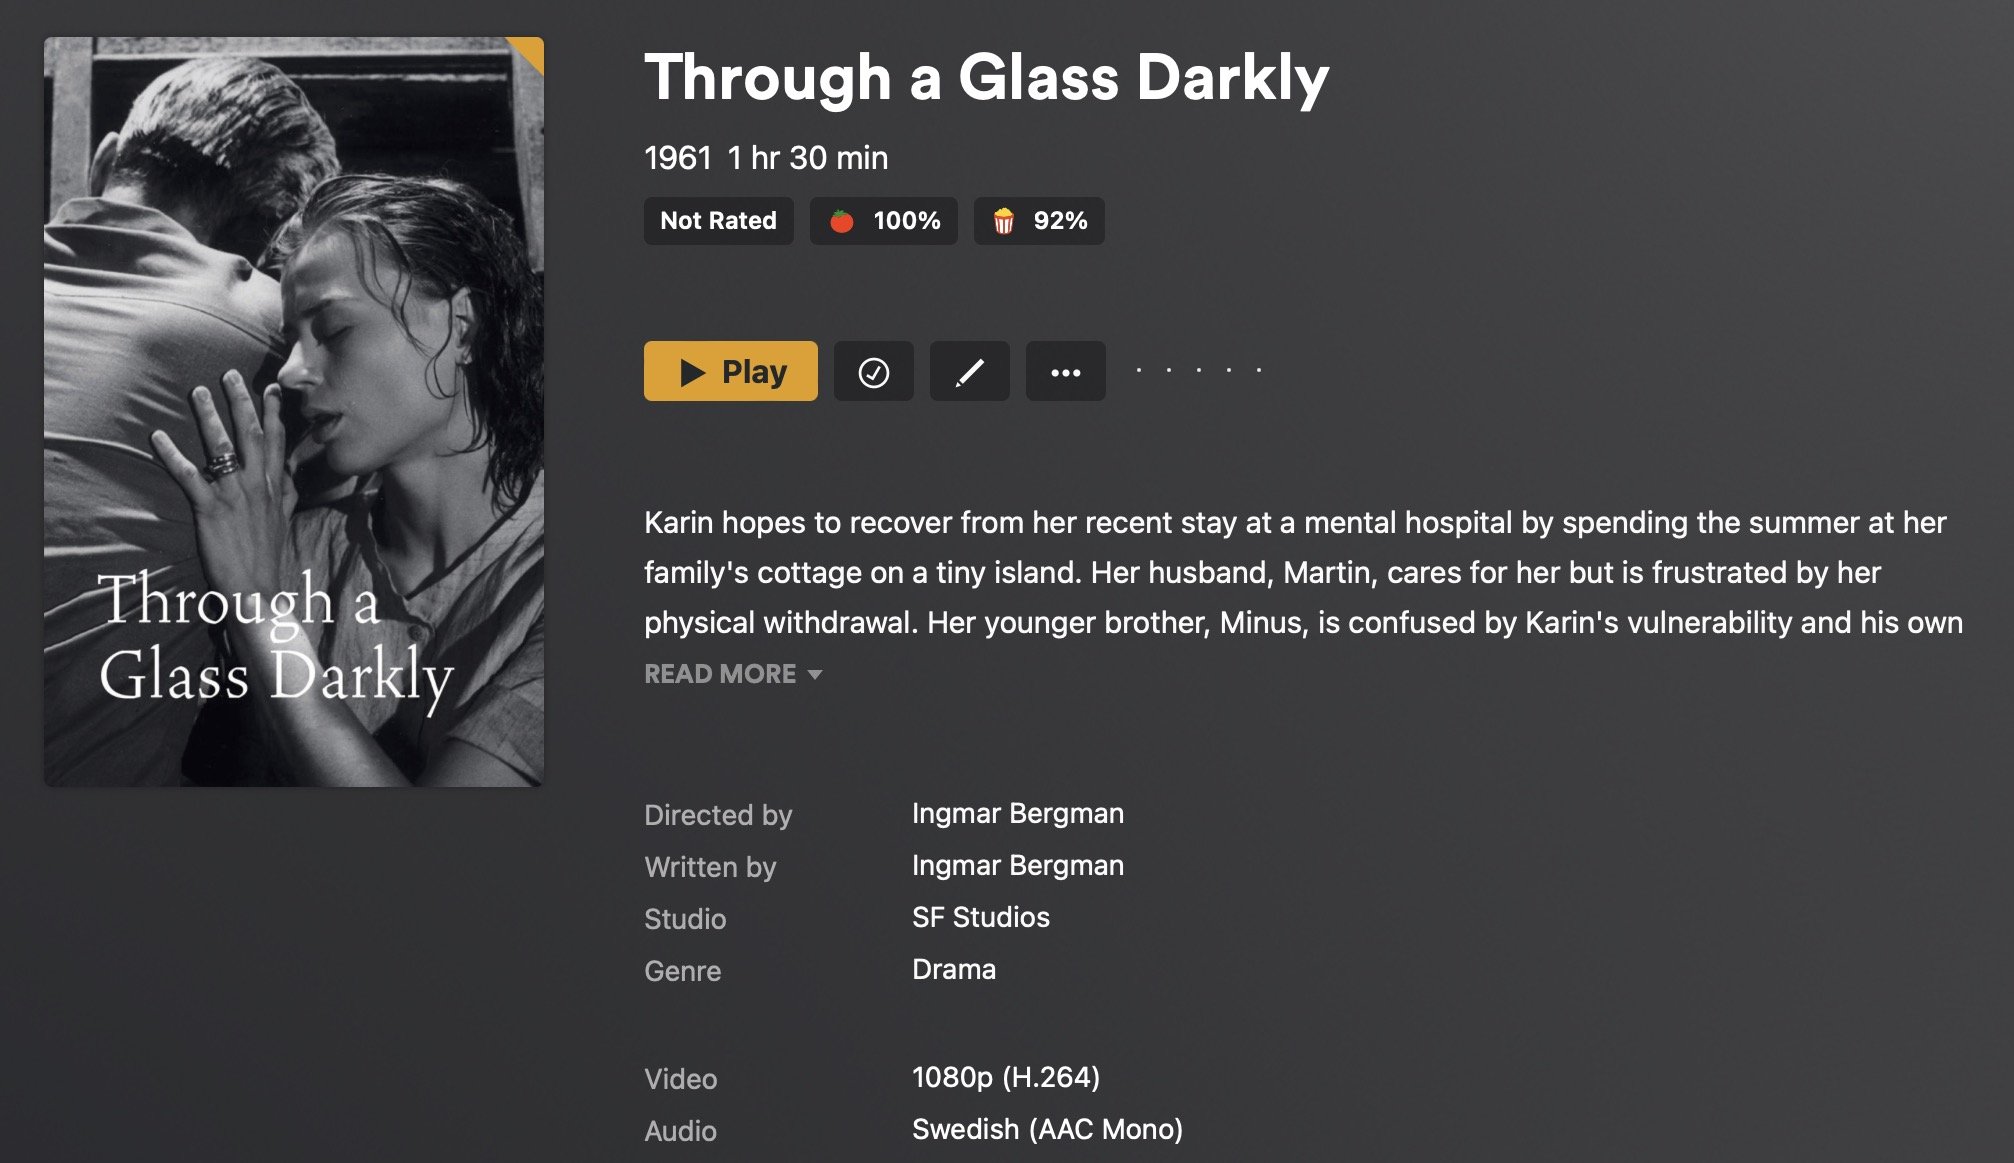
As you can see above, there is no metadata when you add files like this to your TV library, other than the title, which is the file name. Click the Details tab and add what metadata you want: actors, director, date, and, perhaps, find some cover artwork by searching Google. As you can see, if you rip a lot of movies, there’s a fair amount of work afterwards.
If you use Plex, and you add the file to your Plex library, that app searches for metadata, and you can edit that metadata in the Plex interface.
Alternate ripping method
While ripping Blu-rays or DVDs generally doesn’t take too long, converting them does; it may take as long as the video’s duration, or even longer, depending on your Mac’s CPU. If you want to speed up the process, there’s a way to do this.
Handbrake is based on ffmpeg, which is a command line tool that you can install on your Mac. You can convert MKV files using ffmpeg, by running a Terminal command, if you install the software on your Mac. I won’t go into detail about this here, but this article by Rob Griffiths explains the process, and shows the difference in time it takes to convert an MKV file with Handbrake or from the command line. You also have a lot of options – such as you see in Handbrake – and once you’ve decided how you want to convert videos, save the command and run it in Terminal.
For example, when ripping a set of films by Ingmar Bergman, I used the following command:
other-transcode --burn-subtitle 1 --crop auto
This burns in the subtitles, and crops the video automatically, so there’s no letterboxing.
Bottom line
Ripping DVDs or Blu-ray discs can be time-consuming, but with the workflow I suggest, you can rip your discs before actually converting them, making the process a lot easier. It’s a great way to digitize your Blu-ray and DVD collection, so you can have access to your files more easily. And, of course, it even allows you to free up some of the space in your living room.
How can I learn more?
 Each week on the Intego Mac Podcast, Intego’s Mac security experts discuss the latest Apple news, security and privacy stories, and offer practical advice on getting the most out of your Apple devices. Be sure to follow the podcast to make sure you don’t miss any episodes.
You can also subscribe to our e-mail newsletter and keep an eye here on The Mac Security Blog for the latest Apple security and privacy news. And don’t forget to follow Intego on your favorite social media channels: ![]()
![]()
![]()
![]()
![]()
![]()
![]()

