Understanding RAID for Data Storage and Backups
Posted on
by
Kirk McElhearn
Following my article about 4 Types of Backup Hard Drives for Mac, several readers asked about RAID storage. This is a type of storage that offers a number of advantages, including faster speed, better data security, or a combination of both. But you may be wondering a few things, such as what the heck is RAID? Is it a backup in and of itself? And should you use RAID for data storage and backups? These are all good questions that I’ll clear up, making the complex easier to understand, so you can decide if RAID is right for you.
This article covers how RAID storage works, and also I’ll discuss whether you should use RAID devices for your data and for your backups.
What is RAID?
RAID stands for “redundant array of independent disks,” which is a way of storing data on multiple drives. There are a number of RAID levels, each of which offers different advantages. However, there are also some disadvantages to RAID, so it’s important to understand what happens when you copy data to a RAID array.
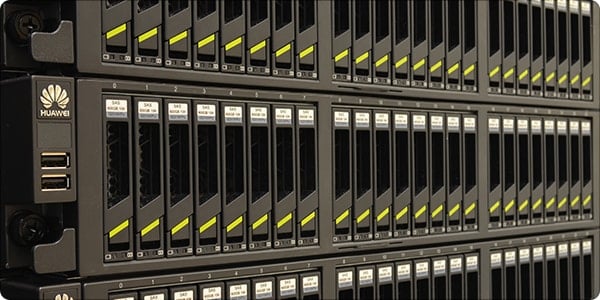
RAID devices are plentiful. You can get large devices that hold five drives, from Drobo and LaCie, which are often Mac-ready out of the box, as well as smaller two-drive devices (for RAID levels 0 and 1; see below) from a variety of vendors. Network-attached storage (NAS) devices can also be RAID arrays, and large data systems, such as object storage, use a similar though more sophisticated technology.
When setting up a RAID array, you choose which RAID level you want to use; this is akin to formatting a drive. With some devices, and with some RAID levels, you may be able to change this later, but it could take a long time to do so, because you’d have to copy all your data to another drive first.
There are many RAID levels, but the main ones to consider are the following:
- RAID 0: This uses a pair of disks set up with “striping,” where data is written to two disks alternately. As a gross simplification, think that the odd numbered blocks of data are written to the first disk and the even numbered blocks to the second disk. Since both disks are spinning simultaneously, the data can be written much faster than to a single disk. You would choose this RAID level if you need speed, but RAID 0 offers no extra data protection.
- RAID 1: This uses “data mirroring,” where all the data written to the array is written to two disks simultaneously. This provides drive redundancy, ensuring that if one disk fails, your second disk is available. You’ll be able to read and write to the second disk, and replace the failed disk to maintain data security. While this should not be considered a backup, because if you accidentally delete a file from one drive the array deletes it from the other, it is a good way to ensure that you always have a second copy of your data ready to use. With two 4 TB drives, RAID 1 gives you 4 TB storage.
- RAID 5: This setup requires at least three drives, and uses block-level striping (as in RAID 0) and distributed parity. This means that the data is written in such a way so if one drive is damaged or fails, you can still recover all your data. But you don’t get all the capacity of the drives, because of this protection. For example, if you have three 4 TB drives in a unit, you’ll get 8 TB capacity with RAID 5. With five such drives, you’ll get 16 TB. Most RAID units allow you to hot-swap a drive – change it without restarting the unit – and it automatically “rebuilds” when you do so, ensuring that the new drive takes its place in the array.
- RAID 6: This is similar to RAID 5, but with extra parity, or data protection. You need at least four drives, and you only get 60% of their capacity as usable storage space (five 4 TB drives gives you 12 TB of usable storage), but two drives can fail without your losing data. Since there is the risk with RAID 5 that one drive will fail during the restoration procedure, the extra drive redundancy you get from RAID 6 makes your data much more secure.
- RAID 10: This level offers even more data protection, but at the expense of storage. As an example, five 4 TB drives give you 8 TB storage.
Many RAID arrays let you use drives of different sizes with RAID 5 or 6. So if you have a combination of drives from, say, 2 to 8 TB, you’ll be able to use them, though the percentage of their space available will be similar to what I explain above. To understand this, you can check out Synology’s capacity calculator. Choose a RAID level, and drag and drop drive sizes to see how much storage space you get.
RAID devices have software to manage their read and write operations, but it’s important to note that you’ll also need a driver, or software installed on your Mac, so you can read their data. You cannot simply connect a RAID array to a computer and read its data, and you can’t pull out a drive from a RAID array and read its data either.
You can also use software RAID, where an operating system or additional application offers support for this technology. macOS supports RAID 0 and 1 (you can set this up from Disk Utility), and different versions of Linux and Unix offer more RAID levels. Nonetheless, using your computer to manage a RAID array means that its CPU will have to do a lot of work, so this is only practical if you have a computer that is only storing files.
Is RAID a backup?
While RAID arrays can provide enhanced data protection, their extra disks should not be considered as backups. If your main drive is a RAID array, you still need to back it up.
If you have, say, 12 TB storage on a RAID array, you’ll want to back it up to another device. This could be, for example, two standard 8 TB drives, where you back up part of the total storage on the RAID array to each drive. The RAID array appears to your Mac as a single volume, so any backup software, such as Intego Personal Backup, can copy files from those devices to other drives.
Should you use RAID for backups?
Your RAID array can be used for backups, with software such as Intego Personal Backup or Apple’s Time Machine. If you have a Mac with a couple of external drives connected to it, you can also connect a RAID array via Thunderbolt or USB 3. You can configure the backup software so it copies its backups to the RAID array. The same is the case for a network-attached storage RAID device.
RAID’s data parity offers addition protection for your backup, over and above what you’d have on a single hard drive. The worst thing that can happen is that your computer’s drive fails, and you find that your backup drive is unreadable. With a RAID array as a backup target, you can add extra levels of protection to your backups. If any of its drive fails, the device’s software will warn you, and you can swap a disk, ensuring that your backups are always reliable.
RAID can seem complex at first, especially because you don’t get the full capacity of your drives when you use levels such as RAID 5, 6 or 10. However, once you understand the principle, you will see that this extra protection can be worth the cost. Think about using a RAID array as your main external drive, or setting up a RAID array as a backup unit. Either way, your data will be more secure.
How can I learn more?
 Each week on the Intego Mac Podcast, Intego’s Mac security experts discuss the latest Apple news, security and privacy stories, and offer practical advice on getting the most out of your Apple devices. Be sure to follow the podcast to make sure you don’t miss any episodes.
You can also subscribe to our e-mail newsletter and keep an eye here on Mac Security Blog for the latest Apple security and privacy news. And don’t forget to follow Intego on your favorite social media channels: Facebook, Instagram, Twitter, and YouTube.

