Master the macOS Open and Save Dialogs
Posted on
by
Kirk McElhearn

You create and save new documents all day long when you work on your Mac. And you open existing documents, update them, and sometimes save them in different locations. Many people routinely save everything on their desktop, creating a digital pile of documents that’s hard to sift; or, they save documents without checking where the app is putting them, only to discover they can’t find them later.
The macOS Open and Save dialogs are powerful tools that let you find and work on files, and save files efficiently in various locations. In this article, I’m going to show you some of the ways you can master these dialogs.
The Open Dialog
The Open dialog is fairly simple, and it allows you to browse your Mac’s file system to find almost anything. You can do this by selecting a folder, then opening its sub-folders, and browsing until you find the file you’re looking for. Here, I’m looking inside a folder on my Desktop; you can see that the Desktop is selected in the Finder toolbar:
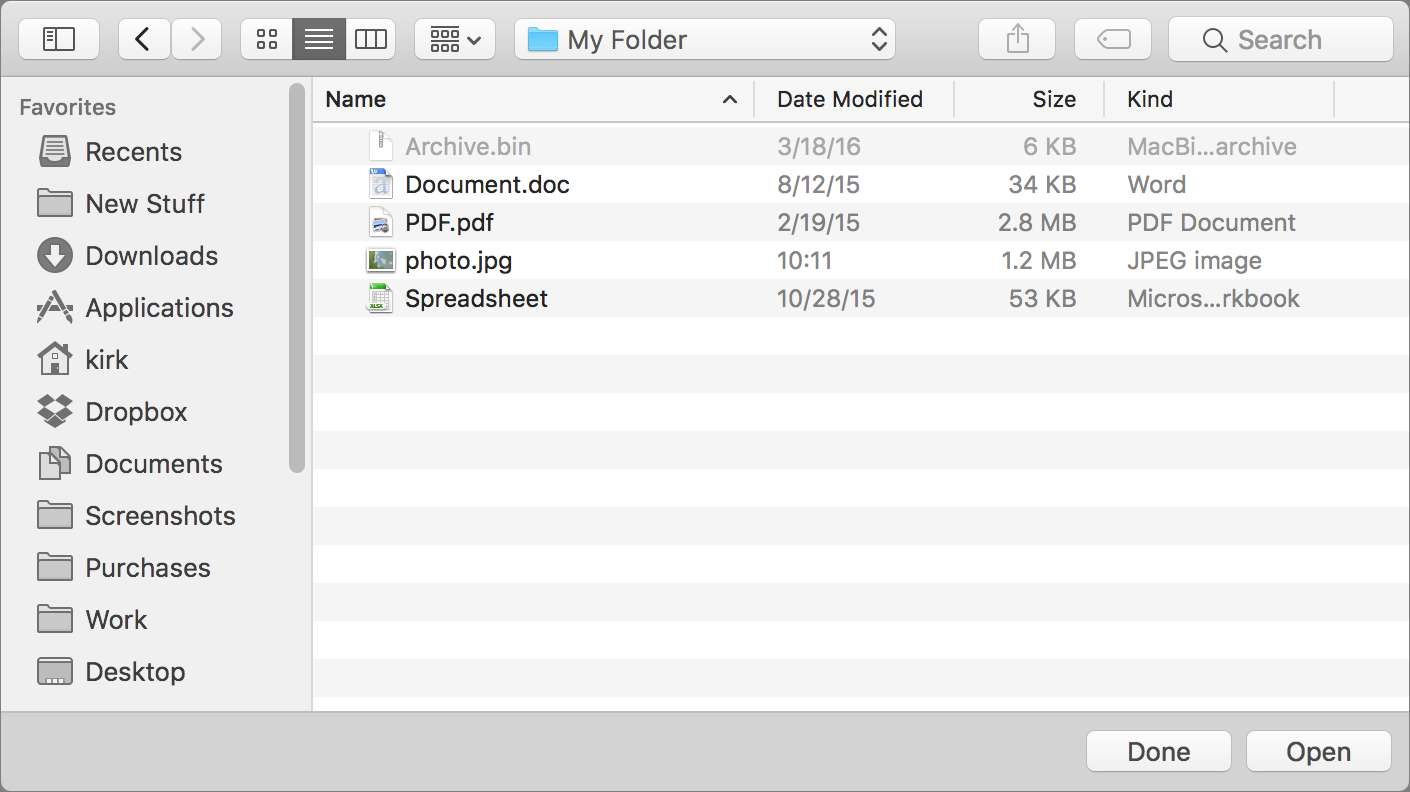
In the above example, I’m looking at my files in List view; you see their names, the dates they were modified, their size, and their kind. But you can also use two other views: Icon view and Column view. You can switch views by clicking one of the three parts of the View button near the left of the toolbar. In the above screenshot, you can see that the List view button is selected. Here’s Icon view:
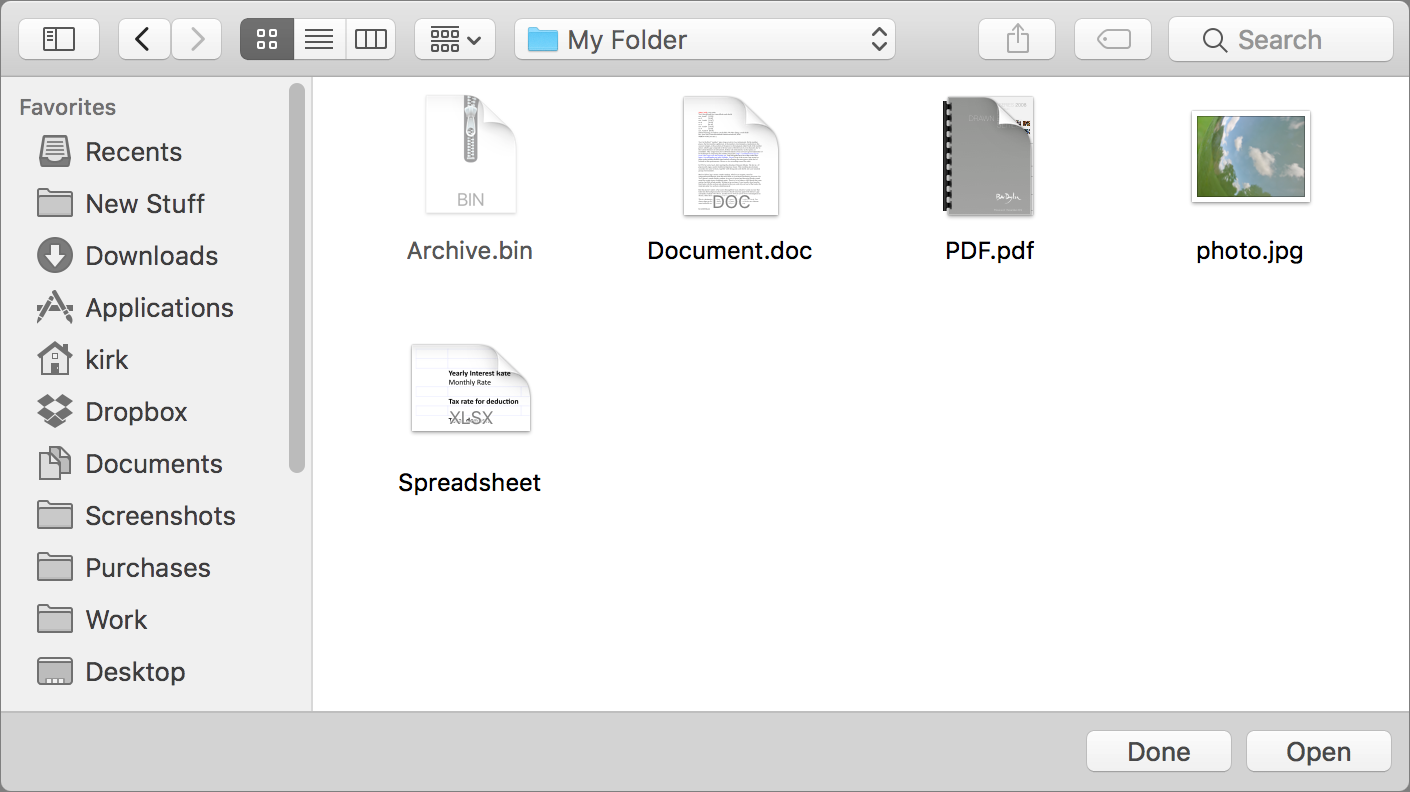
With this view, you can see previews of some of your documents. If you want to take a closer look at any of them, select one and press the space bar to view it using Quick Look. (You can use Quick Look in any view.) This way you can browse through a number of documents with names and icon previews that may look similar, and choose the one you want. This is a lot easier than opening each one only to discover they’re not what you were looking for, then closing them and trying again.
You can also use Column view, as shown below:

The Column view is a great way to browse documents when you have a lot of sub-folders. Column view is particularly useful because of the large preview that displays in the rightmost column, as you can see above.
It’s a good idea to put folders you use often in the Finder sidebar, but you can also use a number of keyboard shortcuts to quickly find certain folders. They’re the same ones that you can use in the Finder, and you can see them in the Finder’s Go menu:
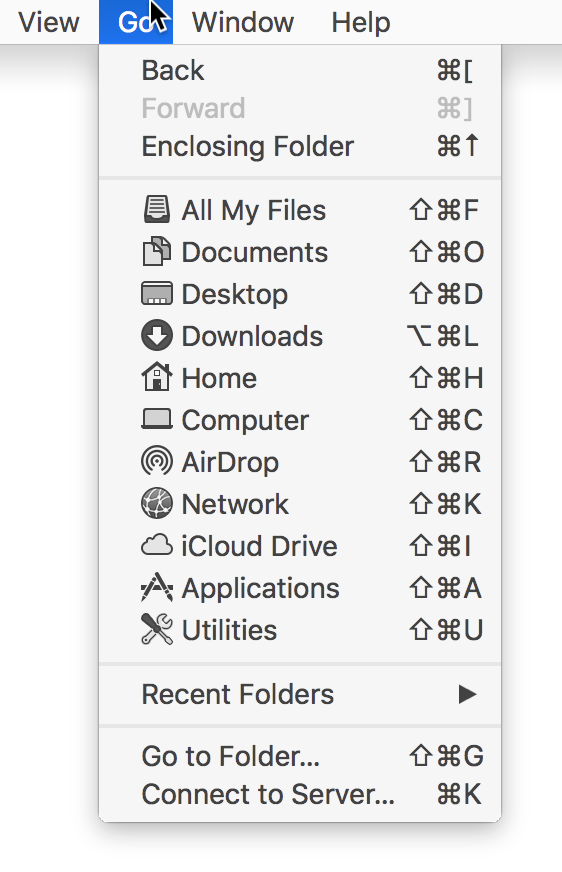
For example, if you store a lot of files on your Desktop, press Command-Shift-D to view that folder (it really is a folder, at least to the Mac), or press Command-Shift-O to go to your Documents folder. And Command-Shift-L takes you to your Downloads folder.
The Save Dialog
The Save dialog looks a lot like the Open dialog, and for a good reason: they are both ways of accessing your Mac’s file system. Yet sometimes the Save dialog looks different than the Open dialog. You may find that the Save dialog displays in a contracted form in some of your apps:
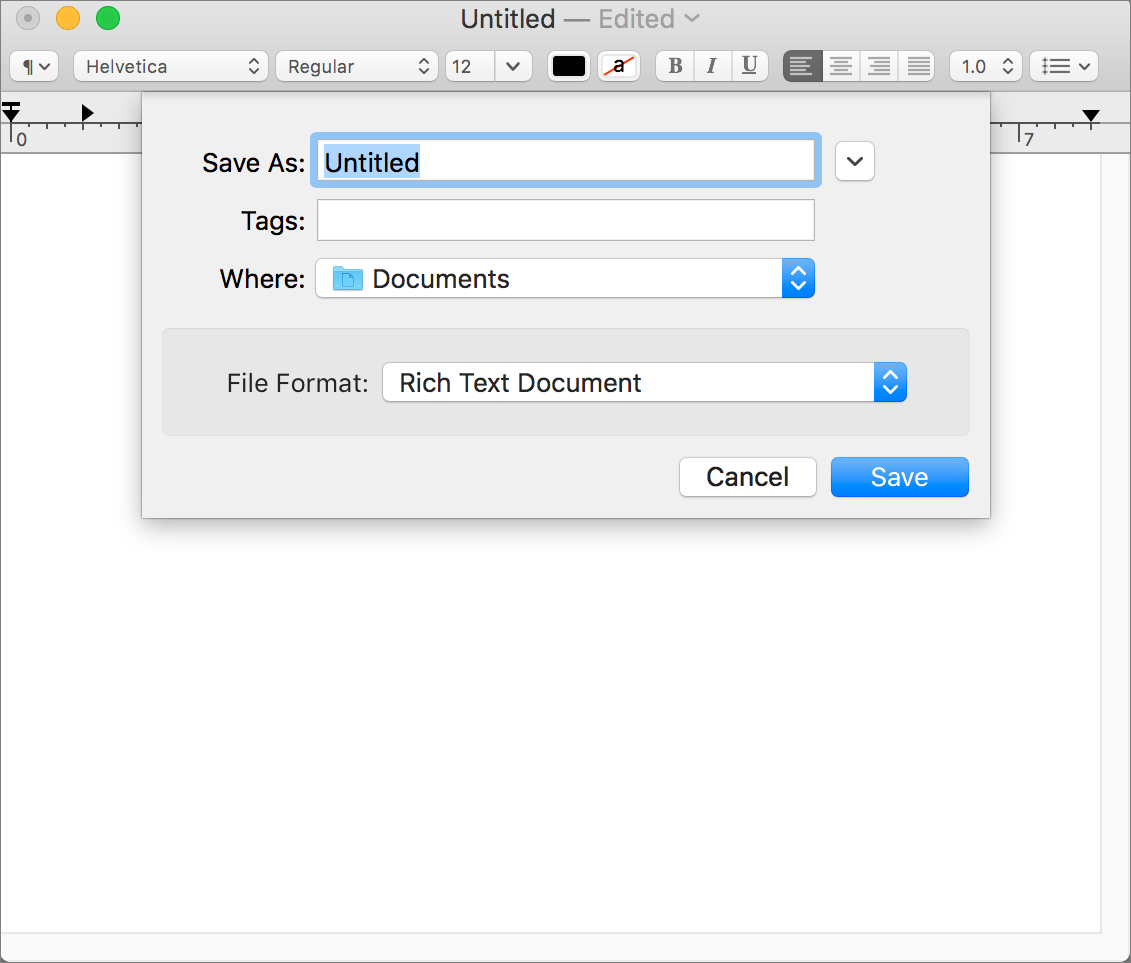
If so, click the small arrow button to the right of the Save As field. The dialog expands to look almost exactly like the Open dialog:
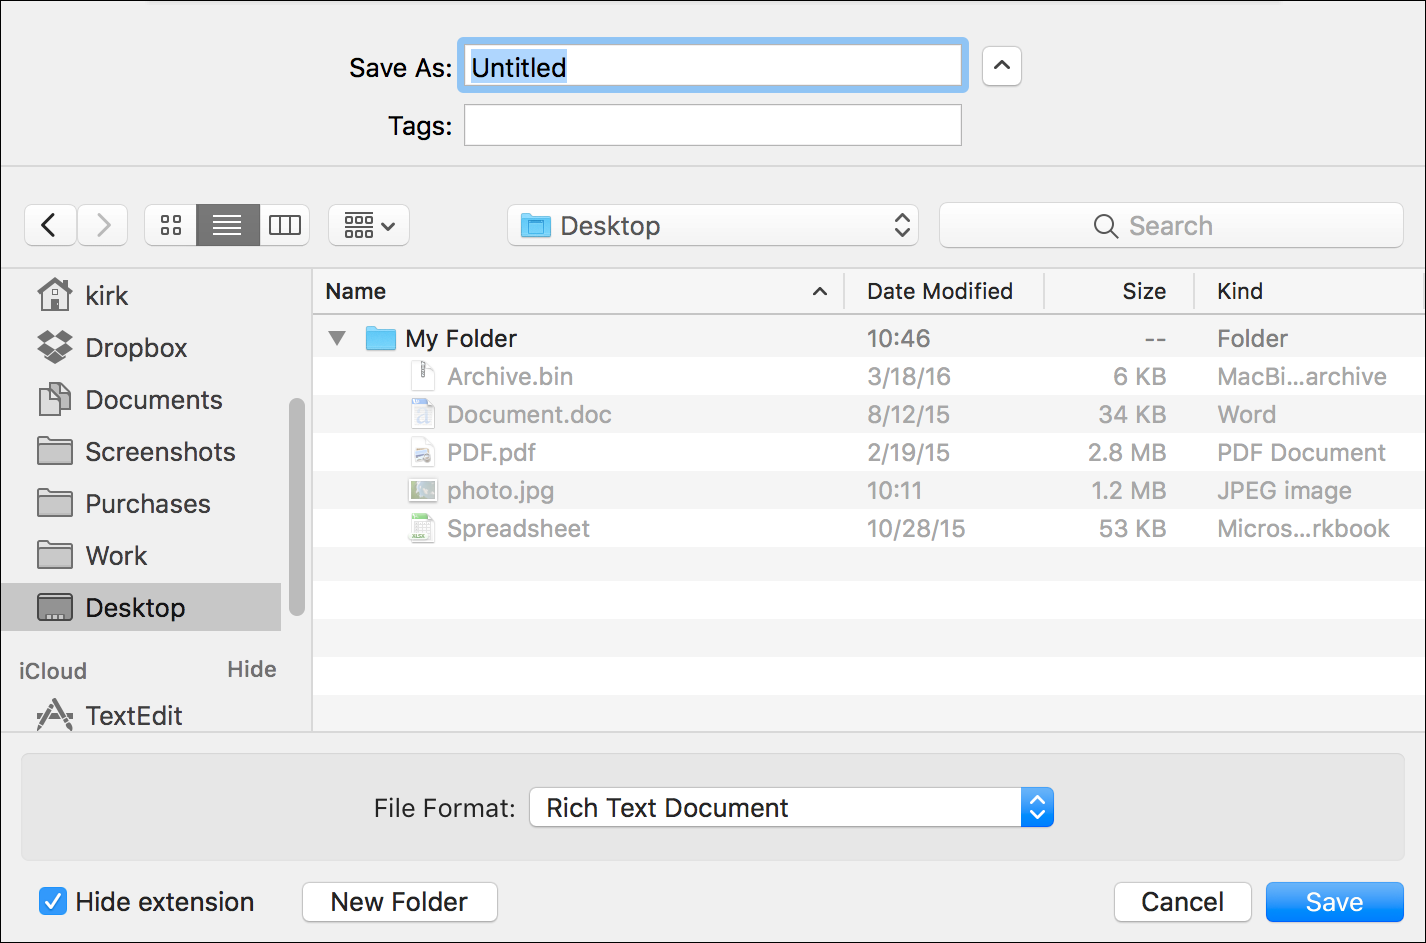
As with the Open dialog, you can change views (Icon, List, or Column view) to browse your Mac’s file system and choose where to save your file. You can also click New Folder, to create a new folder in any location; you then give that folder a name, and you can save your file within it. (Press Command-Shift-N to create a new folder more quickly.)
Depending on the app, you may see a menu asking you to choose a format for the file. In the screenshot above, I’ve created a file in TextEdit, so I have options to save it in a number of file formats. You can also choose to show or hide the file’s extension, if you wish, by checking or unchecking a box at the bottom of the window. Some apps will offer more options depending on the type of files they save.
Quickly Navigating the Open and Save Dialogs
I briefly explained above how you can navigate the Open dialog, and you can do the same with the Save dialog. However, there are quicker ways to navigate these dialogs. By pressing the Command key, together with arrow keys, you can move around your Mac’s file system and find the files you want to open and the folders you want to use to store your files. Here are a few keyboard shortcuts to help you quickly navigate the Open and Save dialogs:
- Command-up-arrow: This moves you up one level. So, in my example, in a folder on the Desktop, pressing these keys moves me to the Desktop itself.
- Command-down-arrow: This moves you into a folder. If I were on the Desktop, and selected a folder, pressing these keys would open that folder. And if you’ve found the file you want to open, pressing Command-down-arrow opens the file; it’s the same as double-clicking it.
- Command-right-arrow and Command-left-arrow: When in List view, this opens or closes a folder without switching to a new level. Select a folder and press Command-right-arrow and the folder expands to show its contents; press Command-left-arrow to hide the folder’s contents.
- Right-arrow and left-arrow: In Column view, these keys alone, with no modifier keys, move you up and down the file system, from column to column. Visually, you’re moving horizontally, but figuratively, you’re moving up and down.
- Back button and Forward button: At the top left of each dialog, you see back and forward buttons. These work like in a web browser, taking you back through folders you’ve viewed, or moving you forward if you’ve already moved back.
- Command-F: This activates the Search field. You can search for files to open, or for folders to store your documents in. To exit the Search field, press the Esc key.
Use the Finder Sidebar
I mentioned earlier that you can use the Finder sidebar to quickly move to folders you use often. If you haven’t customized the Finder sidebar, you can add any folder to it by selecting a folder and choosing File > Add to Sidebar.
You’ll also notice a number of useful sections in the sidebar. Some apps store files in iCloud, and their Open and Save dialogs will show an iCloud section. You can store files there or open files from iCloud, but you can also open and save files locally.
The Devices section shows your Mac, plus any hard drives you have connected to it. And the Shared section shows any network volumes that are available to you. Either of these might contain files you want to open, or folders where you might want to save files.
Takeaway
Since you work with lots of files on your Mac, learning how to quickly open them and efficiently save them can save you a lot of time. Get to know these two dialogs to be more productive.
New to macOS? Learn tips and tricks at Intego’s New Mac User Center!
Want to get the most out of your new MacBook, iMac or other Apple computer? Whether this is your first laptop or you’ve just switched from Windows, there are a few things you should know about your new Mac, like basic keyboard shortcuts or how to use the various features macOS has to offer. Learn more about what your Mac computer can do for you at the Intego New Mac User Center: Get started now!
