Install macOS betas on your Mac in a new APFS volume
Posted on
by
Kirk McElhearn
At this time of year, when the forthcoming version of macOS is made available in beta versions, many users want to try it out. If you’re a developer, you need to test your software to make sure it’s compatible with the next version of macOS. Apple gives you plenty of time to do this. The first beta of macOS Sequoia was released in early June, and the official release will not occur until the fall.
Even if you’re not a developer, you may want to try out the public beta and play around with the new features. Apple allows non-developers to run these betas through its public beta program so they can get feedback from more users.
But you don’t want to run beta operating system software on a production machine; your data could be at risk. We’ve previously explained how to run macOS Sequoia in a VM—that is, in a window on your existing macOS installation. In this article, I’ll explain another method for trying out macOS Sequoia: how to add a new APFS volume to your Mac, so you can boot into the beta version of macOS Sequoia and try it out.
What is an APFS volume?
APFS is the Apple File System, which rolled out with macOS Sierra in 2017. It has many advantages for data security and efficiency, one of which is the ability to create new volumes easily. Unlike with previous file systems, where you had to partition a disk to make a new volume, the APFS version is non-destructive. You don’t have to erase a disk to partition it (though this was possible, in some cases, previously), and it’s easy to create a new volume with just a few clicks.
This is useful for running beta software because macOS now installs in two volumes on your Mac: a data volume and a system volume. If you open Disk Utility (in /Applications/Utilities), and select your Mac’s drive, you can see this.
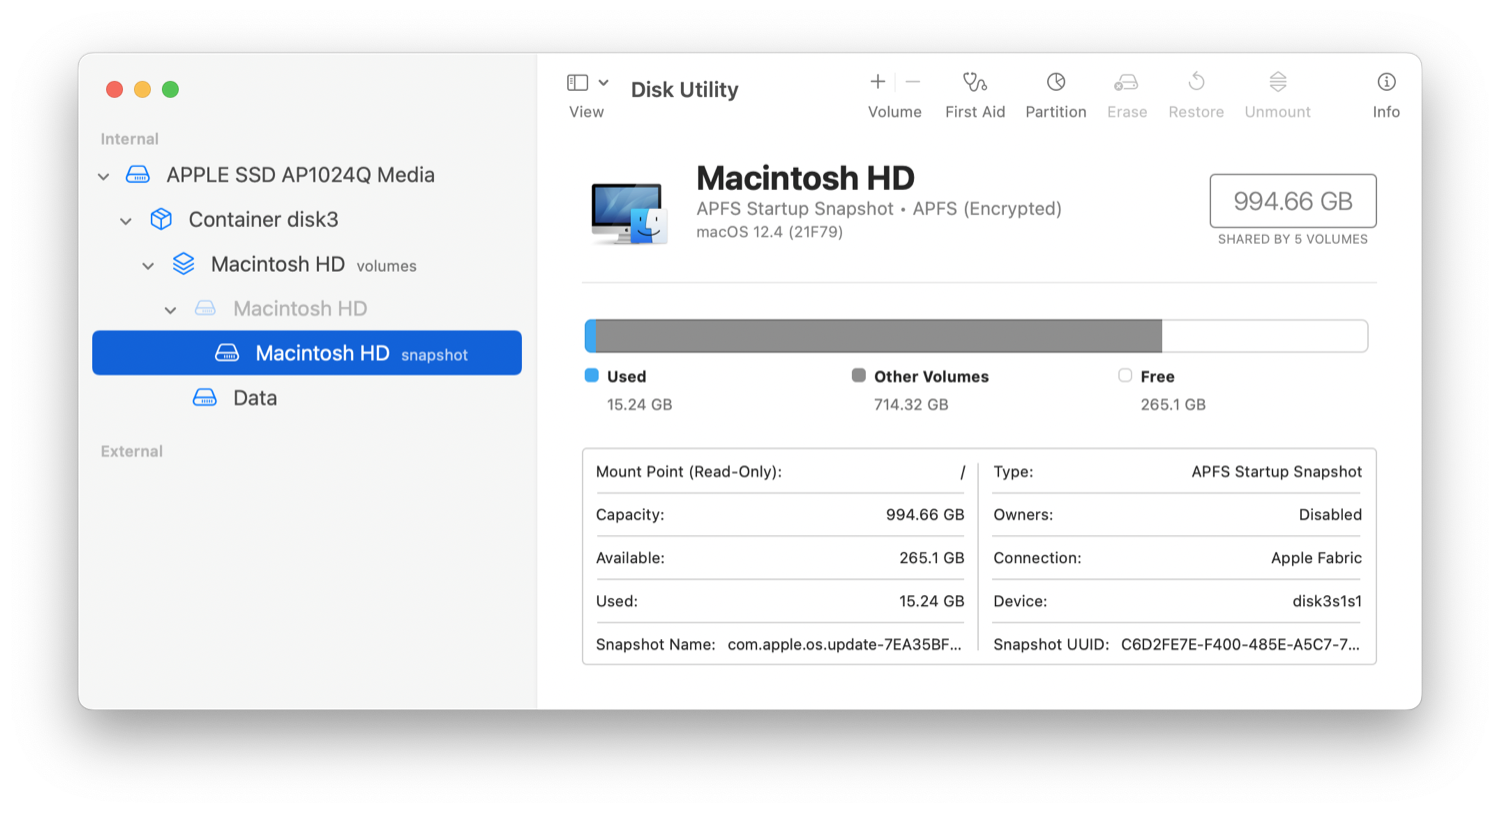
There is a system volume, called a “startup snapshot,” which contains the operating system. There is also a Data volume, which contains everything other than macOS itself: all your user files. Because of this, it’s easy to create a new system volume and install another version of macOS, while still accessing your data.
Create a new APFS volume
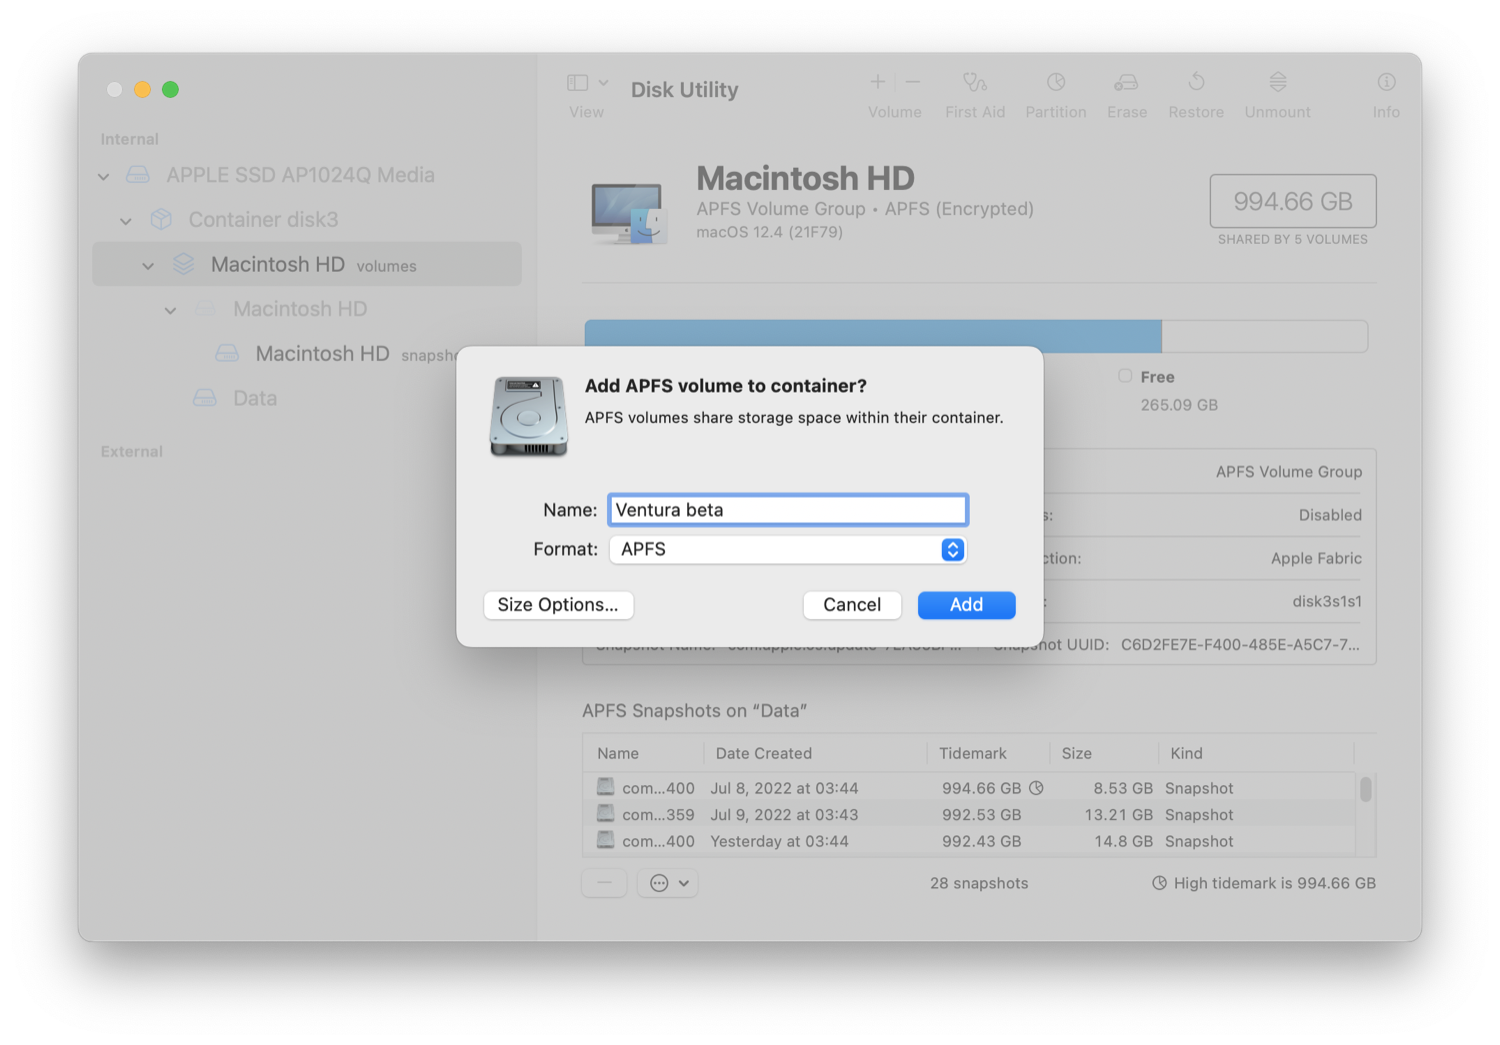
To create a new APFS volume, select the top-level volume in the sidebar; in the above example, that would be Macintosh HD. (Don’t select the top-level entry, which, here, begins with Apple SSD, or the Container just below it.) Choose Edit > Add APFS Volume, enter a name, then click Add. You’ll see the new volume in the sidebar.
Install the macOS Sequoia beta on your new APFS volume
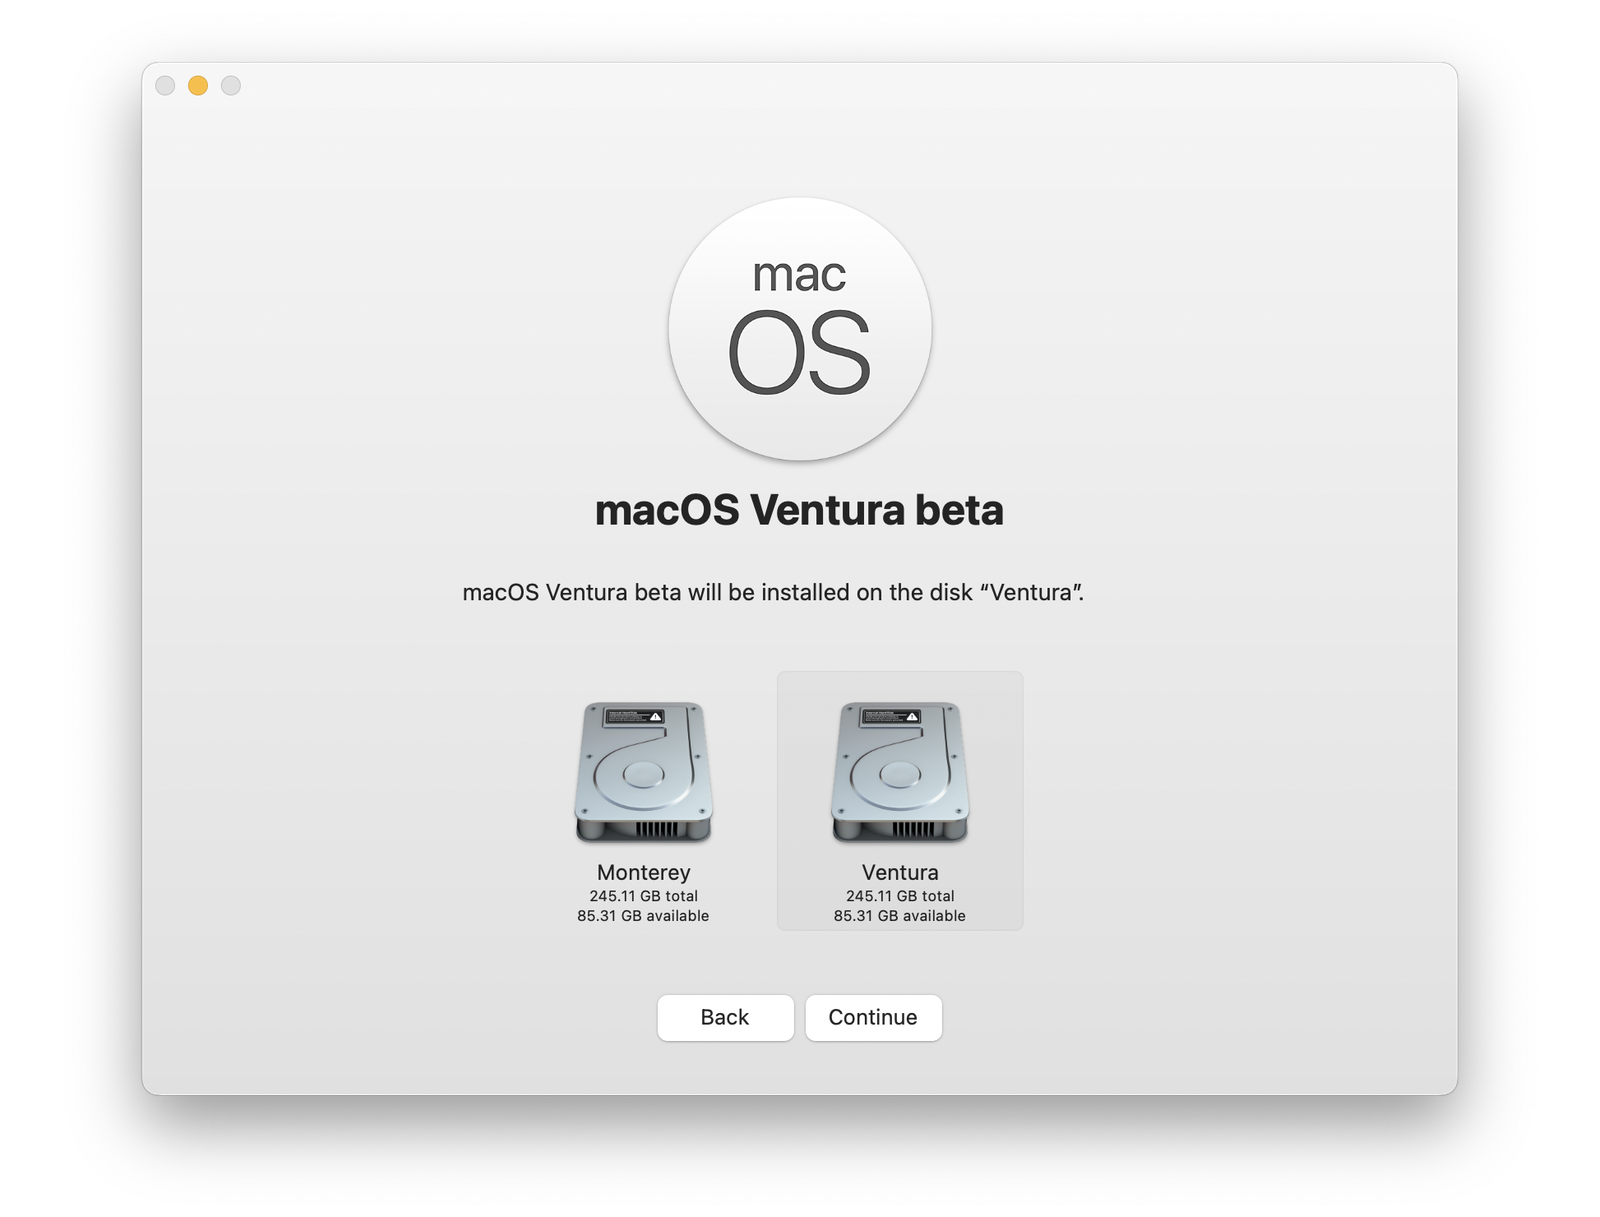
To install a macOS beta, you need to either have a developer account or sign up for the public beta. In either case, you can go to System Settings > General > Software Update and click the ⓘ (info) button next to Beta Updates to select which beta program you’d like to opt into. (If your Mac is still running macOS Ventura 13.3 or earlier, you’ll need to download Apple’s macOS Beta Access Utility instead, or upgrade to the latest version of macOS Sonoma or Ventura.) Follow the instructions to install macOS Sequoia. When you launch the installer, click Show All Disks, and you should see both your Mac’s internal drive and the new APFS volume. Select that volume, and proceed with the installationimghp
Once this has completed, your Mac starts up in the beta software. You can change this at any time by selecting a new startup disk in System Preferences > Startup Disk. Or, you can choose on the fly by doing one of the following.
If you have an Intel Mac, press and hold the Option key when you turn on your Mac.
If you have an M1 or M2 Mac, press and hold the power key until you see Loading startup options.
In both cases, you’ll be able to choose which disk to start up your Mac from. But the next time you start up your Mac, it will boot using the disk selected in the Startup Disk preference pane.
You can create multiple APFS volumes on your Mac. The advantage of this approach over partitioning the drive is that APFS volumes don’t use any drive space until you put data on them. They all share the total space of the drive, so you don’t have to commit to a specific size, as with a partition.
Delete an APFS volume
When you’ve finished working with an APFS volume, you can delete it with a few clicks. Start your Mac up from a different volume, then, in Disk Utility, select the volume you want to delete and choose Edit > Deleted APFS Volume.
This way of creating APFS volumes makes it much easier to try out beta versions of macOS. You no longer need to make partitions or work off of external drives. If you have enough space to install the new operating system, it’s easy to do and efficient.
How can I learn more?
For an alternative method of running macOS Sequoia beta on your Mac, check out our related article on how to create a macOS virtual machine.
Install macOS Sequoia Beta in a Virtual Machine on an M1, M2, or M3 Mac with UTM
 Each week on the Intego Mac Podcast, Intego’s Mac security experts discuss the latest Apple news, security and privacy stories, and offer practical advice on getting the most out of your Apple devices. Be sure to follow the podcast to make sure you don’t miss any episodes.
You can also subscribe to our e-mail newsletter and keep an eye here on The Mac Security Blog for the latest Apple security and privacy news. And don’t forget to follow Intego on your favorite social media channels: ![]()
![]()
![]()
![]()
![]()
![]()
![]()

