How to Use Content Caching on macOS to Save Bandwidth
Posted on
by
Kirk McElhearn
If you have multiple Apple devices in your household, you know how annoying it can be when it’s time to update them. It can take a long time to get the latest macOS or iOS updaters, and if you have to download the same multi-gigabyte files for more than one iPhone, iPad, or Mac, your bandwidth can get saturated.
Content caching, a feature of macOS, can help. When you enable this on a Mac, that computer will keep copies of every installer and updater you download, along with apps from the iOS and Mac App Stores. Content caching can also cache some iCloud content, such as photos, and some documents.
Content caching is simple to use; here’s how to save time and bandwidth with content caching.
How does content caching work?
Content caching used to be part of macOS Server, but Apple has included it on the standard version of macOS for several years. When you enable content caching on a Mac, all your Apple devices request downloads through that Mac, for installers, updaters, apps, and more. The content caching Mac downloads the files, passes them on to the devices that requested them, and stores copies. When another device requests the same content, it is served from the cache, which not only doesn’t use your bandwidth, but is also much quicker, because it’s on your local network.
For example, if you have two Macs, and you want to install the latest macOS update, have one of your Macs request the update. After installation, have the other Mac request the update. You’ll see that it "downloads" much more quickly, because the Mac running the content caching service has kept a copy.
The same is true if you have multiple iPhones, iPads, or Apple Watches. Each one of these devices requires its own updater – you can’t use an iPad updater on an iPhone, for example – but as long as you have more than one device, you’ll save time and free up your bandwidth.
Enabling content caching
Enabling content caching is incredibly simple. Go to System Preferences > Sharing, click the padlock and authenticate as an administrator, and check Content Caching. You can choose types of content from the Content menu: All Content, Only Shared Content, and iCloud content. All Content includes software updates and apps downloaded from Apple, along with iCloud content. Only Shared Content is only that content that can be used by multiple users, software updates and apps. Only iCloud Content is user-specific content, such as photos and documents.
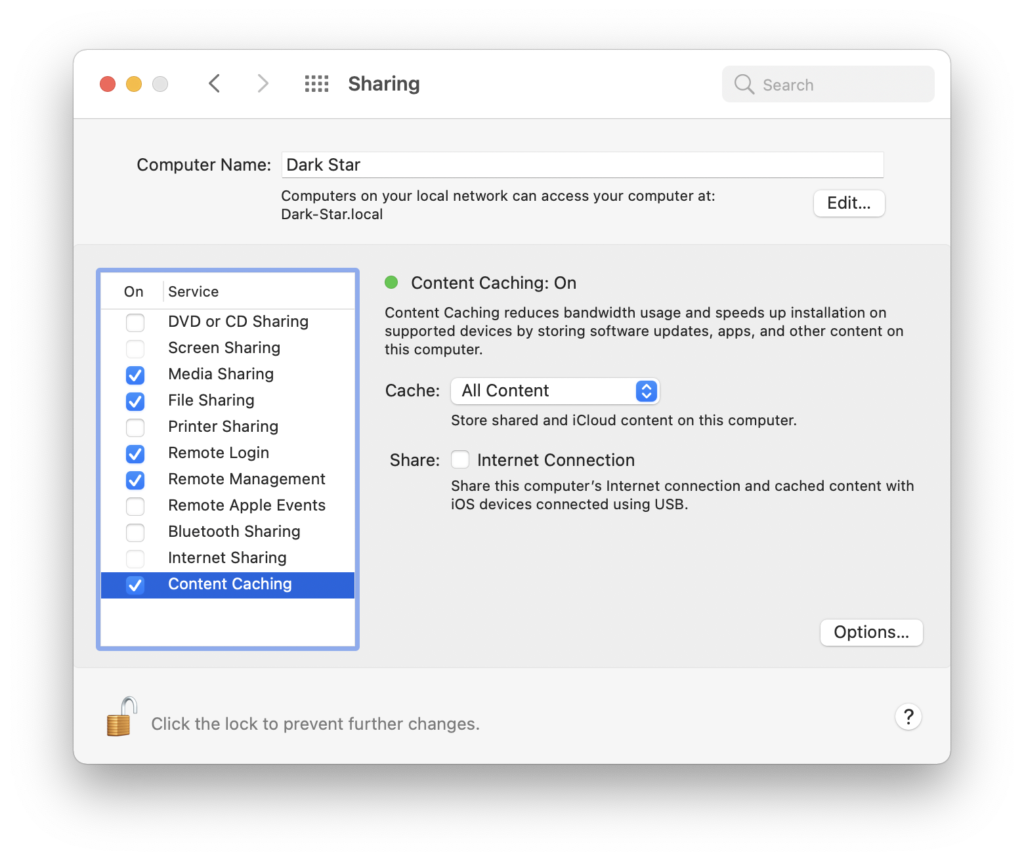
This Apple support document explains all the content that content caching supports.
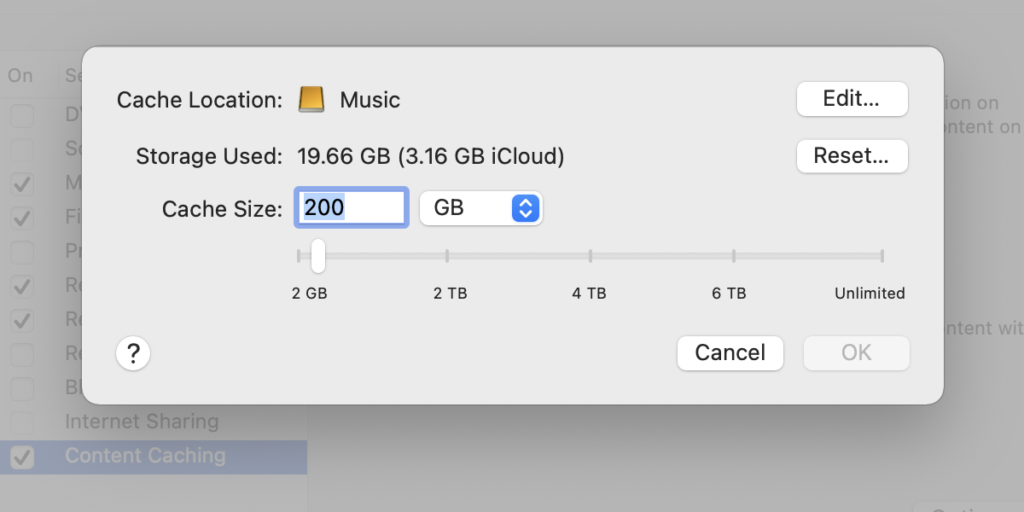
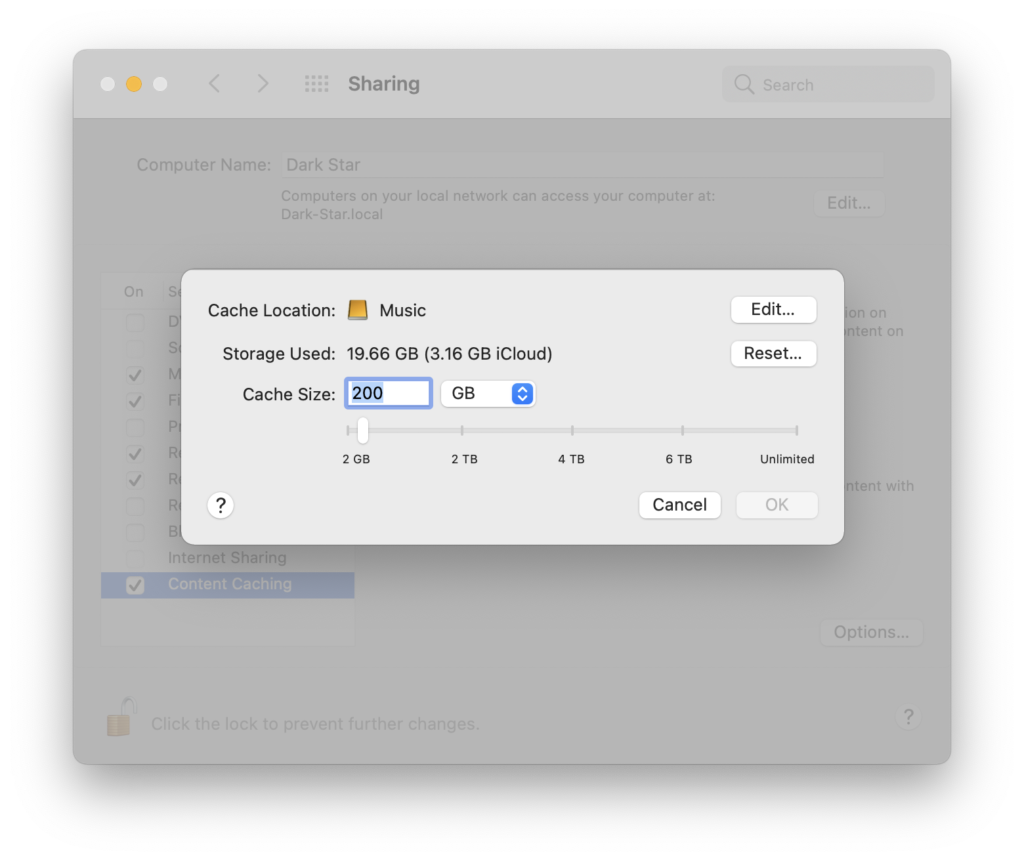
By default, content caching uses your startup disk to store the cache. If you have an SSD with limited storage, you might want to change this. Click Options, and you can change the cache location, and you can set a limit for the amount of storage the cache will use.
If the cache size is reached, macOS will delete the older files as needed.
If you press the Option key, the Options button changes to Advanced Options. Most users won’t need these options, which allow you to set up clients and peers, but if you do, this Apple support document explains what you can do.
Using content caching
This is the best part about content caching: to use it, you don’t have to do anything. Your Apple devices search the network to see if a Mac is running the content caching service, and, if so, they go through that Mac.
Ideally, you’ll want the Mac running content caching to have the fastest network connection; Ethernet, if possible. And Content caching only works while your Mac is awake, so if you need it to be accessible all the time, go to the Energy Saver pane of System Preferences to prevent your Mac from sleeping.
Seeing content caching statistics
If you have content caching enabled on a Mac, you’ll be able to see statistics in Activity Monitor. A sixth tab will be available showing content caching information. Here’s Activity Monitor after I downloaded a 12 GB macOS Big Sur installer:
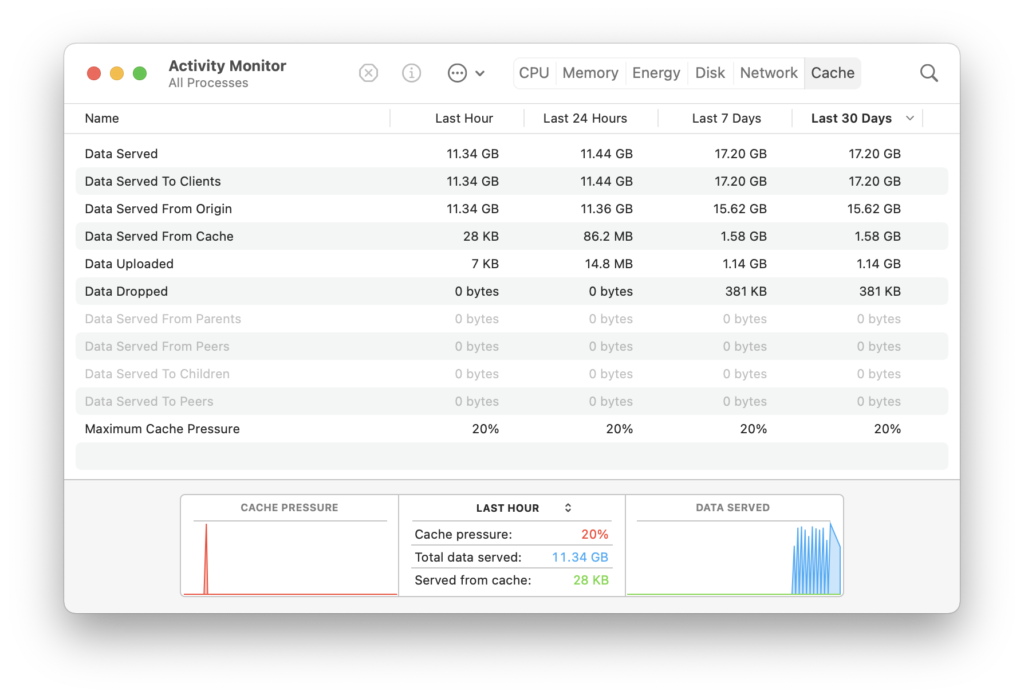
You can see the amount of data downloaded in the last hour, 24 hours, 7 days, and 30 days, and how much data is served to clients, from origin (Apple’s servers), and from the cache. Any data served from the cache is data that you have not had to re-download. In this case, it’s quite low, because I reset content caching for this article. Here is an Apple document explaining the content cache information in Activity Monitor.
For more about using Activity Monitor, see this article.
Disabling content caching
If you decide you no longer want to use content caching, go to the Sharing preferences and uncheck that option. Content caching will terminate, and the Mac will delete the cache. You can also manually delete the cache if you need disk space: click the Options button on the Sharing pane with Content Caching selected, then click Reset.
How can I learn more?
 Each week on the Intego Mac Podcast, Intego’s Mac security experts discuss the latest Apple news, security and privacy stories, and offer practical advice on getting the most out of your Apple devices. Be sure to follow the podcast to make sure you don’t miss any episodes.
You can also subscribe to our e-mail newsletter and keep an eye here on Mac Security Blog for the latest Apple security and privacy news. And don’t forget to follow Intego on your favorite social media channels: Facebook, Instagram, Twitter, and YouTube.

