Using the Mac Downloads Folder: A Newbie’s Guide
Posted on
by
Craig Grannell and Kirk McElhearn
The cloud is where it’s at. Apple increasingly nudges people to store their documents in the cloud. Since macOS Sierra, you can opt to store your Desktop and Documents folders in iCloud, making whatever’s within them more easily accessible from other Macs and mobile devices.
If you use this feature, your home folder – the one with the house icon and user name – is less important than in the past, but there are still some important folders remain housed there, one of which is Downloads.
How to access Downloads
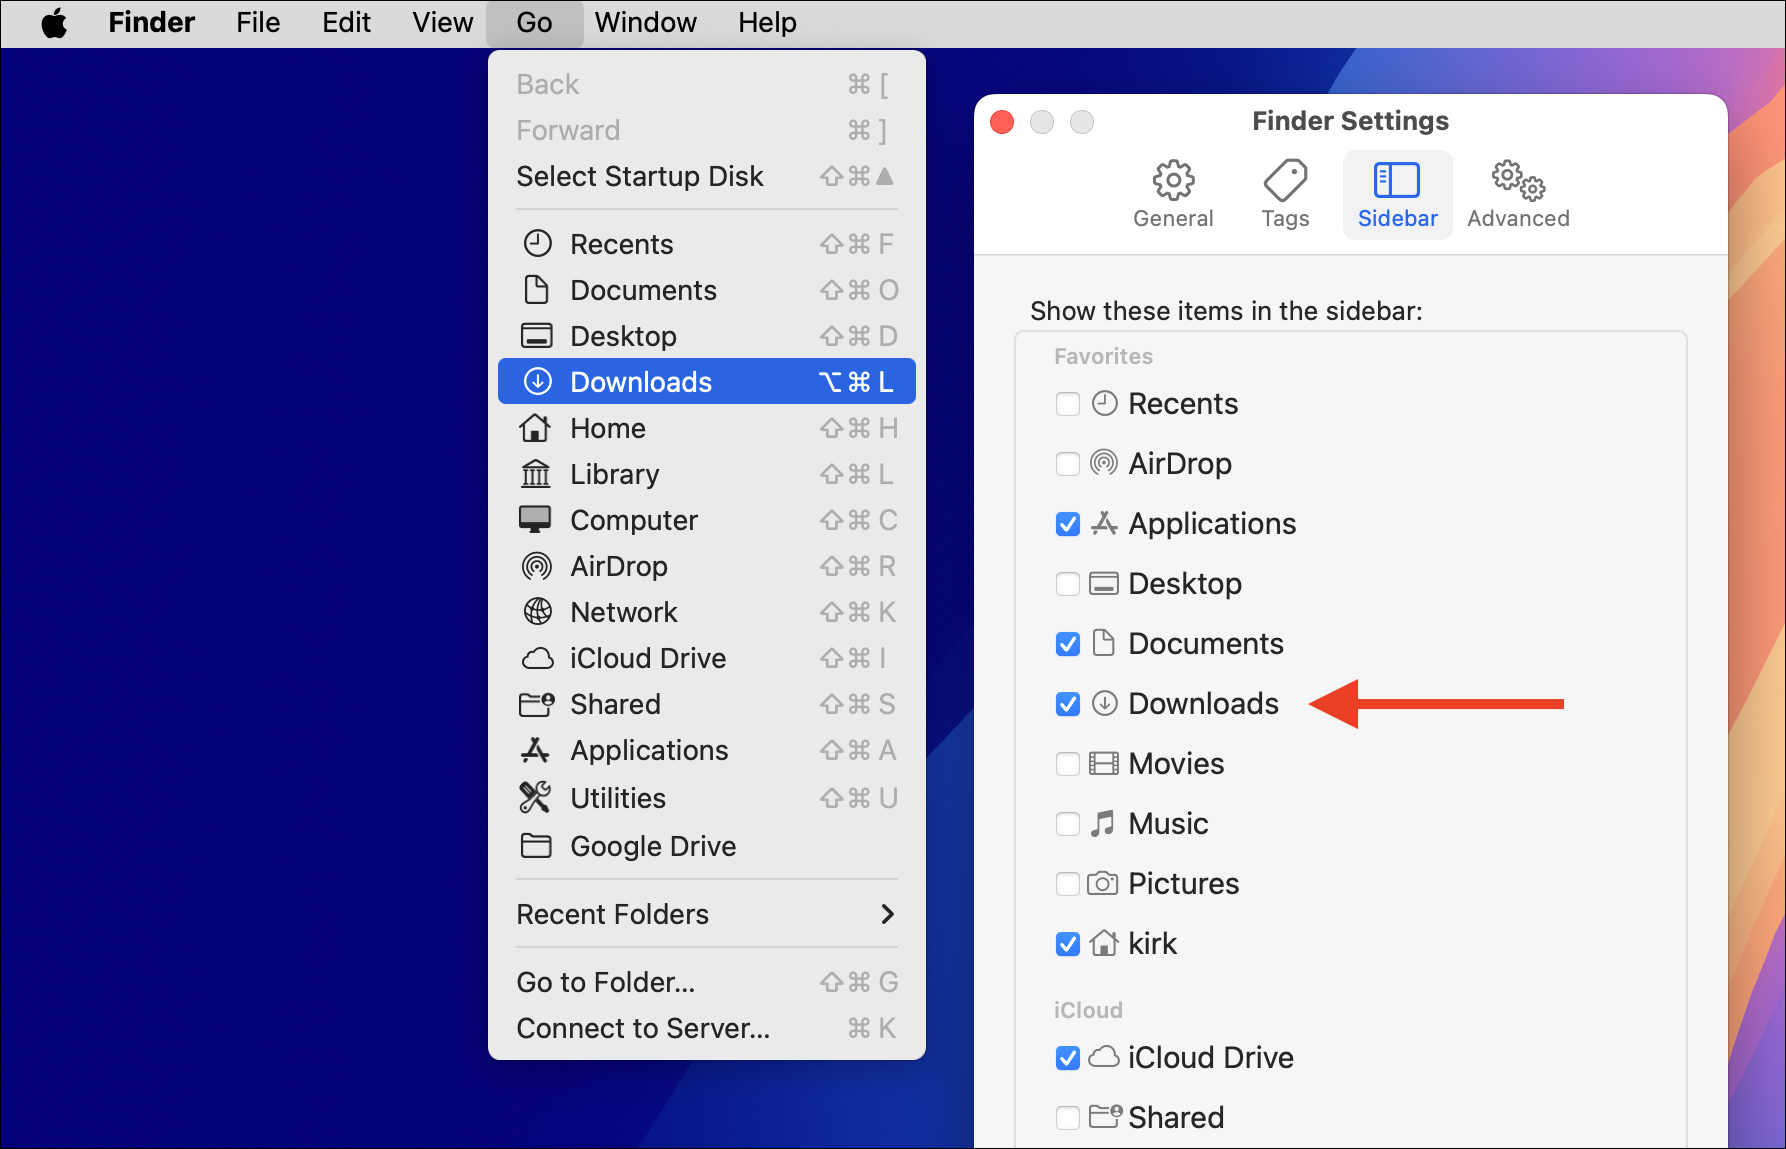
You can easily access the Downloads folder is easily accessed from Finder’s sidebar. If you don’t see it under Favorites, go to Finder > Preferences, and turn it on in the Sidebar tab. You can also quickly get to it from Go > Downloads (Option+Command+L).
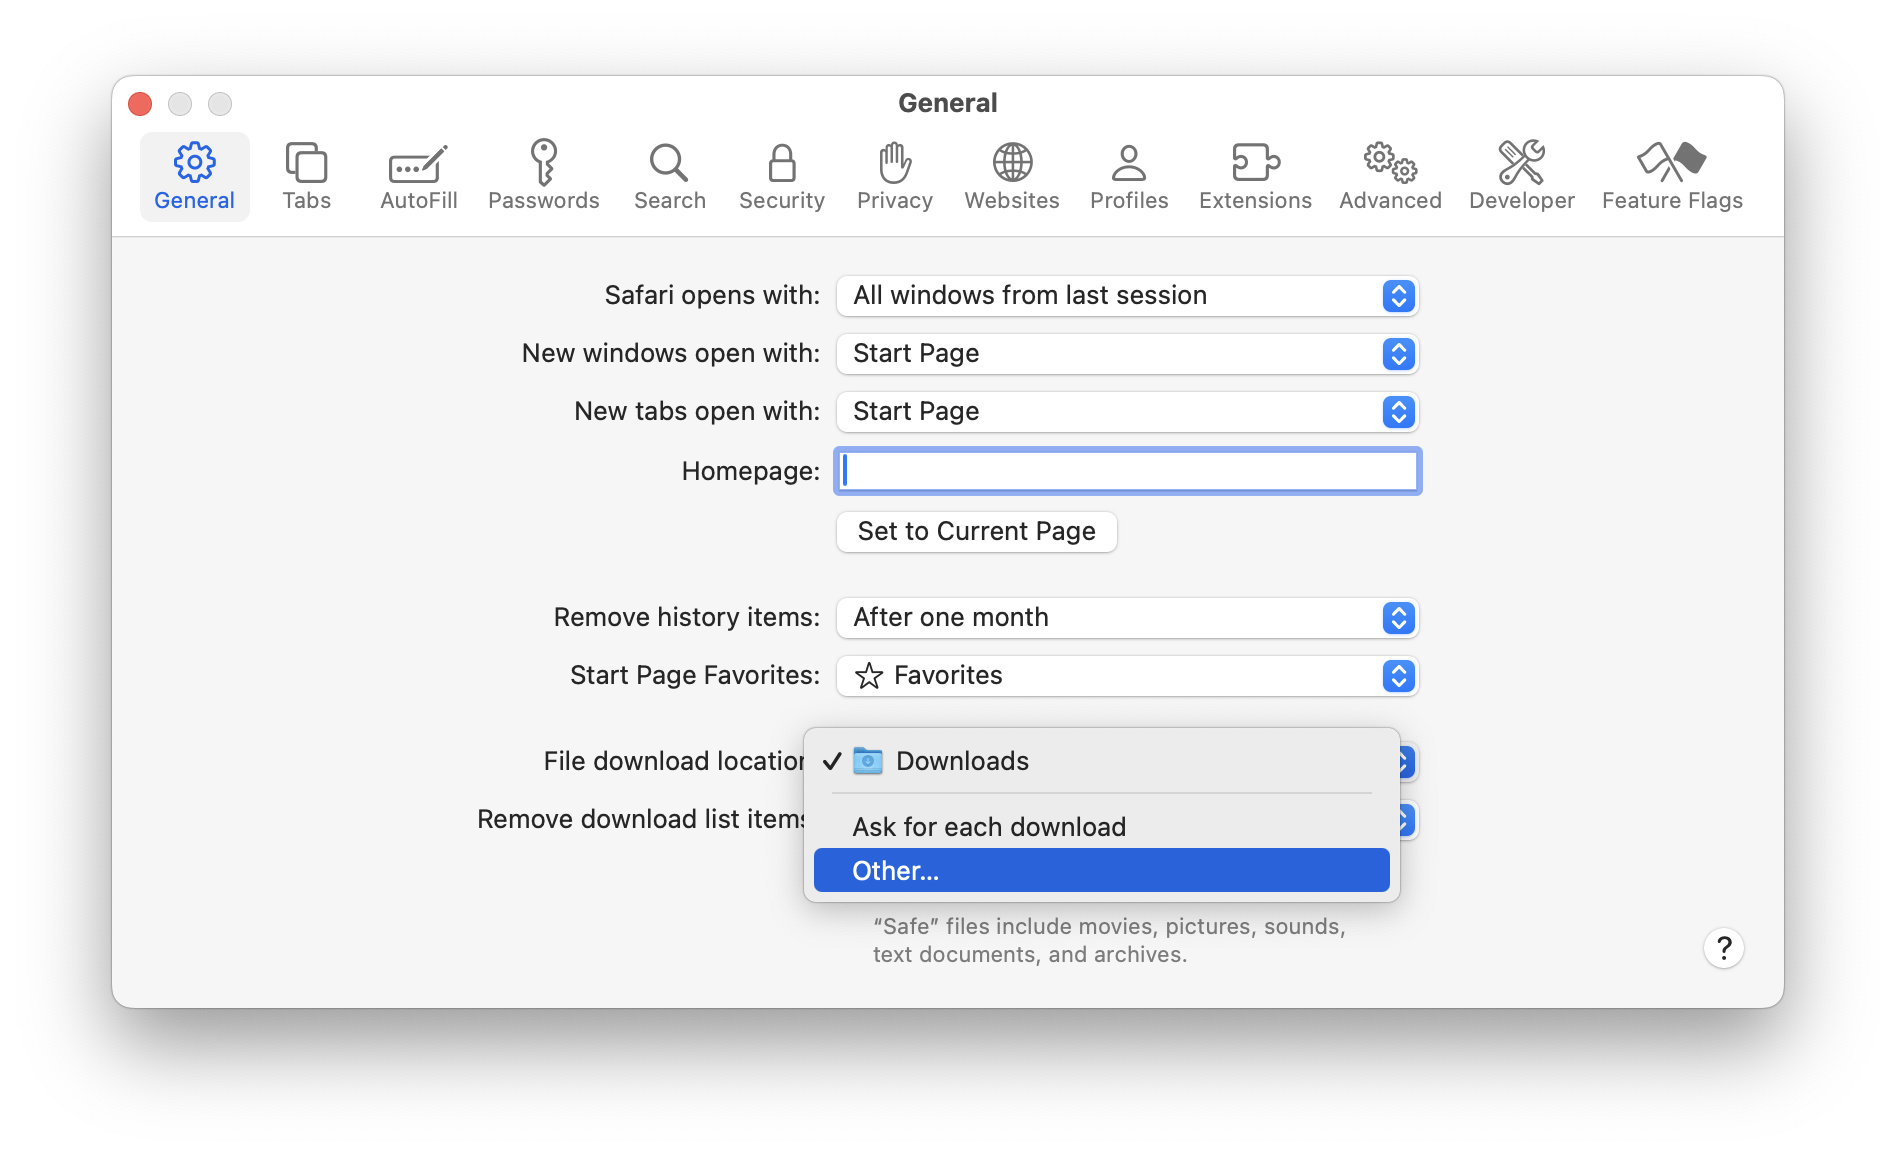
The Downloads folder is where your Mac stores files downloaded by Safari, attachments you download from Messages, and where many other apps save files when you download them from the internet or other devices on a local network. This setting can be changed: in Safari, for example, go to Safari > Preferences, click General, choose Other from File download location, and then select a different folder. Most people, though, stick with the default.
(Tip: if you’re downloading a lot of files in Safari or another browser, and are planning to move them to an external drive, you can change this setting while you are download the files, then change it back.)
Browsers typically make it easy to quickly get to downloaded files. In Safari’s case, a Download button appears in the toolbar, which you click to view a list of recent downloads. Clicking the magnifying glass button next to an item reveals the downloaded file in Finder. (Clicking the Clear button hides the Downloads button until you download something new.)
Managing your downloaded files
The Downloads folder can become a messy mix of semi-abandoned cruft and items you actually need. You might download music from the likes of Bandcamp or Amazon, but then import it into the Music app, making the original downloads redundant. Perhaps these files will end up nestled with app installers, PDF copies of bills you need for your taxes, and other accumulated documents you haven’t yet got around to filing properly.
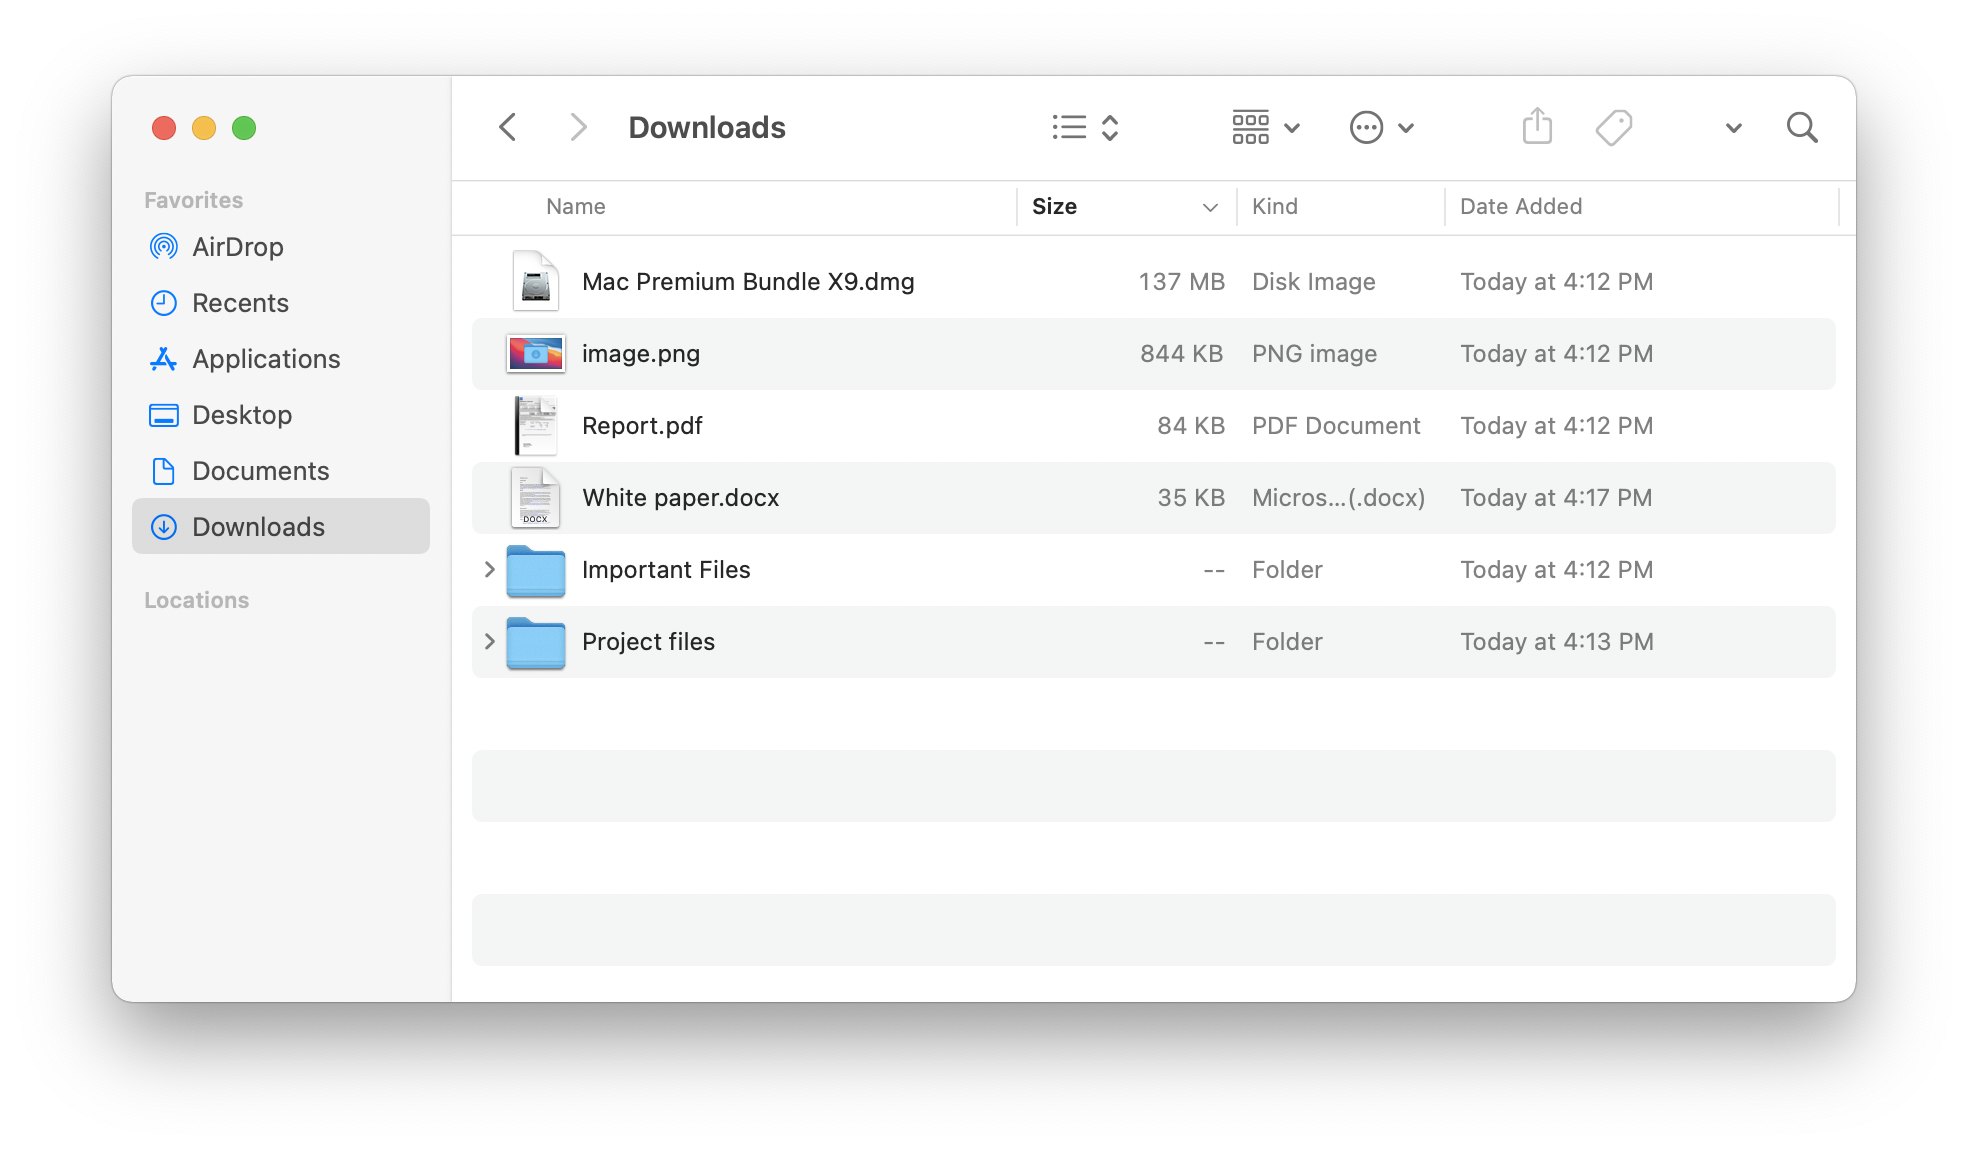
In order to filter what you find, choose View > As List to use the Finder’s column view. Sorting items by size can help you quickly discover – and potentially trash – large items. But also try sorting by kind to quickly go through documents of a certain type, and also by date, to find items that have been hanging around for months.
If that sounds like too much hard work, take a look at file organization tool Hazel ($42, Noodlesoft). The app lets you set up rules that determine what happens to certain types of files in any watched folder; and any considered superfluous to requirements can be automatically sent to the Trash. Everything happens in the background, without you having to lift a finger.
How can I learn more?
 Each week on the Intego Mac Podcast, Intego’s Mac security experts discuss the latest Apple news, security and privacy stories, and offer practical advice on getting the most out of your Apple devices. Be sure to follow the podcast to make sure you don’t miss any episodes.
You can also subscribe to our e-mail newsletter and keep an eye here on The Mac Security Blog for the latest Apple security and privacy news. And don’t forget to follow Intego on your favorite social media channels: ![]()
![]()
![]()
![]()
![]()
![]()
![]()

