How to open files on a Mac
Posted on
by
Kamso Oguejiofor-Abugu

Most files on a Mac open with a simple double-click, but not every file behaves the same way. When you double-click a file, macOS automatically chooses the right app for that file type. For instance, a PDF will typically open in Preview, while a Word document opens in Microsoft Word, or in Pages if you don’t have Word installed.
Sometimes, though, things don’t go quite as smoothly. Your Mac might not recognize the file type, you may not have the app that opens it, or the file itself is damaged.
In this guide, we’ll look at the different ways you can open your files, how to use a different app when you need to, and what to do if a file refuses to open.
The quickest way to open files on a Mac
You can open most files on your Mac by double-clicking them. Your Mac recognizes most common file types and opens them in the app it normally uses for that format.
When you download something from the web, it usually goes straight into your Downloads folder, which you can find in Finder’s sidebar. From that folder, you can double-click the file to open it.
Many web browsers also let you open recently downloaded files directly from their downloads menu by clicking them.
Email attachments work much the same way. Some email apps let you click and preview the file inside the message, while others require you to download it before you can open it.
If a file refuses to open when you click it, the solution is simple — your Mac might need a different app to open it, or it might be a file type macOS doesn’t support. If that happens, you can pick a different app yourself.
Common ways to open files on a Mac
Other methods come in handy if a file won’t open with a double-click or if you want to use a different app for the job.
Right-click and select Open
Right-clicking (or holding Control while you click) and choosing Open does the same thing as a double-click. It’s another way to get there if you prefer the menu.
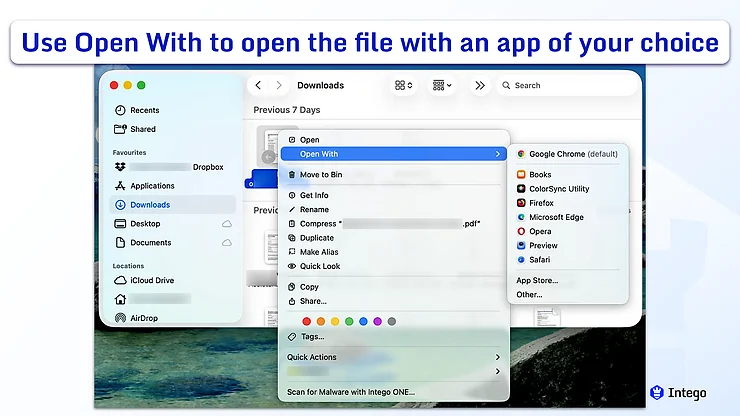
Use Open With
If you want to use a different app than usual, right-click the file and hover over Open With. A side menu will appear showing the other applications on your Mac that can read that specific file. This is the go-to when your usual app won’t open a file. You can also set an app as the default for that file type from the same menu.
Drag the file onto an app
You can also drag a file directly onto an application’s icon, either in your Dock or inside your Applications folder. If the app supports that file type, the icon will light up, and letting go of the file will open it inside that app.
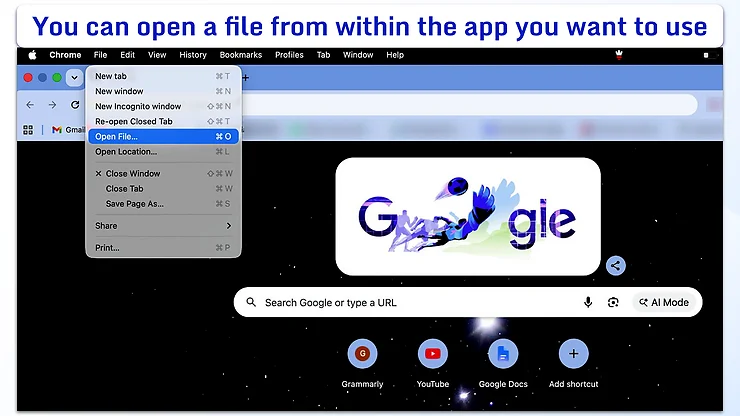
Open the file from within the app
Some apps let you open files from within the app. With the application open, click File in the menu bar at the top of your screen, choose Open or Open File (depending on the app), and find the file you need from the window that pops up.
Use a keyboard shortcut
If you prefer using your keyboard, highlight a file on your Desktop or in Finder and press Command + O (or Command + Down Arrow) to open it. If you’re already working inside an application, pressing Command + O will also open that app’s Open window so you can choose a file.
Open a recent file
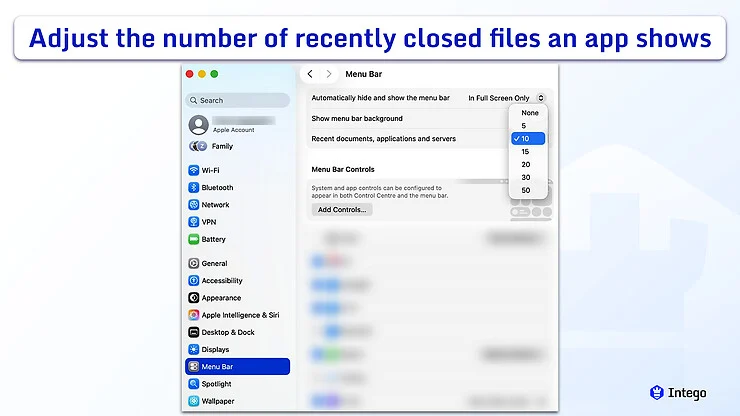
Some apps let you jump back into a project you recently closed. Select File in the top menu bar and click Open Recent. It shows a short history of your latest documents.
If you find you need a longer history, you can increase this limit in System Settings > Menu Bar > Recent documents, applications, and servers.
Find and open files with Spotlight
If you know a file’s name but can’t remember where you saved it, press Command + Space to bring up Spotlight search. Type in the name, and once the file shows up in the list, you can press Return or double-click to open it.
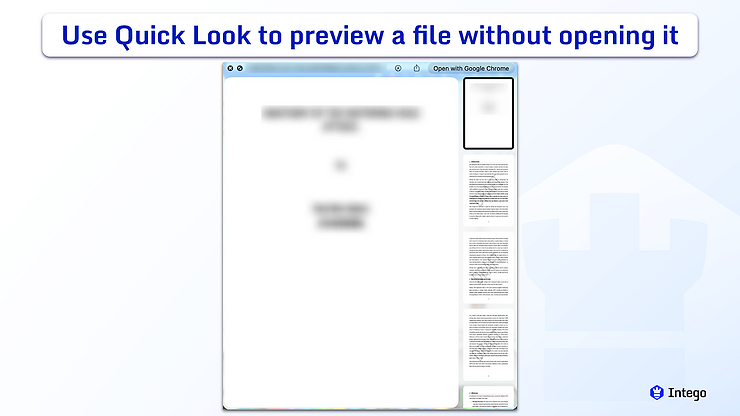
Preview files with Quick Look
If you only need a quick glance at a document or image without waiting for an app to load, select the file and press the Space bar. This opens a fast preview that you can dismiss by pressing the Space bar again.
Open files from the Dock
You can also check your Dock for quick access. Right-clicking an app icon will often bring up a small list of your most recently opened items, letting you jump straight back into your work without opening a Finder window.
Open files from Terminal
If you use the Terminal, you can open files directly from the command line. Type “open” followed by a space, then drag your file right into the Terminal window to paste its path, and press return. Most Mac users won’t need to use Terminal for this, but it’s helpful if you already spend time working in that environment.
How to choose which app opens a file on Mac
Sometimes the problem isn’t the file itself. It’s the app macOS is trying to use to open it. If a file won’t open or opens in the wrong application, you can choose a different app instead.
If you only need to do this as a one-off, right-click (or Control-click) the file and move your cursor to Open With. Choosing an app from this list opens the file just this once, leaving your usual settings exactly as they were.
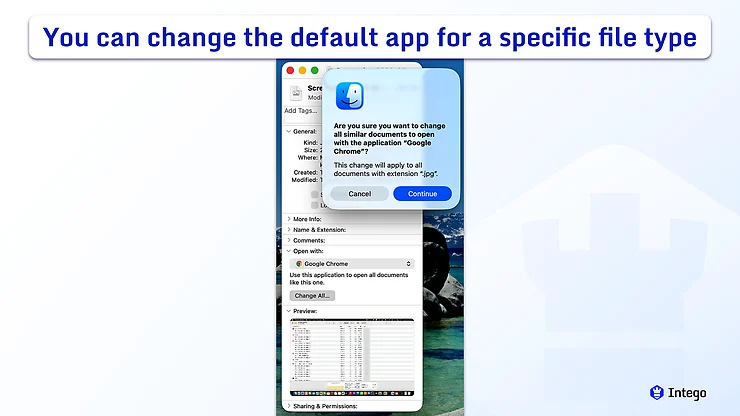
For files you work with all the time, you can set a permanent preference so they always open where you want them to. Right-click the file and choose Get Info. In the window that appears, look for the Open with section, select your app from the list, click Change All, and choose Continue. This ensures every similar file opens the same way from now on.
If your Mac tells you there is no application available to open a file, it means the computer doesn’t have the right tool for that specific format yet. You’ll need to see what kind of file it is and find an app that recognizes it.
When you need to download a new app for an unfamiliar file, stick to the Mac App Store or the developer’s official website. This lowers the risk of downloading unsafe or unreliable software.
How to open different file types on a Mac
Most of the files you come across every day will open when you double-click them because your Mac already knows how to handle standard documents, photos, and videos. When a file doesn’t open right away, it’s usually because it was made for Windows or requires a specific app you don’t have.
If you come across a file you don’t recognize, take a look at its extension (the letters after the final period in the filename). Those letters tell you what kind of file it is, and how to open it safely.
| File type | How to open it | Safety note |
| Double-click to open it in Preview. | Be cautious with PDFs from unknown senders. | |
| ZIP | Double-click to extract. | Make sure you trust where the folder came from before you start clicking on the files inside. |
| DMG | Double-click the file to open it, then follow the install instructions. | Only install software from trusted developers. |
| RAR | Use a trusted unzipping app from the App Store. | Be cautious with archives from unknown sources. |
| EXE | EXE files don’t run directly on Mac. Check for a Mac version or use Windows on Mac if needed. | Only run Windows software from sources you trust. |
| AVI | Try QuickTime first. Use a trusted media player if it doesn’t open. | Download media players from reputable sources. |
| MKV | Use a trusted media player if QuickTime won’t play it. | Verify files from unfamiliar download sources. |
| WMV | Use a trusted media player or convert the file. | Avoid sites that force “special” video software. This is often used to push unwanted or malicious apps. |
| MSG | Open it in Outlook on the web, use a trusted MSG viewer, or ask for an EML/PDF version. | Be cautious with unexpected email attachments. |
| Torrent | Open it with a BitTorrent client. | Downloaded content may carry security or legal risks. |
| BIN | Check the source and purpose first. Some BIN files need specialist software. | Treat unknown BIN files with caution. |
| MXF | Open it with a trusted professional video app. | Files can be large and may require specialized apps. |
How to open RAR files on a Mac
RAR files are compressed packages similar to ZIP files, but macOS doesn’t include built-in tools for opening them. To open one, you need to download a separate application like The Unarchiver (free, on the Mac App Store) or Keka. Once installed, either app can extract the files for you.
How to open EXE files on a Mac
EXE files are Windows programs, which means they aren’t built to work on a Mac. If someone sent you one, it was likely meant for a Windows PC.
You can check the creator’s website to see if they make a specific version for Mac. If they don’t, opening that file would require setting up Windows on your Mac.
How to open ZIP files on a Mac
ZIP files are one of the easiest file types to open on a Mac. Simply double-click the file, and your Mac will automatically extract everything into the same folder.
How to open DMG files on a Mac
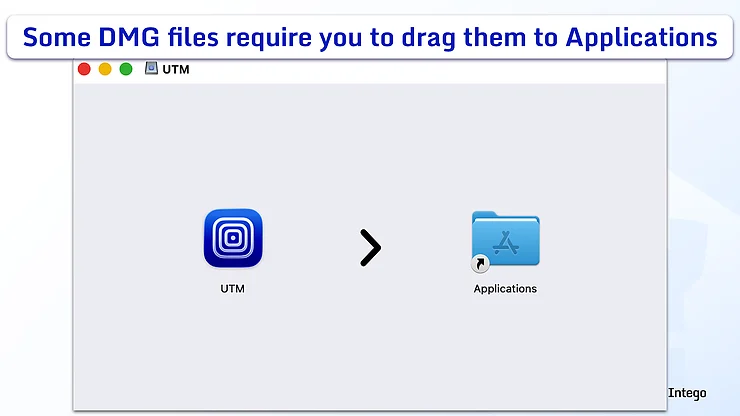
A DMG file is essentially a digital package used to deliver software to your Mac when you download an app directly from a website instead of the App Store.
When you double-click the file, a window will usually appear with instructions for installing the app. In many cases, you’ll drag the app into your Applications folder, though some installers may ask you to double-click an installation package and follow a few on-screen steps.
How to open video files on a Mac
While most videos play right away using the built-in QuickTime Player app, certain formats like MKV or AVI won’t open on their own. For those, you’ll want to use a trusted third-party media player.
What to do if a file won’t open on your Mac
If a file won’t open, the problem is usually related to the app, the file itself, or your Mac’s built-in security. Before assuming the file is broken, there are a few straightforward things you can check.
- Try opening the file with a different app: Right-click (or Control-click) the file, select Open With, and choose another app from the list.
- Check what type of file it is: The file extension (such as .pdf, .zip, or .mkv) can tell you what kind of file you’re dealing with. If it’s a less common one, you might need to find a specific app designed to handle it.
- Update macOS and the app you’re using: Older software may not support newer file formats, so it’s worth checking that both your Mac’s operating system and the app itself are current.
- Redownload the file: If you got the file online, try downloading it again. Downloads occasionally get interrupted halfway through, and a fresh copy from the website or email often fixes the problem.
Is it safe to open unfamiliar files on a Mac?
Usually, it’s best not to. While many files are perfectly safe, others can carry malware. Before you click on anything unfamiliar, it’s worth remembering how it got onto your Mac.
Files from an official developer website are much less likely to cause trouble than files from unfamiliar sites, unexpected email attachments, torrent downloads, or fake installers.
The type of file matters, too. For instance, compressed folders such as ZIP and RAR files can hide their contents until they’re extracted, which means you can’t spot suspicious files beforehand.
Meanwhile, installer files can change your system when you run them, so only get them from trusted sources like a developer’s official website.
And if your Mac shows a warning when you try to open a file, take it seriously. These built-in alerts are there to give you a heads-up if the software hasn’t been verified or might cause harm.
It’s also worth scanning unfamiliar files before opening them. Intego Virus Scanner can scan a file for malware before you open it, and it checks for both Mac and Windows threats. That matters more than it sounds: a Windows virus won’t run on your Mac, but you could still pass it to someone on a PC without knowing. A scan catches it first.
Frequently asked questions
How do I open files on a Mac?
The easiest way to open a file on a Mac is to double-click its icon. Your Mac will automatically open it with the right app for that file type.
Why won’t my Mac open a file?
Usually, this happens for a few simple reasons: your Mac might not have an app that can read that specific type of file, or the file itself might be damaged or incomplete. Sometimes, macOS security protections may also block an app or installer if the developer can’t be verified.
How do I open RAR files on a Mac?
Macs don’t have a built-in way to open RAR files on their own. You’ll need to download an unzipping tool from the App Store, which will handle the process for you.
How do I open EXE files on a Mac?
EXE files are built specifically for Windows PCs, so they won’t open on a Mac. Your best first step is to check the developer’s website to see if they make a Mac version. If they don’t, you would need to set up Windows on your Mac to use it.
How do I open ZIP files on a Mac?
Just double-click the ZIP file, and your Mac will unpack its contents. The extracted files will usually appear in the same folder as the ZIP file.
Is it safe to open downloaded files on a Mac?
It mostly depends on where the file came from. If you downloaded it from a website you know and trust, it’s usually safe to open. It’s best to be cautious with unexpected email attachments or files from unfamiliar websites, as those are the places where harmful software tends to hide.

