How to Back Up Your Mac’s Data with Time Machine
Posted on
by
Kirk McElhearn
Backing up your data is one of the most essential security tasks you can do. Because of the many ways you can lose data, having multiple backups is the only way to ensure that if anything happens – such as disk failure, a lost or stolen computer, or malware deleting files – you can restore your important data quickly.
There are many strategies for backing up your Mac, and using multiple backups is one of the keys to protecting your data. You can back up your Mac to any of several types of local hard drives, to a network device, and you can use online backup services.
While Intego Personal Backup, which is part of Mac Premium Bundle X9, is a flexible, powerful backup tool, it’s a good idea to also use Apple’s Time Machine. In this article, I’m going to explain how Time Machine works, and how you can use it to back up your Mac.
What is Time Machine?
Time Machine is macOS’s built-in backup tool. It’s easy to use and it automatically backs up your Mac every hour (if it’s on, and if a backup disk is available). Time Machine makes hourly backups for the past 24 hours, daily backups for the past month, and weekly backups for all previous months, as long as you have space on the hard drive you use for backups. When you run out of space, Time Machine deletes the oldest backups to make more room.
Once you set up Time Machine, it’s automatic; there’s nothing to do. On a desktop Mac, Time Machine runs in the background, and if you’re using a laptop, and aren’t able to perform backups each hour, your Mac stores snapshots, which it backs up when your Time Machine is next available. So when you come home from work, from meetings, or from a trip, plug in your Time Machine drive to back up your Mac. If you use a laptop, it’s a good idea to get a small, portably hard drive that you can take with you on the road. You can get a 4 TB hard drive like this for less than $100; just connect it to your laptop from time to time, and let it back up your files.
Setting Up Time Machine
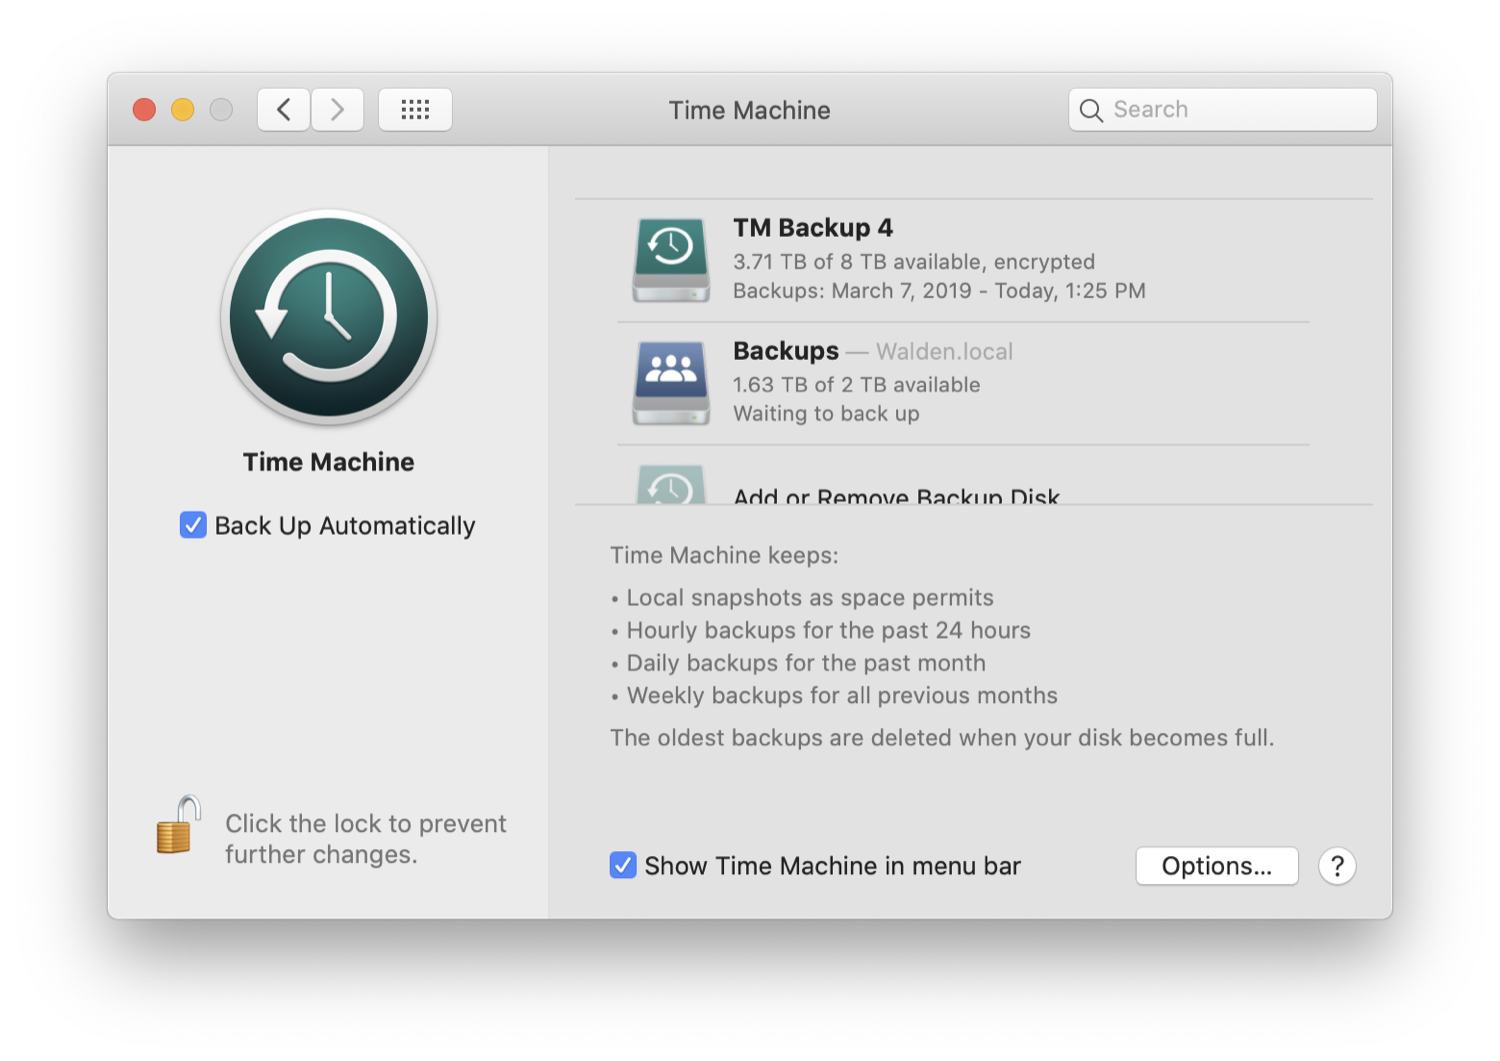
You set up Time Machine in System Preferences. The Time Machine preference pane is quite simple: you turn on the feature by checking Back Up Automatically, then you select a drive to back up your data to. This could be a hard drive connected to your Mac, or a network drive on another Mac, or on a NAS. Make sure to check Encrypt Backup Disk for extra protection.

Once you’ve done this, you can check Show Time Machine in menu bar to have a small menu extra display. You can use this to launch a backup, stop a backup, or to Enter Time Machine. (See below to learn how to recover files.)
By default, Time Machine backs up everything on your Mac, and all external drives connected to it (but not network drives mounted on the Mac). You can choose to which items get backed up to Time Machine. Click Options, then click the + button to navigate to folders that you want Time Machine to exclude from backups. For example, you may want to save space on your Time Machine drive by eliminating some folders with large files that you have backed up in other ways. If you use Dropbox, OneDrive, or Google Drive, you may not need to back those folders up, since their data is available elsewhere. However, backing these folders up ensures that you have multiple versions of files they contain, which may not be available from those services.
You may have a backup strategy where you regularly clone your startup drive so you can use it as a bootable backup. Even if you do, I recommend that you don’t check Exclude system files and applications. This latter setting will save space, but you can recover from a problem by using Time Machine to restore your Mac, so it’s good to have this available.
One way to protect your data even more is to use two drives for Time Machine backups. Time Machine alternates the drives you’ve selected each time it runs. Click Add or Remove Backup Disk and select a second drive (you could potentially use three or four drives if you want).
Recover files from Time Machine backups
If you have a Time Machine backup and need to recover files, there are two ways to do this.
To recover the latest versions of all the files on your Mac, this Apple support document explains how to recover files, or recover both macOS and your files.
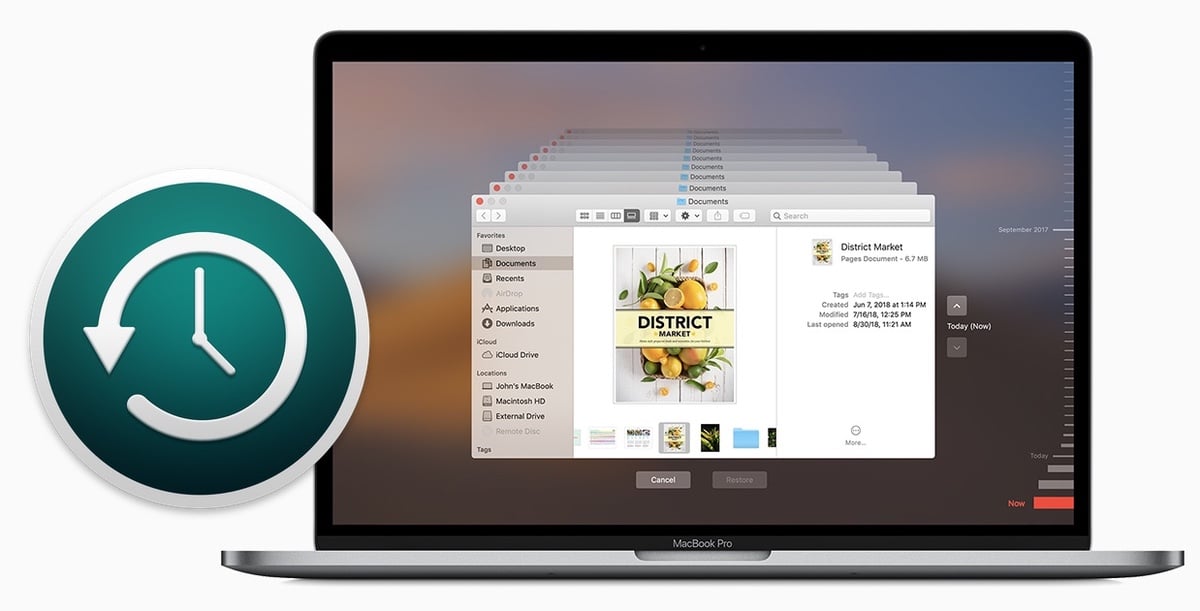
To recover individual files, click the Time Machine menu extra in the menu bar and choose Enter Time Machine. When you do this, the current Finder window will be shown with its multiple backups. You can go back in time and recover files that you accidentally deleted, or that became corrupted.
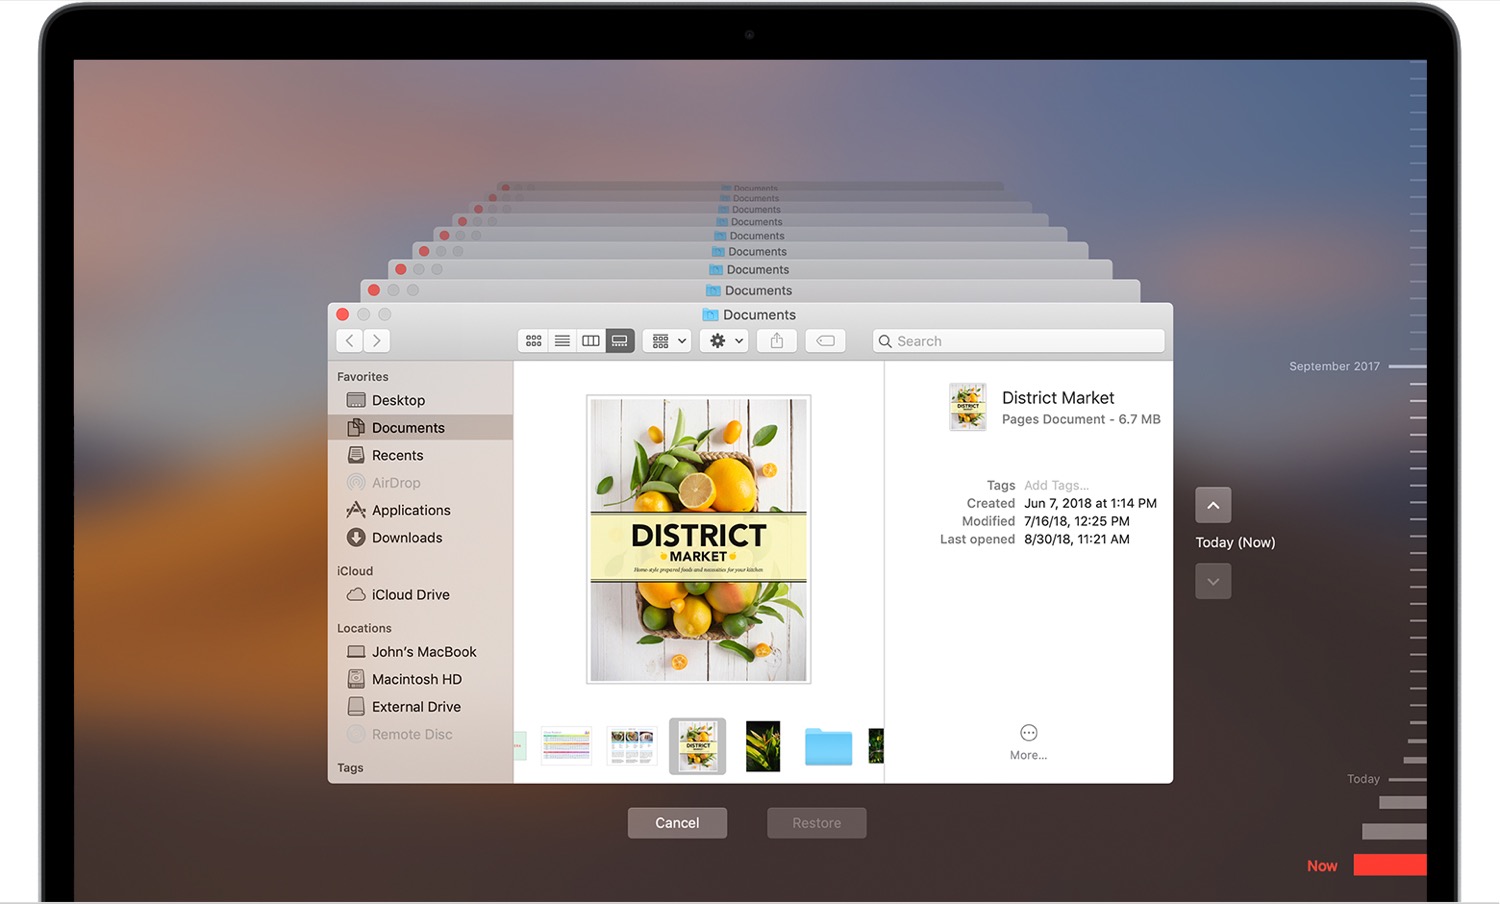
Click in the timeline on the right side of the screen to go to a specific date. Or click the up arrow to go back, one backup at a time, until you see the file you’re looking for. You can navigate through your folders, but it’s easiest to enter Time Machine from the folder where you think the file is located. When you find a file, click it to select it – or click multiple files – then click Restore. If the files exist, such as if they’re older versions of existing files, Time Machine will ask if you want to replace the existing files or keep both versions.
Time Machine is just one element in a thorough backup solution. Its ease of use makes it essential to ensuring your data protection.

