How to Use the macOS Menu Bar
Posted on
by
Kirk McElhearn and Craig Grannell

The menu bar is one of the most ubiquitous elements you use to control your Mac. Yet, do you really know all of the many features it offers? You can access menus and their commands, of course, but you can also use menu extras (those icons at the right side of the menu bar, which Apple also refers to as status menus), search for menu commands, get help, and much more. And you can access the menu bar from the keyboard, and change the way it displays.
In this article, I’m going to explain some of the lesser known features that make the menu bar a powerful tool for using your Mac.
The Simplicity of the Mac Menu Bar
The menu bar is pretty simple to use. You click on a menu name, then you choose a menu item in a menu. For example, you can click File, then move your mouse, or glide your finger or your trackpad, select Save, and then click the mouse or trackpad to activate that command. (In this article, I’ll abbreviate actions like that by saying “Choose File > Save.”)
Similarly, you can also control the menu bar with your keyboard. If you click a menu name, and a menu displays, you can navigate that menu using the arrow keys on your keyboard. You can even activate the menu bar from the keyboard if you turn on a setting. Here’s how:
In System Preferences, on the Keyboard tab, click Shortcuts, then Keyboard. Check Move Focus to the Menu Bar, and you’ll see there’s a shortcut there: ^F2. (That’s the ctrl key and the F2 key at the same time.) You can change this shortcut if you like, but bear in mind that, on some Mac keyboards, you’ll also need to press the fn key at the bottom left of the keyboard.
When you activate this keyboard shortcut, the menu highlights. You can then use the arrow keys to navigate the menus and their commands: the right arrow key moves across the menu bar, and the up and down arrow keys navigate each menu. Just press Enter when you’ve found the command you want to use.
Save Time with Keyboard Shortcuts
You’ll notice that many of the menus on your Mac display keyboard shortcuts. For example, in the Edit menu, you’ll see that Cut, Copy, and Paste respectively have the shortcuts ⌘X, ⌘C, and ⌘V. Learn these shortcuts to save time. Instead of selecting text, then choosing File > Copy, just press Command-C. As you peruse the menus, try to commit to memory the shortcuts you use often. But don’t worry if you forget; you can always see them in any menu, or sub-menu, as a reminder.
Minimize Distractions: Hide the Menu Bar
You might find the menu bar to be a distraction. If so, you can hide it when you’re not using it. In the General pane of System Preferences, check Automatically Hide and Show the Menu Bar. When you do this, the menu bar slides up off your screen, and only comes back again when you move your cursor to the top of your display, or if you activate the keyboard shortcut I mentioned above that highlights the menu bar.
If you use any apps in full screen mode, the menu bar hides by default, even if you don’t turn this option on. You display it in the same manner, by moving your cursor to the top of the screen.
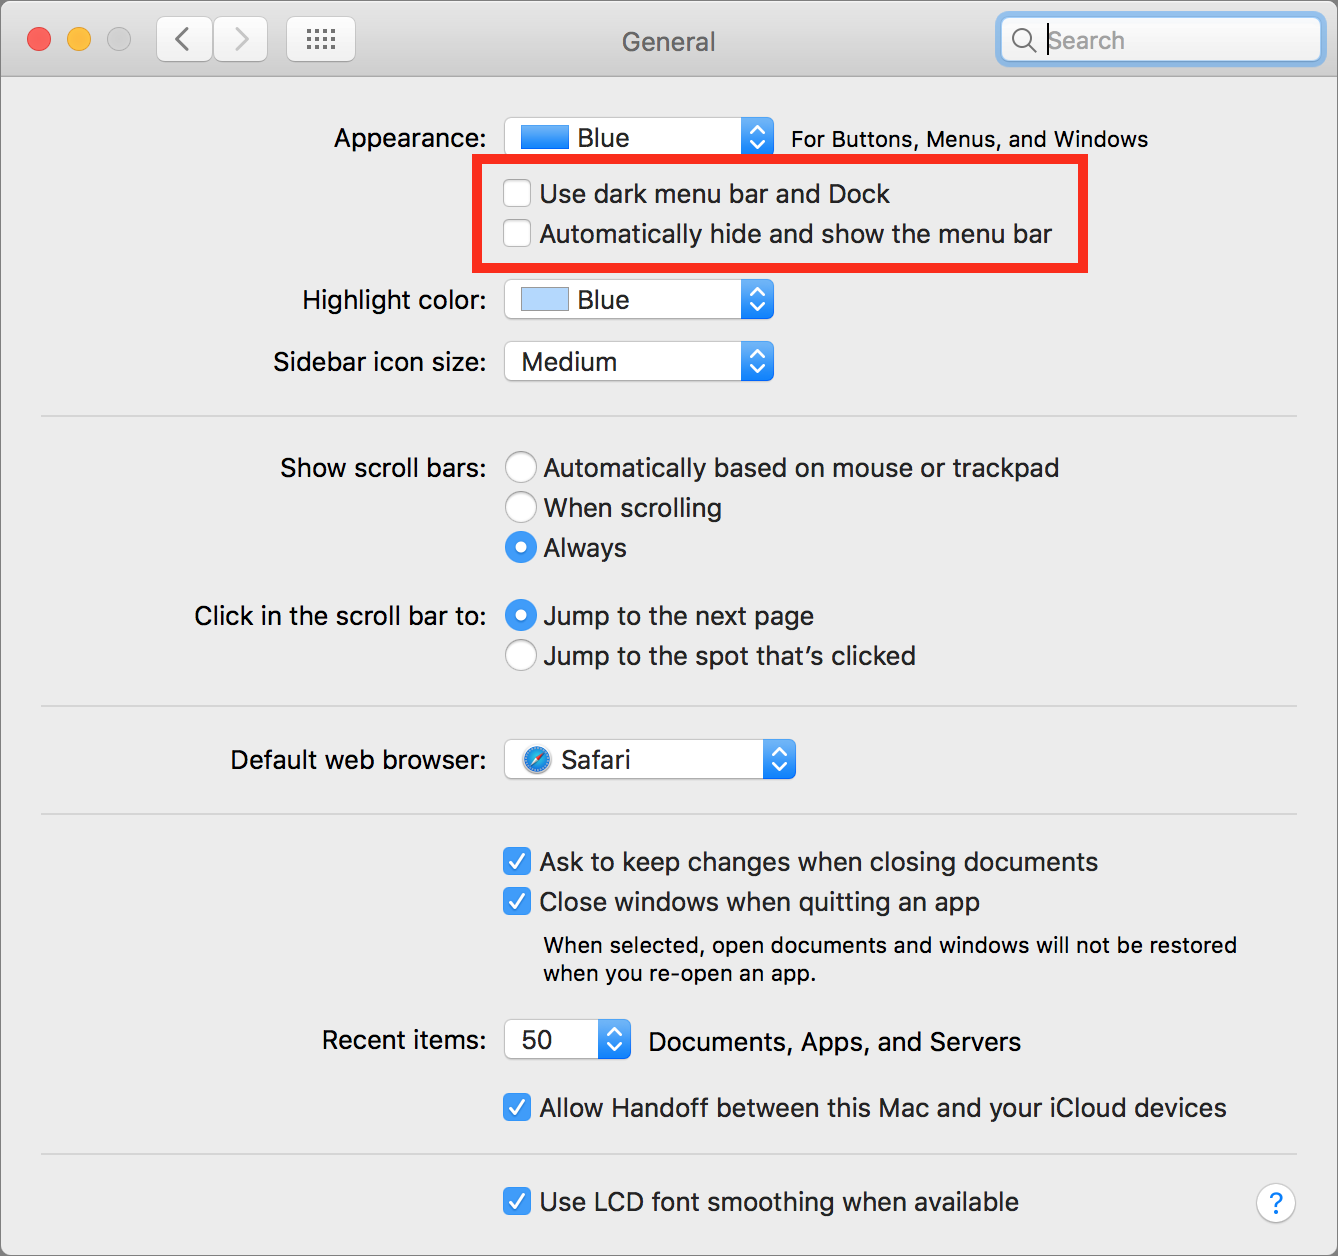
There are two options in the General preference pane that changes the way the menu bar displays.
Paint it Black
Some people like the menu bar to be black, with white text, instead of the default color. You can choose this in the General preferences. Just check Use Dark Menu Bar and Dock. As the option says, this also changes the color of the Dock. You may find that the dark menu bar is less distracting.
Get Help
You’ve certainly noticed the Help menu in the menu bar. If you click this menu, you’ll see a number of options (depending on the app), such as help for that app, information about an app, support contacts, and more. But there’s also a search field that displays when you click this menu, and it’s really useful.
When you type a search term in the search field, macOS searches in the menus of the current application for that term, as well as searching in any help files. So, if you’re in iTunes, for example, and you’ve forgotten where the Organize Library command is, start typing Organize in the Search field. The Menu Items section of the Help menu shows any menu items that contain your search term. Move your cursor over that menu item, and you’ll see exactly where it is so you can choose it.
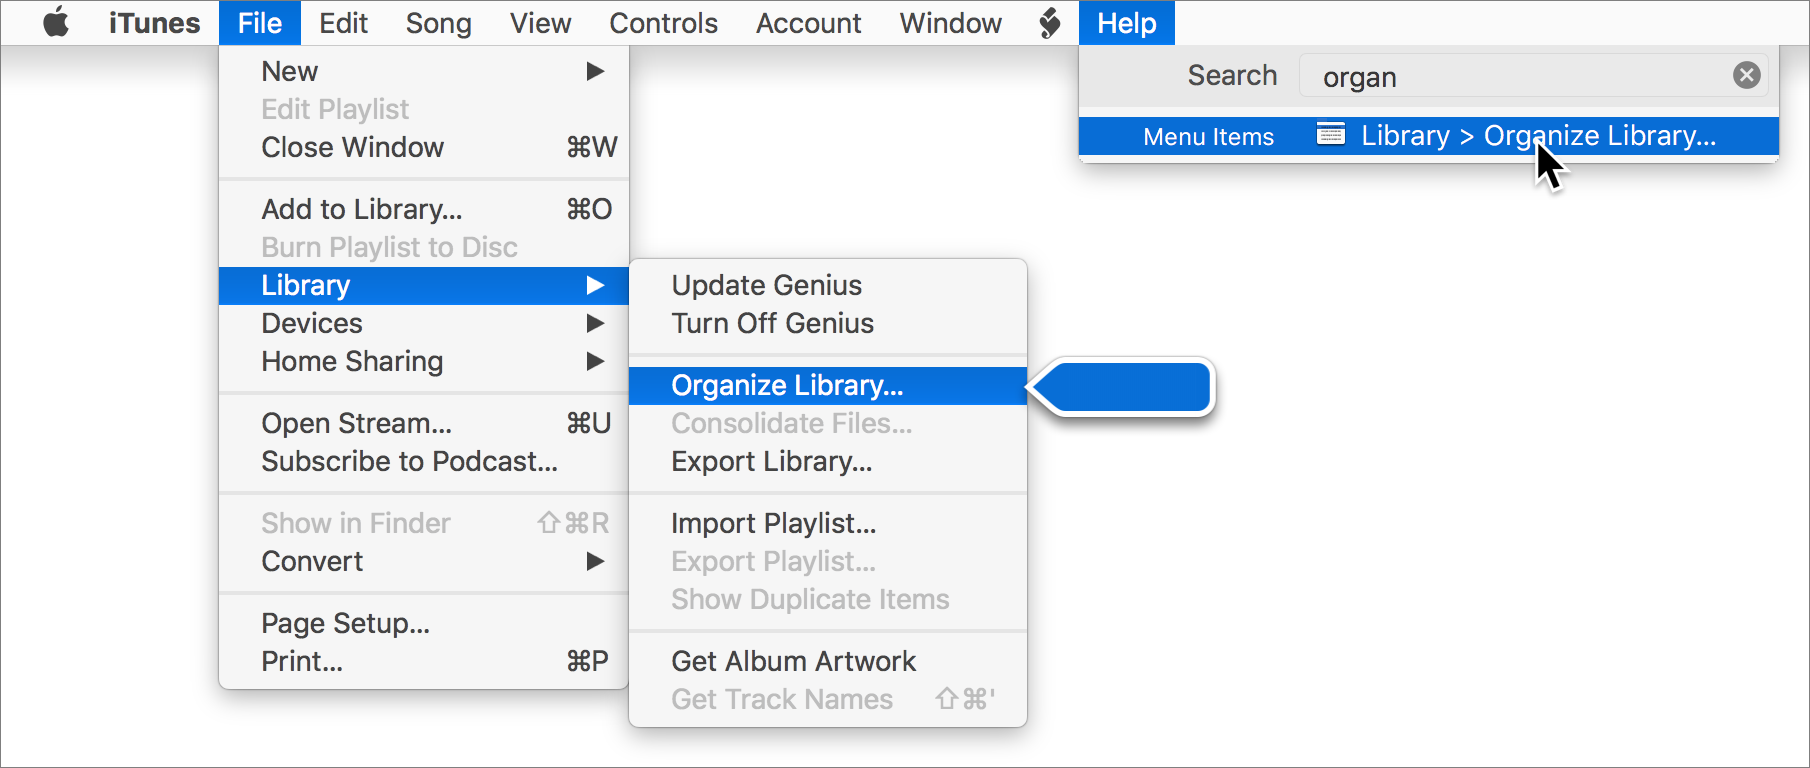
Use the Search feature in the Help menu to find hidden menu items.
Menu Extras (Status Menus)
At the right side of the menu bar are a number of icons, called menu extras (now referred to by Apple as “status menus”). Some display information—such as the date and time—and they all display menus, when clicked, that have a number of commands.
For example, the Wi-Fi menu extra lets you turn Wi-Fi on or off, or choose a different network. The Bluetooth menu extra lets you see which Bluetooth devices are connected to your Mac, and how much charge they have left. Some menu extras, such as Spotlight and Siri, merely activate a feature: the former displays a search field in the middle of your screen, and the latter wakes up Siri so you can ask for something.
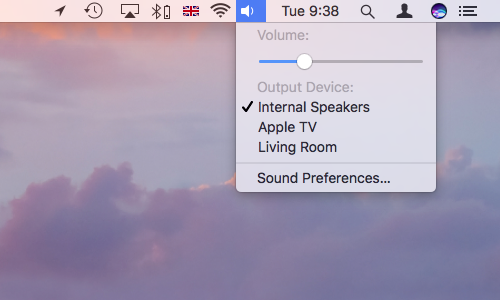
Some menu extras have an additional/alternate menu, accessed by holding Option when clicking the menu’s icon. For example, the Sound menu in macOS contains a volume slider and lists output devices, but the alternate menu lists both output and input devices. (In OS X El Capitan and earlier, input and output selections are only found in the alternate menu—the standard one is just a volume slider.) Some third party apps work similarly: click Dropbox’s menu extra to view a panel with tabs for recent files and notifications; Option-click and you get a simpler menu with a few key items.
You may want to re-organize some of these menu extras, so they display in a way that is more efficient for you. To do this, press and hold the Command key, then click one of the menu extras and drag it. Many third party apps also display menu extras, and since the release of macOS, you can also reposition those as desired.
To remove an Apple menu extra, press and hold Command, drag the item off of the menu bar, wait until a cross appears, and release. For a third-party menu extra, you usually have to quit the parent app. Some, though, offer preferences settings for removing a menu extra when the app is running. If not, menu extra managers like Bartender can force icons off of your menu bar.
Exploring Apple’s menu extras
We cover some great third-party menu extras elsewhere on this blog, but Apple also provides several of its own. These are activated in System Preferences.
Displays: This once enabled you to switch display resolutions but is now restricted to mirroring options, for example to mirror your display on an Apple TV. (Use Resolutionator for an equivalent of the older behavior.)
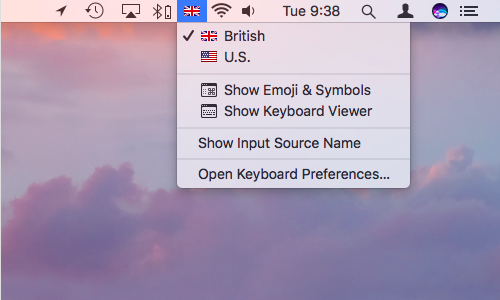
Keyboard: In the Keyboard tab of this System Preferences pane, you can opt to show keyboard and emoji viewers in the menu bar. This is useful as a visual reminder of your current keyboard layout, if you tend to switch between several. The emoji and symbols viewer is less useful, since you can in most apps use Ctrl+Command+Space to trigger a pop-up window for inserting special characters.
Sound: This one’s great if you use multiple sound sources, because you can quickly switch output devices (for example, between headphones, connected USB devices, and AirPlay). Option-click the menu extra to view input sources.
Ink: This menu extra provides quick access to options for toggling the Ink window and being able to ‘write anywhere’ when you’ve a stylus connected to your Mac.
Network: Click this menu extra to view available Wi-Fi networks and personal hotspots. You also get options to manually join or create a network. Option-click the menu extra for details about the network you’re currently connected to (such as its IP address and channel).
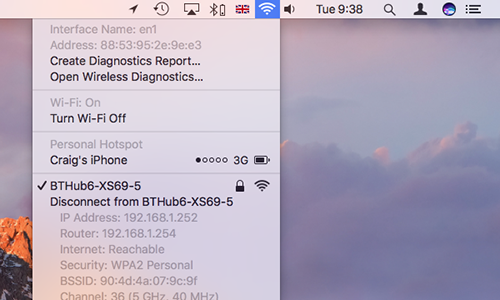
Bluetooth: Along with being able to turn Bluetooth on and off, this menu extra lists connected devices, and their battery levels. There are also options to begin the process of sending files to a compatible device (or browsing those already on it). Like the Network menu extra, this one displays additional details about your connection when you Option-click.
Users & Groups: Under Login Options, you can choose to show the fast user switching menu extra in various forms: full name; account name; icon. Regardless of how its displayed, this menu extra enables you to switch users directly from the menu bar. (Note: you must be an administrator to activate this menu extra.)
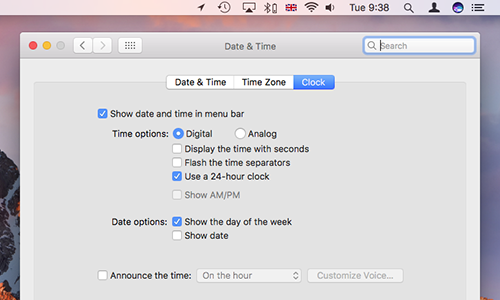
Date & Time: The Clock tab includes the option to show the date and time in the menu bar. Appearance settings exist for tweaking how this is displayed: you can go analogue or digital, and in the latter case add the day of the week and date.
Time Machine: The menu extra for Apple’s back-up solution is in part an indicator of Time Machine’s status: when in progress, an arrow is added towards the bottom-left; when an error occurs, an alert icon replaces the clock. Click on the menu and you get options to skip a back-up, and to enter the main Time Machine interface, in order to browse and restore older versions of documents.
Additionally, if you have location services activated in Security & Privacy, the arrow indicator may appear in the menu bar from time to time. Click it to find apps that are using your location.
As you can see, there is a lot you can do with your Mac’s menu bar. These tips can help you use this interface element more efficiently. So take advantage of the many hidden powers of the menu bar, and you’ll be able to do more on your Mac with less hassle.
Are you new to Mac?
Want to get the most out of your new MacBook, iMac or other Apple computer? Whether this is your first laptop or you’ve just switched from Windows, there are a few things you should know about your new Mac, like basic keyboard shortcuts or how to use the various features macOS has to offer. Learn more about what your Mac computer can do for you at the Intego New Mac User Center: Get started now!

