How to Shoot Video with an iPhone
Posted on
by
Kirk McElhearn
Shooting video with an iPhone is easy, but you may not know all the many options available on your device. You can choose the resolution and frame rate of your videos, shoot slow motion or time-lapse videos, and you can zoom and use the different lenses on your iPhone, if your model has multiple cameras.
But you can also take stills while you’re shooting video, and with third-party video apps, you have tight control over focus and exposure, making the iPhone good enough to shoot a feature film. (And it’s been done.)
In this article, I’m going to explain the many options available on an iPhone for shooting video. (And note that most of what I describe also applies to the iPad.)
The basics of shooting video
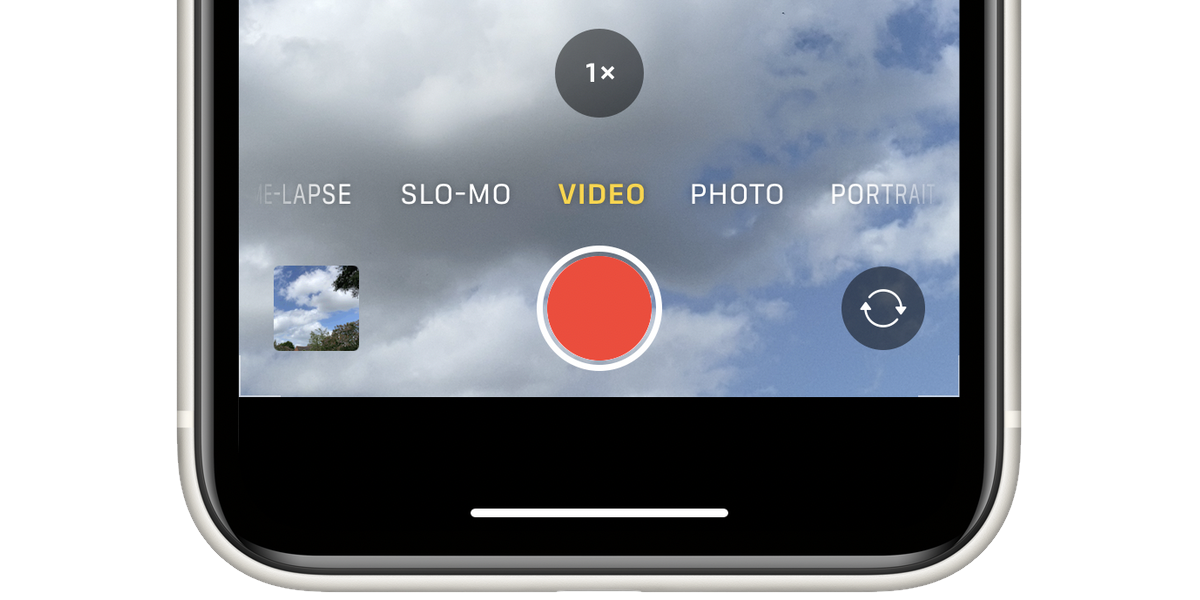
To shoot a video with the Camera app on your iPhone, open the app and slide the format menu to Video. Tap the shutter button or press one of the volume buttons to start recording. Tap the shutter button again, or press a volume button to stop recording.
Your video gets stored in the Photos app, and you can view it there, share it, sync it to a Mac or other Apple device via iCloud, and edit it in iMovie or in more powerful video editing apps. You can also do some basic editing in the Photos app, such as trimming a video, adjusting exposure or contrast, or applying filters.
One feature on recent iPhones that you may not notice is optical image stabilization. This means that as you move, the iPhone doesn’t record jerky movements, but smooths them out. This feature also allows you to get better photos and videos in low-light situations.
Recent iPhones have this to varying degrees. For example, the iPhone 11 has this only on the standard camera, but not the ultra-wide camera. The iPhone 11 Pro and Pro Max have optical image stabilization on the regular camera and the telephoto camera. The iPhone SE (2nd generation) has this feature on its only camera. You’ll find this feature on some older iPhones, starting with the iPhone 6 Plus (but not the regular iPhone 6), then on all subsequent iPhone models.
Zooming when shooting video
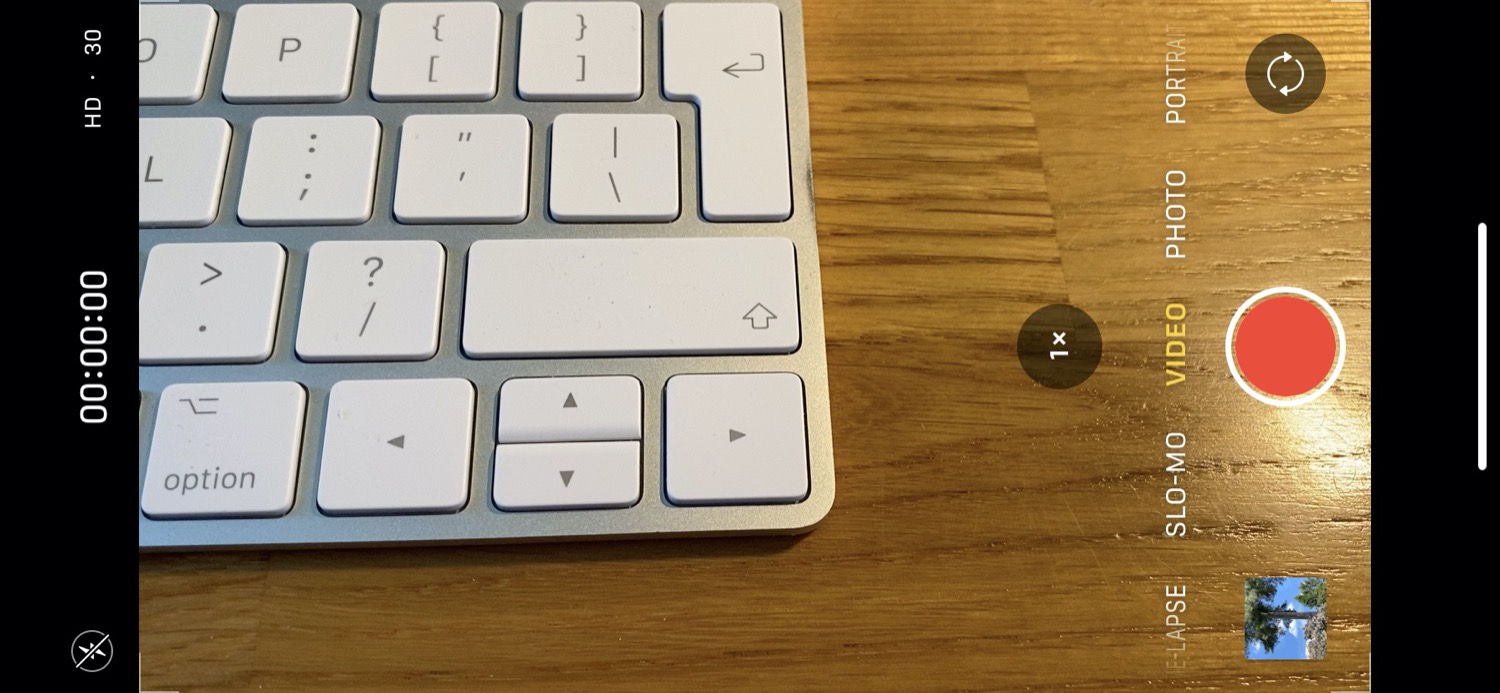
If you have an iPhone with multiple lenses – technically they are different cameras, but it’s good to think of them as different lenses – then you can zoom in or out to adjust which lens you use when shooting videos. Just above the shutter button (in portrait mode) on to the left of the shutter button (in landscape mode), you’ll see a 1x by default. If you tap this, you can cycle through the available lenses on your device.
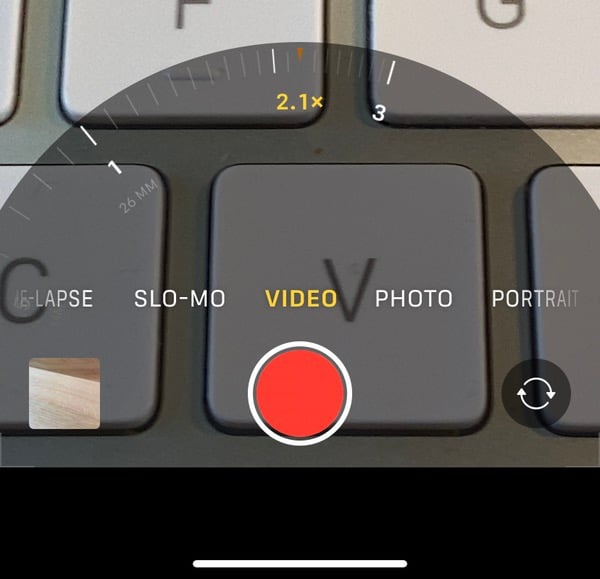
You may have .5x for a wider angle lens, and 2x for a telephoto lens. If you tap and hold the lens button, you can zoom in or out, which uses a combination of optical zoom (the different lenses on your iPhone) and digital zoom (where the image is altered digitally on the iPhone, with a slight loss of quality). On my iPhone 11, I can go to a maximum of 3x, but on an iPhone 11 Pro, the maximum is 10x.
Record a QuickTake video
On some recent iPhones – the iPhone 11 series and the iPhone SE (2nd generation) – you can shoot a QuickTake video. You can do this when in photo mode, by pressing and holding the shutter button. When doing this, you’ll see a timer at the top of the window as the recording progresses. If you slide your thumb or finger to the right (in portrait mode) or up (in landscape mode) this locks the recording in video mode. Tap the shutter button to stop recording.

Video settings
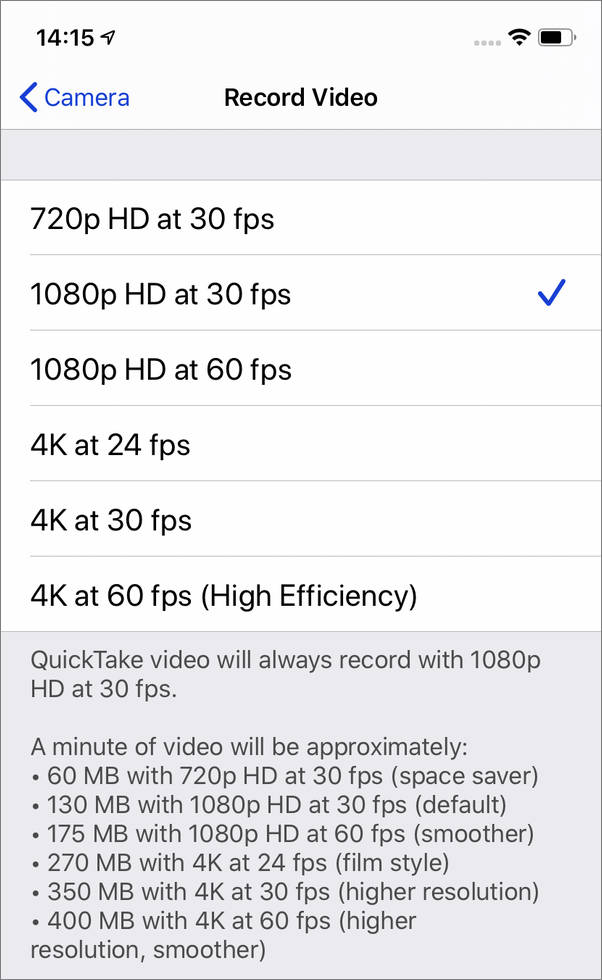
As you can see in the screenshot above, my video settings are HD (1080p) at 30 frames per second. If you go to Settings > Camera on your device, you’ll see some settings for recording video, and for recording slow-mo. For video, depending on your iPhone model, you have options to record in 720p, 1080p, or 4K, and you can choose from different frame rates: 24, 30, or 60, depending on the resolution. As the Settings screen shows, these choices affect how large your video files are, and how much you can record. Video can use from 60 MB to 400 MB per minute, so choose according to the quality you want, but also the amount of storage available on your device. If you do plan to shoot a lot of video on your iPhone, then you need to get enough storage to do so.
There are similar settings for slow-motion videos. You can choose from three options, ranging in quality from 720p to 4K, and in frame rates of 120 or 240 frames per second. These frame rates tell how many frames are recorded per second, but at playback, slow-motion videos are played at 30 fps, so this means that your recording is either 1/4 or 1/8 the actual speed.
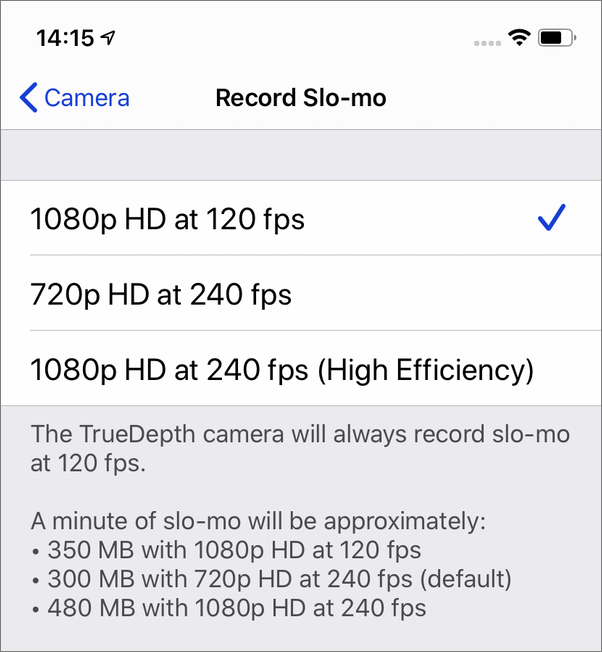
Shooting slow-motion videos
The iPhone is very capable for advanced video modes, one of which is slow-motion. It’s a lot of fun to shoot videos of your kids or your pets in slow motion. To do this, slide the video mode menu to Slo-Mo, and tap the shutter button; shoot as you normally would for a regular video, then tap the shutter button to stop. When you play back the video, you’ll see it at 1/4 or 1/8 speed, depending on the settings you’ve chosen.
Shoot time-lapse videos
Time-lapse videos are created by taking still photos at set intervals and then playing them back at normal video speed. You can use these to show clouds moving in the sky, or a sunset, sped up. You cannot change the frame rate, and the iPhone will automatically record images for time-lapse videos so they play back for a duration of 20 to 40 seconds. So don’t expect to be able to record a time-lapse video for a full day; for that type of video, you need a “real” camera. But the short time-lapse videos you can make with an iPhone can be fun.
Going further with third-party video apps
Just as there is no shortage of photo apps for the iPhone, there are also plenty of video apps that let you go much further. Filmic Pro is one of the best-known such apps, allowing you full manual control of focus and exposure, more frame rate options, advanced image quality settings, and much more.
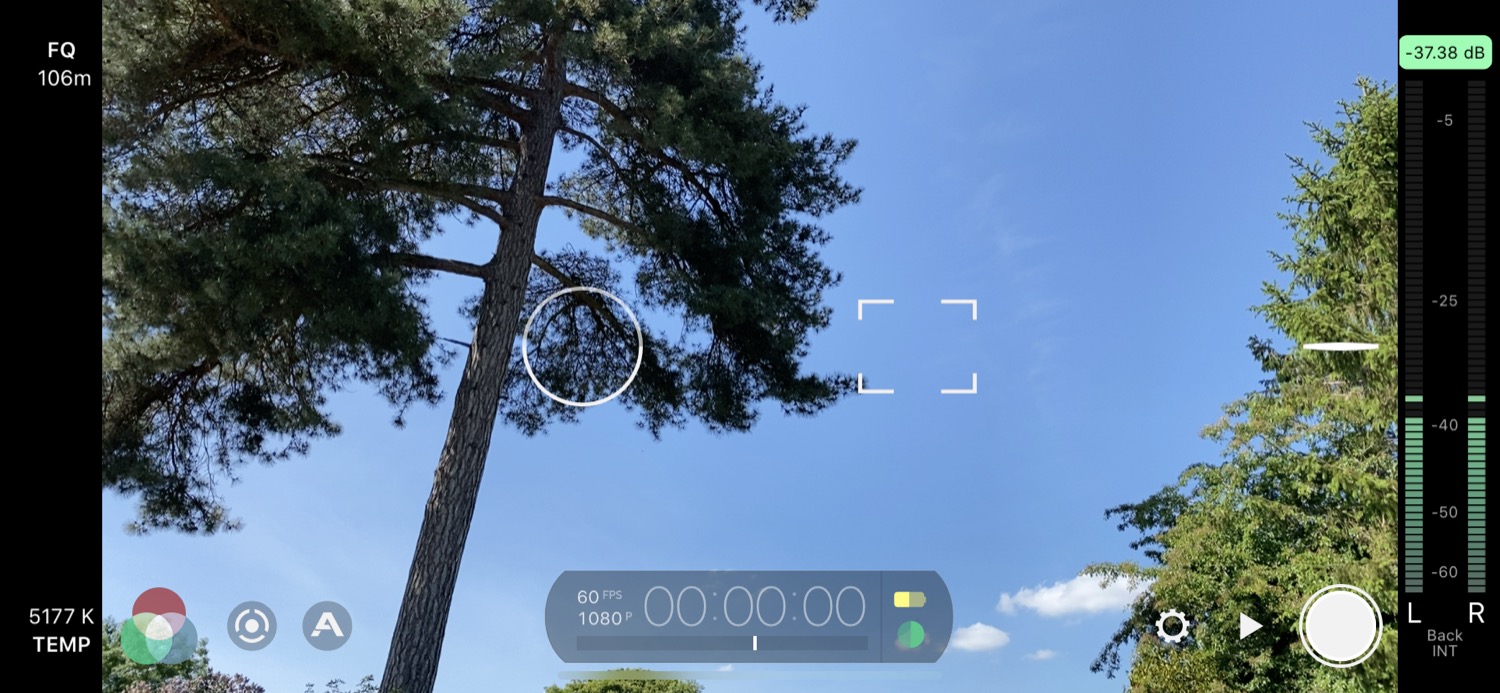
Filmic Pro also supports a number of gimbals, handheld stabilizers that turn a smartphone into a steadicam. While you may not want to reproduce the scenes in the maze from The Shining, using a gimbal can make home videos of kids parties, for example, a lot more enjoyable.
The learning curve with Filmic Pro is pretty steep, but you can get started pretty quickly before delving into the more advanced settings, many of which you won’t need.
So get to know your iPhone’s video capabilities. Other than taking quick videos of your friends or family, you have lots of options for different types of videos, and for different resolutions. And if you’re a budding filmmaker, try out an app like Filmic Pro. You may be surprised at the quality of the iPhone’s video.

