How To + Recommended + Security & Privacy
A Layman’s Guide to Ransomware Protection for Mac
Posted on
by
Jay Vrijenhoek
Ransomware is no longer the exclusive Windows-only scare it once was. The first Mac ransomware was discovered in March of this year, and it’s only a matter of time before the next one rears its ugly head.
As no-one can tell you what the infection vector will be, how it will work exactly or what types of files it will go after, how do you prepare for it?
As with any good security strategy, for ransomware protection the best defense is made up of multiple layers. The first layer begins with a trusted security suite that monitors your system for malware and checks your web and network traffic for malicious content. The next defense layer is you. By not downloading content or opening email attachments from untrusted sources you greatly reduce risk of infection. Another layer is backups. Making sure your data is safe is the main priority and a smart backup strategy should be in place even if your Mac is not connected to the Internet. Let’s face it, at some point every hard drive or solid state drive fails, even if it’s never been touched by malware.
OS X’s built-in backup solution Time Machine is a good first step on the road to securing your files. Use it to backup your data to an external hard drive, local server, a Time Capsule or all of the above. I say Time Capsule is a good first step because, even though it’s very easy to set up, it’s very limited in functionality. Also, the ransomware that was recently discovered (and surely future ransomware as well) encrypted files on external drives and mounted network shares as well!
Now don’t start celebratory drinking just yet, you have options!
A day in the life of ransomware
Ransomware typically infects a computer and lies dormant. Ransomware creators need to find the sweet spot between infecting as many computers as possible, encrypting the data on them, and word of the ransomware getting out.
If a computer is infected and files start being encrypted right away, word of the ransomware will get out; antivirus companies will quickly update their products and thwart chances of infecting more computers. The end result may be just a hand full of computers infected.
If the ransomware installs but doesn’t do anything for a few days, chances of people knowing it exists are much smaller. This gives the ransomware more time to infect a lot more computers. After a few days, the ransomware contacts a Command & Control (C&C) server for instructions. If the C&C server gives the OK to get to work, suddenly thousands or hundreds of thousands of Macs across the globe will start having their files encrypted. By the time the alarm bell is rung and the world is aware, it will be too late for all those that are infected. In that scenario the potential payout for the people behind the ransomware is huge.
Leaving the ransomware dormant for too long also increases the risks of it being detected. Security researchers and antivirus companies are always looking for new malware and even when dormant, ransomware leaves a trace that can be discovered by those highly skilled people.
KeRanger, the previously mentioned Mac Ransomware, laid dormant for three days before it sprung into action. The next ransomware may take a week or longer.
You mentioned something about options?
Indeed I did. We want a backup solution that can backup to multiple destinations, at a schedule of our choosing and offer a variety of backup types and settings. Time Machine can back up to multiple drives, but the type of backup destination is limited and the schedule you set applies to all backup destinations.
Luckily for Intego customers that utilize Mac Premium Bundle, a backup utility is available that does everything you may need. Personal Backup can:
- Back up to an external drive, local network share (AFP, SMB, FTP), remote server share or sync data 1:1 with another Mac.
- Perform simple clone backups, backups with versioning, bootable backups or synchronize.
- Set a schedule you like. Hourly, daily, weekly on any day or multiple days of your choosing, monthly or several selected days per month.
- Configure advanced settings. Not pre-set ones, no, customize them any way you want using Automator actions! These actions can be configured to run before starting a backup, after a backup or both.
- Easily restore files from any of your configured backup tasks. Browsing your backups is easy and you can restore files to their original location or select a new location.
- Set a notification schedule if a backup has not been done for 1 or more days.
- Send a status email to let you know if a backup was completed successfully.
- Does not conflict with Time Machine so both can be used if desired.
How will backups provide ransomware protection?
This is where the additional features prove to be a great value. The way your backup destinations connect to your Mac are no different and can potentially be attacked by ransomware. The potential key to saving your files if you are hit by ransomware is time between backups and only making your backup destinations available at the time of those backups. After all, if ransomware can’t access the backup, it can’t encrypt your files.
Now there are a lot of different ways to skin this particular kitty, but let’s assume you have one external hard drive and a Time Capsule. Of course, if you have multiple external drives and an OS X server running, your schedules can be a lot more complex than what I am about to describe.
With the Time Capsule and external drive available, you can configure the following backups:
- Hourly backups to your Time Capsule using Time Machine.
You have it built-in to your OS so there is no reason not to use it. - Daily, weekly, bi-weekly and even monthly backups to your external hard drive using Personal Backup.
If space allows, divide your external drive in multiple partitions. One for daily, weekly and bi-weekly backups. For help with partitioning, have a look here.
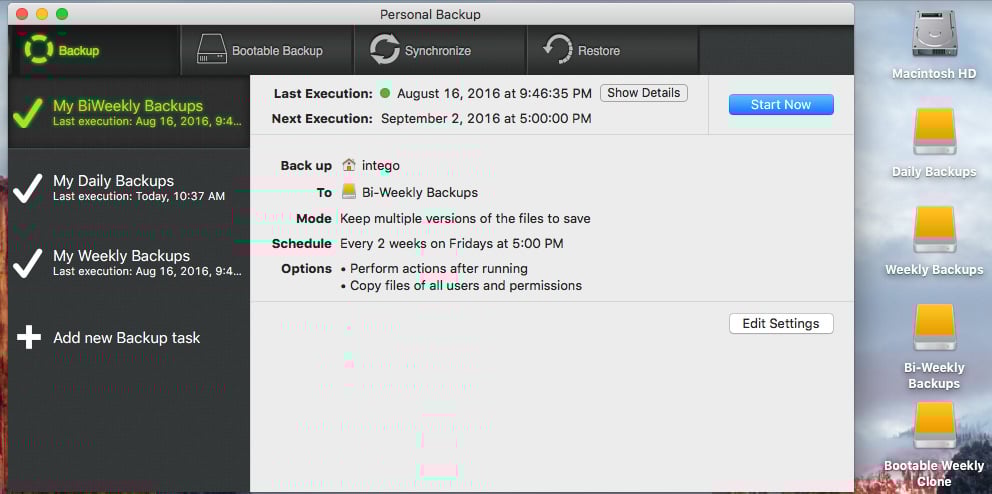
Your Personal Backup schedule and partitions would look something like this:
Let’s walk through the setup of the daily backup.
Fire up Personal Backup and you will be asked to create a Backup task.
- Name your task “My Daily Backups” or something that easily identifies the schedule it keeps.
- Select your backup source. This can be your home folder, a set of folders of your choosing or your entire hard drive. If you want to backup your whole drive though, it’s best to create a bootable backup instead. If you can not afford any downtime, a bootable backup as the name implies will allow you to start up from your external drive and keep on working.
- Select your backup destination.
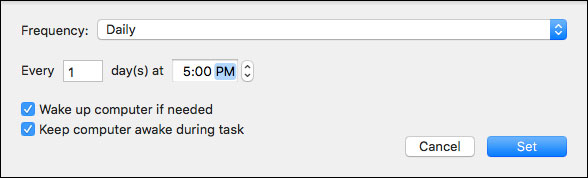
- How often you want to back up in this case is daily so the default setting should be ok to use. However if you use a laptop or your Mac is powered off after a certain time, it’s best to select the exact time you want the backup to start every day. This way you’ll know the Mac is on and able to run the backup. To do this, click the “Other..” button. You may also want to enable the “Wake computer if needed” and “Keep computer awake during task” options.
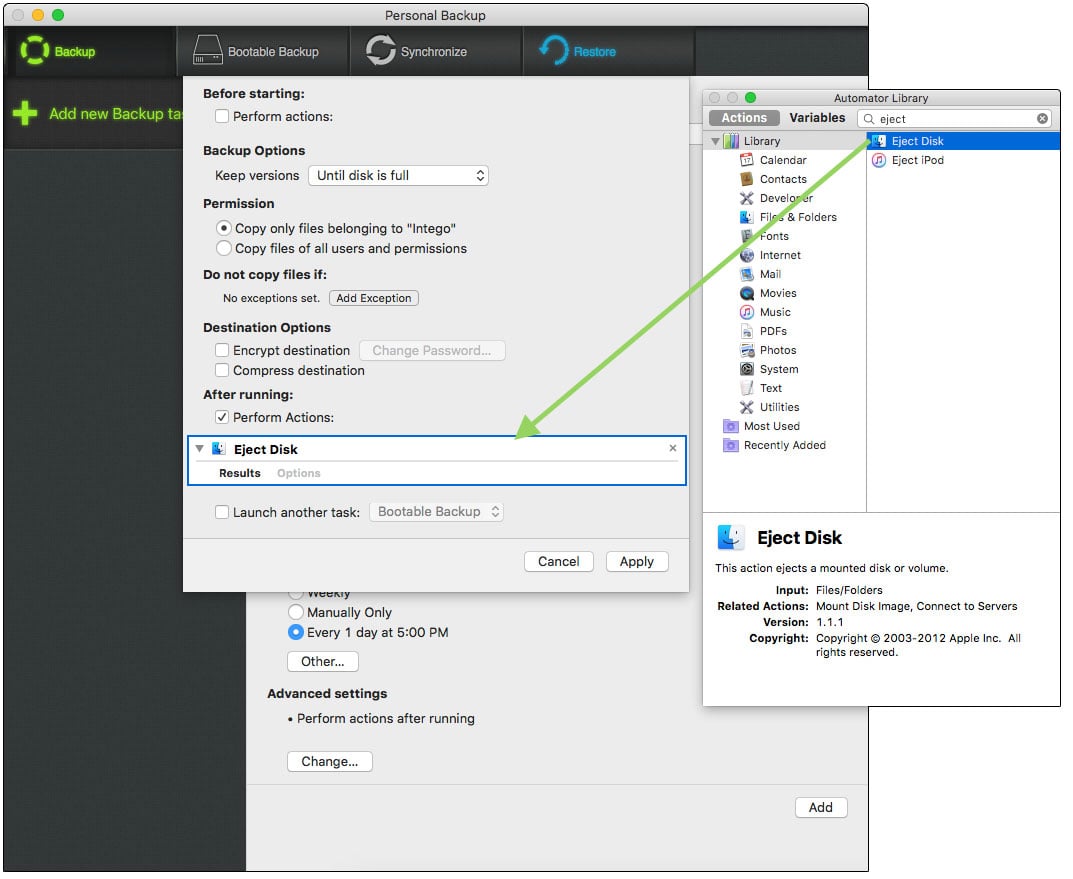
- Now the fun stuff. Under “Advanced settings” click the “Change..” button. In the window that appears you can change options, permissions and exclusions which you can set to fit your needs. What we are after here is the “After running” option. Click the “Perform Actions” checkbox and a panel of Automator actions will open. Run a search for “eject” and one of the results will be the “Eject Disk” action. Drag this to the drop area that appeared when you clicked the checkbox.
Here you can also choose to encrypt your backup. If others have access to your external drive or if you carry the drive with you in a laptop bag for example, encryption is a good idea.
• Apply the changes.
• The end result should look something like this.
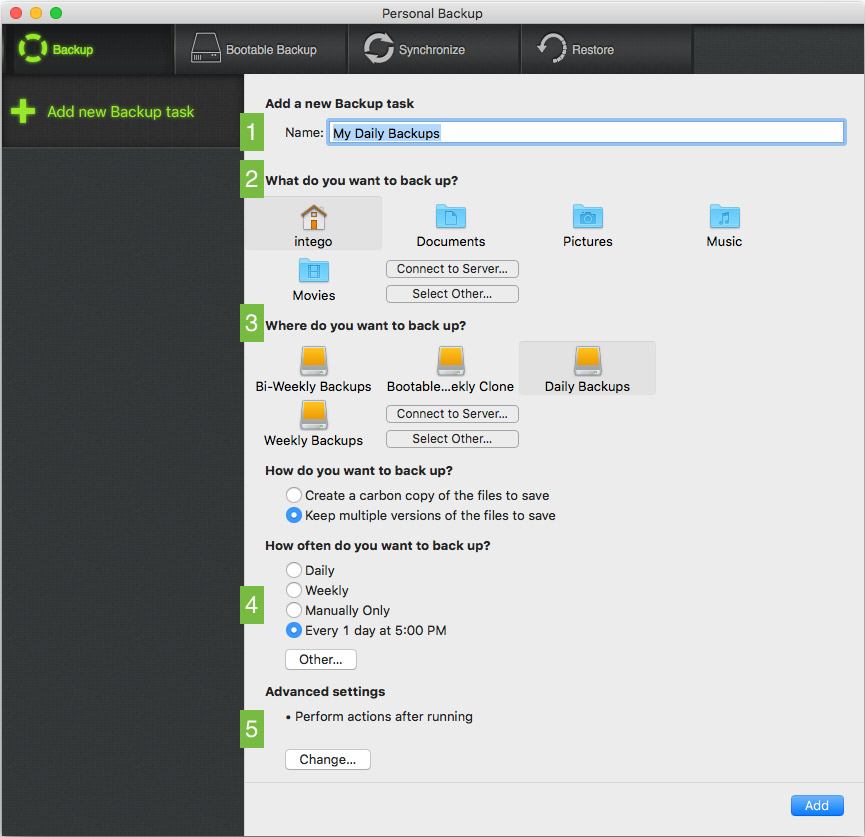
• Click the “Add” button and your task will be saved. The first backup will begin in a few minutes.
When you set all your backup tasks, go ahead and eject all the hard drive partitions from your desktop.
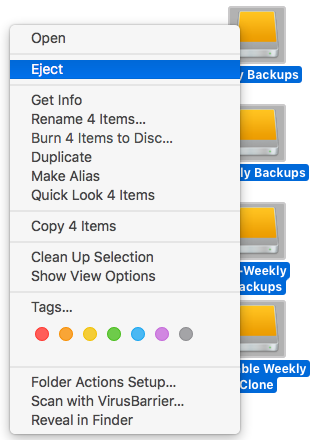
Personal Backup will mount them when needed and eject it when done. Ejecting the partitions is an important step. Make sure you eject your backup partitions after each computer restart as well. Here you can see Personal Backup mount the disk, make the backup and eject when done:
Run through these steps for your weekly and bi-weekly tasks and you end up with a solid backup strategy in place. Chances of your weekly or bi-weekly backups surviving a ransomware’s dormant period are good.
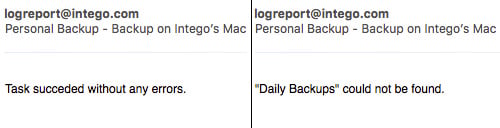
Finally, open up the Personal Backup preferences. Here you can set how soon you want to be notified if a backup has not been completed and you can fill out a notification email.

You will be alerted when a backup was successful or if it for some reason failed immediately. Compare that to Time Machine, which does not let you know a backup failed to run for 24 hours or longer! Here are two examples of the email notification:
With backups running every day, every week and every two weeks and the backup drives being mostly unavailable to the system, the chances of your data surviving a ransomware infection are greatly improved.
If you have access to off-site servers, you can set up additional weekly or even monthly backups to those destinations. Even a server that hosts your website can provide FTP access and a small chunk of space, which might be enough to make bi-weekly backups of your documents folder or other important data. Depending on your available resources, you can create very complex and redundant backup schedules.
What does your backup strategy look like? Let us know in the comments!

