Setting up your new Mac for security and privacy
Posted on
by
Kamso Oguejiofor-Abugu

Getting a new Mac is a good opportunity to put the right security and privacy settings in place before you start filling it with apps, accounts, and personal files. It doesn’t matter if it’s a MacBook Neo, MacBook Air, or MacBook Pro, the essential security steps are similar.
This checklist walks you through setting up your Mac securely, from transferring your files and protecting your Apple Account to turning on important security features and managing app permissions. We’ll start with the initial setup, then cover the settings worth checking once your Mac is up and running.
Choose how to set up your new Mac: New or migrated
When you turn on your new Mac for the first time, Apple’s Setup Assistant guides you through the basics, like choosing your language and region. You’ll then see four options for getting started, including transferring your data from another computer or setting up your Mac as new.
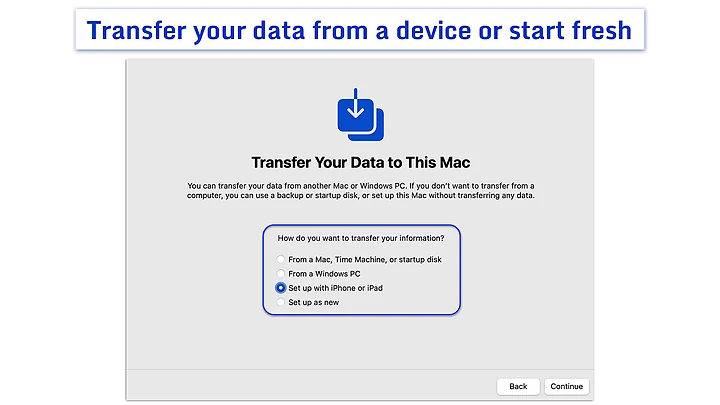
From a Mac, Time Machine, or startup disk: Migration Assistant
If you’re upgrading from an older Mac, Migration Assistant can transfer your documents, apps, user accounts, and settings, so you don’t have to start from scratch. You can transfer everything directly from your previous Mac or restore from a Time Machine backup or external hard drive.
For a wireless transfer between two Macs, keep them nearby with Wi-Fi turned on while the files copy. If you’re using a backup drive, connect it to your new Mac before you start.
You can also skip the transfer for now, especially if your old Mac or backup drive isn’t at hand, or you’d rather start using your new Mac right away. Migration Assistant is always available after setup, so you can bring over your files when you’re ready. Just press Command + Space to open Spotlight, search for Migration Assistant, and follow the onscreen instructions.
From a Windows PC: Migration Assistant
If you’re switching from Windows to Mac, you can use Apple’s Windows Migration Assistant to copy over your personal files, email accounts, contacts, calendars, and photos.
To get started, download Windows Migration Assistant onto your PC. Apple provides different versions for different macOS releases, so make sure you choose the one that matches your new Mac.
Next, keep both computers nearby with Wi-Fi and Bluetooth turned on, then follow the onscreen instructions to transfer your data. For Macs running macOS Ventura 13 or earlier, you’ll also need to connect both computers to the same network or directly with an Ethernet cable.
Set up with iPhone or iPad
This option uses a nearby iPhone or iPad that’s already set up to help configure your Mac. If your device is signed in to your Apple Account, your Mac can use that same account during setup.
If you already keep things in iCloud, your Mac will pull in that information automatically. Your photos, messages, notes, calendars, passwords, and contacts will be available once they’ve synced.
Note that this feature only works on Macs running macOS Sequoia 15.4 or later and iPhones or iPads running iOS 18.4 or iPadOS 18.4 or later. If you don’t see this option during setup, check that your iPhone or iPad is updated to iOS 18.4 or iPadOS 18.4 or later. Otherwise, choose a different setup option.
To get started, you’ll need to enable both Wi-Fi and Bluetooth on both devices. Then, unlock your iPhone or iPad, bring it near your Mac, and follow the onscreen instructions.
It’s worth noting that this option isn’t a full transfer. Unlike Migration Assistant, it won’t move your Mac apps, overall system settings, or personal documents only stored on your old computer. You’ll need to transfer those separately if you want them on your new Mac.
Set up as new
Setting up your Mac as new is a good choice if you’d prefer a completely fresh start without transferring data from an older computer. It can be an opportunity to leave behind apps and files you no longer need, so you can keep your new Mac organized from the start.
Setup Assistant will still guide you through basic preferences. Once you reach the desktop, you can download your apps as you need them and sign in with your Apple Account to bring back synced items, like your photos or documents.
You can still transfer data from your old computer later if you change your mind by using Migration Assistant.
Sign in with your Apple Account
Your Apple Account connects your Mac to services like iCloud, Find My, and the App Store, so it’s worth setting up right away.
During the initial setup, Setup Assistant will give you the option to sign in to your existing Apple Account or create one if you’re new to Apple. Make sure you use a long, unique password that you don’t use for anything else, and have two-factor authentication turned on.
If you want to review your Apple Account details later, open System Settings, select your name at the top, and go to Sign-In & Security. Here, you can change your password, check two-factor authentication, and manage your trusted phone numbers.
Create a strong login password and set up Touch ID
While setting up your Mac, you’ll be asked to set up a login password. This password also protects access to your files and certain system settings, so make sure you choose a password that’s difficult to guess and avoid reusing passwords from other accounts.
If your Mac supports Touch ID, Setup Assistant will prompt you to set it up during this process, or you can turn it on later in System Settings under Touch ID & Password.
Turn off analytics sharing
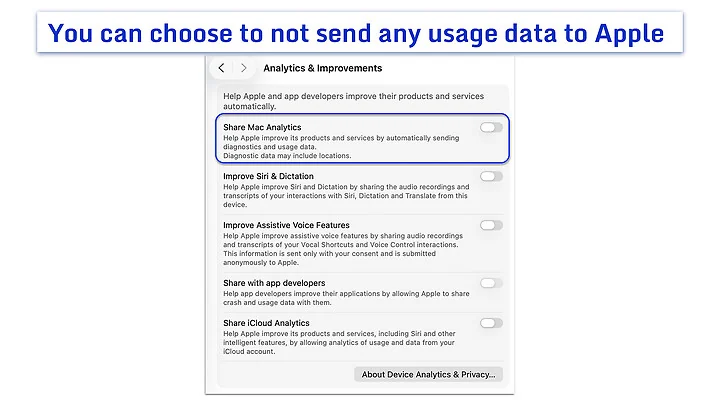
Your Mac can send diagnostic and usage information to Apple and to app developers. If you prefer not to share this information, you can turn these options off when you first set up your Mac.
You can also change these settings at any point later on. Open System Settings > Privacy & Security > Analytics & Improvements, and turn off the Mac analytics options you’re not comfortable with.
Install updates and turn on automatic updates
Even a brand-new Mac has usually been sitting in its box for a few weeks, so it may have software updates waiting when you first turn it on.
Setup Assistant won’t always ask you to update right away, since the Mac can finish turning on without it. It’s worth checking before you start using your Mac, as software updates patch up known security gaps and help keep your Mac protected.
Open System Settings > General > Software Update, and install any available updates. Then click the small info icon next to Automatic Updates and toggle the options on for automatically installing macOS updates and security updates.
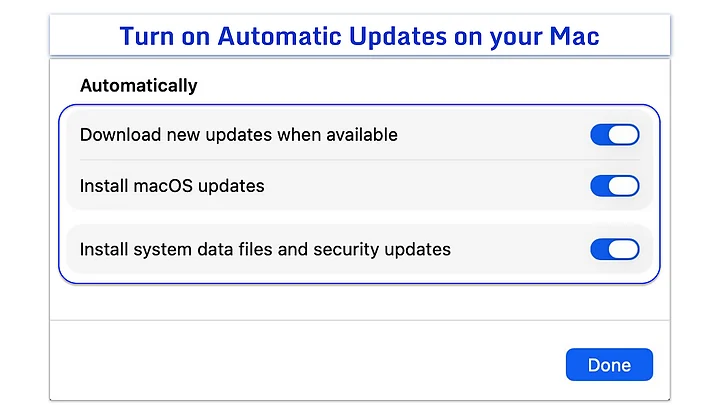
Turning these on lets your Mac handle small security patches and routine updates quietly in the background later on.
Set your Mac to require a password after it wakes
Ideally, your Mac should ask for your password as soon as the screen goes dark or the screen saver kicks in. Setup Assistant doesn’t bring this step up, so it’s easy to miss on a new Mac.
Head to System Settings > Lock Screen, look for Require password after screen saver begins or display is turned off, and change it to Immediately. This helps prevent anyone else from accessing your Mac when you step away.
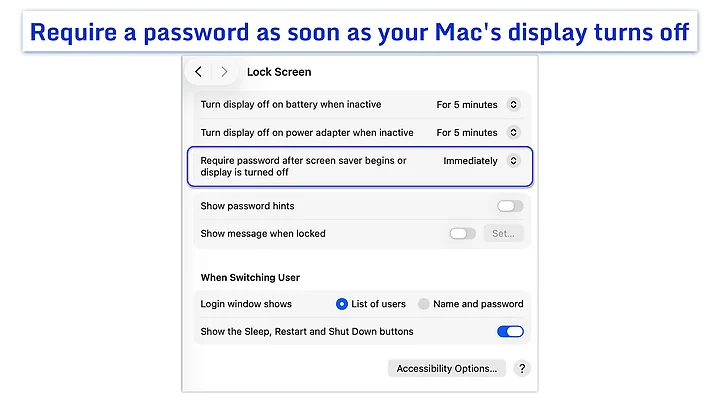
While you’re on this screen, it’s also worth adjusting how long your Mac sits idle before the display turns off.
Turn on FileVault
FileVault encrypts everything saved on your Mac’s startup disk. If your Mac is ever misplaced or stolen, it helps prevent anyone without your password from accessing your personal files.
On macOS Tahoe 26 and later, FileVault is turned on by default during setup if you sign in to an Apple Account. You can check whether it’s turned on by going to System Settings > Privacy & Security > FileVault, and then turn it on there if needed.
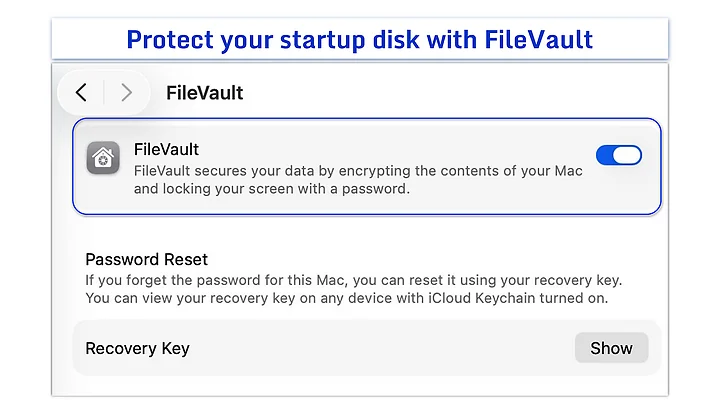
When you turn on FileVault, macOS will ask how you’d like to recover access if you ever forget your login password. You can either use your Apple Account or a generated recovery key. If you opt for a recovery key, save it in a secure spot off your Mac, like a password manager or a safe physical location.
Keep in mind that there’s no back door into your encrypted drive. If you forget your password and lose access to your recovery method, you may not be able to recover your files.
Turn off automatic login
If automatic login is enabled for a macOS user account, your Mac automatically logs in to that account whenever it starts up. This leaves your account open to anyone who turns on your Mac.
To disable automatic login, go to System Settings > Users & Groups, and set Automatically log in as to Off. If you turned on FileVault in the previous step, macOS turns automatic login off for you, but it’s worth checking either way.
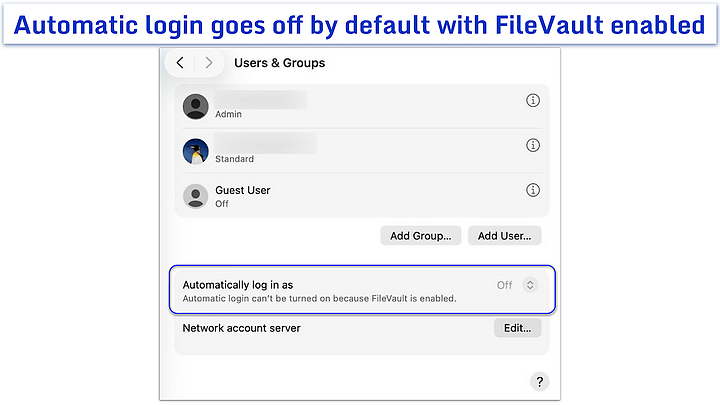
Turn on Find My Mac
Find My Mac helps you protect your Mac if it ever gets lost or stolen. You can use it to track your Mac’s location on a map, play a sound to find it nearby, or lock and erase it remotely. It also enables Activation Lock, which helps prevent someone else from erasing your Mac and setting it up as their own.
To turn it on, open System Settings, select your name at the top, then go to iCloud > See All > Find My Mac and enable it. Make sure Location Services is also turned on under Privacy & Security > Location Services.
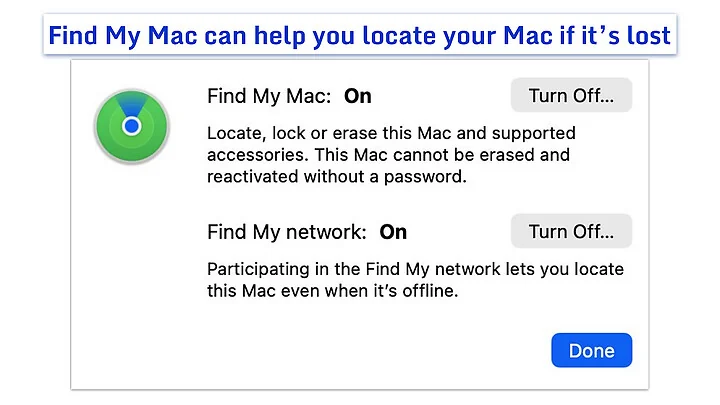
Be sure to turn on the Find My network option as well. This uses nearby Apple devices to help pinpoint your Mac even when it’s offline.
Set up backups with Time Machine
macOS includes a built-in backup feature called Time Machine. It keeps a copy of your files so you can easily restore them if your Mac hardware fails, gets damaged, or a file is mistakenly deleted.
Plug in an external hard drive, then open System Settings > General > Time Machine. Click Add Backup Disk, select your drive, and click Set Up Disk. When setting it up, make sure to enable encryption so the files on your external drive stay safe even if the drive itself is misplaced or taken.
It helps to remember that iCloud and Time Machine handle your data differently. iCloud syncs files so they match across all your devices, while Time Machine preserves a true standalone backup of your Mac’s files.
For example, if you accidentally delete a file from iCloud Drive, that deletion syncs across your devices. Having a separate Time Machine backup gives you another way to recover lost files, provided they were included in an earlier backup.
Install security software
Setting up dedicated security software early on gives you a clean baseline before your everyday apps and files start accumulating.
Macs come with reliable built-in security like XProtect, but this antivirus technology works quietly in the background. It doesn’t provide clear status reports, nor does it let you run a manual scan whenever you want to check for threats.
The built-in macOS firewall also focuses exclusively on blocking incoming connections. It doesn’t monitor outgoing connections. This means that if malware, like a remote access trojan (RAT), gets onto your Mac, it could send your data to an attacker’s server without the firewall alerting you.
Intego ONE for Mac covers both sides of that gap with its antivirus and firewall protection.
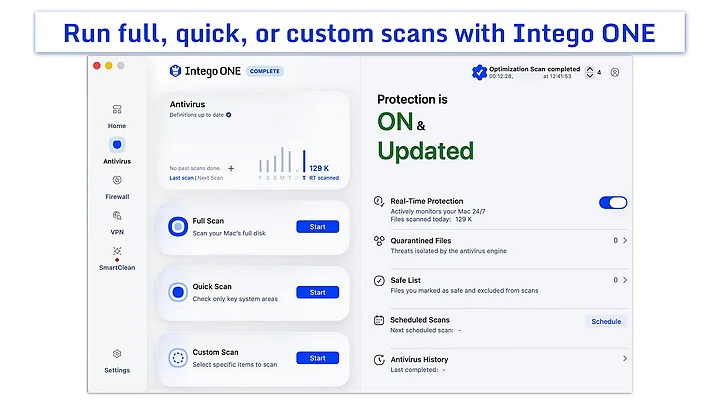
It gives you direct control over malware scans and detailed activity reports whenever you want them, while managing both incoming and outgoing connections in one place.
Install apps only from trusted sources
As you customize your Mac with new apps and browser extensions, be deliberate about where you download them from. Downloading apps from untrusted third-party sources is risky and can expose your Mac to malware.
The safest route is to download software directly from the Mac App Store. For anything outside the App Store, download directly from the trusted developer’s official website, not from an ad or a link in an email.
Review your app permissions
After you finish downloading your everyday apps, it helps to spend a few minutes reviewing what access those programs have gathered.
Head to System Settings > Privacy & Security to review permission categories and turn off access for any apps that don’t need it. The main categories worth checking are:
- Location Services
- Camera
- Microphone
- Photos
- Contacts
- Files & Folders
- Full Disk Access
Most requests are reasonable. For instance, a video call tool clearly needs your camera and microphone. However, you don’t have to give every app every permission it requests.
If an app asks for something that feels disconnected from what it actually does, it’s usually best to hold off until you can look into why.
These settings aren’t set in stone. As your tools update or your habits shift, you can always turn off access you no longer use.
Optional and conditional settings
While the security steps above apply to most people, these additional options depend on your location, hardware, and whether you share your Mac.
Advanced Data Protection for iCloud
This setting applies full end-to-end encryption to sensitive cloud data like your Photos, Notes, and iCloud backups. It means Apple holds no decryption keys for those files, so only your trusted devices can unlock them. Since Apple can’t recover this data for you, macOS will ask you to set up a recovery contact or key before enabling it.
You can turn Advanced Data Protection on under your Apple Account settings in System Settings. Keep in mind that availability varies by region, and it’s unavailable for new users in the UK.
A separate user account
If family members or colleagues share your Mac, creating individual user accounts keeps personal files, browser histories, and preferences separate.
Even on a personal Mac, some people prefer using a standard account for everyday tasks and reserving the administrator login for approving system changes or installing software.
You can set up new users on your Mac in System Settings > Users & Groups. While you’re there, it’s also worth ensuring the Guest User profile is turned off if you don’t plan on using it.
Firmware password for Intel Macs
If your Mac has an Intel processor, you can set a firmware password to prevent someone from booting your computer from an external drive or recovery partition without your permission. Macs with Apple silicon, which includes all current models, don’t use a firmware password, so there’s nothing to set up.
FAQ
Should I set up my new Mac as new or migrate from my old Mac?
Setting up your Mac as new makes sense if you prefer a fresh, uncluttered start, or if this is your first Mac. If you’d rather bring over your existing apps, files, accounts, and settings from a Time Machine backup or your previous Mac, Migration Assistant can move everything across for you.
What security settings should I turn on first on a new Mac?
Start by creating a strong login password. After that, it’s worth turning on FileVault to encrypt your drive, making sure your Mac asks for a password when waking from sleep, enabling Find My, and checking that macOS is fully updated.
Does a new Mac need antivirus?
While macOS has strong security features built right into the system, Mac-specific malware does exist, and no single safeguard prevents every risk. If you want an extra layer of defense or a clearer view of what’s running in the background, adding separate Mac antivirus software can be a helpful step.
How do I set up a separate user account on my Mac?
Go to System Settings and open Users & Groups, then click Add User and enter your administrator password. For day-to-day use, choose a Standard user account, fill in the person’s name and password, and finish by selecting Create User.
Can I restore my whole Mac from iCloud?
Not completely. iCloud keeps specific items in sync across your devices, like your photos, contacts, and documents, but it isn’t designed to save a full backup of your Mac. If you need to restore an entire Mac or move everything over to a new one, you’ll want to use Migration Assistant alongside a Time Machine backup instead.


