
VirusBarrier X6 Preferences and Configurations
- General Preferences
- Modem Preferences
- Log Preferences
- Traffic Preferences
- Whois Preferences
- Advanced Preferences
- Working with Configurations
VirusBarrier X6 is designed to work unobtrusively in the background once it's installed. However, it has numerous options to let you control how its various functions run, and how you see the results when they're done. You set these options in the Preferences window, which you reach either by choosing VirusBarrier X6 > Preferences... or by pressing Command-comma.
General Preferences
The Preferences window is divided into six panes: General, Modem, Log, Traffic, Whois, and Advanced.
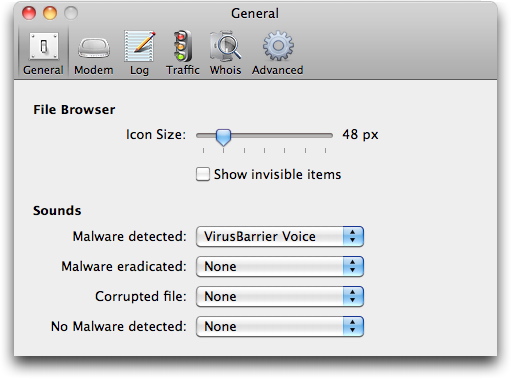
The top section of the General Preferences pane controls how the program looks to you; the bottom, how it sounds. Here's an explanation of each option.
The Icon size slider lets you choose how big you want icons to appear when you click Select on the Overview screen in order to scan files and folders for malware, and use Icon view, as well as for icon displays in the Quarantine Zone. (Changes to this setting have no effect when viewing items in List or Column view.)
The second option, Show invisible items, displays files that Mac OS X usually keeps hidden. These are typically files that are needed for your Mac to function properly, and that shouldn't be changed. Viruses and malware can hide in invisible files, so scanning them is of great importance. However, you don't need to show them to scan them: when you scan a folder, VirusBarrier X6 scans every item inside it, including invisible items.
Note that the Quarantine Zone always displays invisible items regardless of the setting in these preferences.
The Sounds section lets you control what you hear when VirusBarrier X6 detects or eradicates malware, when it finds a corrupted file, or when VirusBarrier X6 completes a scan without finding any malware. By default, these are set to speak their announcements: you can hear how they sound by clicking the appropriate popup menu and re-selecting VirusBarrier Voice. You can also change each sound by selecting any of the other sounds in that popup menu. To turn off any of the sounds entirely, select None from its popup menu.
Modem Preferences
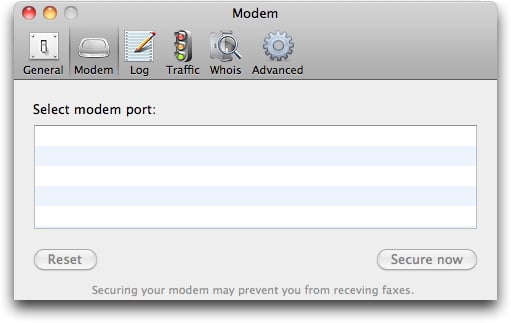
You can use this option to provide total security for your modem, if you have one. To do this, click the Modem button on the Preferences screen. Securing your modem may prevent it from answering any calls. By clicking the Secure now button, you're telling VirusBarrier X6 not to accept any incoming calls: however, you'll still be able to make outgoing calls. To return your modem to its normal, unsecured state, click the Reset button.
Log Preferences
You can set VirusBarrier X6 to export its log at regular intervals. To do this, click the Log button on the Preferences screen.
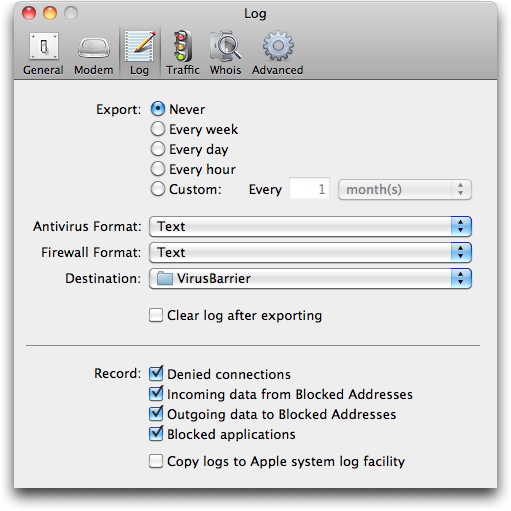
Your first choice is how often you'd like the log export to occur. If the Every week radio button is on, exports occur at midnight between Sunday and Monday; for Every day, they occur at midnight; for Every hour, they occur at the top of the hour. The Custom selection allows you to name a multiple of these times, for example once every two weeks. (The Custom selection also allows you to do the export once a month, at midnight on the first day.)
If your Mac is off or asleep when an export is scheduled, this procedure will occur when it is next turned on.
Antivirus logs can be exported in any of three formats; Firewall logs, in six formats. Click the Format popup menus to select the export format.

Note: for a description of Log export formats, see Exporting the Log later in this chapter.
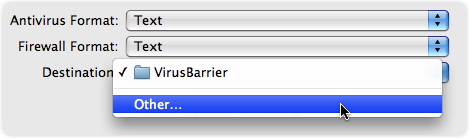
You can select the folder where log export files are saved. By default, they are saved in the /Library/Logs/VirusBarrier folder. If you wish to have these files saved in another folder, select Other... from the popup menu and navigate until you get to the folder you wish to use. Then click Select to use this folder.
VirusBarrier X6 stores two Network logs. There is a rotating log, which contains a maximum of 4096 entries, which you see in VirusBarrier X6's Log panel. If automatic exports are enabled, a second log stores all entries. If you wish to retain full logs of all activity, you should therefore activate periodic exports. These logs are not limited by size (other than the available space on your hard disk). If you check Clear log after exporting, this will delete the log entries after each export so each new export contains only those entries recorded after the previous export. This setting only affects automated exports, and doesn't affect log exports done manually from the Log window.
You have a choice of which elements are recorded in your logs, as indicated by the checkboxes at the bottom of the Log preferences pane. The options are:
- Denied connections: Attempts to reach your Mac that were blocked because they violated rules you set up in VirusBarrier X6.
- Incoming data from Blocked Addresses: Attempts to send data to your Mac from hosts that are in the Blocked Addresses list.
- Outgoing data to Blocked Addresses: Attempts to send data from your Mac to hosts that are in the Blocked Addresses list.
- Blocked applications: Instances where VirusBarrier X6's Anti-Spyware prevented an application from communicating with the network.
The last checkbox is Copy logs to Apple system log facility. When checked, the Log data will be registered in the unified log system found in Mac OS X 10.5 and later; you can view these logs in the Console application, found in the /Applications/Utilities folder.
Traffic Preferences
Like the Log preferences, the Traffic preferences screen gives you options to export traffic data at regular intervals. This screen also gives you several options for managing traffic data. To change these settings, click the Traffic button on the Preferences screen.
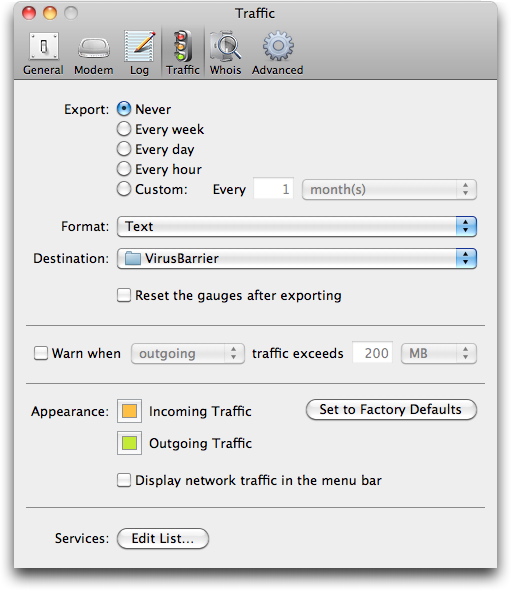
In the top section of this screen you control automated, periodic exports of traffic data. It works exactly the same as the log preferences: see the Log Preferences section above for details. The one setting that's different is the checkbox Reset the gauges after exporting, which in essence is the same as the log's Clear log after exporting checkbox. Checking it is the equivalent of clicking the Reset button next to the gauges to change total traffic to zero after automated exports. For more information about Traffic gauges, see Using VirusBarrier X6 Monitoring Tools.
VirusBarrier X6's Traffic preferences include a setting that notifies you if the amount of data entering or leaving your computer goes above a certain limit. This can be very useful if you have an Internet access account with uploading or downloading restrictions.

If you check this option, VirusBarrier X6 displays a warning when your traffic exceeds the amount you have selected. You can choose to have a warning for Incoming, Outgoing or Global (total) traffic, and you can choose the threshold in kilobytes, megabytes or gigabytes.
Below that is an Appearance section where you can change the color of incoming and outgoing traffic in all Traffic gauges and timelines. Clicking either colored box brings up a standard Mac OS X color picker: select your preferred color, then close the window by clicking the red Close button in the upper-left corner. The Set to Factory Defaults button returns the colors to orange for incoming traffic and green for outgoing traffic.
VirusBarrier X6 can display network traffic in the menu bar. Check Display network traffic in the menu bar to turn this feature on. This displays the amount of incoming and outgoing traffic at all times. You can turn this off by unchecking Display network traffic in the menu bar.
Finally, the Services button at the bottom lets you add, remove and change the kinds of traffic displayed in the Traffic gauges, which is very helpful if you're testing a new networking program. Clicking the Edit List... button opens a window that lists existing services
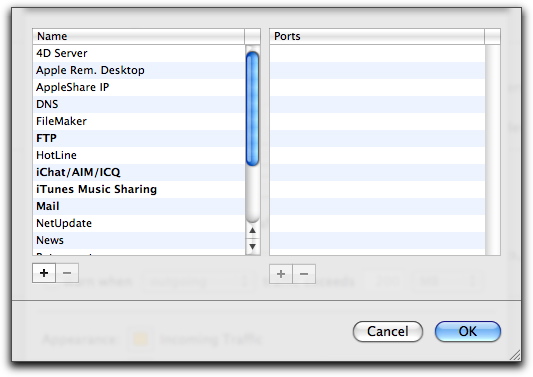
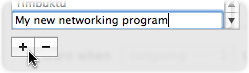
To add a service, click the + button in the lower-left corner, then enter the name of the service.
With that service highlighted, you then click the other + button, below the right column, to add ports that are associated with that program.
Similarly, you can edit or delete any services in the list that aren't listed in bold. Bold services such as Chat, Mail and Web are core to networking, and are therefore locked in place as a safety measure.
Whois Preferences
VirusBarrier X6's Whois function allows you to search for information on domain names and IP addresses. Four Whois servers are preset in this pane, and they are queried in the order shown in this panel.
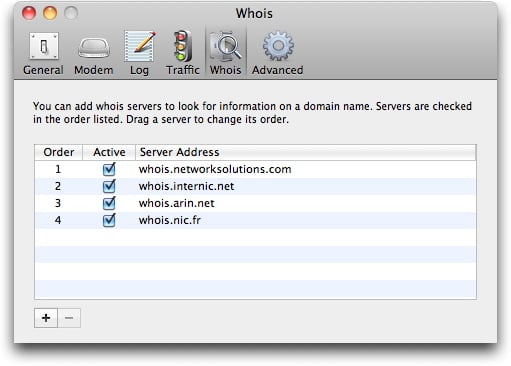
If you wish to change their order, you can do so by selecting one of the servers and dragging it to a new location.
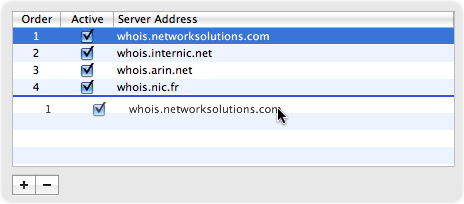
Adding new Whois servers to VirusBarrier X6 is easy: just click the + button and type in the name of the Whois server you wish to add.
You can also activate or deactivate the Whois servers in this panel. To deactivate a server, uncheck its checkbox. To activate a deactivated server, check its checkbox.
To remove a Whois server, select it by clicking it, and click the - button. A dialog box asks you for confirmation.
Advanced Preferences
Four options are available in the Advanced panel of VirusBarrier X6 Preferences.
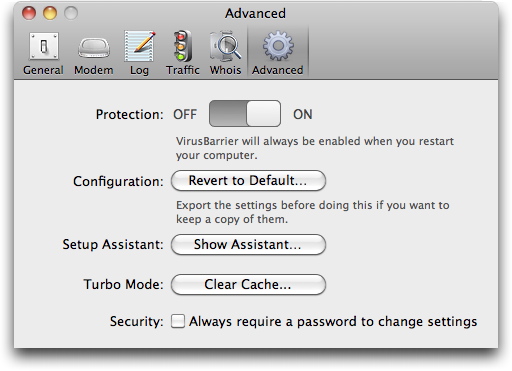
- Protection: This is a simple OFF/ON slider, to quickly disable (or re-enable) all protections VirusBarrier X6 offers. Moving this slider to OFF completely turns off VirusBarrier X6, including the program's firewall logging. You will need an administrator's password to do this, or to change the slider back to ON. Regardless of the setting, VirusBarrier X6 will automatically be re-enabled when you restart your Mac.
- Configuration: Clicking the Revert to Default... button allows you to reset VirusBarrier X6 to its default configuration: "Client, local server" mode for the Firewall, with Antivandal and Privacy functions disabled. Regarding malware protection, these settings activate the Real-Time scanner, deactivate the scan of archives, and activate certain Advanced scanner settings. You will need an administrator's password to make this change. Doing so also clears all Firewall Modes and other settings you created, along with your Blocked Addresses and Trusted Addresses. It is recommended to export your current VirusBarrier X6 settings (File > Export settings...) before reverting to Default settings in case you want to recover your settings at a later date.
- Setup Assistant: Clicking the Show Assistant... button will launch VirusBarrier X6's Setup Assistant. See Getting Started with Intego VirusBarrier X6 for more information.
- Security: If you check Always require a password to change settings, only those users who can enter an administrator's password to make any changes to VirusBarrier X6's settings.
Working with Configurations
VirusBarrier X6 lets you save multiple configurations. Each configuration contains all the settings and preferences you have applied to VirusBarrier X6 in its different screens and preferences. You can make configurations for different locations, for example, one configuration when you're using your laptop at the office, and another for home use. You may want to have one configuration that includes additional protection for the times your Mac works as a server, and another for when it is a client. You may also want a specific set for less protection when you are connected to a local network, and additional protection when you are using public hotspots. You may want to have a configuration that sends you e-mail messages when any intrusions occur, for when you are not at your computer.
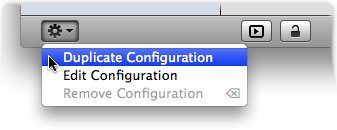
Configurations appear in a list on the left of every screen. A small action button below the list lets you duplicate, edit, remove and hide configurations. If you don't see the Configuration list, it might be hidden: display it by pressing Command-K, choosing View > Show Configurations, or clicking the Toggle Configurations button at the very bottom-left corner of the window.

Creating, Editing and Deleting Configurations
The first time you use VirusBarrier X6 you'll see one configuration in the list, bearing the name you chose when you ran the Setup Assistant, or, if you did not run the Assistant, named "default." To create a new configuration, you duplicate an existing configuration by first highlighting it, then clicking and holding the action button (which looks like a gear), then choosing Duplicate Configuration.
This new configuration has the same name as the one you duplicated, with the word "copy" appended. Rename the new configuration by double-clicking on it and typing a new name.
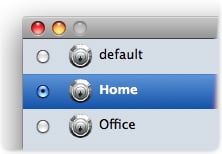
Now that you have a new configuration, activate it by clicking its radio button. Here, we've created two new configurations by duplicating "default" twice, renamed them, and selected the one named Home.
You can now make any changes to VirusBarrier X6 that you want, and they are saved under the current configuration. To make another configuration active, simply click its radio button. You can also select another configuration from the Configurations list in the Intego Menu. (For more information about the Intego Menu, see 2. Getting Started with Intego VirusBarrier X6.)
Once you've created a configuration, edit it by clicking the action button below the Configurations list and choosing Edit Configuration. You'll see a window like this:
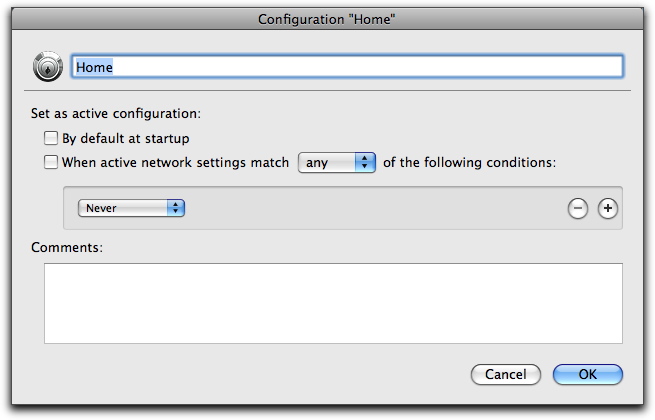
This Configuration will become active when you turn on or restart your Mac if you check By default at startup.
In addition, by checking the When active network settings match... checkbox it will automatically become active when any or all conditions you specify regarding the following networking criteria are true.

- Never: This condition will never be true, so this prevents the configuration from turning on automatically.
- Type: Choices are Ethernet, AirPort, FireWire, PPP or Bluetooth.
- IP Address: You can choose a specific IP address, or a range. A Current button identifies the IP address your Mac has at the moment.
- AirPort SSID: The common name for a wireless network, such as "My AirPort." You can choose for this condition to be true when the SSID is, is not, or contains a text string you specify.
- AirPort BSSID: The MAC address of a wireless network connection point, expressed as a string of hexadecimal numbers.
- Location: The Location defined in your Mac's Network preferences.
- Always: The condition is always true.
The Comments field is a place for any description or notes you'd care to add: they don't affect operation of the configuration in any way.
There are two ways to delete a configuration. First, click it once to highlight it; then, either click the action button below the configuration list and choose Remove Configuration; or, press Command-Delete. In either case, a dialog box asks you to confirm the deletion. You can't remove the active configuration: instead, you must switch to another before removing it.
Exporting and Importing Settings
You can save all your VirusBarrier X6 settings in a special file that you can then use to import these settings into another copy of VirusBarrier X6. This is especially useful if you manage many computers and want to use the same settings for all of them.
To export your settings, select File > Export Settings.... A dialog box asks you to name the settings file and choose a location to save it. Click Export when you have finished. The result is an XML file that can be imported into any copy of VirusBarrier X6, including the one that created it.
To import settings, select File > Import Settings... A file dialog asks you to locate the settings file. Once you have located the file, click Import and these settings are immediately applied to VirusBarrier X6. You can also double-click a VirusBarrier X6 settings file to import it.