
Getting Started with Intego VirusBarrier X6
- Using the Setup Assistant
- Using the VirusBarrier X6 Overview Screen
- Status Indicators on the Overview Screen
- Malware Scanning at a Glance
- Using the Intego Menu
When you first launch VirusBarrier X6, you need to choose how to configure the program to provide optimal protection for the way you use your Mac. VirusBarrier X6 includes a Setup Assistant to help you do this, and to understand the many malware and network protection features the program provides.
Using the Setup Assistant
VirusBarrier X6's Setup Assistant helps you quickly and easily adjust the program's basic settings so they are appropriate to the way you use your Mac. The first time you open VirusBarrier X6, the Setup Assistant launches automatically.
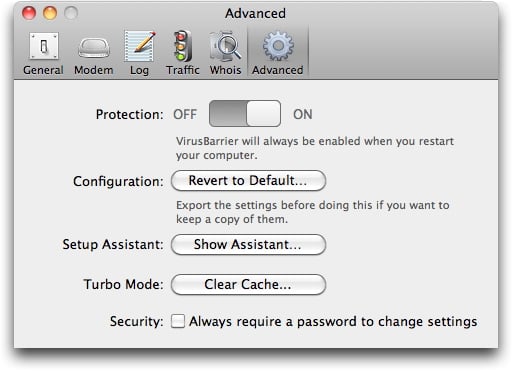
If, at any time, you want to launch the Setup Assistant manually, you can do so by choosing VirusBarrier X6 > Preferences and clicking the Advanced icon, then clicking Show Assistant.... You will need an administrator's password to run the Setup Assistant.
Note: if you have upgraded from a previous version of VirusBarrier or NetBarrier, the program will adopt the settings you had applied to those programs. If you had both of these programs, all settings will be imported; if you only had one of these programs, however, and you run the Setup Assistant, VirusBarrier X6 will overwrite your existing settings. In such cases, you may want to quit the Assistant and adjust malware or network protection settings manually.
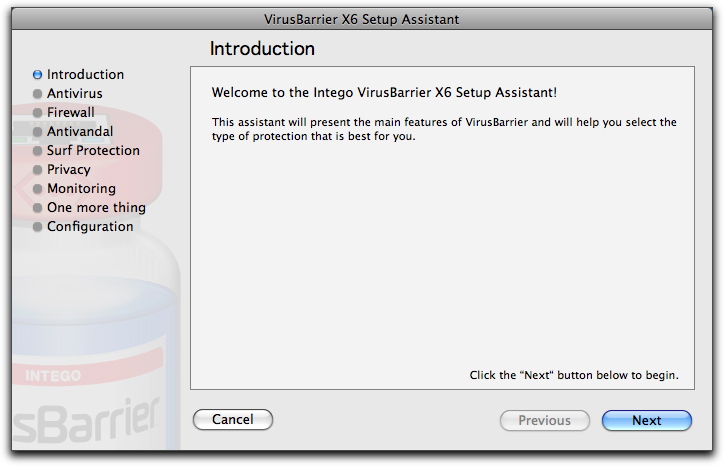
The first eight screens of the VirusBarrier X6 Setup Assistant briefly present information about the program's various functions:
- Antivirus
- Firewall (Rules and Trojans)
- Antivandal (Policy, Blocked Addresses and Trusted Addresses)
- Surf Protection
- Privacy (Anti-Spyware, Data)
- Monitoring (Monitoring tools)
- One more thing (miscellaneous tools)
When done, the Configuration screen allows you to choose which VirusBarrier X6 configuration you want to use.
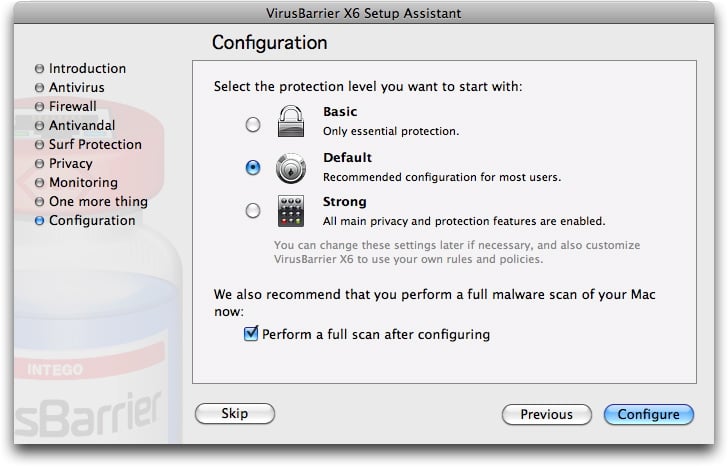
The configurations are:
| Name | This setting is best if... | Malware and Network Protection | Other settings |
|
Basic |
...you need to allow access to your Mac from the local network, but want to be protected from invasions from outside your local network. |
The Real-Time scanner is active to protect you from malware. The firewall is set to "Client, local server" mode: your Mac can access the Internet as a client computer, and can function as both a client and server on a local network. Scanning for Windows and Linux malware is deactivated, and scanning for malware in archives is deactivated. |
Antivandal filters are enabled against Buffer Overflow Attacks, Intrusion Attempts, Ping Attacks, Port Scans and SYN Flooding, but disabled against Ping Broadcasts. Anti-Phishing protection is enabled. Web Threat protection is disabled. Privacy filters are disabled. |
|
Default |
...you do not use your computer as a network server or for local file sharing. |
The Real-Time scanner is active to protect you from malware. The firewall is set to "Client, local server" mode: your Mac can access the Internet as a client computer, and can function as both a client and server on a local network. Scanning for Windows and Linux malware is activated, as is scanning for malware in archives. |
Antivandal filters are enabled against Buffer Overflow Attacks, Intrusion Attempts, Ping Attacks, Port Scans and SYN Flooding, but disabled against Ping Broadcasts. Anti-Phishing protection is enabled. Web Threat protection is enabled. Privacy filters are disabled. |
|
Strong |
...you want maximal protection, and can accept that this configuration might block some traffic. |
The Real-Time scanner is active to protect you from malware. The firewall is set to Client only mode: your Mac can function only as a client on a local network or the Internet. The server functions of your computer are blocked. |
All Antivandal filters are enabled, as are those that protect against Trojans. Anti-Phishing protection is enabled. Web Threat protection is enabled. Privacy filters are enabled. |
After choosing your protection level, you have the option of running a full scan of your Mac immediately to ensure that it does not contain any malware, or to spot and eliminate any malware that is there. If you wish to do this, leave Perform a full scan after configuring checked. If you want to run this scan later, you can do so manually; in this case, uncheck this option. See later in this chapter for an introduction to scanning your Mac, and see Protecting Your Mac from Viruses and Malware for detailed information about running malware scans on your Mac.
Click the Configure button to activate the configuration you have selected and run a full scan of your Mac, if you have chosen to do this.
Using the VirusBarrier X6 Overview Screen
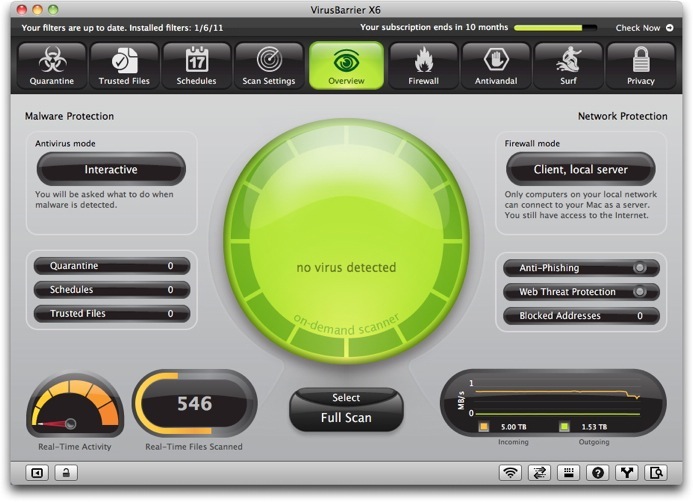
When you open VirusBarrier X6, the Overview screen displays. This screen displays information about how VirusBarrier X6 is running, and provides real-time feedback on its activities.
The Overview screen gives quick access to:
- VirusBarrier X6's functions, settings and logs,
- Several helpful network utilities, such as Whois and Traceroute,
- Visual indicators of what sorts of protection are enabled,
- Information about the program itself, such as when it was last updated,
- A way of managing multiple configurations, so you can quickly change protection settings.
At the top of the Overview screen is a row of buttons that provide access to VirusBarrier X6's many settings. The four leftmost buttons lead to settings that affect how VirusBarrier X6 protects you against malware. For details on these settings, see Protecting Your Mac from Viruses and Malware.
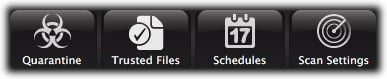
The four rightmost buttons lead to network protection controls. For details on these settings, see Protecting Your Mac from Network Attacks.

When you click buttons for malware or network protection, the resulting screens have tabs that lead to additional controls. The Firewall button, for example, leads to a screen with two tabs, Firewall Rules and Trojan.
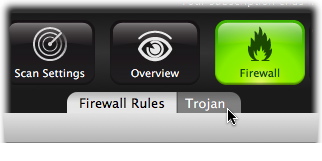
The center button in this row leads back to the Overview screen.

Any of these buttons glows green when the screen it leads to is active.

Controls for Monitoring are the smaller buttons in the bottom-right corner.

Monitoring functions are also available through selections under the View menu, and by using keyboard shortcuts. They are:
|
|
Log |
Option-Command-L |
Shows a record of VirusBarrier's activities, and traffic to and from your Mac to the Internet or local networks |
|
|
Services |
Option-Command-1 |
Shows a list of ways that your Mac is prepared to provide information to the outside world |
|
|
Traceroute |
Option-Command-2 |
Shows the network path that a signal takes to get from your Mac to another computer |
|
|
Whois |
Option-Command-3 |
Shows information about the owners and managers of Internet domains |
|
|
Traffic |
Option-Command-4 |
Shows network traffic entering and leaving your Mac |
|
|
Networks |
Option-Command-5 |
Shows outside networks that are currently available to your Mac |


Each of these features is described in Using VirusBarrier X6 Monitoring Tools.
In the bottom-left corner is a button that reveals a list of Configurations. (You can also toggle between showing and hiding the Configurations list by pressing Command-K or choosing View > Hide/Show Configurations List.)

Each configuration is a collection of settings for VirusBarrier X6's malware and network protection. At first there is only one configuration, with either the name you chose in the Setup Assistant, or, if you did not run the Assistant, with the name "default". The radio button shows which configuration is currently active.

At the bottom of the Configurations list is an action button that lets you duplicate, edit and remove configurations. For more information, see VirusBarrier X6 Preferences and Configurations.
Next to the Configurations button is a Lock button, which allows you to lock VirusBarrier X6 so other users can't make changes to its settings. Since users who don't have administrator's accounts cannot make changes to VirusBarrier X6's settings, administrators will need to unlock the program to make changes. They can then click the Lock button to block access to settings again. (Non-administrators have access to all of VirusBarrier X6's scanning and monitoring features.)

To lock VirusBarrier X6, either click the Lock button, press Command-L, or choose File > Lock Settings. To unlock VirusBarrier X6, click the Lock icon again, press Command-L or choose File > Unlock settings, then enter your administrator's password to complete the process.
At the very top of the screen is the NetUpdate Status Bar, which shows the dates of the latest VirusBarrier filters installed on your Mac, whether your filters need to be updated, and how much time remains on your subscription. VirusBarrier X6 uses Intego NetUpdate to periodically check for updates, or you can check manually by clicking Check Now in the upper-right corner. To hide the NetUpdate Status Bar, choose File > Unlock settings. For more on using NetUpdate, see the Intego Getting Started Manual.

Status Indicators on the Overview Screen
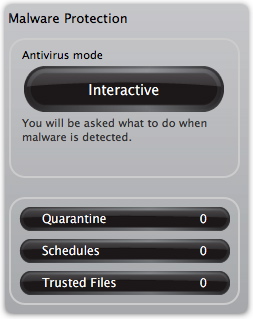
The status of various VirusBarrier X6 features appears on the Overview Screen. Indicators related to malware protection are on the left side of the screen.
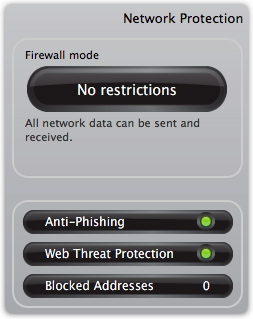
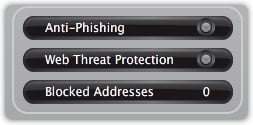
Indicators related to network protection are on the right side.
Clicking any of the indicators leads you to the screen where you can examine and change the settings relevant to that indicator.
The Anti-Phishing and Web Threat Protection indicators display green lights when enabled, as is shown above. When disabled, they display gray lights.
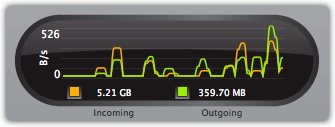
At the bottom left of the screen are two gauges that show current and past activity of the Real-Time Scanner, which continually monitors your Mac for malware infections.

The bottom-right part of the screen shows current network throughput, both incoming and outgoing.
Malware Scanning at a Glance
You can have VirusBarrier X6 automatically scan your Mac for malware after choosing your level of protection in the Setup Assistant, and VirusBarrier X6's Real-Time Scanner will then continue to monitor your computer to prevent possible infections. But you can also run a manual scan whenever you want. Full details are in Protecting Your Mac from Viruses and Malware, but here are a few tips to get you going quickly.
To scan your entire Mac, and any disks connected to it, just click the Full Scan button.
To quickly scan specific files or folders, simply drag and drop them either onto the program's icon in the Finder or in the Dock, or onto the Orb when VirusBarrier X6 is running.
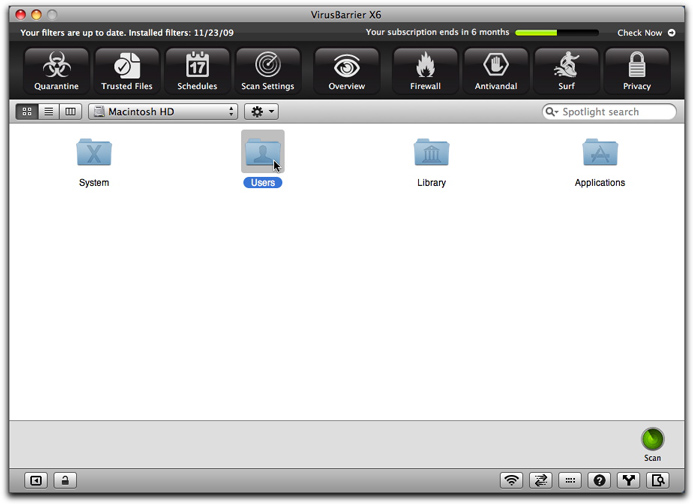
To scan only selected files or volumes using the VirusBarrier X6 interface, click the Select button to see images of all the hard drives, volumes or other storage devices connected to your Mac.

Navigate to the file, folder or volume you want to scan in the same way you would in the Finder. Click to select the item, or press the Command key while clicking to select multiple items, then click the Scan button.
VirusBarrier X6 informs you if it finds files infected by any known malware. For more on VirusBarrier X6's alerts and what they mean, see Protecting Your Mac from Viruses and Malware.
Using the Intego Menu
VirusBarrier X6 installs a menu in the menubar, called the Intego menu. Its icon is a small tower, as in the Intego logo.

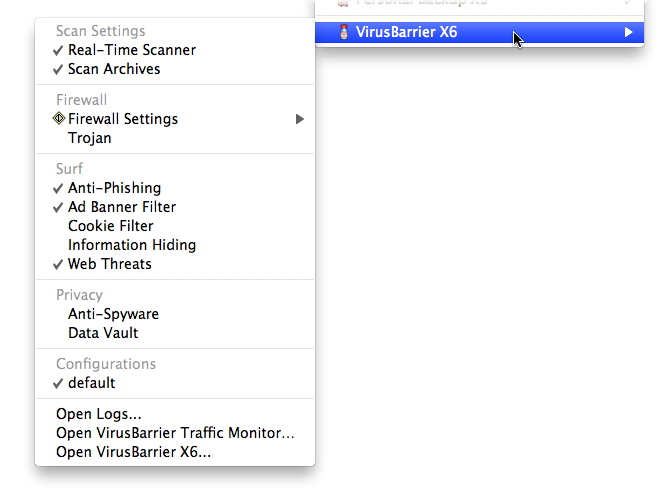
Click the Intego menu icon to display a menu that shows all your Intego software:
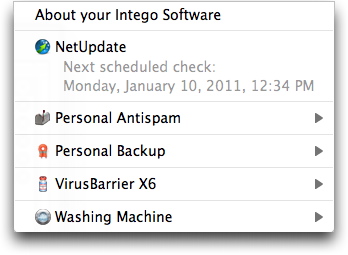
You can change many of VirusBarrier X6's settings from the Intego menu. Choose the Intego Menu > VirusBarrier X6. You can start and stop the Real-Time scanner, you can change configurations, and you can turn settings on or off, such as Surf or Privacy settings. And you can open VirusBarrier Traffic Monitor by choosing its menu item near the bottom of the menu.
For more information about these features, see the appropriate sections of this manual: Protecting Your Mac from Viruses and Malware and Protecting Your Mac from Network Attacks.