Creating Custom Firewall Rules
- Custom Firewall Rules
- Creating Rules with the Assistant
- Creating Service-Specific Rules Quickly
- Creating Rules Manually
- Working with Rules
Custom Firewall Rules
Each of the five firewall settings described in chapter 4, Protecting Your Mac from Network Attacks, is actually a collection of rules, each of which in turn is defined by naming permitted or forbidden sources, destinations, services and interfaces.
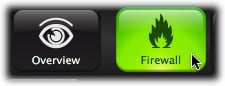
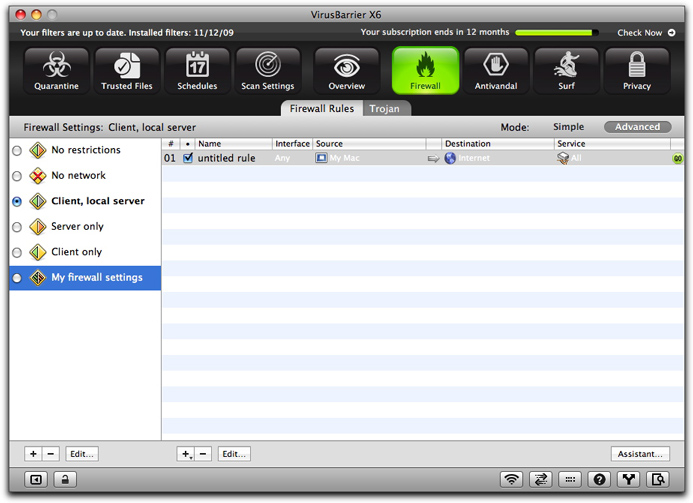
Simple mode doesn't permit you to change the rules or any of their parts. To do that, you need to enter the Firewall screen's advanced mode. To do so, click the Firewall button at the top of the main screen.
Then, click the Firewall Rules tab, if it's not active, and the Advanced Mode button in the upper-right corner.

WARNING: Changing these settings could dramatically affect your computer's ability to access local networks and the Internet. You should only use advanced mode if you fully understand its effects and how it functions.
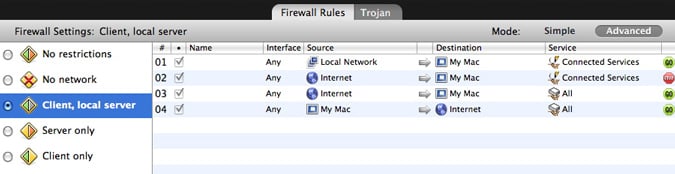
In simple mode, clicking any of the five preset firewall settings displays an animation; in advanced mode, you see the details of each setting's rules.
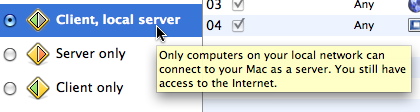
In addition, hovering the cursor over any of the preset settings for a few seconds displays a text that briefly describes what it does.
In this example, the "Client, local server" setting shown has four rules. The first allows the local network to access your Mac through all Connected Services - that is, TCP connections that involve back-and-forth communications, such as serving files from your Mac. The second rule, however, forbids such connections from the Internet at large, preventing your Mac from acting as a server to an unknown computer outside your local network. The third rule allows all other communications from the Internet to your Mac, while the fourth allows all communications from your Mac to the Internet.
The five preset firewall settings are "frozen" for convenience and stability: you can't change their rules, or the order in which they appear. But VirusBarrier X6 gives you two ways to create additional, customized settings: through the program's Firewall Assistant, and manually.
In either case, the first step is to click the + button below the list of settings. You'll see a new setting appear, named "untitled settings". Click it and type any name you prefer, then press Enter or Return to make the change permanent.

Note that you have only created this setting, but have not enabled it yet. It's a good idea to not enable firewall settings until you have finished adding all your rules. To make it the active setting, click the radio button to its left.
Creating Rules with the Assistant
VirusBarrier X6 contains an assistant to help you create your own custom firewall rules. With this assistant, you can create your own rules with just a few mouse clicks. While not all of VirusBarrier X6's rule features are available when you create rules with the assistant, it can cover most of your needs for firewall rules. If you need more customization, you can create rules using the assistant then edit them manually.
The VirusBarrier X6 Assistant walks you through a series of steps to create your rule:
- Introduction
- Name and Behavior
- Direction
- Service
- Options
- Conclusion
To create a new rule using the assistant, click the Assistant button.

The first assistant screen displays.

Click the Next button to begin creating a new rule. You can click the Previous button at any time to return to previous screens, or click Close to exit the Assistant.
Name and Behavior
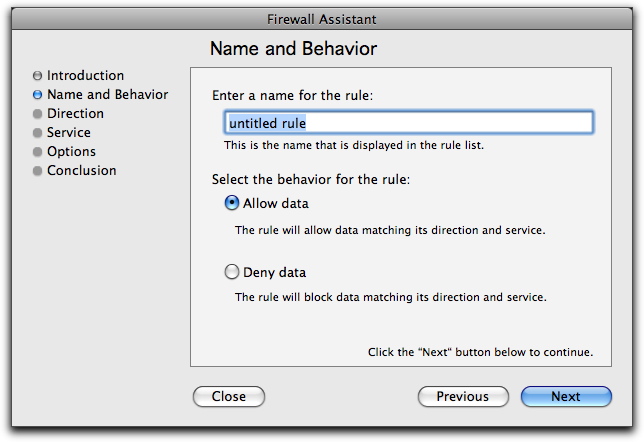
Enter a name for your rule in the name field, then select the behavior for the rule: Allow data or Deny data. If you select Allow data, the rule will allow data matching its direction and service to pass. If you select Deny data, the rule will block data matching its direction and service.
Click the Next button to go to the next screen.
Communication Direction
This screen lets you choose the communication direction and which host initiates the communication.

First, in the This rule will affect connections with: section, select a remote host. You have four choices for the remote host:
- Any other computer: Any computer other than your Mac.
- Computers on my local network: Any computer on the same local network as your Mac.
- Computers on the default AirPort network: Any computer on your default AirPort network, if you have one.
- Computers on this custom network: If you have created any custom networks using the standard rule editor, you can select one of them here.
Next, select the computer that initiates the connection:
- My Mac: The computer using this rule.
- The other computer: The remote host, as was defined in the first part of this screen.
When you have finished, click the Next button to go to the next screen.
Service
This screen lets you choose the service that the rule affects.
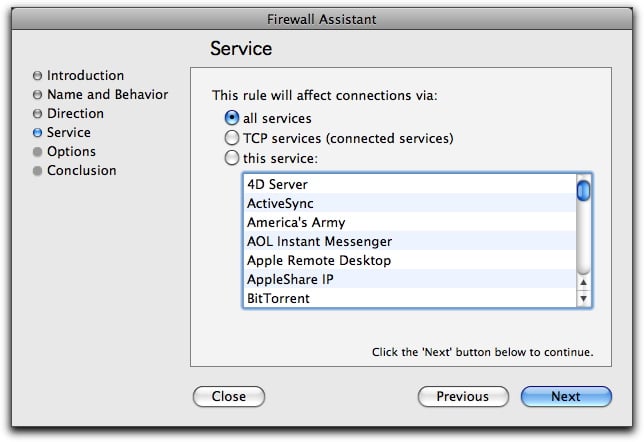
You can choose from three types of services:
- All services: All network services.
- TCP services (connected services): Services that require that a connection be open and maintained between two computers, such as HTTP, FTP, Telnet, SSH, POP3, AppleShare, etc. This covers all TCP connections.
- This service: You can choose from a list of services that correspond to popular applications and protocols. Select the service you want to use by clicking its name in the list.
When you have finished, click the Next button to go to the next screen.
Options
This screen lets you choose additional options for your rule.
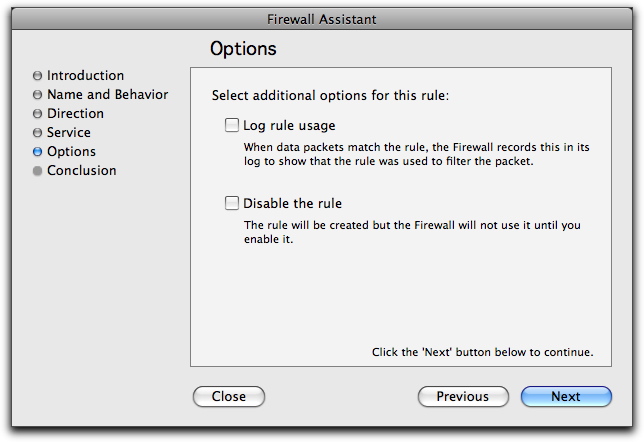
Two options are available on this screen:
- Log rule usage: The firewall records each time this rule is used in its log.
- Disable the rule: VirusBarrier X6 creates the rule but disables it. You can enable it manually.
When you have finished, click the Next button to go to the next screen.
Conclusion
This screen creates the rule according to the settings you have selected in the assistant.
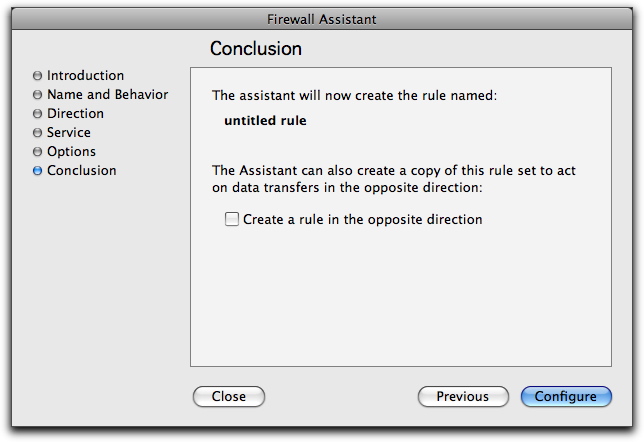
This screen offers one final option: if you check Create a rule in the opposite direction, the assistant creates a matching rule with the source and destination switched.
Click Configure to create your rule and exit the assistant.
When you have finished, you will see that your rule (or rules, if you checked Create a rule in the opposite direction) displays in the VirusBarrier X6 list of firewall rules.
If you wish to further customize the rule, or edit it, see below, Editing Rules.
Creating Service-Specific Rules Quickly
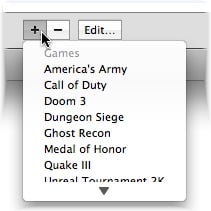
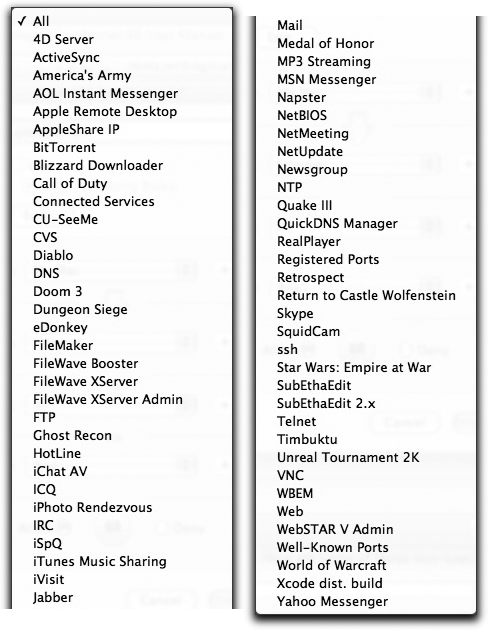
There are two ways to quickly create rules to control information to and from common services and programs. The first is by clicking the + button at the bottom of the Rule list and holding your mouse button down for a second. You'll be able to choose from a popup list of the most common services. A rule governing your selection then appears in the Rules list.
The second way to quickly create service-specific Rules is with the Services Library. To display the Services Library, choose Window > Services Library, or press Option-Command-6.

The Services Library window opens and displays a list of the most common services.
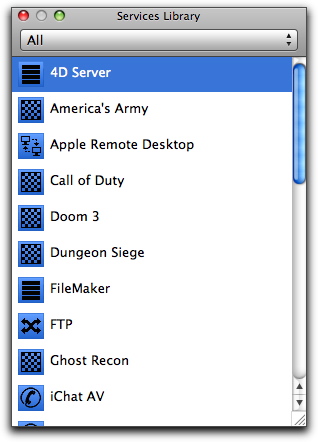
To create a new rule, select the desired service and drag it to the rule list. By default, rules added in this way allow all traffic from your Mac to the Internet, on all interfaces. In other words, the rule doesn't prohibit any activity until you edit its settings, as is described below.
Creating Rules Manually
You can create individual rules using the Rule Editor. Click the + button at the bottom of the list of rules and the Rule Editor displays.
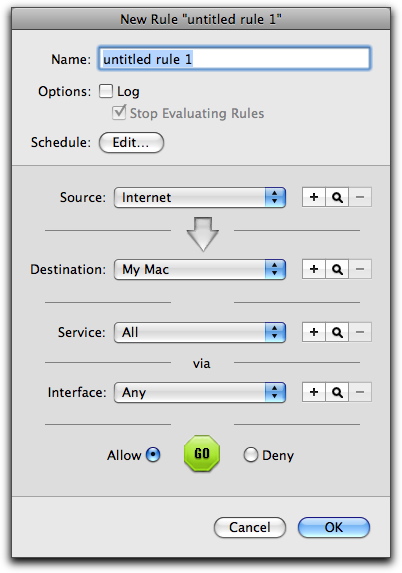
VirusBarrier X6's Rule Editor allows network administrators to quickly and easily define and implement a comprehensive security policy. It is extremely flexible, and allows you to define an unlimited number of rules in seconds. To create a rule, you need to specify details in six areas:
- Rule Name, Logging, Evaluation and Schedule
- Rule Source
- Rule Destination
- Rule Service
- Rule Interface
- Rule Action
Rule Naming, Logging, Evaluation and Schedules
At the top of the Rule Editor is a field where you can name this rule. Just below it is the Log checkbox. If you check the Log box, an entry is added to the VirusBarrier X6 log any time this rule acts; a small red dot to the right of the rule's name in the Rules list indicates that the rule is logged. If this box is not checked, this rule is not logged.
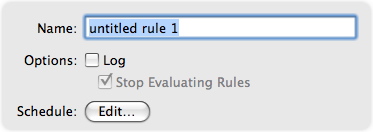
If the Log checkbox is checked, the Stop Evaluating Rules checkbox will be available, and is checked by default. These two settings, in tandem, are a powerful way to troubleshoot a network without hampering its traffic.
WARNING: If you can't figure out why some of your rules aren't taking effect, look at the rules above it and ensure that the Stop Evaluating Rules checkbox is off for each of them.
To edit the Schedule, click the Edit... button. The Schedule window displays.
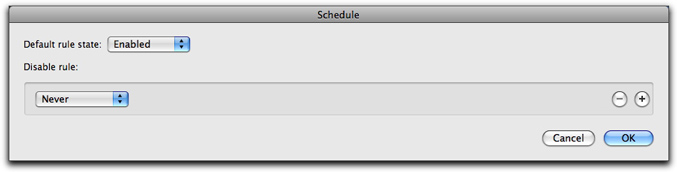
The Default rule state is set to Enabled, which means that your rule is activated. If you set it to Disabled, VirusBarrier X6 does not use this rule. You may want to have certain rules active in one configuration, and not another. For more on using configurations, see chapter 6, Preferences and Configurations.
If your Default rule state is Enabled, you can set specific times for the rule to be disabled. If your Default rule state is Disabled, you can set specific times for the rule to be enabled.
When you first create a rule, the rule will always be active. If you wish to have the rule enabled or disabled at certain times, click the popup menu for either Enable rule or Disable rule, depending on which Default rule state you have chosen, and select one of the time intervals in the list.

Three options are available in addition to Never.
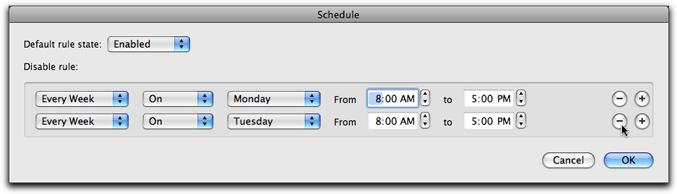
- Every Week allows you to change the rule's schedule so it is enabled at a fixed time every week, such as every Monday at 8:00 am.
- Every Day enables the rule at a specific time every day.
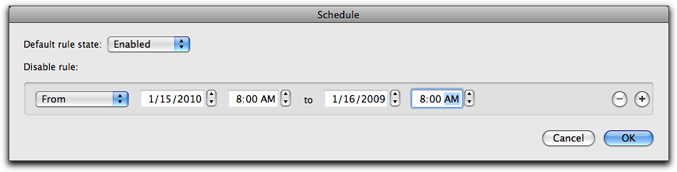
- From allows you to disable or enable the rule for a specific period of time by specifying the beginning and ending time.
You can schedule additional times for rules to be enabled or disabled using the + button. For example, if you need a rule to be disabled only on Mondays and Tuesdays, you can set these two days in the Schedule window. To remove a scheduled time from the list, click the - button to the right of the item.
Scheduled rules are displayed with a calendar icon in the rule list. This particular rule also has logging turned on, as indicated by the small red dot next to its name.

Rule Sources and Destinations
When defining rules, the Source is the entity that sends data; the Destination is where the data goes. You can choose from a list of four sources and destinations for any rule. However, VirusBarrier X6 will not allow you to choose the same source and destination for a given rule. (If you try, VirusBarrier X6 will correct the error.)
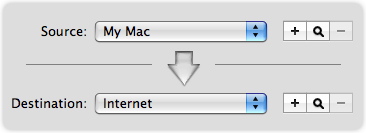
These four Sources and Destinations are available by default:
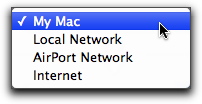
- My Mac: Your computer.
- Local Network: A local network that your computer is connected to.
- AirPort Network: A wireless AirPort network that your computer is connected to.
- Internet: The Internet, in addition to any local network you may be connected to; effectively, all networks.
Creating New Sources and Destinations
You can create new sources and destinations to use in your rules. This allows you to specify exactly which computers you wish to have your Mac communicate with.
To create a new source, click the + button to the right of the Source or Destination popup menu. In our example, we'll create a new Source; however, once it's created, it will also show up in the list of possible Destinations.
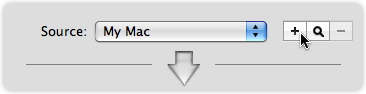
The New Network editor displays.
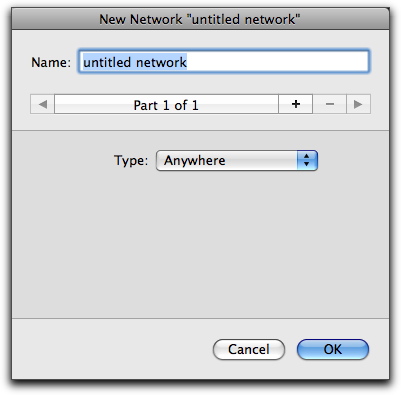
Enter a name that will help you remember the network. If, for example, you're blocking IP addresses whose last octet is in the range of 100-155, you might name the Source/Destination "IPs from 100-155".
The pop-up menu offers a selection from seven types of network.
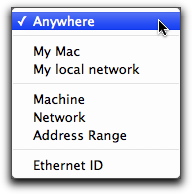
| Name | Definition | Address Type |
| Anywhere | Any network. | None, as this source covers all networks. |
| My Mac | Your computer. | The IP address(es) of your Mac displays in the Address field, and cannot be changed. |
| My local network | The local network your computer is connected to. | The IP address(es) of your Mac and subnet mask of your local network display in the Address field, and cannot be changed. |
| Machine | A specific IP address. | Any IP address. If you enter a domain name, VirusBarrier X6 will resolve it to a single IP address. |
| Network | A specific network. | Any Subnet IP address and Subnet mask. As above, VirusBarrier X6 will resolve domain names to a single IP address. |
| Address Range | A group of IP addresses. | Beginning and ending addresses. VirusBarrier X6 will resolve domain names to a single IP address. |
| Ethernet ID | A single device connected to the network by Ethernet. | An Ethernet ID, as six two-character hexadecimal numbers. |
Rule Services
A "Service" is a combination of protocol type, port (or ports) used, and protocol-specific criteria. These items, taken together, typically describe a program or class of program that sends and receives information. For example, information sent by the TCP protocol over port 80 using HTTP would be a Web service.
VirusBarrier X6 comes with over 50 common services preprogrammed so you can easily stop (or allow) traffic that appears to be of a specific type.
While most preprogrammed Services clearly map to a specific program, some selections in this list such as "Web" pertain to a class of communications instead. Here are some of those non-specific Services:
| Name | Description | Settings |
| All | All communications, regardless of protocol or port. | All protocols, on all ports. |
| Apple Remote Desktop | A program that allows an administrator Mac to control another Mac over a network connection. | Port 3283 over UDP. |
| Connected Services | All TCP communications. A TCP session maintains a connection between computers, so it's always clear that it was initiated by the Mac and can therefore be trusted. By comparison, a UDP session is a series of communications without a "memory" of who initiated it. | All TCP communications, on any port. |
| FTP | File Transfer Protocol. | TCP, ports 20 or 21. |
| iChat AV | An instant messaging program with video and sound. | Port 5060 over UDP. |
| IRC | Internet Relay Chat. | TCP on port 194 for IRC, and all TCP traffic between ports 6665 and 6669, inclusive. |
| iTunes Music Sharing | A way to share your iTunes music library over your local network. | Port 3689 over TCP. |
| E-mail communications. | TCP port 25 for SMTP, port 110 for POP3, port 143 for IMAP4, port 220 for IMAP3 port 389 for LDAP, and port 587 for message submission. | |
| NTP | Network Time Protocol. | UDP on port 123. |
| SSH | Secure Shell. | TCP on port 22 using SSH. |
| Telnet | Remote login. | TCP on port 23 using telnet. |
| VNC | Virtual Network Computing, a graphical remote-control system. | TCP on ports 5900-5999. |
| Web | Web browsing, for example through a browser such as Safari. | TCP on ports 80 and 8080 through HTTP, and on port 443 on HTTPS. |
| Well-Known Ports | A large range of ports with long usage traditions in network communications. | TCP and UDP on all ports from 0 to 1023. |
The remaining services are for specific programs or protocols.
Be careful when creating rules for specific services. When you select a service for a specific program, it is possible that this program uses the same port as another program or service. Blocking or authorizing a specific service may conflict with other, more general rules. For example, if you wish to block ICQ traffic, selecting ICQ as a service will also block AOL Instant Messenger traffic since both programs use the same port. Other programs may also share the same ports. If you find that you cannot connect to a given service, or send or receive traffic, try deactivating your rules one by one to see if there is a conflict.
Creating New Services
To create a new service, click the + button next in the Service section.

The New Service editor displays.
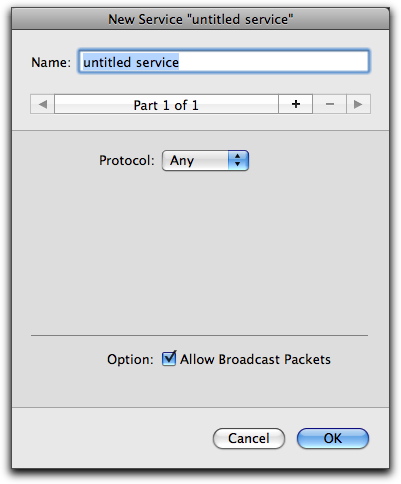
Four different protocol suites are available from the Protocol pop-up menu: TCP, UDP, ICMP and IGMP. You can also select Any, which covers all protocols.
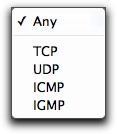
When you select one of these protocol suites, additional options display in the bottom section of the panel, with a list of services that you can select from. The options depend on the protocol you selected.
TCP or UDP have the following options:
- Any port: Affects all ports.
- Single Port: Lets you specify a single port either by typing its number or by selecting from over a hundred options in the popup menu. (VirusBarrier X6 automatically fills in the correct number when you select from the popup menu.)
- Range of Ports: Lets you enter the beginning and ending port numbers that define a range.
ICMP or IGMP have the following options:
- Any: Affects all types.
- Specific Type: Lets you specify a single value either by typing its number or by selecting from over twenty options in the popup menu. (VirusBarrier X6 automatically fills in the correct number when you select from the popup menu.) You can also specify a Code number, if necessary.
For each of these, an option is available to Allow Broadcast Packets. If checked, packets sent to all computers on a local network are included in this service.
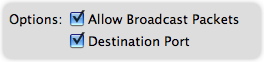
Destination Port is a final option, available only for services utilizing the UDP protocol. If it is checked, packets are filtered according to the function of the Destination Port. If left unchecked, packets are filtered according to the function of the source Port.
Rule Interfaces
The Interface is the network adapter that the data passes through. This can be an Ethernet card, a wireless AirPort card, or any other type of network interface.
You can choose from a list of preprogrammed interfaces that exist on your computer, or you can create your own interfaces by clicking the + button.

The New Interface editor displays.
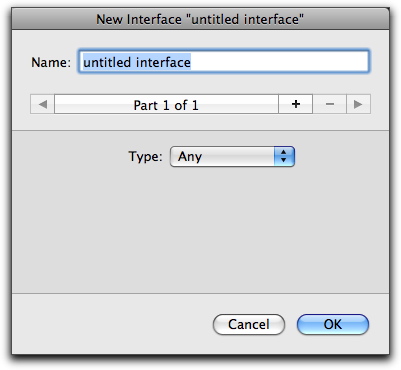
The Type pop-up menu has two options. The first, Any, uses all available network interfaces. The second, Specific, lists those interfaces that are available to you, depending on your computer's hardware and software, and gives you some additional options.
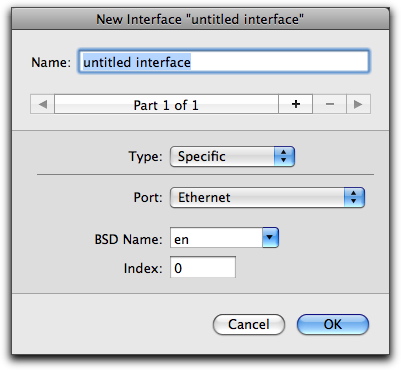
Typical interfaces are:
- Airport: Wireless networking
- Built-in Ethernet: Wired interface commonly used for networking
- Built-in FireWire: Wired interface commonly used for peripherals, such as a hard drive, but which can also be used as a network interface
The BSD Name and Index number are the identifiers used by the Unix layer of Mac OS X. You can set these manually, if you need to. (You probably won't have to, and shouldn't change them if you don't understand what they are.) If other interfaces are present in your Mac, an Other option will also be available.
Rule Actions
Two actions are possible for any rule: Allow or Deny. Select the action you wish to use for your rule by checking the appropriate radio button, at the bottom of the Rule Editor window.

Finally, click OK to add this rule to your VirusBarrier X6 firewall rules.
Multi-Part Sources, Destinations, Services and Interfaces
Rule sources, destinations, services and interfaces can have several parts. You can, for example, dictate that traffic from several specific IP addresses be banned, listing each one separately in a given Source.
When you create or edit a source, destination, service or interface, you see a bar at the top of the window that looks like this:

- Create a new part: Click the + button.
- Move among parts: Click the arrow icons. Note that the text in the middle will tell you where you are, and how many parts exist in total. When you reach the last part, clicking the right arrow takes you back to the first one.
- Delete a part: To delete a part, it must be visible. Click one of the arrow icons until the part you wish to delete is displayed. Click the - button, then confirm the deletion in the dialog box that follows.
Deleting Sources, Destinations, Services and Interfaces
You can delete any sources that you have created. To do so, select the source, and then click the - button.

A dialog box displays, asking if you really want to remove that network. Click Remove to delete the source network, or Cancel if not.
Working with Rules
Rule Order
Rules you add to VirusBarrier X6's firewall are applied from first to last, so you need to make sure that your rules are in the correct order to function properly.

In this example, the first rule blocks data coming from the Internet (which includes all networks, even a local network). Rule 3 allows traffic from a local network; but since it's in 3rd position, it is not applied; the 1st rule takes precedence. For rule 3 to be applied, it needs to be moved to the top of the rule list. To do this, select the rule and drag it to the appropriate position.

Editing and Deleting Rules
To edit a rule, select the rule by clicking it, then click the button with the pencil icon at the bottom of the list. The Rule Editor will open, and you can make any changes you want to this rule. When you have finished making changes, click OK to save your changes. If you decide you do not want to save the changes, click Cancel.
To delete a rule, click the rule in the list of rules, then click the - button at the bottom of the list.
Using the Rule Contextual Menu
VirusBarrier X6 lets you make changes to firewall rules quickly through a contextual menu. You can use this contextual menu to add new rules, to edit existing rules, or to change rule characteristics on the fly.
To see this contextual menu, hold down the Control key and click on a rule. (If you have a two-button mouse, you can just click the right button of your mouse.)
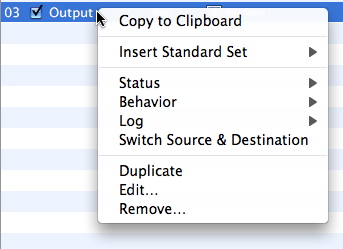
The menu offers the following options:
- Copy to Clipboard: Copies the contents of a Rule to the Mac's Clipboard in plain-text format. You can then paste the rule into a document, where it will look something like this: "#02/ON/Input/Any/Internet -> My Mac/All/Deny" (where slashes are tabs).
- Insert Standard Set / Add Standard Set: Insert or add a standard set of rules, from the same selection as is found in simple mode: No restrictions, No network, Client, Local Server, Server only, or Client only.
- Status: You can toggle the state of a rule, turning it On or Off. If the rule is scheduled to run at certain times, a check mark is displayed next to Scheduled in the submenu.
- Behavior: Toggle the behavior of a rule between Allow or Deny traffic.
- Log: Toggle whether the rule records traffic information in the log.
- Switch Source & Destination: "Reverses" a Rule, exchanging the source and destination.
- Duplicate: Makes a new copy of the Rule.
- Edit...: Opens the Rule Editor for the indicated Rule.
- Remove...: Deletes the Rule.