Using Intego VirusBarrier Server 3
- Launching VirusBarrier Server Admin
- Using the Browser
- Adding Servers to the Browser
- Managing Products via the Browser
- VirusBarrier Server 3 Protection Settings
- Using the Console Log
- Using the VirusBarrier X6 Application on your Server
- Using VirusBarrier Server 3 from the Command Line
- Using VirusBarrier Server 3 and AppleScript
Launching VirusBarrier Server Admin
After you've installed VirusBarrier Server 3 on the server you wish to manage, and installed VirusBarrier Server Admin on your administrator's computer, open VirusBarrier Server Admin, located in /Applications/Server. The program displays the Browser tab.
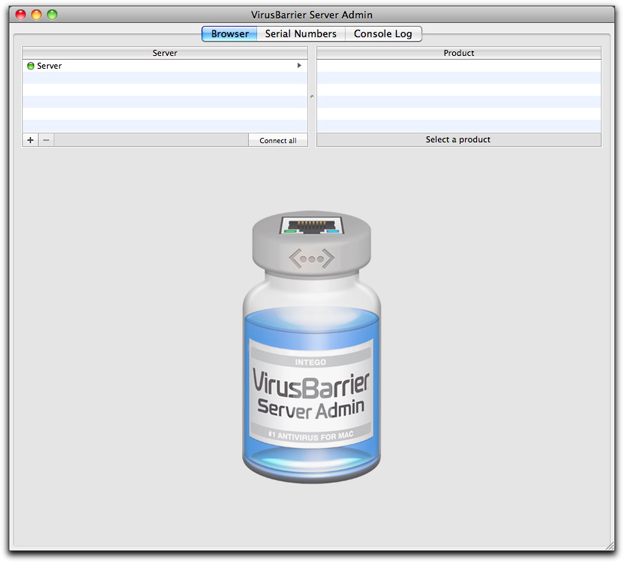
VirusBarrier Server Admin contains three tabs, each of which provides access to information or management functions:
- Browser: lets you browse servers and select the VirusBarrier Server 3 programs installed. From this tab you can make changes to settings, view logs and quarantine information, monitor and manage updates via Intego NetUpdate, and control all the malware and network protection features of VirusBarrier Server 3.
- Serial Numbers: lets you view the serial numbers used for VirusBarrier Server 3 on the servers you manage.
- Console Log: provides a log of all actions made from the VirusBarrier Server Admin application.
Using the Browser
The VirusBarrier Server Admin browser gives you an overview of servers and Intego products that you can manage. You can view information for specific servers, you can check which Intego products are installed and verify their serial numbers, and you can check logs to see what actions have been applied to specific servers.
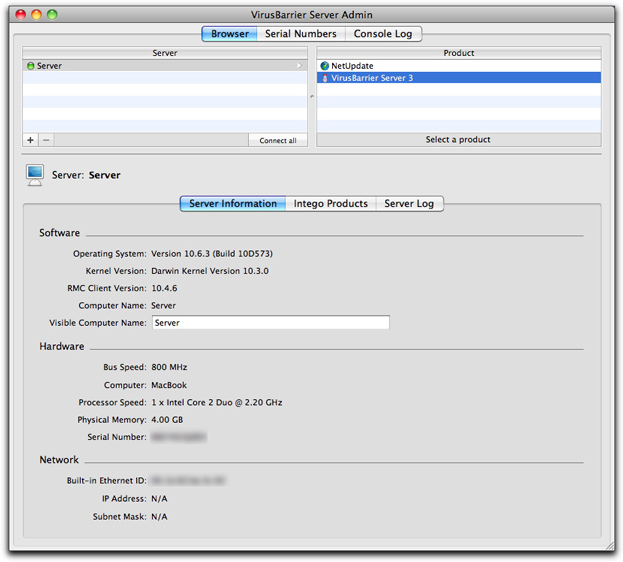
When the Browser tab is active, VirusBarrier Server Admin displays the Server list, which shows a list of servers that you can manage. If you click on a server in the Server list, VirusBarrier Server Admin displays detailed information about that computer in the Server Information tab.
VirusBarrier Server Admin displays the following information about servers:
- Software: this section displays the operating system version and build, the kernel version, the RMC Client version (an RMC Client component must be installed on the server with VirusBarrier Server 3 to ensure remote management), the computer name (as set on the server), and the visible computer name. You can change this visible computer name by replacing the text in this field.
- Hardware: this section shows the type of computer, the processor and bus speed, the amount of RAM installed, and the computer's serial number.
- Network: this displays the server's Ethernet (or MAC) address, IP address, and subnet mask.
A colored icon appears before the names of the computers in the server list. Three colored icons may appear in this column:
- Green: VirusBarrier Server Admin is connected to the server.
- Red: VirusBarrier Server Admin is not connected to the server; the server is not available on the local network.
- Orange: VirusBarrier Server Admin is not connected to the server; the connection has failed.
If any servers do not respond you can attempt to reconnect to them by clicking the Connect All button.
The Intego Products tab, which displays when the Browser tab is active and a server is selected, shows a list of all Intego products available on the selected server, their version numbers and their serial numbers.

The Version column shows both the version of the Intego product and the date of the last update to VirusBarrier Server 3's virus definitions.
The Serial Number column shows you if any serial numbers are not recognized (which also includes serial numbers you have not yet added to VirusBarrier Server Admin for specific products), or if a serial number is not needed, as is the case for Intego NetUpdate. If a product displays Running in demo mode in the Serial Number column then you haven't yet entered its serial number and it is still within the 30-day evaluation period.
The Server Log tab shows which actions have been performed on the selected server. This log displays the Date & Time, the Intego program that has been acted on (Product), the Type of action, and the Result of the action, whether it was successful or not.
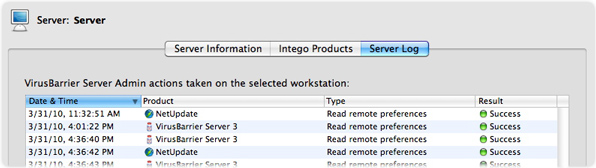
Two icons display in the right-hand column of the Server Log list: a green icon indicates that the action was successful, and a red icon that the action failed. Actions such as reading or writing preferences may fail if there is a connection failure with the remote computer while the action is carried out. If an action fails, the Result column shows an error message explaining why.
Adding Servers to the Browser
VirusBarrier Server Admin uses Bonjour to automatically detect all Mac OS X computers on a local network where the RMC client is installed. All servers accessible locally therefore display automatically in the Browser.
The best way to manage Macs outside your local network with VirusBarrier Server Admin is to create a VPN tunnel between the administration computer and remote servers. If you do this, remote computers will display in the Server list via Bonjour.
You can also add Macs to the Server list manually. To do this, click the plus (+) button below the Server list. A dialog displays asking you to enter a server name and address.
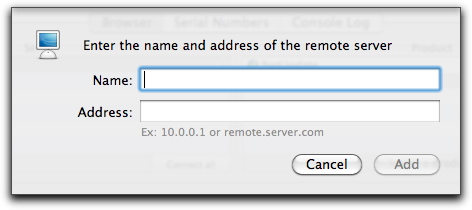
You can enter any name you wish for the server; this is the visible computer name that will display in the Server Information tab of the browser.
Enter an IP address for the remote computer. You must have direct access to a remote server to add it in this manner; if the server is behind a router, you must set up port mapping so ports 8500 and 8502 TCP are mapped to the remote server.
Once VirusBarrier Server Admin has detected a server, or once you have added one to the browser, it remains in the list even if it is not available when you launch VirusBarrier Server Admin at a later time. You can remove a server, if you wish, by clicking its name to select it, then clicking the minus (-) button below the Server list.
Managing Products via the Browser
When you click one of the computers in the Server list, a list of available Intego products displays in the Product column. You can select one of these products to get information about the product and access its settings.
Below the Browser's Product column you can see if a program does not need a serial number (this is the case for NetUpdate), if it is running in demo mode, or if it has been serialized.

The first time you click on a product that requires a serial number in the Browser, VirusBarrier Server Admin will ask you to enter a serial number for the product. The following dialog displays:
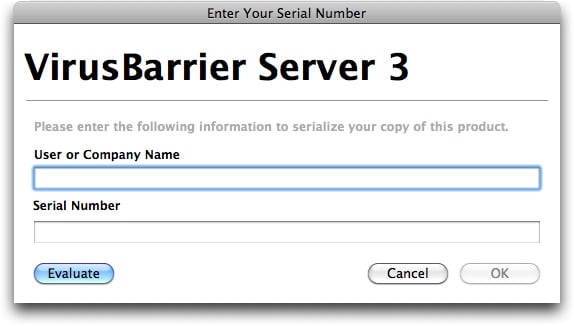
Enter your name or company and your serial number, then click OK. If you want to run the program in demo mode, click Evaluate.
You can also add serial numbers by clicking the Serial Numbers tab at the top of the VirusBarrier Server Admin window and clicking the + icon at the bottom of the window; the procedure is the same.
Once you've entered the appropriate serial numbers for the Intego products you are managing, you can make changes to any of these programs from the Browser. To do this, select a server, then a product. This presents an interface that allows you to apply settings and carry out certain actions.
To learn how to keep your Intego programs up to date via the Browser, see the NetUpdate Scheduling Preferences section of Chapter 6.
VirusBarrier Server 3 Protection Settings
Selecting VirusBarrier Server 3 from the Product column shows you the following:
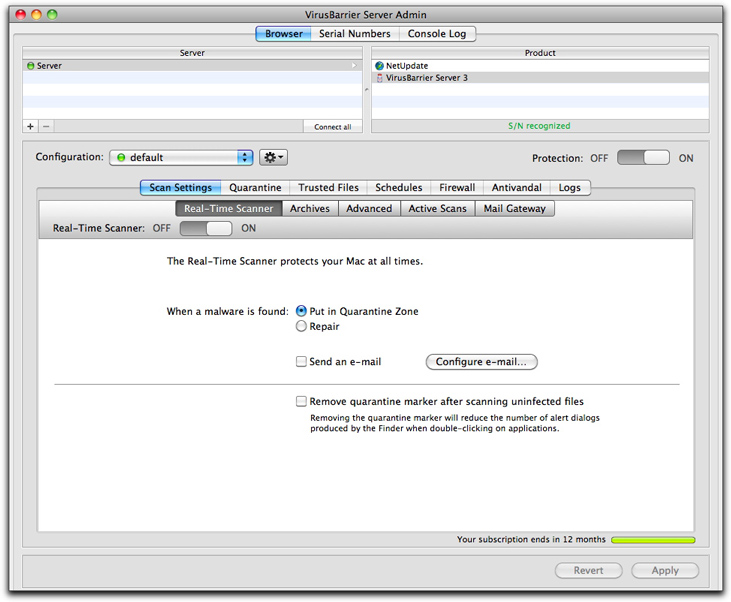
These screens, which are very similar to those in VirusBarrier X6, give you access to the many ways that VirusBarrier Server 3 can protect computers on your network. Details on changing these settings are found in the remaining sections of this manual.
Turning Protection Off
If you ever want to turn off both malware and network protection on a copy of VirusBarrier Server 3, you can do so by dragging the slider from ON to OFF when a server and a copy of VirusBarrier Server 3 are selected as shown above.
Using the Console Log
The Console Log tab shows you a list of all actions you have carried out with VirusBarrier Server Admin on all servers. Like the Server Log tab in the Browser, this log shows which actions have been performed on the selected server. This log displays the Result, the Type of action, the Date & Time, and the Product, or Intego program that has been acted on. It also shows which server these actions were performed on.

Two icons display in the right-hand column of the console log: a green icon indicates that the action was successful, and a red icon that the action failed. Actions such as reading or writing preferences may fail if there is a connection failure with the remote computer when the action is carried out. If an action fails, the Result column shows an error message explaining why the action was not successful.
You can also narrow down the display in the console log using the search field at the bottom of the window. You can enter a string containing part of a name of a server, a product, a date, type of action or a result. As you type, the log displays only those log entries that contain your search string.
Using the VirusBarrier X6 Application on your Server
A copy of VirusBarrier X6 is provided with VirusBarrier Server 3. VirusBarrier X6 is not a substitute for VirusBarrier Sever 3; rather, it extends the functions of the server program.
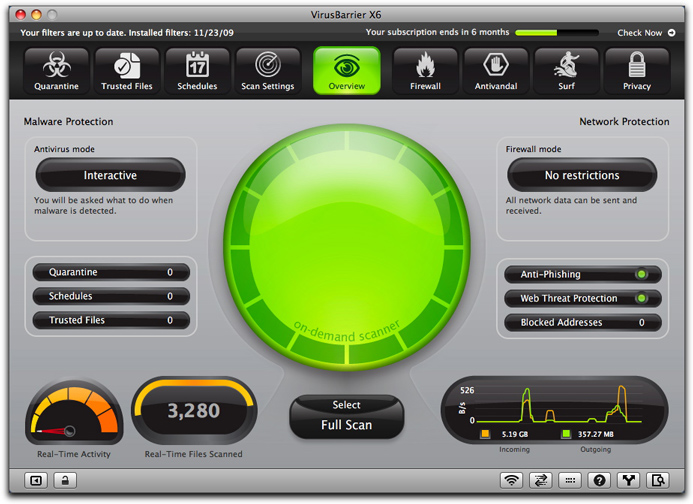
For more on using VirusBarrier X6, see the VirusBarrier X6 manual, available from the Help menu of VirusBarrier X6.
Using VirusBarrier Server 3 from the Command Line
VirusBarrier Server 3 also give you the option of scanning files and volumes from the command line. The following describes the use of this command.
	/Library/Intego/virusbarrier.bundle/Contents/MacOS/virusbarriers
	[-rtcCaz] <pathname_to_scan> [<current_directory_pathname>]

	The following options are available:

	-a:    Scans all files, including those symlinked to other volumes
	       (or other mount points in /Volumes).
	-c:    Counts files before scanning.
	-C:    Counts files, but does not scan.
	-Q:    Performs a quick scan.
	-r:    Repairs infected files.
	-t:    Uses Turbo Mode; scans only those files that have not been modified
	       since the previous scan.
	-T:    Scans all but trusted files.
	-z:    Scans compressed archives (including those in e-mail attachments).

	<pathname_to_scan>: This is required; it can be a relative or absolute path.

	[<current_directory_pathname>]: This is optional; it is the current working
	directory if a relative path is used as the first argument.

	Example:

	/Library/Intego/virusbarrier.bundle/Contents/MacOS/virusbarriers
	-tacz /

	This scans all volumes for which the user has read permission, scanning
	archives and counting the number of files to scan before beginning. If you run
	the command preceded by sudo, and authenticate, you can scan all files.

	You can also define aliases to simplify the use of this command.

	For bash:

	alias vbscan=/Library/Intego/virusbarrier.bundle/Contents/MacOS/
	virusbarriers

	For tcsh:

	alias vbscan /Library/Intego/virusbarrier.bundle/Contents/MacOS/
	virusbarriers

	This allows you to run the same command as follows:

	vbscan -tacz /

	To change network protection settings, use the following option, along with the
	operations, objects and data listed below (all commands with firewall options
	require sudo):

	-W: Execute firewall operations

   	operation           object                     		data
   	--------------------------------------------------------------------
    	import|export       settings                            file_path
    	revert              settings
    	add|remove          blocked_address|trusted_address     ip_address
    	print               blocked_address|trusted_address
    	get                 protection
    	enable/disable      protection
    	enable/disable      trojans
    	activate            configuration                       configuration_name
    	print               configuration

	For example, to enable firewall protection, run the following command with sudo:

	/Library/Intego/virusbarrier.bundle/Contents/MacOS/virusbarriers -W enable protection
Using VirusBarrier Server 3 and AppleScript
VirusBarrier Server 3 offers the ability to run scans using AppleScript. For more information on the program's AppleScript syntax, open the VirusBarrier X6 dictionary on the remote server from Script Editor. VirusBarrier X6 is installed in the /Applications folder of the server.